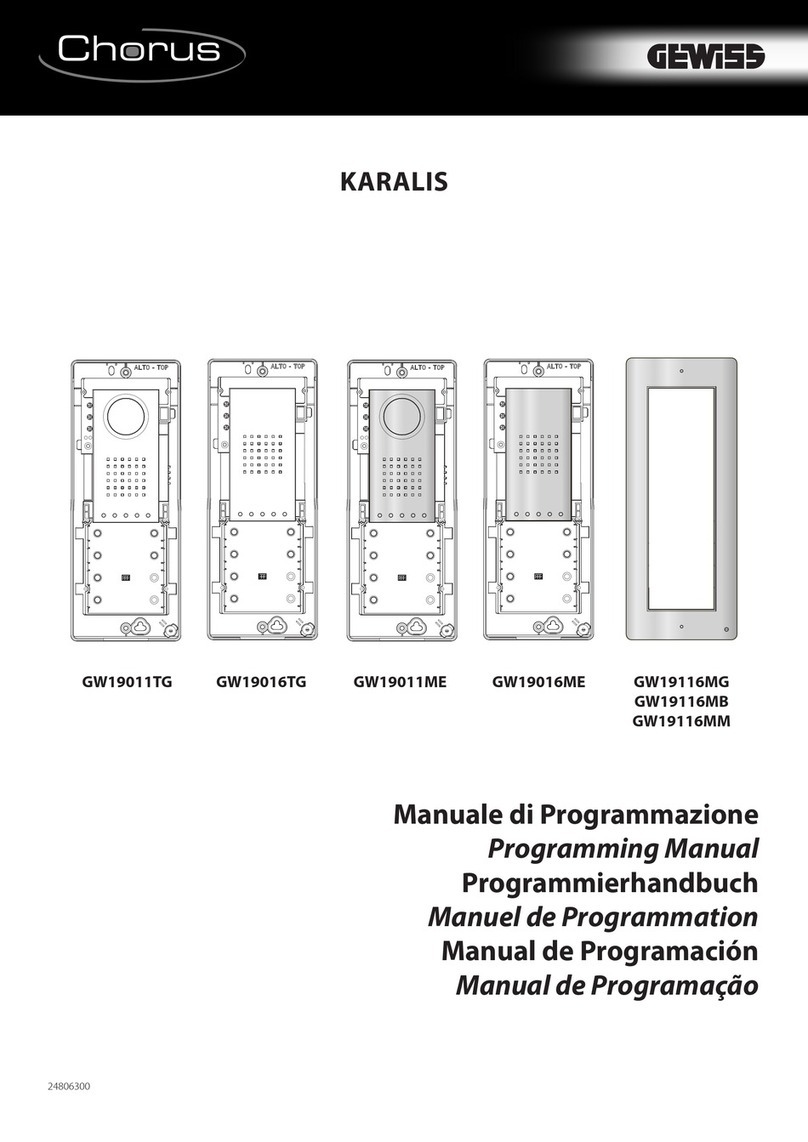
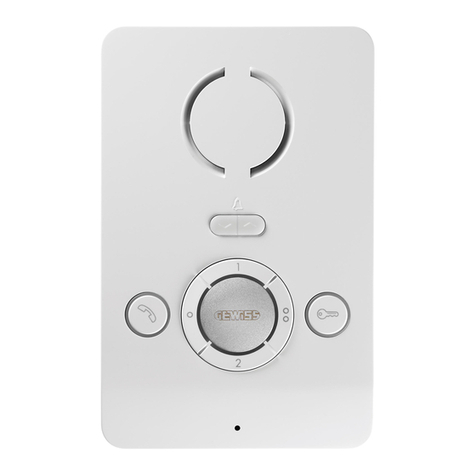
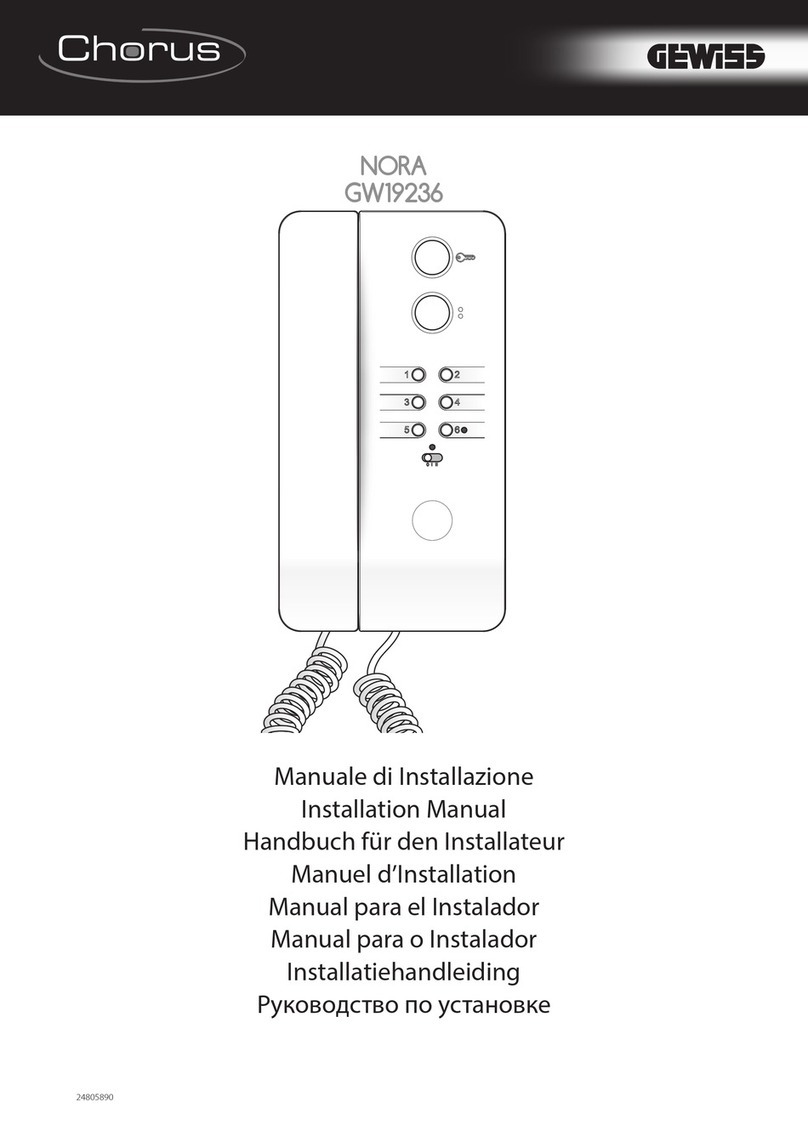
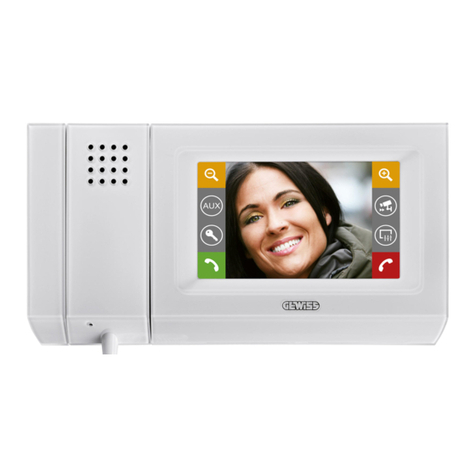
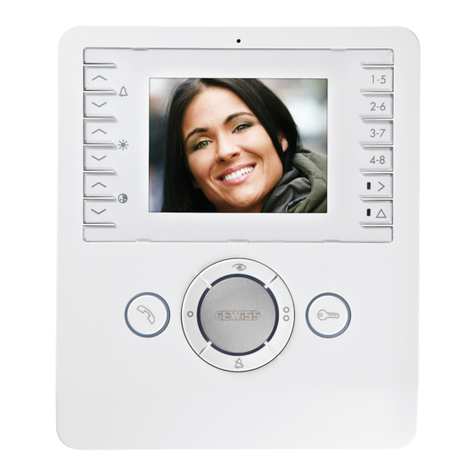
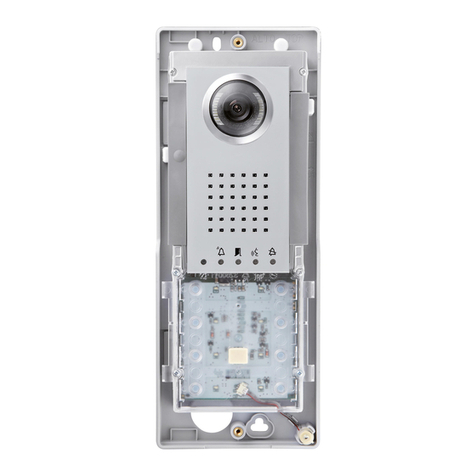
Gewiss CHORUS VELIA GW19216BK User manual

Manuale di Installazione
Installation Manual
Handbuch für den Installateur
Manuel d’Installation
Manual para el Instalador
Manual para o Instalador
GW19216WH - GW19216BK
VELIA
24806390

Avvertenze generali
• Leggereattentamenteleistruzioni,primadiiniziarel’installazioneedeseguiregliinterventicomespeci-
catodalcostruttore;
• Dopoavertoltol’imballaggioassicurarsidell’integritàdell’apparecchio;
• Glielementidell’imballaggio(sacchettiinplastica,polistiroloespanso,ecc.)nondevonoesserelasciatialla
portatadeibambiniinquantopotenzialifontidipericolo;
• L’installazione,laprogrammazione,lamessainservizioelamanutenzionedelprodottodeveessereeet-
tuatasoltantodapersonaletecnicoqualicatoedopportunamenteaddestratonelrispettodellenormative
vigentiivicompreseleosservanzesullaprevenzioneinfortuni;
• Operareinambientisucientementeilluminatieidoneiperlasaluteeutilizzarestrumenti,utensilied
attrezzatureinbuonostato;
• IldispositivovainstallatoconformementealgradoIPindicatonellecaratteristichetecniche;
• L’impiantoelettricodovràessererealizzatoinconformitàconlenormativeinvigorenelpaesediinstallazio-
ne;
• Iconduttorideicablagginonutilizzatidevonoessereisolati.
• Saldarelegiunzioniela parteterminaledeilionde evitare malfunzionamenticausatidall’ossidazione
deglistessi;
• Alterminedell’installazione,vericaresempreilcorrettofunzionamentodell’apparecchiaturaedell’im-
piantonelsuoinsieme;
• Primadieettuarequalunqueoperazionedipuliziaodimanutenzione,toglierel’alimentazionealdispo-
sitivo;
• Incasodiguastoe/ocattivofunzionamentodiundispositivo,distaccarlodall’alimentazioneenonmano-
metterlo;
• Perl’eventualeriparazionerivolgersisolamenteaduncentrodiassistenzatecnicaautorizzatodalcostrut-
toreecomunqueutilizzaresempreiricambifornitidaGewisss.p.a.;
• L’apparecchiodovràesseredestinatounicamenteall’usoperilqualeèstatoespressamenteconcepito.
• Ilmancatorispettodelleprescrizionisopraelencatepuòcomprometterelasicurezzadell’apparecchio.
• Ilcostruttorenonpuòcomunqueessereconsideratoresponsabilepereventualidanniderivantidausi
impropri,erroneiedirragionevoli.
General Precautions
• Readtheinstructionscarefullybeforestartinginstallationandproceedasspeciedbythemanufacturer;
• Afterremovingthepackaging,checktheconditionoftheunit;
• Thepackagingitems(plasticbags,expandedpolystyrene,etc.)mustnotbehandledbychildrenastheymay
bedangerous;
• Installation,programming,commissioningandmaintenanceoftheproductmustonlybeperformedbyquali-
edtechnicianswhohavebeenproperlytrainedincompliancewithcurrentstandards,includinghealthand
safetyregulations;
• Operateinsucientlylightedareasthatareconducivetohealthandusetools,utensilsandequipmentthat
areingoodworkingorder;
• ThedevicemustbeinstalledinaccordancewiththeIPdegreeindicatedinthetechnicalfeatures;
• Theelectricalsystemmustcomplywithcurrentstandardsinthecountryofinstallation;
• Wiresbelongingtocablesthatarenotusedmustbeinsulated.
• Weldthejointsandtheendsofthewirestopreventmalfunctionscausedbywireoxidation;
• Wheninstallationiscompleted,alwayscheckforcorrectoperationoftheunitandthesystemasawhole;
• Beforeperforminganycleaningormaintenanceoperation,disconnectthepowersupplytothedevice;
• Inthecaseofdevicefailureormalfunction,disconnectitfromthepowersupplyanddonottamperwithit;
• Shouldtheunitbeinneedofrepair,contactonlyatechnicalsupportcentreauthorisedbythemanufacturer
andalwaysusesparepartsprovidedbyGewisss.p.a.;
• Theequipmentmustonlybeusedforthepurposeforwhichitwasexplicitlydesigned.
• Failuretofollowtheinstructionsprovidedabovemaycompromisetheunit’ssafety.
• Themanufacturerdeclinesallliabilityforanydamageasaresultofimproper,incorrectorunreason-
ableuse.
Allgemeine Hinweise
• VorderInstallationdieAnweisungenaufmerksamlesen,undalleArbeitenwievomHerstellerangegeben
ausführen.
• DasGerätausderVerpackungnehmenundseineUnversehrtheitkontrollieren.
• DieVerpackungsteile(Plastiktüten,Polystyrolschaumusw.)dürfennichtinReichweitevonKinderngelas-
senwerden,dasiepotentielleGefahrenquellendarstellen.
• DieInstallation,dieProgrammierung,dieInbetriebnahmeunddieWartungdesProduktsdürfennurnon
qualiziertemundeinschlägigausgebildetemFachpersonalunterBeachtungdergeltendenBestimmun-
genundUnfallverhütungsmaßnahmenausgeführtwerden.
• InausreichendbeleuchtetenundnichtgesundheitsschädigendenRäumenarbeitenundInstrumenteund
WerkzeugeingutemZustandbenutzen.
• DieVorrichtungmussgemäßdemIP-Schutzgrad,derindentechnischenMerkmalenaufgeführtist,installiert
werden.
• DieVorrichtungenvorsichtighandhaben:sieenthaltenzerbrechlicheundfeuchtigkeitsempndlicheElekt-
ronikteile.
• Um ungewollten Kontakten vorzubeugen, die Netzanschlusskabel und die Niederspannung führenden
Signalleitungengetrenntumbinden.
• DieVerbindungsstellenunddasEndederLeiterverschweißen,umStörungendurchOxidationderselbenzu
vermeiden.
• NachAbschlussderInstallationsarbeitenimmerdenkorrektenBetriebdesGerätsunddergesamtenAnla-
geprüfen.
• VorallenReinigungs-oderWartungsarbeitendieVorrichtungvonderSpannungtrennen.
• ImFalleinerStörungund/odereinesfehlerhaftenBetriebseinesGeräts,diesessofortvonderStromversor-
gungtrennenundkeineunautorisiertenEingriedurchführen.
• WendenSiesichfüreventuelleReparaturarbeitenausschließlichaneinevomHerstellerautorisierteKun-
dendienststelleundbenutzensieinjedemFallimmervonGewisss.p.a.gelieferteErsatzteile.
• DasGerätdarfausschließlichfürdieZweckebenutztwerden,fürdieesausdrücklichkonzipiertwurde.
• DieNichtbeachtungderobenangeführtenVorschriftenkanndieSicherheitdesGerätsbeeinträchtigen.
• DerHerstellerhaftetnichtfürSchäden,diedurcheinenunsachgemäßen,falschenoderunvernünftigen
Gebrauchverursachtwerden.
Avertissements généraux
• Lireattentivementlesinstructionsavantdecommencerl’installationeteectuerlesopérationscommespéci-
éparlefabricant;
• Aprèsl’avoirdéballé,vérierquel’appareilsoitenbonétat;
• Nepaslaisserlesélémentsd’emballage(sachetsenplastique,polystyrèneexpansé,etc.)àlaportéedes
enfantscarilsconstituentunesourcepotentiellededanger;
• L’installation,laprogrammation,lamiseenserviceetl’entretienduproduitnedoiventêtreeectuésquepar
dupersonneltechniquequaliéetspécialisé,enrespectantlesnormesenvigueur,ycompriscellesenmatière
depréventiondesaccidents;
• Travaillerdansdeslieuxsalubresetsusammentéclairésetn’utiliserquedesoutilsetinstrumentsenbon
état;
• LedispositifdoitêtreinstalléconformémentaudegréIPindiquédanslescaractéristiquestechniques;
• L’installationélectriquedevraêtreréaliséeenconformitéauxnormesenvigueurdanslepaysd’installation;
• Lesconducteursdescâblagesquinesontpasutilisésdoiventêtreisolés.
• Souderlesjonctionsetlapartieterminaledeslsand’éviterdesdysfonctionnementsdérivantdel’oxydationde
ceux-ci;
• Àlandel’installation,toujourscontrôlerlebonfonctionnementdel’appareiletdetoutel’installation;
• Avantd’eectuertouteopérationdenettoyageoud’entretien,couperl’alimentationélectriquedudispositif;
• Encasdepanneet/oudemauvaisfonctionnementd’undispositif,ledébrancherduréseauélectrique,sans
tenteraucuneréparation;
• Pourtouteréparation,adressez-vousuniquementàuncentred’assistancetechniqueagrééparlefabricantet
danstouslescasutilisertoujoursdespiècesderechangefourniesparGewisss.p.a.;
• L’appareiln’estdestinéqu’àl’utilisationpourlaquelleilaétéexpressémentconçu.
• Lenon-respectdesprescriptionssusmentionnéespourraitcompromettrelasécuritédel’appareil.
• Lefabricantnepourradanstouslescasêtreretenuresponsabledesdommagesdérivantd’uneutili-
sationincorrecteouerronée.
Advertencias generales
• Leaatentamentelasinstruccionesantesdecomenzarlainstalación,yrealicelasintervencionestalycomo
especicaelfabricante;
• Trashaberlosacadodesuembalaje,compruebeelbuenestadodelaparato;
• Loselementosdelembalaje(bolsasdeplástico,poliestirenoexpandido,etc.)nodebendejarsealalcance
delosniños,yaquesonpotencialesfuentesdepeligro;
• Lainstalación,laprogramación,lapuestaenservicioyelmantenimientodelproductodebenserefectua-
dossolamenteporpersonaltécnicocualicadoquecuenteconlaformaciónpertinente,cumpliendolas
normativasvigentes,incluidaslasnormasdeprevencióndeaccidentes;
• Trabajeenentornossucientementeiluminadoseidóneosparalasalud,yutiliceherramientas,utensilios
yequipamientoenbuenestado;
• EldispositivodebeinstalarsedemaneraconformealgradoIPindicadoenlascaracterísticastécnicas;
• Lainstalacióneléctricadeberárealizarseconformealasnormativasvigentesenelpaísdeinstalación;
• Esprecisoaislarlosconductoresdeloscableadosnoutilizados.
• Sueldelasjunturasylaparteterminaldeloshilosparaevitarfuncionamientosdefectuososcausadosporsu
oxidación;
• Alnaldelprocesodeinstalación,compruebeelcorrectofuncionamientodelequipoydelainstalaciónensu
conjunto;
• Antesdeefectuarcualquieroperacióndelimpiezaomantenimiento,cortelaalimentacióndeldispositivo;
• Encasodeaveríay/ofuncionamientodefectuosodeundispositivo,desconéctelodelaalimentaciónynolo
manipule;
• Siesnecesarioefectuarreparaciones,acudaúnicamenteauncentrodeasistenciatécnicaautorizadoporel
fabricante,yencualquiercasoutilicesiemprelosrecambiossuministradosporGewisss.p.a.;
• Elaparatodeberádestinarseúnicamentealusoparaelquehasidoexpresamenteconcebido.
• Elincumplimientodelasanterioresinstruccionespuedeponerelpeligrolaseguridaddelaparato.
• Encualquiercaso,elfabricantenoasumiráningunaresponsabilidadporposiblesdañosderivados
deusosimpropios,incorrectosoirrazonables.
Advertências gerais
• Leiacomatençãoasinstruções,antesdeiniciarainstalaçãoeefectueasoperaçõesconformeespecicadopelo
fabricante;
• Apósterremovidoaembalagemcertique-sedequeoaparelhoestáíntegro;
• Oselementosdaembalagem(sacosdeplástico,isopor,etc.)nãodevemserdeixadosaoalcancedecrianças
porquesãofontespotenciaisdeperigo;
• Ainstalação,aprogramação,acolocaçãoemserviçoeamanutençãodoprodutodevemserefectuadasape-
nasporpessoaltécnicoqualicadoecomformaçãoadequada,cumprindoasnormasemvigor,inclusiveas
disposiçõessobreaprevençãodeacidentes;
• OdispositivodeveserinstaladodeacordocomograuIPindicadonascaracterísticastécnicas;
• Trateosdispositivoscomcuidado:contêmcomponenteselectrónicosfrágeisesensíveisàhumidade;
• Oscondutoresdosconectoresnãoutilizadosdevemserisolados.
• Solde asjunçõese aparteterminaldos osa mde evitarfalsos alarmescausadospela oxidaçãodos
mesmos;
• Nomdainstalaçãoveriquesempreofuncionamentocorrectodoequipamentoedainstalaçãonoseu
conjunto;
• Antesdeefectuarqualqueroperaçãodelimpezaoudemanutenção,desligueodispositivodarededealimen-
taçãoeléctrica;
• Nocasodeavariae/oumaufuncionamentodeumdispositivo,desligue-odaalimentaçãoenãooabra;
• Paraaeventualreparaçãodirija-seapenasaumcentrodeassistênciatécnicaautorizadopelofabricantee
utilizesempreaspeçasdereposiçãofornecidaspelaGewisss.p.a.;
• Oaparelhodeveserdestinadounicamenteaousoparaoqualfoiexpressamenteconcebido.
• Onãocumprimentodosconselhosenumeradosacimapodecomprometerasegurançadoaparelho.
• Ofabricantenãopode,emtodoocaso,serconsideradoresponsávelporeventuaisdanosdecorrentes
deusosimpróprios,erradoseirracionais.
2
IT INSTALLAZIONE
Sganciare l’apparecchio dal supporto plastico,
facendolo scorrere su di esso dopo aver premuto
il pulsante plastico (gura 1).
Fissare il supporto plastico alla scatola d’incasso
tonda Ø 60 mm (gura 2), alla scatola rettan-
golare GW24403 (gura 3) o a parete (gura 4)
utilizzando le viti in dotazione e rispettando l’in-
dicazione ALTO .
La scatola deve essere installata ad un’altezza
adeguata all’utente.
Evitare il serraggio eccessivo delle viti.
Eettuati i collegamenti, agganciare il terminale
al supporto plastico (gura 5-6).
Per sganciare l’apparecchio dal supporto plastico
premere il gancio plastico e sollevare il terminale
(gura 7).
EN INSTALLATION
Remove the unit from the plastic support by sli-
ding it after pressing the plastic button (gura 1).
Fasten the plastic support to the round built-in
box of Ø 60 mm (gure 2) or to the rectangu-
lar box GW24403 (gure 3) or it may be wall-
mounted using (gura 4) the provided screws
and observing the UP indication .
The recessed box must be tted at a suitable
height in relation to the user.
Avoid excessive tightening of the screws.
Once the connections have been made, hook
the terminal to the plastic support (gure 5-6). To
release the unit from the plastic support, press
the plastic hook and lift the terminal (gure 7).
DE INSTALLATION
Das Gerät an der Kunststohalterung aushän-
gen, dabei nach dem Drücken der Kunststo-
taste das Gerät auf der Halterung verschieben
(Abbildung 1).
Die Kunststohalterung am runden Unterputz-
kasten Ø 60 mm (Abbildung 2) oder am recht-
eckigen Gehäuse GW24403 befestigen (Abbil-
dung 3) oder an der Wand mit Klemmendeckeln
(Abbildung 4), hierfür die beiliegenden Schrau-
ben benutzen und die Angabe OBEN beachten
.
Der Kasten muss auf für den Benutzer geeigneter
Höhe installiert werden.
Die Schrauben nicht zu stark anziehen.
Nach den Anschlüssen das Terminal an der
Kunststohalterung einhängen (Abbildung 5-6).
Um das Gerät von der Kunststohalterung aus-
zuklinken den Plastikhaken drücken, und das
Terminal anheben (Abbildung 7).
FR INSTALLATION
Retirer l’appareil du support en plastique, en le
faisant glisser sur lui-même après avoir appuyé
sur la touche plastique (gura 1).
Fixer le support en plastique au boîtier d’encas-
trement rond Ø 60 mm (gure 2) ou au boîtier
rectangulaire GW24403 (gura 3) ou sur le mur
(gura 4), en utilisant les vis fournies et en res-
pectant l’indication HAUT .
Le boîtier doit être installé à une hauteur adé-
quate pour l’utilisateur.
Éviter de serrer excessivement les vis.
Une fois les raccordements eectués, xer le ter-
minal au support en plastique (gure 5-6).
Pour retirer l’appareil du support en plastique,
appuyer sur le clip en plastique et soulever le
terminal (gure 7).
ES INSTALACIÓN
Desenganche el aparato del soporte de plástico,
pulsando el botón de plástico y haciendo que se
deslice (gura 1).
Fije el soporte de plástico a la caja empotrable
redonda Ø 60 mm (gura 2) o a la caja rectangu-
lar GW24403 (gure 3) o sobre una pared (gure
4) utilizando los tornillos suministrados y respe-
tando la indicación ALTO .
La caja debe instalarse a una altura adecuada
para el usuario.
No apriete demasiado los tornillos. Una vez reali-
zadas las conexiones, enganche el terminal al so-
porte de plástico (gura 5-6). Para desenganchar
el aparato del soporte de plástico, pulse el gan-
cho de plástico y levante el terminal (gura 7).
PT INSTALAÇÃO
Solte o aparelho do suporte de plástico, fazen-
do-o deslizar sobre o mesmo após ter premido o
botão de plástico (gura 1).
Fixar o suporte de plástico à caixa de encastre re-
donda Ø 60 mm (gura 2) ou à caixa retangular
GW24403 (gura 3) ou na parede (gura 4) uti-
lizando os parafusos fornecidos e respeitando a
indicação ALTO .
A caixa deve ser instalada a uma altura adequada
para o utente.
Evite o aperto excessivo dos parafusos.
Após efectuar as ligações, enganche o terminal
no suporte de plástico (gura 5-6).
Para desprender o aparelho do suporte de plá-
stico carregue o gancho plástico e levante o ter-
minal (gura 7).
2
1
3
110
170
31
60
60
83.5
6
7
1
2
1
2
4
5
3

IT MORSETTIERE EN TERMINAL BOARDS DE KLEMMENBRETTER
M1
BIngresso linea BUS BUS line input Eingang BUS-Leitung
–Chiamata pianerottolo Doorbell Ruf vom Treppenhaus
FR BORNIERS ES BORNERAS PT - RÉGUAS DE BORNES
M1
BEntrée ligne BUS Entrada línea BUS Entrada linha BUS
–Appel depuis le palier Llamada desde el rellano Chamada do patamar
–
B
INT
M1 3/4
1/2
INT
IT Il jumper INT serve per creare due gruppi intercom distinti: lasciare il jumper
INT nella posizione “1/2” sui derivati del primo gruppo e spostare il jumper INT
nella posizione “3/4” sui derivati del secondo gruppo.
EN The INT jumper is used to create two separate intercom groups: leave the
INT jumper in position“1/2”on the receivers of the rst group and move the INT
jumper to position“3/4”on the receivers of the second group.
DE Der Jumper INT ermöglicht es, zwei unabhängige Interkom-Gruppen zu
denieren: Den Jumper INT auf den Innensprechstellen der ersten Gruppe auf
der Position “1/2“ lassen und den Jumper INT auf den Innensprechstellen der
zweiten Gruppe auf die Position “3/4“ einstellen
FR Le jumper INT sert à créer deux groupes intercom distincts: laisser le
jumper INT sur la position“1/2”sur les dérivés du premier groupe et dépla-
cer le jumper INT sur la position “3/4” sur les dérivés du deuxième groupe.
ES El jumper INT sirve para crear dos grupos intercomunicantes distintos:
deje el jumper INT en la posición “1/2” en los derivados del primer grupo
y mueva el jumper INT a la posición “3/4” en los derivados del segundo
grupo.
PT O jumper INT serve para criar dois grupos de intercomunicação distin-
tos: deixe o jumper INT na posição “1/2” nos derivados do primeiro grupo
e coloque o jumper INT na posição“3/4” nos derivados do segundo grupo.
1
2
1
2
INT
1/2 3/4
INT
1/2 3/4
INT
1/2 3/4
INT
1/2 3/4
4
Assorbimento - Absorption - Stromaufnahme - Absorption - Consumo - Consumo 80 mA max (<1 mA stand-by)
Assorbimento singolo LED (esclusione suoneria) - Single LED Absorption (ring disabled)
Einzel LED Absorption (Läutwerkabschaltung) - Absorption individuel LED (Exclusion sonnerie)
Consumo de un solo LED (Inhabilitación del timbre) - Consumo de um único LED (Exclusão dos sons)
1 mA
Dimensioni - Dimensions - Maße - Dimensions - Dimensiones - Dimensões
110x170x31 mm
Temperatura di stoccaggio - Storage temperature - Lagerungstemperatur
Température de stockage - Temperatura de almacenamiento - Temperatura de armazenagem
-25°C +70 °C
Temperatura di funzionamento - Operating temperature - Betriebstemperatur
Température de fonctionnement - Temperatura de funcionamiento - Temperatura de funcionamento 0 °C +35 °C
Grado IP - IP Degree - IP-Grad - Degré IP - Grado IP - Grau IP
IP 20
IT CARATTERISTICHE TECNICHE
FR
CARACTÉRISTIQUES TECHNIQUES
EN TECHNICAL FEATURES
ES CARACTERÍSTICAS TÉCNICAS
DE TECHNISCHE MERKMALE
PT CARACTERÍSTICAS TÉCNICAS

Ingresso in Programmazione. Premereper5volteilpulsante entro5s.Unbrevesegnaleacusticoconfermal’ingressoinprogramma-
zionea.
Accessing programming.Pressthebutton 5timeswithin5s.Abriefacousticsignalwillconrmthatprogramminghasbeenaccesseda.
Einstieg in die Programmierung. Innerhalb5Sek.fünf,maldieTaste drücken.EinkurzerSignaltonbestätigtdenEinstiegindiePro-
grammierunga.
Entrée en Programmation. Appuyer5foissurlatouche dansles5s.Unbrefsignalsonoreconrmel’entréedanslaprogrammationa.
Entrada en la modalidad de Programación Pulse5veceselbotón antesde5s.Unabreveseñalacústicaconrmaráquesehaentrado
enlamodalidaddeprogramacióna.
Entrada em Programação.Aperte5vezesobotão por5s.Umbrevesinalacústicoconrmaráaentradaemprogramaçãoa.
Programmazione della melodia associata alla chiamata dal posto esterno (1 segnale acustico). Perascoltareinsequenzale
melodiepremereiltasto b.Perselezionarelamelodiaedusciredallaprogrammazionepremereiltasto c.Perselezionarelamelodiae
proseguireconlaprogrammazionepremereiltasto d.
Programming the melody associated to the call from the entry panel (1 acoustic signal). Tohearthemelodiesinsequence,press
thekey b.Toselectthemelodyandexitprogramming,pressthekey c.Toselectthemelodyandcontinuewithprogramming,pressthe
key d.
Programmierung der Melodie, die mit dem Anruf von der Außenstation verknüpft ist (1 akustisches Signal). Umdie
Melodiennacheinanderzuhören,dieTaste drückenb.ZumWählenderMelodieundVerlassenderProgrammierung,dieTaste drücken
c.ZumWählenderMelodieundfortsetzenderProgrammierung,dieTaste drückend.
Programmation de la mélodie associée à l’appel provenant du poste extérieur (1 signal sonore). Pourécouterlesmélodiesen
séquence,appuyersurlatouche b.Poursélectionnerlamélodieetquitterlaprogrammation,appuyersurlatouche c.Poursélectionnerla
mélodieetcontinuerlaprogrammation,appuyersurlatouche d.
Programación de la melodía asociada a la llamada desde la placa exterior (1 señal acústica). Paraescucharensecuencialas
melodías,pulseelbotón b.Paraseleccionarlamelodíaysalirdelamodalidaddeprogramación,pulseelbotón c.Paraseleccionarla
melodíayproseguirconlaprogramación,pulseelbotón d.
Programação da melodia associada à chamada da placa botoneira (1 sinal acústico). Paraouvirasmelodiasemsequênciaapertea
tecla b.Paraseleccionaramelodiaesairdaprogramação,aperteatecla c.Paraseleccionaramelodiaecontinuaraprogramação,aperte
atecla d.
Programmazione della melodia associata alla chiamata dal pianerottolo (2 segnali acustici). Perquestotipodiprogram-
mazioneb c d procederecomela“Programmazionedellamelodiaassociataallachiamatadalpostoesterno”precedentementedescritta.
Programming the melody associated with the doorbell (2 acoustic signals). Forthistypeofprogrammingb c dproceedas
previouslydescribedfor“Programmingthemelodyassociatedtothecallfromtheentrypanel”.
Programmierung der Melodie, die mit dem Anruf vom Treppenhaus verknüpft ist (2 akustische Signale). FürdiesePro-
grammierungsartb c dwiebeiderzuvorbeschriebenen“ProgrammierungderMelodie,diemitdemAnrufvonderAußenstationverknüpft
ist”vorgehen.
Programmation de la mélodie associée à l’appel provenant du palier (2 signaux sonores).Pourcetypedeprogrammationb c
dprocédercommepourla“Programmationdelamélodieassociéeàl’appelprovenantduposteextérieur”décriteprécédemment.
Programación de la melodía asociada a la llamada desde el rellano (2 señales acústicas). Paraestetipodeprogramación
b c d sigalosmismospasosqueparala“Programacióndelamelodíaasociadaalallamadadesdelaplacaexterior”descritapreviamente.
Programação da melodia associada à chamada do patamar (2 sinais acústicos). Paraestetipodeprogramaçãob c dcontinue
comoparaa“Programaçãodamelodiaassociadaàchamadadaplacabotoneira”descritaanteriormente.
Programmazione del numero di squilli di chiamata (3 segnali acustici). Premereiltasto tantevoltequantisonoglisquillichesièscelto
perlachiamata(da1a6squilli)e.Dopo3sdall’ultimapressionedeltastoverràriprodottalachiamataselezionataperilnumerodisquilliprescelto.
Persalvarelamelodiasceltaeduscirecompletamentedallaprogrammazionepremereiltasto f.
Programming the number of call rings (3 acoustic signals).Pressthekey thenumberoftimesequaltotheringsselectedforthecall(1
to6rings)e.3safterthekeyispressedthelasttime,thecallselectedfortheselectednumberofringswillbewillbereproduced.Tosavetheselected
memoryandexitprogrammingcompletely,pressthekey f.
Programmierung der Anzahl der Ruftöne (3 akustische Signale). DieTaste sooftdrücken,wieRuftönefürdenAnrufgewünscht
werden(1bis6Ruftöne)e.3snachdemletztenDrückenderTastewirddergewählteAnrufmitderAnzahlderfestgelegtenRuftönewiederholt.
ZumSpeichernderMelodieundvollständigenVerlassenderProgrammierung,dieTaste drückenf.
Programmation du nombre de sonneries d’appel (3 signaux sonores). Appuyersurlatouche autantdefoisquelenombredesonneries
quel’onachoisipourl’appel(de1à6sonneries)e.3saprèsladernièrepressionsurlatouche,l’appelsélectionnépourlenombredesonnerieschoisi
seraeectué.Poursauvegarderlamélodieetquittercomplètementlaprogrammation,appuyersurlatouche f.
Programación del número de tonos de llamada (3 señales acústicas). Pulseelbotón unnúmerodevecesigualalostonosquese
deseanparalallamada(de1a6tonos)e.Pasados3sdesdelaúltimavezquesepulseelbotón,sereproducirálallamadaseleccionadaconel
númerodetonoselegido.Paraguardarlamelodíaseleccionadaysalircompletamentedelamodalidaddeprogramación,pulseelbotón f.
Programação do número de toques de chamada (3 sinais acústicos). Aperteatecla tantasvezesquantasdesejarparaonúmerode
toquesdachamada(de1a6toques)e.Após3s,apartirdaúltimavezqueapertouatecla,seráreproduzidaachamadaseleccionadaparaonúmero
detoquesdesejado.Parasalvaramelodiaescolhidaesairtotalmentedaprogramaçãoaperteatecla f.
a
b
c
d
yPer la programmazione della chiamata, vedere la docu-
mentazione dei posti esterni.
yFor call programming, see the entry panel documentation.
yFür die Rufprogrammierung, siehe Unterlagen der Außen-
stationen.
yPour la programmation de l’appel, voir la documentation
des postes extérieurs.
yPara la programación de la llamada, consulte la documen-
tación de las placas exteriores.
yPara programar a chamada, consulte a documentação das
placas botoneiras.
e
f
IT - PROGRAMMAZIONE EN PROGRAMMING DE
PROGRAMMIERUNG
FR PROGRAMMATION ES PROGRAMACIÓN PT PROGRAMAÇÃO
X 5
beep
5

+
–
M2
GW19302
A
VELIA
M1
B
-
VELIA
M1
B
-
KARALIS
+
BOUT
-
-
-
-
M2
M1
INT
1/2 3/4
INT
1/2 3/4
2
1
IT
- ESEMPI DI COLLEGAMENTO
DE
- ANSCHLUSSBEISPIELE
ES
- EJEMPLOS DE CONEXIÓN
EN
- CONNECTION EXAMPLES
FR
- EXEMPLES DE RACCORDEMENT
PT
- EXEMPLOS DE LIGAÇÃO
2
INTERCOM 1/2 INTERCOM 3/4
2
GW19302
2
GW19302
2
12
2
1
2
1
1 2
6

AESIS
VELIAVELIA
VELIA VELIA 2.3
+
BOUT
-
M1
GW19302
A
+
–
M2
-
-
M1
B
-
2.4
M1
B
-
1.1
M1
B
-
1.2
M1
B
-
INT
1/2 3/4
INT
1/2 3/4
INT
1/2 3/4
INT
1/2 3/4
M2
2
INTERCOM 1/2 INTERCOM 3/4
2
GW19302
2
GW19302
2
12
2
1
2
1
1 2
7

+39 035 946 111
8.30 - 12.30 / 14.00 - 18.00
lunedì ÷ venerdì - monday ÷ friday
www.gewiss.com
24h
Ai sensi dell’articolo 9 comma 2 della Direttiva Europea 2004/108/CE e dell’articolo R2 comma 6 della Decisione 768/2008/CE si informa che responsabile dell’immissione del prodotto sul mercato Comunitario è:
According to article 9 paragraph 2 of the European Directive 2004/108/EC and to article R2 paragraph 6 of the Decision 768/2008
/EC, the responsible for placing the apparatus on the Community market is:
GEWISS S.p.A Via A. Volta, 1 - 24069 Cenate Sotto (BG) Italy Tel: +39 035 946 111 Fax: +39 035 945 270 E-mail: qualityma
ULTIMA REVISIONE 04-2013 Cod. 7.01.6.228.4
SMALTIMENTO
Assicurarsi che il ma-
teriale d’imballaggio
non venga disperso
nell’ambiente, ma
smaltito seguendo
le norme vigenti nel
paese di utilizzo del
prodotto.
Alla ne del ciclo di
vita dell’apparec-
chio evitare che lo
stesso venga disperso
nell’ambiente.
Lo smaltimento
dell’apparecchiatura
deve essere eettuato
rispettando le norme
vigenti e privilegiando
il riciclaggio delle sue
parti costituenti.
Sui componenti, per
cui è previsto lo smalti-
mento con riciclag-
gio, sono riportati il
simbolo e la sigla del
materiale.
DISPOSAL
Do not litter the envi-
ronment with packing
material: make sure it
is disposed of accord-
ing to the regulations
in force in the country
where the product is
used.
When the equipment
reaches the end of
its life cycle, take
measures to ensure it
is not discarded in the
environment.
The equipment must
be disposed of in
compliance with the
regulations in force,
recycling its compo-
nent parts wherever
possible.
Components that
qualify as recyclable
waste feature the rel-
evant symbol and the
material’s abbreviation.
ENTSORGUNG
Vergewissern Sie sich,
dass das Verpackungs-
material gemäß den
Vorschriften des
Bestimmungslandes
ordungsgemäß und
umweltgerecht ent-
sorgt wird.
Das nicht mehr
benutzbare Gerät ist
umweltgerecht zu
entsorgen.
Die Entsorgung
hat den geltenden
Vorschriften zu
entsprechen und
vorzugsweise das
Recycling der Geräte-
teile vorzusehen.Die
wiederverwertbaren
Geräteteile sind mit
einem Materialsym-
bol und –zeichen
versehen.
ELIMINATION
S’assurer que le maté-
riel d’emballage n’est
pas abandonné dans
la nature et qu’il est
éliminé conformément
aux normes en vigueur
dans le pays d’utilisa-
tion du produit.
À la n du cycle de vie
de l’appareil, faire en
sorte qu’il ne soit pas
abandonné dans la
nature.
L’appareil doit être
éliminé conformément
aux normes en vigueur
et en privilégiant le re-
cyclage de ses pièces.
Le symbole et le sigle
du matériau sont
indiqués sur les pièces
pour lesquelles le
recyclage est prévu.
ELIMINACION
Comprobar que no
se tire al medioam-
biente el material de
embalaje, sino que sea
eliminado conforme a
las normas vigentes en
el país donde se utilice
el producto.
Al nal del ciclo de
vida del aparato evíte-
se que éste sea tirado
al medioambiente.
La eliminación
del aparato debe
efectuarse conforme
a las normas vigentes
y privilegiando el
reciclaje de sus partes
componentes.
En los componentes,
para los cuales está
prevista la elimina-
ción con reciclaje, se
indican el símbolo y la
sigla del material.
ELIMINAÇÃO
Assegurar-se que o
material da embala-
gem não seja disperso
no ambiente, mas
eliminado seguindo
as normas vigentes no
país de utilização do
produto.
Ao m do ciclo de vida
do aparelho evitar que
o mesmo seja disperso
no ambiente.
A eliminação da
aparelhagem deve ser
efectuada respeitando
as normas vigentes e
privilegiando a recicla-
gem das suas partes
constituintes.
Sobre os componen-
tes, para os quais é
previsto o escoamento
com reciclagem,
estão reproduzidos o
símbolo e a sigla do
material.
This manual suits for next models
1
Table of contents
Other Gewiss Intercom System manuals

Gewiss
Gewiss Chorus Digital Vision User manual

Gewiss
Gewiss Chorus KARALIS GW19137TG User manual

Gewiss
Gewiss Chorus NAXOS GW19201WH User manual

Gewiss
Gewiss CHORUS VELIA GW19216WH User manual

Gewiss
Gewiss Chorus GW19401WH User manual

Gewiss
Gewiss Chorus KARALIS GW19051TG Owner's manual

Gewiss
Gewiss Chorus City Vision NORA GW19236 User manual

Gewiss
Gewiss Chorus City Vision Series User manual

Gewiss
Gewiss Chorus KARALIS GW19016TG Owner's manual

Gewiss
Gewiss Chorus NAXOS GW19201WH User manual