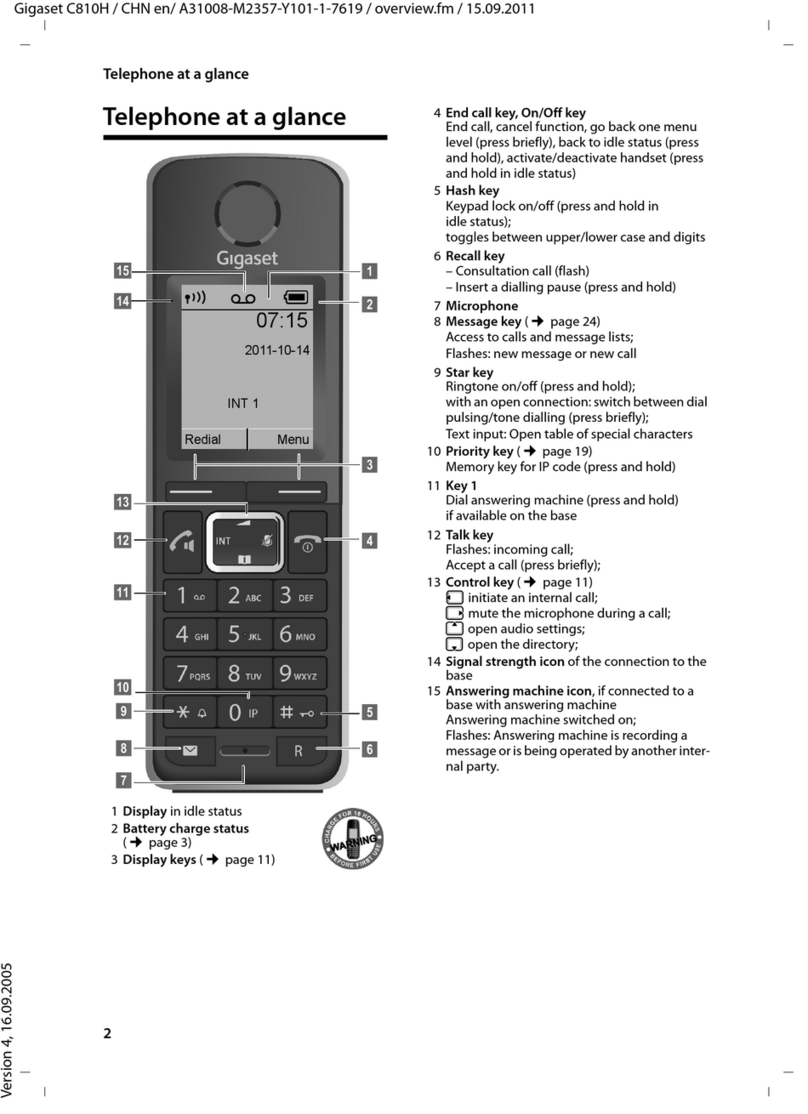
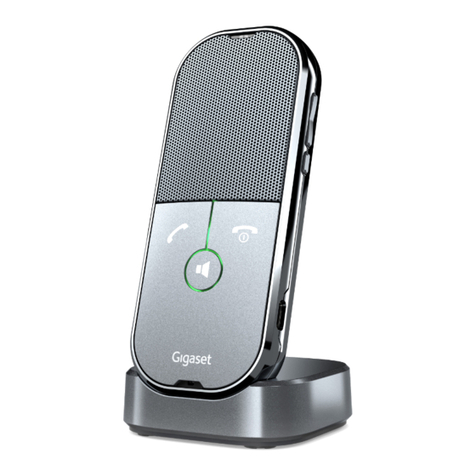
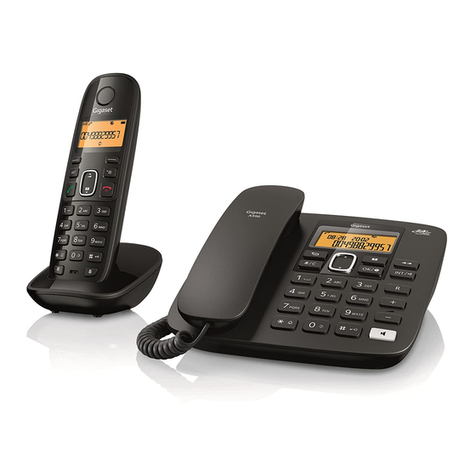
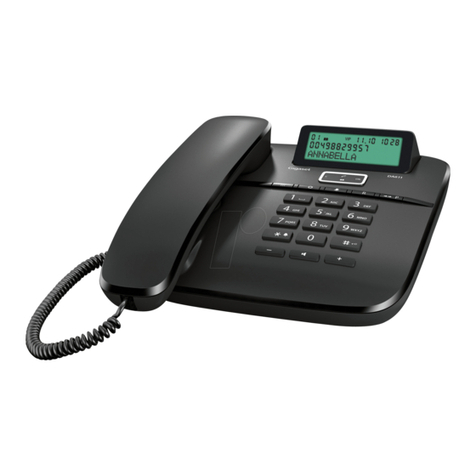
Gigaset E550 User manual

Gigaset E550 / IM Nord en / A31008-M2504-R201-1-SM19 / Cover_front.fm / 3/4/15
A-Klasse_Layout_Neu, Version 4, 28.05.2014

1
Gigaset E550 / IM Nord en / A31008-M2504-R201-1-SM19 / introduction.fm / 3/4/15
A-Klasse_Layout_Neu, Version 4, 28.05.2014
Gigaset E550 – Your reliable companion
This phone has the benefits of an ergonomic design, easy-to-use keys and a clear display with
large font.
It is also impressively robust and has first-class sound quality in handsfree mode as well as a long
operating time.
In Eco Mode your Gigaset is radiation-free while in idle status.
Further information on your phone can be found at www.gigaset.com/e550.
Have fun using your new telephone!
Direct dialling keys
Dial frequently used numbers quickly and easily using special keys (¢page 22).
Jumbo font and lighting
Improve the legibility of dialling digits by using a larger font and set the lighting of the display
to your preference (¢page 32).
Volume
Turn up the earpiece and handsfree volume quickly and easily using the boost key on the right-
hand side of the telephone ( page 20).
Directory for 150 entries
Save phone numbers and names to the directory (¢page 20).
Call list
Check who has called while you were out (¢page 24).
Redial
Use the last dialled numbers (¢page 23).
Environmentally friendly
Make low-radiation calls in Eco Mode (¢page 27).

2
Gigaset E550 / IM Nord en / A31008-M2504-R201-1-SM19 / overview.fm / 3/4/15
A-Klasse_Layout_Neu, Version 4, 28.05.2014
Overview
Overview
iTo change the display language, proceed as described on page 32.
5
6
13
14
16
10
4
12
8
11
7
3
1
2
1Direct dialling key A (¢page 22)
2Direct dialling keys B to D
(¢page 22)
3Display (¢page 4)
4Display keys (¢page 4)
5Talk key
Flashes: Accepting a call
6Control key (¢page 16)
7Key 1
Call the network mailbox (¢page 26)
8Star key
Ringers on/off (press and hold)
9Torch and signal light (LED)
10 Side key for torch
11 Side key for boost function
Extra volume key, setting the volume
(¢page 20)
12 Handsfree key (¢page 19)
Switch between earpiece and hands-
free mode;
Lights up: handsfree activated
13 End call key, On/Off key
End call; cancel function; go back one
menu level (press briefly); back to idle
status (press and hold); activate/deac-
tivate handset (press and hold in idle
status)
14 Hash key
Keypad lock on/off (press and hold,
(¢page 16)); upper/lower case and
digits (¢page 17)
15 0 key/recall key
Consultation call (flash): press and hold
16 Microphone
9
15

4
Gigaset E550 / IM Nord en / A31008-M2504-R201-1-SM19 / Symbols_Keys.fm / 3/4/15
A-Klasse_Layout_Neu, Version 4, 28.05.2014
Using the user guide effectively
Icons
Keys
Display icons
aWarnings, the non-adherence to which can lead to injury to persons or damage to devices
or generate costs.
hPrerequisite for carrying out the following action.
iImportant information regarding function and appropriate handling.
Talk key c/ End call key aNumber/letter keys Qto O
Star key P/ Hash key # Message key f/ Recall key S
Control key p/ Centre of the control key Display keys no
Handsfree key îDirect dialling keys éto ì
Information
Please wait...
Action failed
Action complete
Ð
‰
Ò
À
Alarm call ( page 28)
ØgÚ
Display up/Down
U

5
Gigaset E550 / IM Nord en / A31008-M2504-R201-1-SM19 / Symbols_Keys.fm / 3/4/15
A-Klasse_Layout_Neu, Version 4, 28.05.2014
Using the user guide effectively
Understanding the operating steps
An example of a procedure is as follows:
¤¤qSettings ¤§OK§ ¤qSystem ¤§OK§ ¤qEco Mode+ ¤§OK§ (³=on)
This means you should proceed as follows:
iScroll upwards if you wish to select one of the last entries in a menu level with numerous
entries.
:
Press the control-key when you are in idle mode. The
main-menu will be opened.
¤q:
Press up or down on the control key until ...
Settings
Back OK
¤§OK§:
Press the key below §OK§ on the display screen to
open the submenu.
¤q:
Press up or down on the control key until ...
Settings:
... the menu entry Settings appears on the screen.

6
Gigaset E550 / IM Nord en / A31008-M2504-R201-1-SM19 / Symbols_Keys.fm / 3/4/15
A-Klasse_Layout_Neu, Version 4, 28.05.2014
Using the user guide effectively
Eco
Mode+ ´
Back OK
System
Back OK
Eco
Mode+ ³
Back OK
Eco Mode+:
... the menu entry Eco Mode+ appears on the screen.
System:
... the menu entry System appears on the screen.
¤q:
Press up or down on the control key until ...
¤§OK§:
Press the key below §OK§ on the display screen to
open the submenu.
¤§OK :
Press the key below §OK§ on the display
screen to switch the function on or off
(³=on).
The change is effective immediately and
does not need to be confirmed.
Press the key below §Back§ on the display
screen to jump back to the previous menu
level
Or
Press and hold the end call key ato return
to idle status.

7
Gigaset E550 / IM Nord en / A31008-M2504-R201-1-SM19 / E550IVZ.fm / 3/4/15
A-Klasse_Layout_Neu, Version 4, 28.05.2014
Contents
Contents
Gigaset E550 – Your reliable companion . . . . . . . . . . . . . . . . . . . . . . . . . . . . . . . . . . . . . . 1
Overview . . . . . . . . . . . . . . . . . . . . . . . . . . . . . . . . . . . . . . . . . . . . . . . . . . . . . . . . . . . . . . . . . . . 2
Using the user guide effectively . . . . . . . . . . . . . . . . . . . . . . . . . . . . . . . . . . . . . . . . . . . . . . 4
Safety precautions . . . . . . . . . . . . . . . . . . . . . . . . . . . . . . . . . . . . . . . . . . . . . . . . . . . . . . . . . . . 8
First steps . . . . . . . . . . . . . . . . . . . . . . . . . . . . . . . . . . . . . . . . . . . . . . . . . . . . . . . . . . . . . . . . . . . 9
Using the phone . . . . . . . . . . . . . . . . . . . . . . . . . . . . . . . . . . . . . . . . . . . . . . . . . . . . . . . . . . . . 15
Making calls . . . . . . . . . . . . . . . . . . . . . . . . . . . . . . . . . . . . . . . . . . . . . . . . . . . . . . . . . . . . . . . . 18
Using the network mailbox . . . . . . . . . . . . . . . . . . . . . . . . . . . . . . . . . . . . . . . . . . . . . . . . . . 26
Further functions . . . . . . . . . . . . . . . . . . . . . . . . . . . . . . . . . . . . . . . . . . . . . . . . . . . . . . . . . . . 27
ECO DECT . . . . . . . . . . . . . . . . . . . . . . . . . . . . . . . . . . . . . . . . . . . . . . . . . . . . . . . . . . . . . . . . . . . . . . . . . . . . . 27
Using the handset as an alarm clock . . . . . . . . . . . . . . . . . . . . . . . . . . . . . . . . . . . . . . . . . . . . . . . . . . . 28
Baby monitor . . . . . . . . . . . . . . . . . . . . . . . . . . . . . . . . . . . . . . . . . . . . . . . . . . . . . . . . . . . . . . . . . . . . . . . . . . 29
One touch call . . . . . . . . . . . . . . . . . . . . . . . . . . . . . . . . . . . . . . . . . . . . . . . . . . . . . . . . . . . . . . . . . . . . . . . . . 30
Torch (Spot-LED) . . . . . . . . . . . . . . . . . . . . . . . . . . . . . . . . . . . . . . . . . . . . . . . . . . . . . . . . . . . . . . . . . . . . . . 30
Using multiple handsets . . . . . . . . . . . . . . . . . . . . . . . . . . . . . . . . . . . . . . . . . . . . . . . . . . . .30
Handset settings . . . . . . . . . . . . . . . . . . . . . . . . . . . . . . . . . . . . . . . . . . . . . . . . . . . . . . . . . . . . . . . . . . . . . . 32
Base settings . . . . . . . . . . . . . . . . . . . . . . . . . . . . . . . . . . . . . . . . . . . . . . . . . . . . . . . . . . . . . . . . . . . . . . . . . . 35
Operating the base on the PABX . . . . . . . . . . . . . . . . . . . . . . . . . . . . . . . . . . . . . . . . . . . . . . . . . . . . . . . 37
Appendix . . . . . . . . . . . . . . . . . . . . . . . . . . . . . . . . . . . . . . . . . . . . . . . . . . . . . . . . . . . . . . . . . . 38
Customer Service & Assistance . . . . . . . . . . . . . . . . . . . . . . . . . . . . . . . . . . . . . . . . . . . . . . . . . . . . . . . . 38
Manufacturer's advice . . . . . . . . . . . . . . . . . . . . . . . . . . . . . . . . . . . . . . . . . . . . . . . . . . . . . . . . . . . . . . . . . 41
Specifications . . . . . . . . . . . . . . . . . . . . . . . . . . . . . . . . . . . . . . . . . . . . . . . . . . . . . . . . . . . . . . . . . . . . . . . . . 42
Index . . . . . . . . . . . . . . . . . . . . . . . . . . . . . . . . . . . . . . . . . . . . . . . . . . . . . . . . . . . . . . . . . . . . . . 45

8
Gigaset E550 / IM Nord en / A31008-M2504-R201-1-SM19 / security.fm / 3/4/15
A-Klasse_Layout_Neu, Version 4, 28.05.2014
Safety precautions
Safety precautions
a- Read the safety precautions and the user guide before use.
- Explain their content and the potential hazards associated with using the device to
your children.
- The device cannot be used in the event of a power failure. In case of a power failure
it is also not possible to make emergency calls.
- Emergency numbers cannot be dialled if the keypad/display lock is activated!
Do not use the devices in environments with a potential explosion hazard
(e.g. paint shops).
The devices are not splashproof. For this reason do not install them in a damp
environment such as bathrooms or shower rooms.
Use only the power adapter indicated on the device.
Use only rechargeable batteries that correspond to the specification (see
"Specifications"). Never use a conventional (non-rechargeable) battery or other battery
types as this could result in significant health risks and personal injury. Rechargeable
batteries, which are noticeably damaged, must be replaced.
If you give your Gigaset to a third party, make sure you also give them the user guide.
Remove faulty devices from use or have them repaired by our Service team, as these
could interfere with other wireless services.
Do not use the device if the display is cracked or broken. Broken glass or plastic can cause
injury to hands and face. Send the device to our Service department to be repaired.
Do not hold the rear of the handset to your ear when it is ringing or when speaker mode
is activated. Otherwise you risk serious and permanent damage to your hearing.
During a call, a very high call volume can be set on your handset. This setting can cause damage to
the hearing of people with good hearing and is only intended for people with a hearing impairment .
Your Gigaset is compatible with the majority of digital hearing aids on the market.
However, perfect function with all hearing aids cannot be guaranteed.
The phone may cause interference in analogue hearing aids (humming or whistling) or
cause them to overload. If you require assistance, please contact the hearing aid supplier.
Using your telephone may affect nearby medical equipment. Be aware of the technical
conditions in your particular environment, e.g. doctor's surgery. If you use a medical
device (e.g. a pacemaker), please contact the device manufacturer. They will be able to
advise you regarding the susceptibility of the device to external sources of high
frequency energy (for the specifications of your Gigaset product see "Specifications").
9
Gigaset E550 / IM Nord en / A31008-M2504-R201-1-SM19 / first_steps.fm / 3/4/15
A-Klasse_Layout_Neu, Version 4, 28.05.2014
First steps
First steps
Checking package contents
1. One Gigaset E550 base
2. One Gigaset handset
3. Two batteries
4. One battery cover
5. One power adapter for the base
6. One phone cord
7. One user guide
2
1
3
6
4
7
5

10
Gigaset E550 / IM Nord en / A31008-M2504-R201-1-SM19 / first_steps.fm / 3/4/15
A-Klasse_Layout_Neu, Version 4, 28.05.2014
First steps
If you have purchased a model with multiple handsets, the package should contain the follow-
ing for each additional handset:
Setting up the base and charger
The base and charger are designed for use in dry rooms in a temperature range of +5°C to +45°C.
¤Set up the base at a central point in the building on a level, non-slip surface or mount the
base or charger on the wall ( page 44).
The phone's feet do not usually leave any marks on surfaces. However, due to the multitude of
different varnishes and polishes used on today's furnishings, the occurrence of marks on the sur-
faces cannot be completely ruled out.
Connecting the base
Two batteries Battery cover Charging cradle Power adapter
iPay attention to the range of the base. This is up to 300 m in unobstructed outdoor areas
and up to 50 m inside buildings. The range is reduced when Eco Mode is activated
(page27).
a• Never expose the telephone to the influence of heat sources, direct sunlight or other
electrical devices.
• Protect your Gigaset from moisture, dust, corrosive liquids and fumes.
¤First, connect the tele-
phone jack 2and insert
the cables into the cable
ducts.
¤Then connect the power
adapter 1.
Gigaset E550
21

11
Gigaset E550 / IM Nord en / A31008-M2504-R201-1-SM19 / first_steps.fm / 3/4/15
A-Klasse_Layout_Neu, Version 4, 28.05.2014
First steps
Connecting the charger (if included)
Setting up the handset for use
The display is protected by a plastic film. Please remove the protective film!
Inserting the battery and closing the battery cover
a• The power adapter must always be connected, as the phone will not operate without
a mains connection.
• Use only the power adapter and phone cord supplied. Pin connections on telephone
cables can vary (pin connections ¢page 43).
¤Plug the power adapter into the plug
socket 2.
¤Connect the flat plug on the power adapter
1.
Remove the plug from the charging cradle
To disconnect the plug from the charger, press the release
button 3and disconnect the plug 4.
3
4
1
2
aUse only rechargeable batteries (¢page 42) recommended by Gigaset Communications
GmbH, as this could otherwise result in significant health risks and personal injury. For
example, the outer casing of the batteries could be destroyed or the batteries could
explode. The phone could also malfunction or be damaged as a result of using batteries
that are not of the recommended type.

12
Gigaset E550 / IM Nord en / A31008-M2504-R201-1-SM19 / first_steps.fm / 3/4/15
A-Klasse_Layout_Neu, Version 4, 28.05.2014
First steps
Charging the battery
The correct charge status can only be displayed if the battery is first fully charged and dis-
charged.
i• The handset is already registered with the base. If you have purchased a model with
multiple handsets, all handsets will already be registered with the base. You do not
need to register the handset again.
• After the first battery charge and discharge you may replace your handset in its base
after every call.
• Always repeat the charging and discharging procedure if you remove the batteries
from the handset and reinsert them.
• The batteries may warm up as they are charging. This is not dangerous.
• After a time the charge capacity of the batteries will decrease for technical reasons.
¥Insert the batteries
(for correct +/- direc-
tion, see diagram).
¥Fit the cover from the top
.
¥Then press the cover until it
clicks into place .
1
2
To open the battery cover:
¥Grip the notch on the
cover and slide it
downwards .
3
4
1
2
4
3
9 h
¤Place the handset in the base with its display facing
forward for 9 hours.
iThe handset must only be placed in the desig-
nated E550 base or the corresponding charger.

13
Gigaset E550 / IM Nord en / A31008-M2504-R201-1-SM19 / first_steps.fm / 3/4/15
A-Klasse_Layout_Neu, Version 4, 28.05.2014
First steps
Changing the display language
Change the display language if you do not understand the language currently set.
¤Press the control key in the middle
¤Press keys 5 and 4slowly one after the other. The display for setting languages appears.
The current language (e.g., English) is selected.
¤Press down on the control key s... until the language you wish to use is displayed e.g.,
French.
¤Press the key below §OK§ to select this language. The selection is marked with ³.
¤Press and hold the end call key ato return to idle status.
Setting the date and time
Set the date and time so that the correct date and time can be assigned to incomincalls, and so
that the alarm clock can be used .
¤Press the display key below §Time§ on the display.
¤The input field opens.
Enter the day, month and year as an 8-digit number
via the keypad e.g., Q1Q4 2Q15 for
1 April 2015.
To correct errors: press left or right on the control key
to swap between fields.
¤Press the key below §OK§ on the display screen to confirm your entry.
¤Enter the hours and minutes as four-digit numbers via the keypad
e.g., QM15 for 7.15 a.m.
If necessary, use the control key to swap between fields.
¤Press the key below §OK§ on the display screen to confirm your entry.
¤The display shows Saved. You will hear a confirmation tone.
¤Press and hold the end call key ato return to idle status.
ËTime

14
Gigaset E550 / IM Nord en / A31008-M2504-R201-1-SM19 / first_steps.fm / 3/4/15
A-Klasse_Layout_Neu, Version 4, 28.05.2014
First steps
What would you like to do next?
Now that you have successfully set up your Gigaset, you can immediately start calling
– or you can adapt it to your personal requirements. Use the following guide to
quickly locate the most important functions.
Operating the phone page 15
Transferring an old directory to a new handset page 21
Registering other handsets page 30
Storing numbers in the directory page 20
Changing the ringers and volume on the handset page 33
Changing the call volume on the handset page 33
Switching on Eco Mode / Eco Mode+ page 27
iIf you have any questions about using your phone, please read the tips on troubleshoot-
ing ( page 39) or contact our Service team. Our technicians will be pleased to assist
(page38)!
g
g
g
g
g
g
g

15
Gigaset E550 / IM Nord en / A31008-M2504-R201-1-SM19 / starting.fm / 3/4/15
A-Klasse_Layout_Neu, Version 4, 28.05.2014
Using the phone
Using the phone
Activating/deactivating the handset
aIn idle status, press and hold the end call key (confirmation tone).
Menu guidance
Your telephone's functions are accessed via a menu consisting of several levels.
Main menu (first menu level)
¤When the handset is in idle status, press the display key §Menu§ to open the main menu.
The functions in the main menu are shown by means of an icon
and the function's name.
Selecting a function:
¤You can scroll between functions using the control key q.
The selectable function is shown in the display.
¤Press the display key §OK§ to select the displayed function.
This opens the corresponding submenu and the first entry
is displayed.
If you press the display key §Back§ or briefly press the end call key a, the display returns to idle
status.
Submenus
The functions in the submenu are indicated by name.
Selecting a function:
¤You can scroll between functions using the control key q.
The relevant function is shown in the display.
¤Press the display key §OK§ to select the displayed function.
This opens the corresponding submenu and the first entry
is displayed.
Briefly press the display key §Back§ or the end call key ato
return to the previous menu level.
Reverting to idle status
From any point in the menu:
¤Press and hold the end call key aor
¤Do not press any key: after 2 minutes, the display will auto-
matically revert to idle status.
É
Settings
Back OK
Display
Back OK
бU
07:15
01.04.2015
ËMenu

16
Gigaset E550 / IM Nord en / A31008-M2504-R201-1-SM19 / starting.fm / 3/4/15
A-Klasse_Layout_Neu, Version 4, 28.05.2014
Using the phone
Activating/deactivating the keypad lock
The keypad lock prevents any inadvertent use of the phone.
#In idle status, press and hold the hash key (confirmation tone). The keypad lock is
activated or deactivated. If it is activated, the Øicon appears in the display.
If the keypad lock is activated, a corresponding message is displayed when you press a key.
The keypad lock deactivates automatically when you receive a call. It is reactivated when the call
is finished.
Display keys
The functions of the display keys change depending on the particular operating situation.
Example:
Examples:
Open redial list.
Open main menu/menu for further functions.
Confirm selection or save entry.
Missed calls or messages on the network mailbox (¢page 25).
Delete key: delete character by character/word by word from right to left.
Go back one menu level or cancel operation.
Mute the microphone ( page 19).
Control Key
In the description below, the side of the control key (up, down, right, left) that you have to press
in the different operating situations is marked in black, e.g. vfor "press right on the control
key" or wfor "press the centre of the control key".
i• It is not possible to call emergency numbers either when keypad lock is activated.
Redial Menu
1
2
1
2
1Current display key function
2Display keys
Redial
Menu
OK
Û
Delete
Back
Mute
The control key enables you to navigate the menus and input fields, and also to
call up certain functions depending on the situation.
In idle status
Open the directory Press sbriefly
Open the main menu w or v
Open the list of handsets u

17
Gigaset E550 / IM Nord en / A31008-M2504-R201-1-SM19 / starting.fm / 3/4/15
A-Klasse_Layout_Neu, Version 4, 28.05.2014
Using the phone
Side key
äUpper side key: ¤activates the spot LED (¢page 2)
åLower side key (Boost key): ¤turns up the volume during a call (¢page 20)
Writing and editing names
The following rules apply when writing names:
• Each key between Qand Ois assigned several letters and characters.
• Control the cursor with uv.
• Characters are inserted at the cursor position.
• Press the display key §Delete§ to delete the character to the left of the cursor.
• The first letter of the name is automatically capitalised and then followed by lower case let-
ters.
•Briefly press the key several times in succession to select the required letter/character.
Setting upper/lower case or digits
Repeatedly press the hash key #to change the text input mode.
The change in mode is shown at the middle of the screen.
Correcting incorrect entries
You can correct incorrect characters in the input fields by navigating to the incorrect entry using
the control key. You can then:
• Use the display key §Delete§ to delete the character to the left of the cursor
• Insert characters at the cursor position
• Overwrite the highlighted (flashing) character e.g., when entering time and date.
Call up the menu for setting the handset's call volume t
In submenus, selection and entry fields
Confirm a function w
During a conversation
Open the directory s
Mute the microphone v
Initiate an internal consultation call u
iThe characters assigned to the key are shown in a selection line at the bottom left of the
screen. The selected character is highlighted.
1 Writing digits
AUppercase*
aLowercase
* First letter in capitals, all others in lower case

18
Gigaset E550 / IM Nord en / A31008-M2504-R201-1-SM19 / telephony.fm / 3/4/15
A-Klasse_Layout_Neu, Version 4, 28.05.2014
Making calls
Making calls
When the display backlight is switched off, pressing any key will activate the backlight. The rel-
evant key function is performed.
Making external calls and ending calls
External calls are calls using the public telephone network.
~ (Enter phone number) and press
¤the talk keycor
¤the handsfree keyd
The number is dialled.
You can also first long press
¤the talk keyc Ending a call/cancelling dialling:
Press the end call key aor place the handset in the base or charger.
Accepting a call
The handset indicates an incoming call in three ways: by ringing, by a display on the screen and
by the flashing talk keyc.
You can accept the call on the handset by:
¤Pressing the talk key c.
¤Pressing the handsfree key d.
¤Press the display key §Accept§.
If the handset is in the base and the Auto Answer function is activated ( page 33), the handset
will accept a call automatically when you lift it out of the base.
To deactivate the ringer, press the §Silence§ display key. You can accept the call as long as it is dis-
played on the screen.
Calling Line Identification
When you receive a call, the caller's number is displayed on the screen, if the following prerequi-
sites are met.
• Your network provider supports CLIP, CLI.
• CLI (Calling Line Identification): The caller's number is transmitted.
• CLIP (Calling Line Identification Presentation): The caller's number is displayed.
• You have requested CLIP from your network provider.
• The caller has arranged CLI with the network provider.
Table of contents
Other Gigaset Telephone manuals

Gigaset
Gigaset M270T User manual

Gigaset
Gigaset C620 User manual

Gigaset
Gigaset DX800 User manual

Gigaset
Gigaset A130 User manual

Gigaset
Gigaset S820H User manual

Gigaset
Gigaset AS180 User manual

Gigaset
Gigaset DX800A all in one User manual

Gigaset
Gigaset 5015 User manual

Gigaset
Gigaset A120 User manual

Gigaset
Gigaset DX600 A ISDN User manual

Gigaset
Gigaset Gigaset 5020 User manual

Gigaset
Gigaset S400 professional User manual

Gigaset
Gigaset Gigaset DA710 User manual

Gigaset
Gigaset Gigaset 8825 User manual

Gigaset
Gigaset T300PRO User manual

Gigaset
Gigaset A160 User manual

Gigaset
Gigaset A730 User manual

Gigaset
Gigaset A116 User manual

Gigaset
Gigaset DA210 User manual

Gigaset
Gigaset C610A User manual