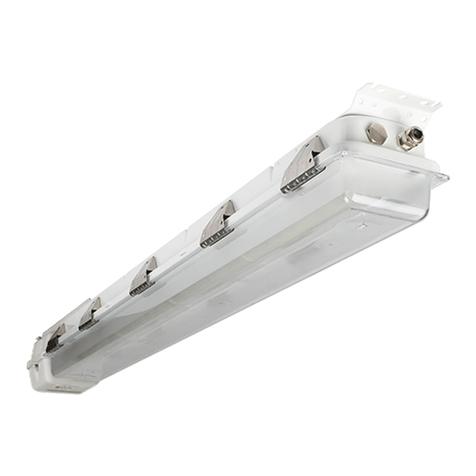
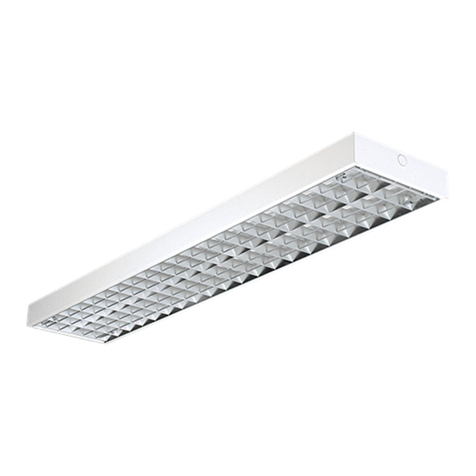
Glamox MAX T8 User manual

18W/36W
58W
Glamox MAX T8
User manual

LED
3
2
English
Do not connect to a temporary electricity
supply. This may damage the electronics.
Norsk
Tilslutt ikke armaturen til midlertidig
byggestrøm. Dette kan skade elektronikken.
English
Our products are subject to the Directive
2002/96/EC (Waste Electrical and
Electronic Equipment - WEEE) and should at
the end of their lifespan always be collected
separately and brought to the appropriate
collection point in your community or region.
Norsk
Våre produkter er underlagt direktiv
2002/96/EC (Waste Electrical and
Electronic Equipment - WEEE) og skal etter
endt levetid leveres til mottak for slikt avfall
eller til en forhandler av slikt avfall.
English
LED are sensitive to electrostatic discharge.
Do not touch the surface of the LED module.
Norsk
LED er følsomme for statisk elektrisitet.
Berør ikke overflaten på LED modulen.
Eesti
Meie toodete kohta kohaldatakse
2002/96/EC WEEE (elektri-ja
elektroonikaseadmetest tekkinud jäätmete)
direktiivi ning nad peavad olema
eluea lõppedes eraldi kokku kogutud
ning toimetatud piirkonna jäätmete
vastuvõtupunkti.
Nederlands
Onze producten zijn onderworpen aan de
Richtlijn 2002/96/EC (Waste Electrical
and Electronic Equipment -WEEE) en moeten
aan het einde van hun levensduur apart
ingezameld en naar het juiste inzamelpunt
gebracht worden in uw gemeente of regio.
Dansk
Vores produkter er underlagt direktiv
2002/96/EC (Waste Electrical and
Electronic Equipment -WEEE) og skal efter
endt levetid leveres til modtagere for sådan
type affald eller til en forhandler af sådan
affald.
Svenska
Våra produkter omfattas av direktivet
2002/96/EC (Waste Electrical and
Electronic Equipment – WEEE) och skall
vid slutet av sin livsängd alltid samlas in
och levereras till återvinningsstation i din
kommun eller region.
Deutsch
Unsere Produkte unterliegen der Richtlinie
2002/96/EG (Waste Electrical and
Electronic Equipment - WEEE) und sollten
am Ende ihrer Lebensdauer immer getrennt
gesammelt und an einem entsprechenden
Sammelpunkt in Ihrer Gemeinde oder
Region entsorgt werden.
Suomi
Tuote kuuluu elektronisten laitteiden
jätteenkäsittelyä (WEEE) koskevan direktiivin
2002/96/EC piiriin ja elinkaaren lopussa
oleva tuote tulee toimittaa asiaankuuluvaan
keräyspisteeseen.
Svenska
Anslut inte armaturen till tillfällig byggström.
Detta kan skada elektroniken.
Deutsch
Nicht an unsauberes Netz (Baustrom)
anschliessen. Die elektronischen Bauteile
können dadurch beschädigt werden.
Suomi
Älä kytke väliaikaiseen virtalähteeseen.
Tämä voi vioittaa elektroniikkaa.
Eesti
Ära kasuta ajutist toiteahelat. See võib
põhjustada vigastusi elektroonikale.
Nederlands
Sluit niet aan op een tijdelijke
elektriciteitsvoorziening. Dit kan de
elektronica beschadigen.
Dansk
Tilslut ikke armaturet til midlertidig
byggestrøm. Dette kan skade elektronikken.
Svenska
LED är känslig för elektrostatisk urladdning.
Rör inte ytan på LED modulen.
Deutsch
LEDs sind empfindlich gegenüber elektro-
statischer Entladung. Berühren Sie nicht die
Oberfläche der LED-Module.
Suomi
LED-valonlähteet ovat herkkiä staattisille
sähköpurkauksille. Älä kosketa
LED-moduleja.
Eesti
Leed on tundlik elektrostaatilise laengule.
Palun ära puuduta leed-moodulit.
Nederlands
LEDs zijn gevoelig voor elektrostatische
ontlading. Raak het oppervlak van de LED-
module niet aan.
Dansk
LED er følsomt for statisk elektricitet. Rør ikke
ved overfladen på LED modulet.
English
For further installation and maintenance
guidance, please see the document
“Installation and maintenance manual”
enclosed with your product or on our web
site.
Norsk
For ytterligere installasjons- og
vedlikeholdsveiledning kan du lese
dokumentet “Installation and maintenance
manual” som følger med produktet, eller
finnes på våre nettsider.
Svenska
För övriga installation och underhålls
uppgifter, var vänlig se vårt dokument
“Installation and maintenance manual”
bifogat med er produkt, eller på vår
hemsida.
Deutsch
Weitere Installations- und Wartungsweise
finden Sie in dem Dokument “Installation
and maintenance manual” zusammen mit
ihrem Produkt auf unsere Webseite.
Suomi
Tarkemmat asennus- ja huolto-ohjeet löytyvät
tuotteen mukana toimitetusta ohjeesta sekä
internetsivuiltamme.
Eesti
Lisainformatsiooni saamiseks vaata palun
“Installation and maintenance manual”, mis
on kaasas valgustiga ning leitav ka meie
koduleheküljelt.
Nederlands
Voor verdere installatie en onderhoud, zie
het document “Installation and maintenance
manual” dat bij uw product is bijgesloten of
kijk op onze website.
Dansk
For yderlig information om installation og
vedligeholdelse, se venligst dokumenterne
på vores hjemmeside på det pågældende
produkt.
0470
II 2G Ex db eb mb IIC T4 Gb
II 2D Ex tb IIIC T70°C Db
PRESAFE 15ATEX 7083X
IECEx PRE 15.0055X
Description:
Surface mounted
Ex luminaire emergency light HF-E or without emergency HF light for Zone 1
Temperature limits (ta): HF: -30°C to 50°C (to 45°C for 58W)
HF-E: -20°C to 50°C
Line voltage: For 18/36W: 110–254VAC 50/60Hz and 220–250VDC
For 58W: 220–254V AC 220–250V DC
Supplied current (mains mode): For 18W: 0.07–0.34A
For 36W: 0.13–0.59A
For 58W: 0.22–0.55A
Power factor: 0.95–0.98W
Light tube type: T8 18W, 36W or 58W Bi-pin tubes with brass pins
For more information, please see www.glamox.com
L1
C1
60
85
128
165
C
L
50
115
150
111
L1 + 134
C1 + 134
124
165
Types L1 C1 L C = M8 Hood nuts distance
18W 724 704 681 400 430 500
36W 1334 1314 1291 500 700 950
58W 1634 1614 1591 700 -110 0
X: Special conditions for safe use:
Potential electrostatic charging hazard – For cleaning use moist cloth only! No solvent.
WARNING:
Do not open when an explosive atmosphere is present!
Live parts behind cover – Do not contact!
Glamox MAX T8, 18W, 36W and 58 W
5
4
Installation and operation
MAX terminal Glamox 112 20556
Torque value for screws: 1.8Nm
Type and size of wires that can be used:
Solid wire: From 1.0mm² to 6.0mm²
Stranded wire with or without ferrule: From 0.75mm² to 6.0mm²
There can only be connected one wire on each side of the screw on
each side of each terminal. (totally max 4 wires at each terminal).
Earthing the luminaire
The luminaire must be earthed in the terminal block.
It can also be earthed external, to the contact on the luminaire house.
Shielded cable must be earthed as described in the drawing.
12mm
N
Earthing
Earthing of
shielded cable
L3 L2 L1 L4
M20 M25
Polyamid 5.0 Nm
8-13mm 7.5 Nm
12-18 mm Torque
Cabel diameter
Brass 7.5 Nm
4-12mm 10.0 Nm
12-18mm Torque
Cabel diameter

Switching of main light
Switching the Ex-luminaire on and off more than once a day, may reduce the lifetime of the fluorescent tubes.
This is due to the cold start ballasts that have to be used in Ex-luminaires. Microswitches switch off power to lampholder
when opening luminaire.
Operation of the MAX HF-E (Emergency light)
The luminaire has normally 2 tubes running. In emergency mode will only one tube be running giving a
reduced light level from 7,5 to 11%.
When mains voltage is switched on the charging indicator (green LED) will light, indicating the battery is being charged.
If the connection to the battery is disrupted the indicator will not light. A new or a discharged battery must be charged
for 24 hours in order to be full charged.
Control
The function of the emergency tube and the emergency function of the ballast should be controlled at least once a month.
Full emergency test (switching off N, L1 and L4 to the lumianire) should be performed once a year and the specified
emergency lighting time should be observed (1.5 or 3 hours for standard luminaire).
Maintenance
The MAX is designed to function many years with a minimum need for maintenance. However it may be necessary to
clean the cover of the luminaire if it gets dirty or to change the NiCd battery after 4 to 6 years (in order to maintain
the specified lighting time). The only batteries to be used are Glamox, part no. PA140818001 (4.8V, 4.0Ah Ni Cd)
for 18W 1h/3h and 36W 1h or part no. PA140818002 (8.4V, 4.0Ah Ni Cd) for 36W 3h and 58W 1h/3h.
If other components need replacement it is important that only original Glamox components will be used.
Do never use any solvents for cleaning the polycarbonate diffuser. Due to the risk of generating static change
in the PC diffuser, always use a moist cloth for cleaning.
When changing light tubes, please also check the diffuser with gasket if there is any visible faults or defects.
Cycling of battery
To have best lifetime of batteries, cycle the batteries at least 2 times when engenieed. Cycle by charging in 24h
(fully charged batteries) and discharge until the emergency light turns off. To cycle, just furn the circuit breaker on/off.
7
6
Installation and operation Installation and operation
Connection of MAX
L1 - N for not emergency (main light)
L4 - N for emergency (charging)
Power supply must be from same line (fuse) for both normal light and emergency.
Mains
L
N
L4
3
N
L1
2
L4
3
N
L1
2
L4
3
N
L1
2
MAX HF-E
Emergency
MAX HF
Not emergency
MAX HF-E
Emergency
• Wiring with 2-poled switch for main light
Connection of MAX to the mains
When the MAX is connected to other luminaires as shows in the diagrams, the switch will switch off/on
all the luminaires. The light in both tubes of the MAX can be switched while the battery will be
charged uninterruptedly.
• Wiring without switch for main light
Mains
L
N
L4
3
N
L1
2
L4
3
N
L1
2
MAX HF-E
Emergency
L4
3
N
L1
2
MAX HF
Not emergency
MAX HF-E
Emergency
Mains
L
N
L4
3
N
L1
2
L4
3
N
L1
2
L4
3
N
L1
2
MAX HF-E
Emergency
MAX HF
Not emergency
MAX HF-E
Emergency
• Wiring with 1-poled switch for main light

9
8
85 mm
Glamox MAX T8 mounting Battery change
12 3
4
With plastic folio at diffuser
Battery pack
Spareparts item no:
PA140818001, 4.8V 4.0Ah
PA140818002, 8.4V 4.0Ah
1.2 Nm
5 6
7 8 9
10 11 12
Remove plastic folio before powering
1.2 Nm

• One or both tubes do not light:
- Check that the mains voltage is in the voltage range of the luminaire.
- Check that the cover of the luminaire is mounted and that the screws are tightened.
- Open the luminaire and check the following:
Light tubes are inserted correctly - change defect tubes.
Check the wires, the contacts, the switches and the ballast.
Change with new one if demaged.
• The charging indicator (LED) do not light:
- Open the luminaire and check the following:
The connection of L4, the battery and the charging unit.
Check the switch on the minus pole of the battery.
- The ballast might be damaged - contact nearest Glamox sales office.
• Emergency illuminance level is too low:
- Clean the cover of the luminaire
- Change the tube
- Change the battery
• Emergency lighting time is under the specified time (1.5 hours for standard luminaire):
- Change the battery
Manufacturer:
Glamox AS
Birger Hatlebakks veg 15
NO-6405 Molde, Norway
Service contact:
Glamox AS
Tel.: +47 71 24 60 00
Fax: +47 71 24 60 01
or nearest Glamox sales office
11
10
What to do if....

Please visit our web site for contact information
www.glamox.com
Please refer to our websit
e
for information about
our 5-year warranty.
© Glamox November 2019 Item no: 72596947
Table of contents
Other Glamox Lighting Equipment manuals

Glamox
Glamox C21 User manual

Glamox
Glamox C50-S User manual

Glamox
Glamox C56-P User manual

Glamox
Glamox E85-R User manual

Glamox
Glamox E20 G2 User guide

Glamox
Glamox C12 -P User manual

Glamox
Glamox A51-R G2 User manual

Glamox
Glamox C30-RIC G2 User manual

Glamox
Glamox SmartLED STRIP G2 User manual

Glamox
Glamox A41-W LED User manual

Glamox
Glamox C55-P User manual

Glamox
Glamox C51-R LED User manual

Glamox
Glamox C64-R User manual

Glamox
Glamox C25-R User manual

Glamox
Glamox C75-P User manual

Glamox
Glamox i40 LED Series User manual

Glamox
Glamox C63-R User manual

Glamox
Glamox C85-R User manual

Glamox
Glamox TL14-W58 Series User manual

Glamox
Glamox C51-S LED User manual