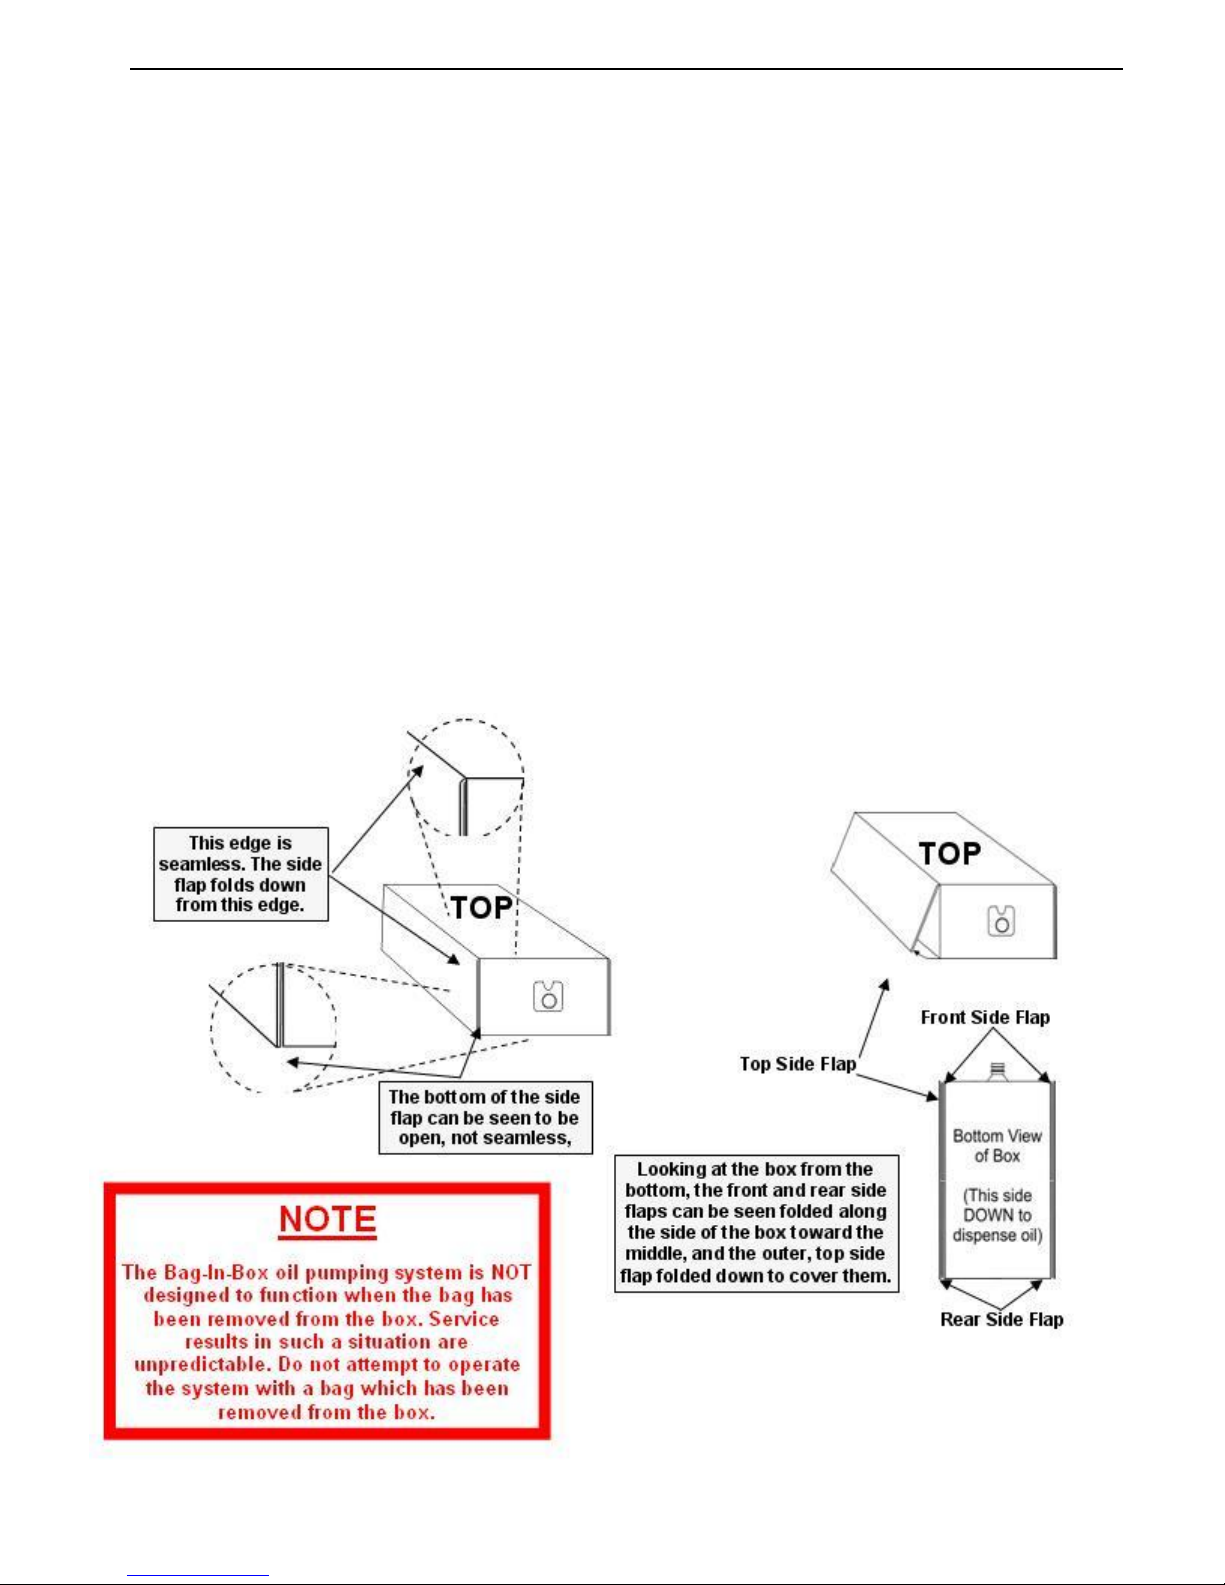
Bag-In-A-Box Enclosed Oil Dispenser
Models #2257GA & #2257GAD
OPERATING INSTRUCTIONS
1. Turn the OIL SYSTEM MASTER switch, located on the popcorn machine, to the ON position. This
will start the heater/blower that will maintain cabinet temperature and provide power for the
pump.
2. Pressing the red OIL DISPENSE button located on the popcorn machine will dispense the oil into
the kettle. If this is the first time the unit has been used, it may take a minute to completely fill the
tube and dispense oil.
E-Z SET TIMER OPERATION
This machine is equipped with a programmable timer for setting the amount of oil needed for popping
popcorn. Holding the red Oil Dispense push button down while turning on the Oil System Master
switch; while continuing to hold the red oil dispense button for five seconds puts the unit in the
program mode. The oil system master switch light will start to blink off and on indicating that the
timer is in the program mode. Hold a cup under the oil line and then use the manual mode of operation
to prime the oil line. After priming the oil line, use a measuring cup and the automatic mode of
operation to set the correct oil amount.
1. Automatic Operation
When in the program mode press and release the oil Dispense switch to start the oil flowing.
When the correct amount of oil has been dispensed into the measuring cup push the oil
Dispense switch to stop the oil flow. The oil amount can be “topped off” by pushing the oil
Dispense switch on/off as many times as needed to finalize the oil amount. Turning the Oil
System Master switch off and then back on puts the unit in the regular mode. The unit will now
dispense the “programmed” amount of oil when the oil Dispense switch is pushed. The oil light
will light only when the oil pump is on.
2. Manual Operation
When in the program mode, immediately turn off the Oil System Master switch; turning the Oil
System Master back on puts the timer in the manual mode of operation. The unit will now dispense
oil only while the oil Dispense switch is pushed.
NOTE:
2257GAD has a dual oil timer. Select salt popping to program the salt oil time. Select sweet
popping to program the sweet oil time.
For Flexi-Pop machines, select one of the load settings. Program the time and then select the
second load setting, program the time for that setting.