Goldmedal 5300 User manual

Part No. 36060
5300, 5300CH,
5300EX , 5300FN
Nacho Cheese Dispenser
And Warmer
Instruction Manual
Cincinnati, OH 45241-4807 USA

Nacho Cheese Dispenser and Warmer
2 All Models
SAFETY PRECAUTIONS

Nacho Cheese Dispenser and Warmer
3 All Models
Installation Instructions
Inspection of Shipment:
Unpack all cartons and check thoroughly for any damage that may have occurred
during transit. Damage claims should be filed immediately with the transportation
company. Gold Medal Products is not responsible for damage that occurs in
transit.
Setup:
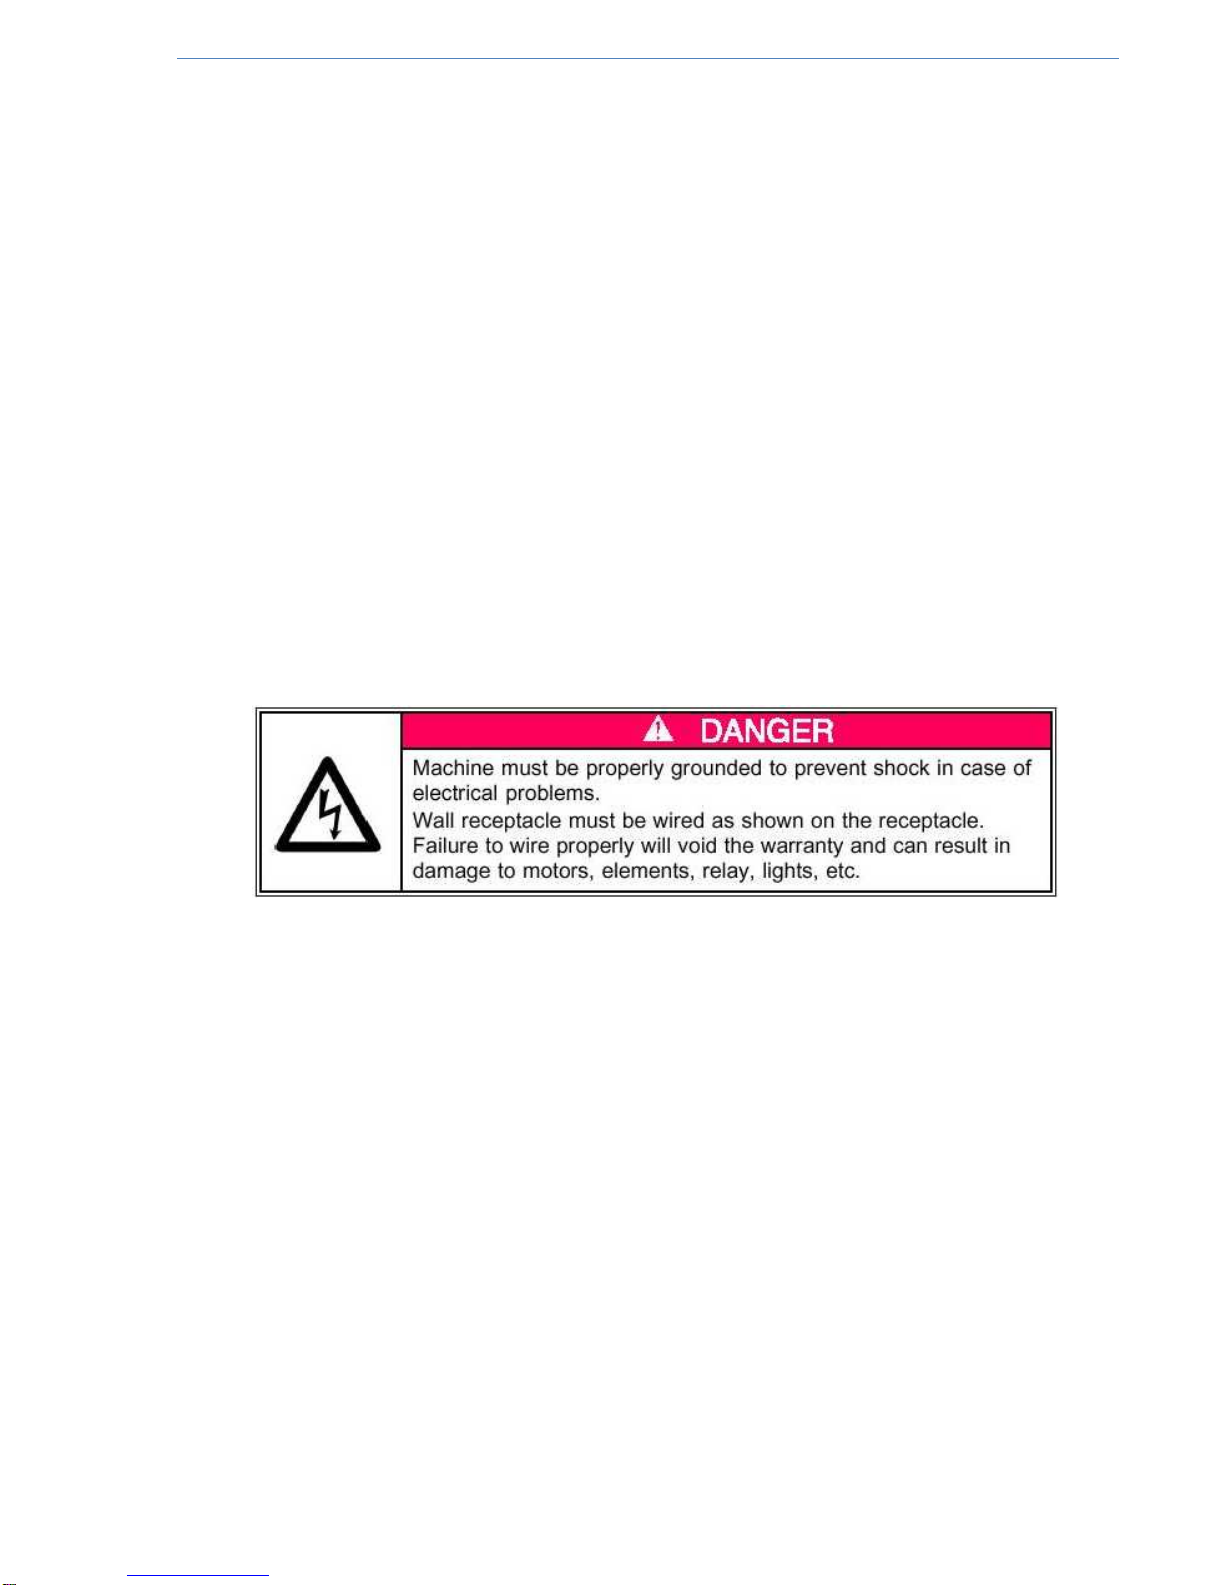
Your new Cheese Dispenser is completely assembled and tested at the factory.
Remove all packing material and tape before starting operation.
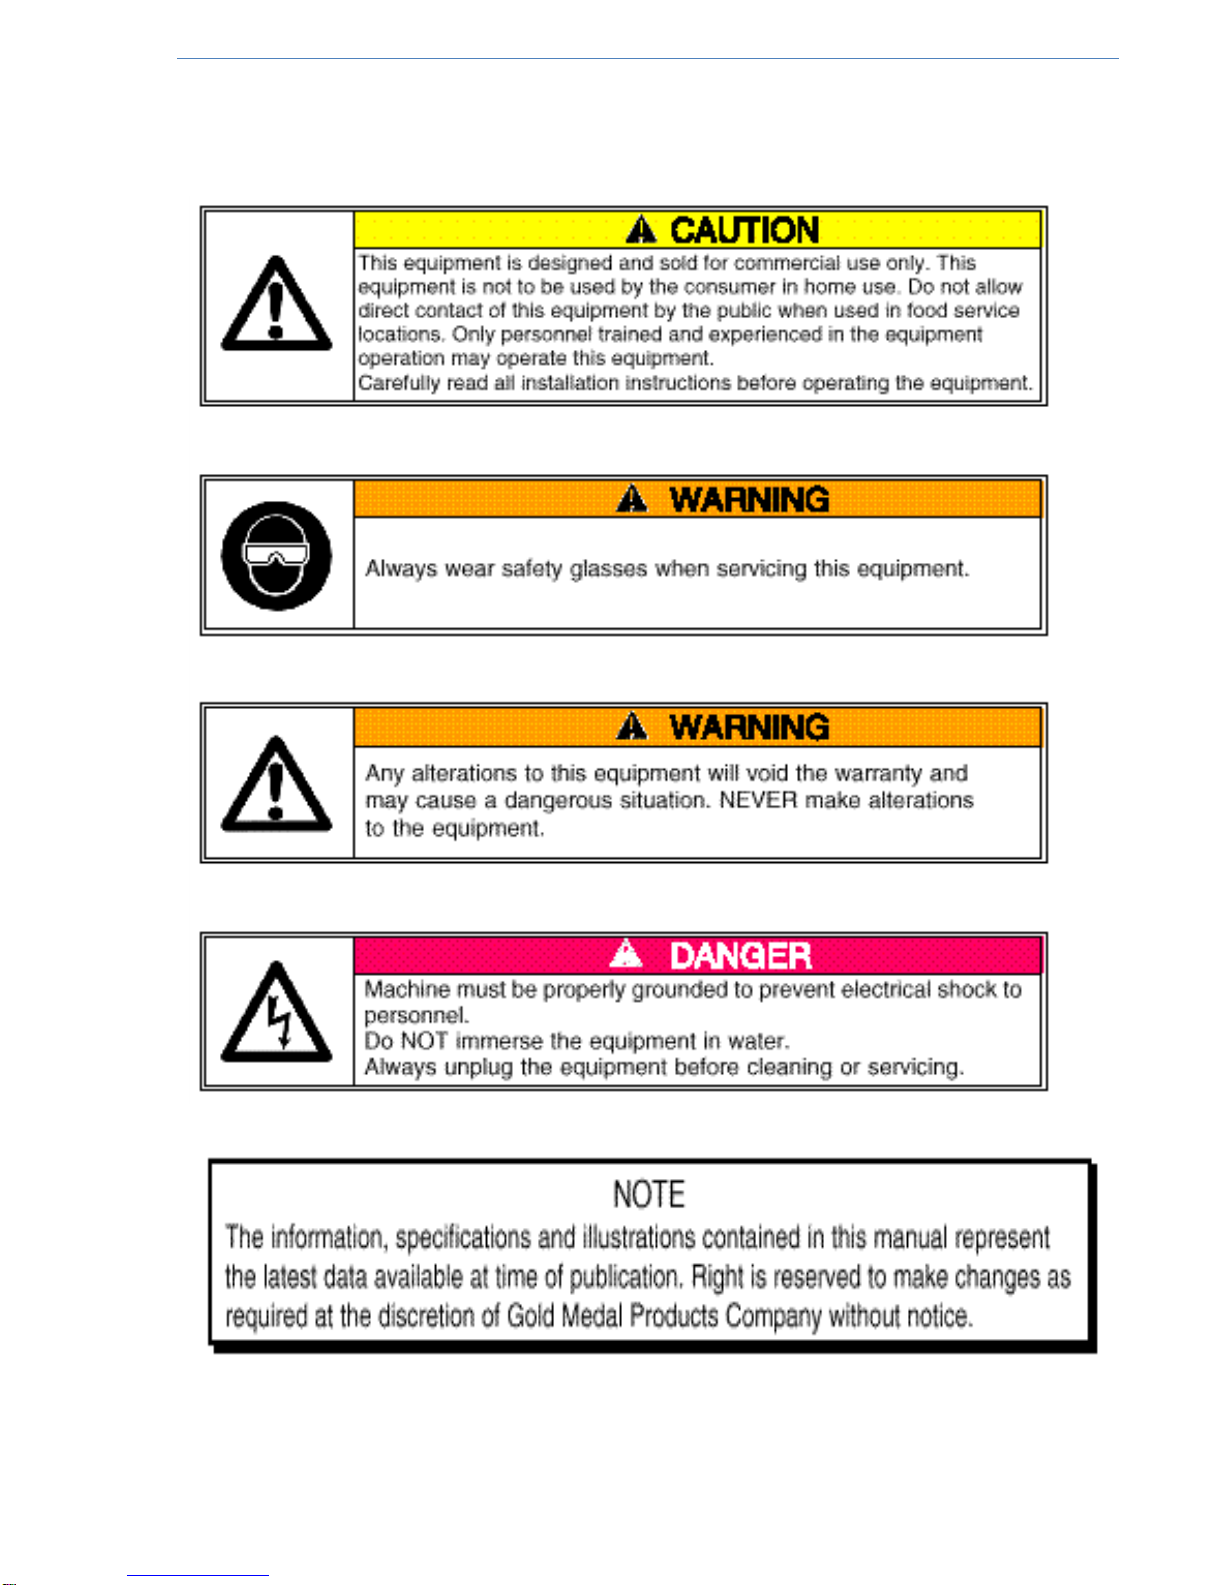
Electrical Requirements:
The following power supply must be provided:
5300, CH, FN: 15 amp, 60 Hz, 120VAC.
5300EX: 15 amp, 50 Hz, 220VAC.
Your electrician must furnish sufficient power for proper machine operation. We
recommend this warmer be on a dedicated and protected circuit. Failure to wire
properly will void the warranty and may result in damage to the machine.
It is Gold Medal Products Company’s recommendation that this machine be
plugged directly into a wall outlet. The use of extension cords is not
recommended due to safety concerns, and may cause sacrificed and/or reduced
performance.
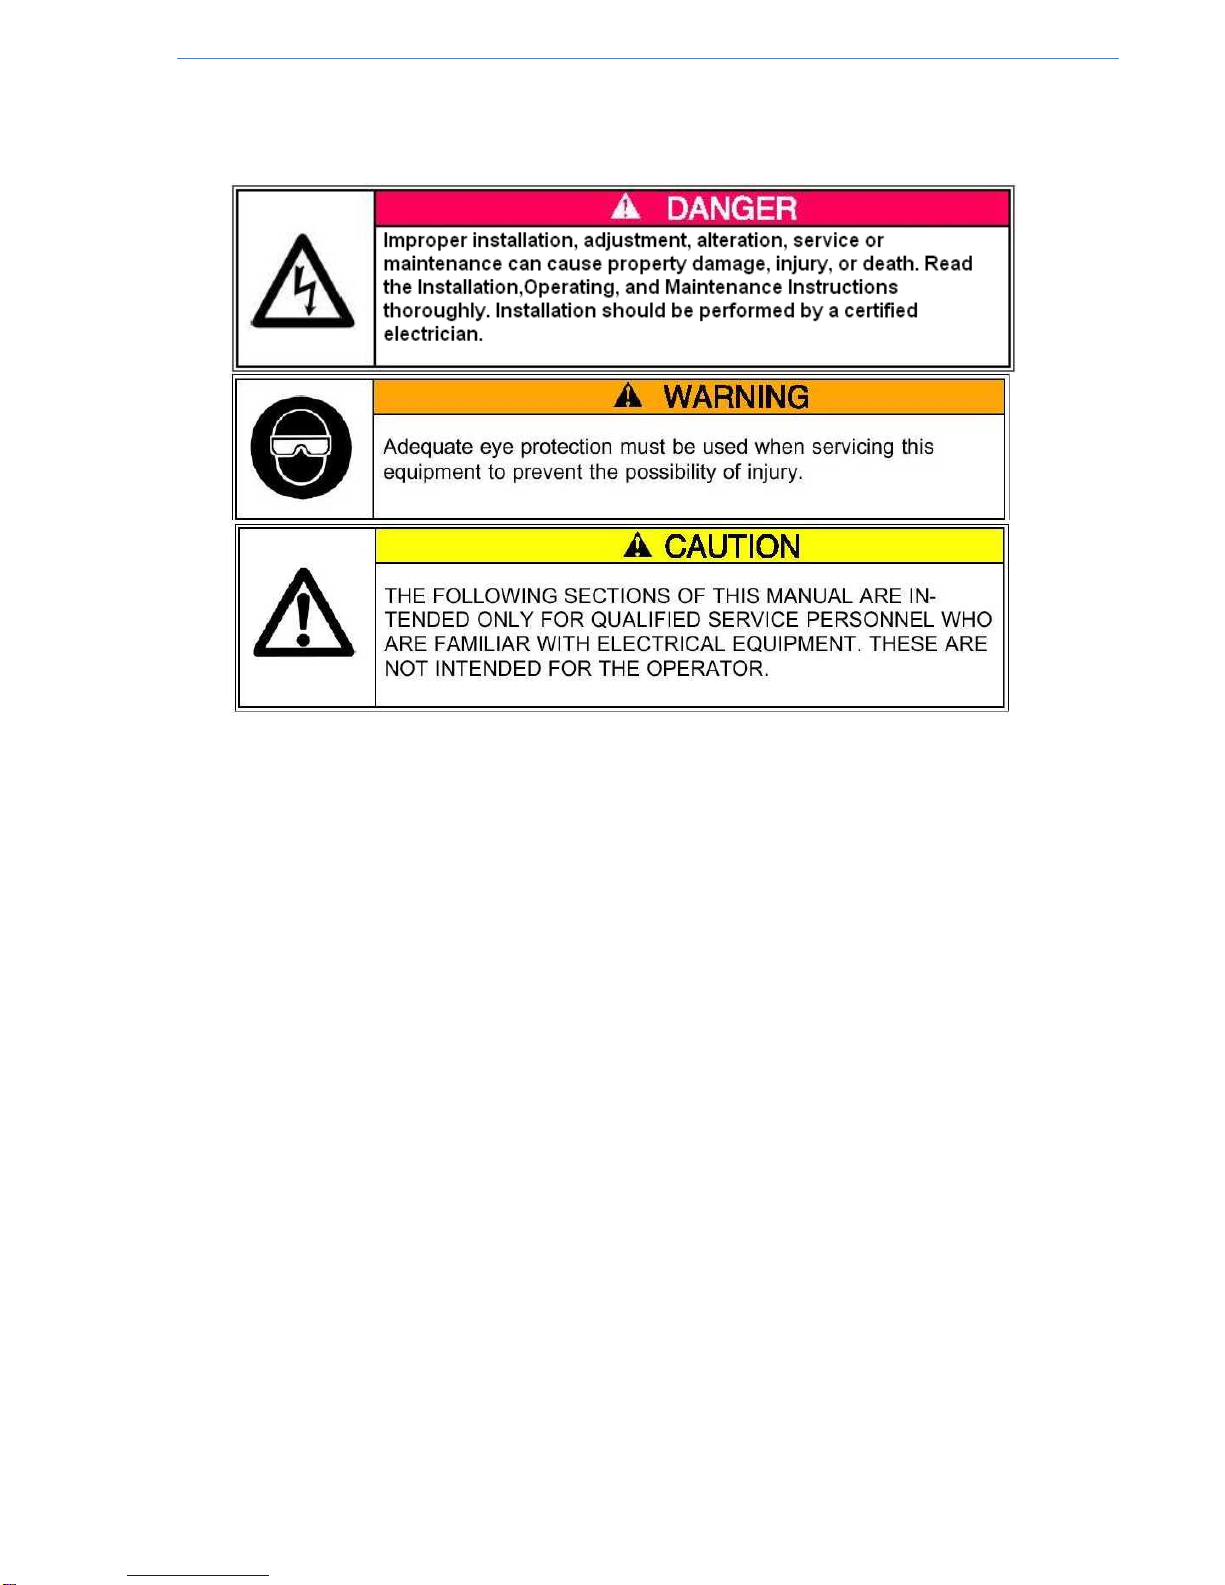
Before You Plug In Machine:
1. Make sure the wall outlet can accept the grounded plugs (where applicable) on
the power supply cord.
2. The wall outlet must have the proper polarity. If in doubt, have a competent
electrician inspect the outlet and correct if necessary.
3. DO NOT use a grounded to un-grounded receptacle adapter.

Nacho Cheese Dispenser and Warmer
4 All Models
Product Installation
1. Remove cap from bagged cheese. Install new tube. Make sure tube is securely
seated into new bag of cheese.
2. Open door by pulling on the left side of the cabinet. Open tube clamp by rotating
Cam Counterclockwise.
3. Place product on rack with spout and tube directed toward the front and
downward through the opening.
4. Guide the tube through the pump slot from top to bottom.
5. Close tube clamp by rotating cam clockwise.
6. Close door.

Nacho Cheese Dispenser and Warmer
5 All Models
Product Removal
1. Open Door
2. Open Tube Clamp
3. Remove Tubing, by pulling from bottom up.
4. Remove empty product bag and tube from the bag cheese dispenser.

Nacho Cheese Dispenser and Warmer
6 All Models
Operating Instructions
Controls and Their Functions
Button Functions (Top to Bottom)
Initial Set-Up for Portion Control*
Pre-Heating
Pre-heat the unit with product in it for approximately ONE hour. Dispensing
temperature for cheese is between 140 deg. F and 155 Deg. F.
Dispensing Volume
The dispenser is set with pre-set dispensing volumes levels, (Large, Small,
Manual). The yellow button is set for small portion cups, the red button is set
for large portion cups, and the orange button is set to free-flow (manual) - as
long as button is activated, unit will dispense product.
Dispensing Temperature
We have set this dispenser from the factory to a default temperature level for
warming the product. If this setting needs changed to fit your application, the
main circuit board has a temperature setting potentiometer that can be adjusted
accordingly.
*See maintenance instructions for details on changing dispensing volume and
temperature to suit your application
CAUTION
Surfaces on this unit are EXTREMELY HOT during operation, care should
be taken when operating this unit.
Powering Off Machine
With the switch set to the OFF position, disconnect power to unit at the end of each
day. Do not leave unit operating unattended.
Yellow Button
–
Large portion dispensing
Red Button
–
Small portion dispensing
Orange Button
–
Manual portion dispensing

Nacho Cheese Dispenser and Warmer
7 All Models

Nacho Cheese Dispenser and Warmer
8 All Models
CARE AND CLEANING
Cleaning Guidelines.
Turn power switch to the OFF position. Disconnect the unit from power source.
After unit cools slide out the tray, and clean. Replace tray.
Wipe exterior surface of unit.
Wipe interior areas of the unit, confirm the unit is cool and unplugged.
WARNING
Do NOT immerse unit in water!
Do NOT hose down the counter when the unit is on!
Keep away from running water!
Cleaning Air Intake (weekly)
1. With the switch set to the OFF position, disconnect Unit from Power supply
2. Position unit onto back panel.
3. Use a vacuum cleaner and or a damp cloth to clean air intake.
4. Position unit for normal operation and reconnect to power source.

Nacho Cheese Dispenser and Warmer
9 All Models
MAINTENANCE INSTRUCTIONS

Nacho Cheese Dispenser and Warmer
10 All Models
ORDERING SPARE PARTS
*Always speak to a Gold Medal Products Technical Service Advisor before
ordering any parts to help ensure accuracy for your product. Included diagrams
may not be the latest information.
1. Identify the needed part by checking it against the photos, illustrations, and/or parts list.
2. When ordering, please include part number, part name, and quantity needed.
3. Please include your model name, serial number, and date of manufacture (located on
the machine nameplate) with your order.
4. Address all parts orders to:
Parts Department
Gold Medal Products Co.
10700 Medallion Drive
Cincinnati, Ohio 45241-4807
Or, place orders by phone or online:
(800) 543-0862
(513) 769-7676
Fax: (513) 769-8500
Web Page: www.gmpopcorn.com

Nacho Cheese Dispenser and Warmer
11 All Models
To Change Dispensing Settings:
Cheese/Chili Dispenser has three buttons for dispensing pre-set amounts of
product.
You can change each button’s dispense amount by following the instructions
below.
Step 1 – Dispense the product into the serving container or measuring cup using the
bottom (Orange) Button. This button is set at the factory for manual operation.
Take note of the dispense time in seconds.
Repeat this step for up to three different serving amounts.
Step 2 – With Power Switch set to off position, unplug the warmer.
Step 3 - Remove the back panel (6 screws.)
Locate the circuit board. You will see three switch banks:
Right Switch Bank (Large, w/eight switch settings) controls the yellow button
Middle bank (Small, w/six switch settings) controls the red button
Left switch bank (Manual, w/six switch settings) controls the orange button
Manual Small Large
Step 4 – Push the switches down, one bank at a time, to the on position according to
the chart below:
Switch (NUMBER) Dispense Time (SECONDS)
1 ½
2 1
3 2
4 4
5 8
6 16
7 (YELLOW ONLY) 32
8 (YELLOW ONLY) 64
Example – for 9 seconds dispense time for red button, on the middle bank of switches,
turn on switches #2 and #5.
Temperature
A
d
j
ustment

Nacho Cheese Dispenser and Warmer
12 All Models
NOTE: For manual operation (push/hold to dispense) put all switches in the off (up)
position.
Step 5 – Replace the back panel. Do NOT over tighten the screws.
To change Dispensing Temperature
1. With power switch set to OFF position, Un-plug unit.
2. Remove – the 6 rear cover screws, and the cover.
3. Locate the circuit board in the bottom of the machine.
4. Locate the 140-155 deg, control in the center of the circuit board.
5. Rotate the pot, clockwise to increase the temperature, or counter clockwise to
decrease the temperature.
Trouble Shooting Guide
Problem Cause Solution
Nothing is working Electrical Failure Check plug is secure in outlet
Check outlet for power.
Check Circuit Breakers
Door will not close Clamp Open Close Clamp
Tray not fully inserted Install tray correctly
No Product Dispensing Out of product Replace empty bag
Product is leaking Clamp not fully closed Close Clamp
Tube loose from spout Check tube
Tube not reaching bottom of clampSpout not seated in receptacle Seat spout in receptacle
Product is cold Dispenser door left open Close Door
No Electricity Check Power
Excess product remain in bag Spout not seated in receptacle Seat Spout
Folds in Bag Lay bag flat in tray

Nacho Cheese Dispenser and Warmer
13 All Models
PARTS LIST – 5300 NACHO CHEESE DISPENSER
Model # 5300
Item Part
No. No. Description Quantity
1 36025 PCBA MOUNT BOX 1
2 36026 REAR ACCESS PANEL 1
3 36028 BAG CHEESE TRAY 1
4 36027 BAG SUPPORT 1
5 36029 SWITCH MOUNT PANEL 1
6 36030 PUMP BLOCK RIGHT SWITCH 1
7 36031 PUMP BLOCK LEFT 1
8 36032 PUMP CAM LOCK 1
9 36033OR BUTTON - ORANGE 1
10 36033RD BUTTON - RED 1
11 36033YL BUTTON - YELLOW 1
12 36034 PUMP DRIVE PLATE METAL 1
13 36036 PUMP FRONT COVER PLATE 1
14 36037 PUMP ROLLER 4
36038 SWITCH 3
36040 RUBBER FEET 4
15 36043 MOTOR 1
36045 MOTOR WIRE HARNESS 1
16 36046 BLOWER - FAN 1
17 36047 HEATER ASSEMBLY 1
18 36048 PCBA MASTER BOARD 36048EX FOR 5300EX 1
19 36049 PCBA TEMPERATURE SENSOR (NOT SHOWN) 1
20 36051 DECAL HOUSING LEFT (NOT SHOWN) 1
21 36052 DECAL HOUSING RIGHT 1
22 36053 DECAL BOTTOM PANEL 1
23 36054 DECAL DOOR 1
24 36055 DECAL REAR PANEL 1
36056 DECAL NAME PLATE AND UL 1
36057 DECAL CAUTION 1
25 N/A N/A 1
36060 MANUAL 5300 NACHO CHEESE 1
42373 IEC SNAP IN RECEPTICAL (230V ONLY) 1
42386 IEC POWER CORD 2 PRG W GR (230V ONLY) 1
26 77122 THUMB SCREW NACHO PUMP 1
27 77125 SLOTTED CAM SCREW 1
28 77130 WASHER - SPRING - M3 2
29 36042 MAGNET DOOR 2
30 23038 POWER CORD w/PCBA CONNECT 1

Nacho Cheese Dispenser and Warmer
14 All Models
4
3
24
2
29
24

Nacho Cheese Dispenser and Warmer
15 All Models
6
14
12
13
26
8
28
7
27
5

Nacho Cheese Dispenser and Warmer
16 All Models
CABINET WIRING IS #16AWG MGT, CSA STYLE A-24, 26/30 STRAND TYPE A NICKLE
WIRING DIAGRAM FOR 5554 PIZZA OVEN
23 21
11
10
9
15
22

Nacho Cheese Dispenser and Warmer
17 All Models
1
18
16
17

Nacho Cheese Dispenser and Warmer
18 All Models
Electrical Schematic

Nacho Cheese Dispenser and Warmer
19 All Models
WARRANTY
WE WARRANT to the original purchaser the Gold Medal equipment sold by us to
be free from defects in material or workmanship under normal use and service. Our
obligation under this warranty shall be limited to the repair or replacement of any
defective part for a period of six (6) months from the date of sale to the Original
Purchaser with regard to labor and two (2) years with regard to parts and does not
cover damage to the equipment caused by accident, alteration, improper use, voltage,
abuse, or failure to follow instructions.
THIS WARRANTY IS IN LIEU OF ALL OTHER WARRANTIES EXPRESSED
OR IMPLIED, AND OF ALL OTHER OBLIGATIONS OR LIABILITIES ON OUR
PART, INCLUDING THE IMPLIED WARRANTY OF MERCHANTIBILITY.
THERE ARE NO WARRANTIES WHICH EXTEND BEYOND THE DESCRIPTION
ON THE FACE HEREOF. We neither assume, nor authorize any other person
to assume for us, any other obligation or liability in connection with the sale of said
GOLD MEDAL equipment or any part thereof.
The term “Original Purchaser” as used in this warranty shall be deemed to mean that
person, firm, association, or corporation who was billed by the GOLD MEDAL
PRODUCTS COMPANY, or their authorized distributor for the equipment.
THIS WARRANTY HAS NO EFFECT AND IS VOID UNLESS THE ORIGINAL
PURCHASER FIRST CALLS GOLD MEDAL PRODUCTS COMPANY AT 1-800-
543-0862 TO DISCUSS WITH OUR SERVICE REPRESENTATIVE THE
EQUIPMENT
PROBLEM, AND, IF NECESSARY, FOR INSTRUCTIONS CONCERNING
THE REPAIR OR REPLACEMENT OF PARTS.
NOTE: This equipment is manufactured and sold for commercial use only.
GOLD MEDAL PRODUCTS COMPANY
10700 Medallion Drive
Cincinnati, Ohio 45241-4807 USA
www.gmpopcorn.com
Phone: 1-800-543-0862
Fax: 1-800-542-1496
Other manuals for 5300
3
This manual suits for next models
3
Table of contents
Other Goldmedal Dispenser manuals
Popular Dispenser manuals by other brands

San Jamar
San Jamar Smart Essence T8400TBK Mounting instructions

Sanela
Sanela SLZN59E Instructions for use

Fetco
Fetco Luxus L3D-10 user guide

Hendi
Hendi 211106 user manual

Pacific Hygiene
Pacific Hygiene D50 Autosense manual

Adast Systems
Adast Systems MINOR V-line 899 Series Instructions for Operation, Maintenance and Installation