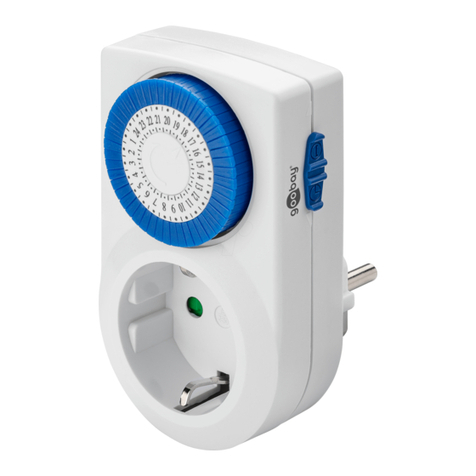
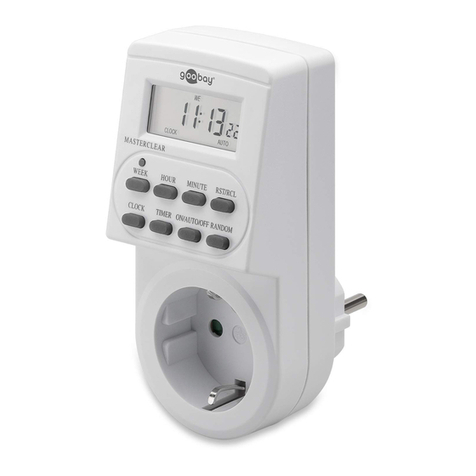
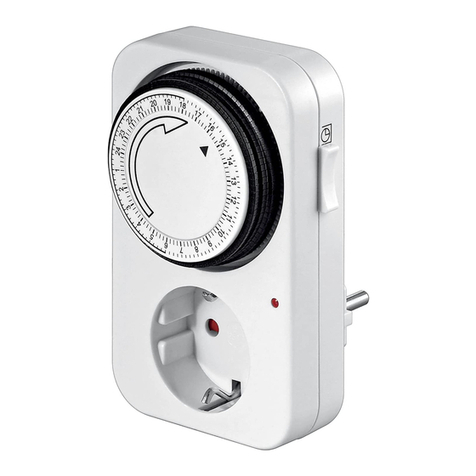
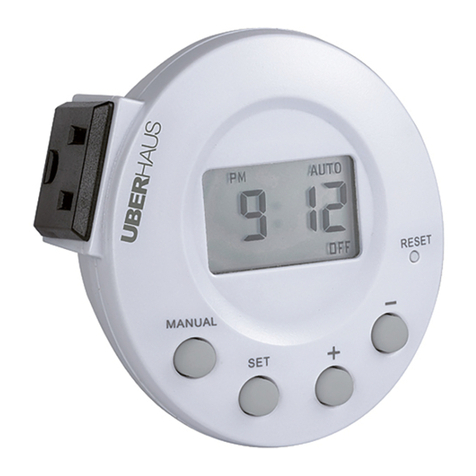
Goobay 55455 User manual

Betriebsanleitung
User manual
Mode d‘emploi
Istruzioni per l‘uso
Art.
55455
Digitale Zeitschaltuhren
Digital time switches
Interrupteurs horaires numériques
Interruttori orari digitali
55455_(51277)_NK_ZSU_IT_user_manual_DIN_A6_DACH_2018.indd 2 25.05.2018 10:34:58

3
Betriebsanleitung
4
BETRIEBSANLEITUNG
1Sicherheitshinweise
1.1 Allgemeines
• Betriebsanleitung vollständig und sorgfältig vor Gebrauch lesen.
Die Betriebsanleitung ist Bestandteil des Produktes und enthält wichtige
Hinweise zum korrekten Gebrauch.
• Betriebsanleitung aufbewahren.
Die Betriebsanleitung muss bei Unsicherheiten und Weitergabe des Produk-
tes verfügbar sein.
• Produkt, Produktteile undZubehörnurin einwandfreiemZustandbenutzen.
•Technische Daten aller zu verwendenden Geräte vergleichen um Kom-
patibilität sicher zu stellen.
• Bei Fragen, Defekten, mechanischen Beschädigungen, Störungen und
anderen nicht durch die Begleitdokumentation behebbaren Problemen,
an Händler oder Hersteller wenden.
Überlast
• Nicht hintereinanderstecken.
• Betreiben Sie keine Bügeleisen, Heizstrahler und ähnliche
Geräte von denen Brandgefahr ausgeht über die Zeitschaltuhr.
Stromschlaggefahr
• Spannungsfrei nur bei gezogenem Stecker.
• Gehäuse nicht öffnen.
• Produkt und Zubehör nicht modizieren.
• Installations-, Demontage-, Wartungs- und Reparaturarbeiten
nur von ausgebildetem Elektro-Fachpersonal ausführen lassen.
• Anschlüsse und Schaltkreise nicht kurzschließen.
Schnittverletzung
• Verpackung, Kleinteile und Dämmmaterial gegen unbeabsich-
tigte Benutzung sichern.
Betriebs-und Lagerbedingungen
• Im eingesteckten Zustand nicht drehen, biegen oder anders
mechanisch belasten.
• Bei großen Temperaturunterschieden nach dem Transport
einige Minuten warten, bis Sie das Gerät in Betrieb nehmen.
• Extreme Belastungen wie Hitze und Kälte, Nässe und direkte
Sonneneinstrahlung, Mikrowellen sowie Vibrationen und me-
chanischen Druck vermeiden.
• Nur zur Verwendung in trockenen Räumen.
Batteriegefahren
Die Batterien/Akkus sind nicht tauschbar.
• Ausgelaufene, deformierte oder korrodierte Zellen im Produkt
belassen und mittels geeigneter Schutzvorrichtungen entsorgen.
1.2 Warnstufen
Warnung vor Gefahren, die bei Missachtung der
Sicherheitshinweise zu Verletzungen führen können.
Warnung vor Gefahren, die bei Missachtung der Hin-
weise zu Sachschäden führen können.
Inhalt
1Sicherheitshinweise ........................................................................... 4
1.1 Allgemeines................................................................................. 4
1.2 Warnstufen .................................................................................. 4
2Beschreibung und Funktion ............................................................... 5
2.1 Zeitschaltuhren............................................................................ 5
2.2 Lieferumfang ............................................................................... 5
2.3 Bedienelemente .......................................................................... 5
2.4 Technische Daten........................................................................ 5
3Bestimmungsgemäßer Gebrauch...................................................... 6
4Anschluss ...................................................................................... 6
5Einstellungen...................................................................................... 6
5.1 Uhrzeit und Wochentag einstellen.............................................. 6
5.2 12/24-Stunden Anzeige .............................................................. 6
5.3 Sommerzeit-Funktion.................................................................. 7
5.4 Schaltzeiten programmieren....................................................... 7
5.5 Manuelle Einstellungen............................................................... 8
5.6 Zufallsfunktion (RANDOM)......................................................... 8
6 Wartung, Pege, Lagerung und Transport ........................................ 8
7Haftungshinweis................................................................................. 9
8Entsorgungshinweise ......................................................................... 9
9EU-Konformitätserklärung ................................................................. 9
BETRIEBSANLEITUNG ............................3
USER MANUAL .........................................11
MODE D‘EMPLOI ......................................19
ISTRUZIONI PER L‘USO ...........................27
55455_(51277)_NK_ZSU_IT_user_manual_DIN_A6_DACH_2018.indd 3-4 25.05.2018 10:34:59

5
Betriebsanleitung
6
2Beschreibung und Funktion
2.1 Zeitschaltuhren
• präzise und komfortable Steuerung von elektronischen Geräten
• ideal für wiederkehrende Aufgaben, wie z.B. Rollos und Aquarien
• 10 Schaltprogramme in 1 Minutenschritten
• 16 verschiedene Wochentagkombinationen
• 12- oder 24-Stundenanzeige
• Steckdose mit Kindersicherung
• Dauerbetrieb möglich
• inkl. Back-up Akku
2.2 Lieferumfang
Zeitschaltuhr, Betriebsanleitung
2.3 Bedienelemente
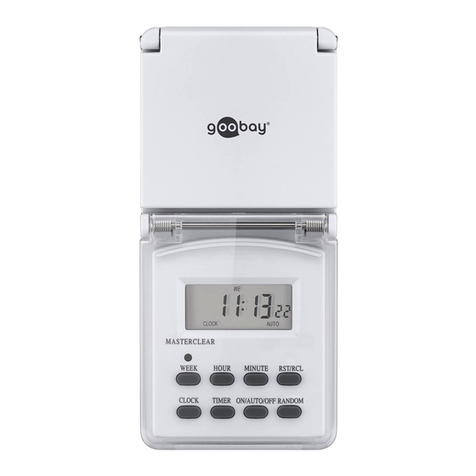
RANDOM: Zufallsfunktion ein- oder ausschalten.
AN:
AUS: keine Anzeige
CLOCK+WEEK:Woche einstellen.
CLOCK+HOUR: Stunde einstellen.
CLOCK+MINUTE: Minute einstellen.
CLOCK+TIMER: zwischen 12- oder 24-h Anzeige wechseln.
CLOCK+ON/AUTO/OFF: zwischen Winter-undSommerzeitwechseln.
TIMER+WEEK:Wochentagseinstellung der Programm-
schaltzeiten einstellen.
TIMER+HOUR: Ein- und Ausschaltestunde festlegen.
TIMER+MINUTE: Ein- und Ausschalteminute festlegen.
ON/AUTO/OFF: Funktionsmodus auswählen.
ON: Permanent AN
AUTO: Programmschaltzeiten sind aktiv.
OFF: Permanent AUS
RST/RCL: alle Programmierungen löschen.
MASTER CLEAR: alle Eingaben und Einstellungen löschen.
2.4 Technische Daten
Modell 55455
Netzstecker Typ L (Italien)
Nennspannung (V~ @ 50 Hz) 230
Betriebsanzeige / Standby (W) Display /
1,0
max. Leistung/Stromstärke 3600 W / 16 (2) A
Maße (mm) 120 x 88 x 57
Gewicht netto / brutto 148 g / 192 g
Uhr 12/24 h
Kindersicherung ; Shutter
min. Zeitintervall 1 Min.
Betriebstemperatur -10 ~ +40 °C
Genauigkeit +/- 1 Min./Monat
Pufferbatterie NiMH 1,2 V >100 h
Schutzklasse / -art I / IP20
Tab.1: Technische Daten
3 Bestimmungsgemäßer Gebrauch
Eine andere als in Kapitel „Beschreibung und Funktion“ bzw. in den „Sicher-
heitshinweisen“ beschriebene Verwendung ist nicht gestattet. Das Nichtbe-
achten und Nichteinhalten dieser Bestimmungen und der Sicherheitshinweise
kann zu schweren Unfällen, Personen- und Sachschäden führen.
IP20 Dieses Produkt ist gegen mittelgroße Fremdkörper, aber nicht gegen
Wassereintritt geschützt.
4Anschluss
SteckenSiedieZeitschaltuhr ineinegutzugängliche Schutzkontakt-Steckdose.
5Einstellungen
5.1 Uhrzeit und Wochentag einstellen
1. Drücken Sie die CLOCK-Taste und halten Sie diese gedrückt.
2. Drücken Sie zusätzlich zur gehaltenen CLOCK-Taste die WEEK-Taste so
oft bis der korrekte Wochentag angezeigt wird.
3. Drücken Sie zusätzlich zur gehaltenen CLOCK-Taste die HOUR-Taste so
oft bis die korrekte Stunde angezeigt wird.
4. Drücken Sie zusätzlich zur gehaltenen CLOCK-Taste die MINUTE-Taste
so oft bis die korrekte Minute angezeigt wird.
5. Lassen Sie alle Tasten los.
Wochentag und Uhrzeit sind eingestellt.
5.2 12/24-Stunden Anzeige
Drücken Sie gleichzeitig CLOCK und TIMER.
Die Anzeige wechselt zwischen dem 12- und 24-h Modus.
55455_(51277)_NK_ZSU_IT_user_manual_DIN_A6_DACH_2018.indd 5-6 25.05.2018 10:35:00

7
Betriebsanleitung
8
5.3 Sommerzeit-Funktion
1. Drücken Sie die CLOCK-Taste und die ON/AUTO/OFF-Taste gleichzeitig.
Das Display zeigt SUMMER (Sommerzeit).
Die Uhrzeit wird um 1 h vor gestellt.
2. Drücken Sie beide Tasten erneut um zur Winterzeit zu wechseln.
5.4 Schaltzeiten programmieren
Es stehen maximal 10 Schaltzeiten-Programme zur Verfügung.
Diese können zu je minimal 1 Minuten-Schritten eingestellt werden.
• Stellen Sie sicher, dass die eingestellten Schaltzeiten sich nicht über-
lappen, v.a. wenn Sie Wochenprogramme einrichten.
Wenn sich Schaltzeiten überschneiden, führt die Zeitschaltuhr die ON (EIN)
oder OFF (AUS) Funktion gemäß der programmierten Schaltzeiten aus.
Ist durch 2 unterschiedliche Programme gleichzeitig OFF (AUS) und ON
(EIN) programmiert, wird OFF (AUS) ausgeführt.
Die Programmierung steht nur im AUTO-Modus zur Verfügung.
1. Drücken Sie die TIMER-Taste kurz.
Das Display zeigt ON_1.
2. Stellen Sie den Einschaltzeitpunkt des 1. Schaltzeiten-Programms
mittels der Tasten WEEK, HOUR und MINUTE ein.
3. Drücken Sie erneut kurz die TIMER-Taste.
Das Display zeigt OFF_1.
4. Stellen Sie den Ausschaltzeitpunkt des 1. Schaltzeiten-Programms
mittels der Tasten WEEK, HOUR und MINUTE ein.
5. Drücken Sie erneut kurz die TIMER-Taste zum Abschließen des ersten
Schaltzeiten-Programms
Das Display zeigt ON_2.
• Wiederholen Sie die Schritte 1. bis 5. um weitere Schaltzeiten-Program-
me vorzunehmen.
• Drücken Sie die CLOCK-Taste um das Programmiermenü zu verlassen.
Die Zeitschaltuhr ist fertig eingerichtet.
Beispiel:
Die Zeitschaltuhr soll an jedem Wochentag 17:15 Uhr anschalten und 22:30
Uhr ausschalten.
1. Drücken Sie die TIMER-Taste kurz.
Das Display zeigt ON_1.
2. Drücken Sie die WEEK-Taste mehrfach bis das Display
MO, TU, WE, TH, FR, SA, SU zeigt.
3. Drücken Sie die HOUR-Taste mehrfach bis das Display
5:00 PM oder 17:00 Uhr zeigt.
4. Drücken Sie die MINUTE-Taste mehrfach bis das Display
5:15 PM oder 17:15 Uhr zeigt.
5. Drücken Sie die TIMER-Taste einmal kurz.
Das Display zeigt OFF_1.
6. Wiederholen Sie die Schritte 3. bis 5. bis das Display
10:30 PM oder 22:30 Uhr anzeigt.
Wenn Sie die HOUR- oder MINUTE-Taste gedrückt halten, können Sie Zeiten
schneller einstellen.
5.5 Manuelle Einstellungen
Der Betriebsmodus kann während der Programmierung nicht geändert
werden.
1. Drücken Sie die ON/AUTO/OFF-Taste zum Wechseln des Betriebsmodus.
Die eingestellten Programme werden ausschließlich im AUTO-Modus ausge-
führt. Im Modus ON ist das angeschlossene Gerät immer eingeschaltet, im
Modus OFF ist es immer abgeschaltet.
Wenn der Modus von ON zu AUTO gewechselt wird, bleibt das angeschlos-
sene Gerät eingeschaltet bis zum nächsten programmierten Ausschaltpunkt.
5.6 Zufallsfunktion (RANDOM)
Durch die Zufallsfunktion RANDOM wird die Aktivierung von Programmen mit
Einschaltepunkt nach 18:30 Uhr und vor 6 Uhr zufällig vorgezogen.
Der Zufallsbereich variiert zwischen einem Zeitvorzug von 10 bis 31 Minuten.
Die Zufallsfunktion RANDOM steht nur im AUTO-Modus zur Verfügung.
1. Drücken Sie die RANDOM-Taste.
Das Display zeigt . Die Zufallsfunktion RANDOM ist aktiviert.
Beispiel:
Programm 1 ist mit einem Einschaltepunkt von 19:00 Uhr und einem Aus-
schaltepunkt von 20:00 Uhr programmiert. Die Zeitschaltuhr bendet sich im
AUTO-Modus. Wird zusätzlich die Zufallsfunktion RANDOM aktiviert, variiert
der Einschalte-Punkt nun im Bereich von 18:29-18:50 Uhr. Der Ausschalte-
punkt liegt in diesem Beispiel 1 Stunde nach dem Einschalten.
2. Drücken Sie die RANDOM-Taste erneut zum deaktivieren.
Das zuvor angezeigte erlischt. Die Zufallsfunktion RANDOM ist deaktiviert.
6Wartung, Pege, Lagerung und Transport
Die Produkte sind wartungsfrei.
Batteriegefahren
Die Batterien/Akkus sind nicht tauschbar.
• Ausgelaufene, deformierte oder korrodierte Zellen im Produkt
belassen und mittels geeigneter Schutzvorrichtungen
entsorgen.
Sachschäden
• Nur ein trockenes und weiches Tuch zum Reinigen verwenden.
• Keine Reinigungsmittel und Chemikalien verwenden.
• Kühl und trocken lagern.
• Produkt bei längerem Nichtgebrauch für Kinder unzugänglich und in
trockener und staubgeschützter Umgebung lagern.
• Originalverpackung für den Transport aufheben und verwenden.
55455_(51277)_NK_ZSU_IT_user_manual_DIN_A6_DACH_2018.indd 7-8 25.05.2018 10:35:00
9
Betriebsanleitung
10
7Haftungshinweis
Druckfehler und Änderungen an Produkt, Verpackung oder Produkt
dokumentation behalten wir uns vor.
• Beachten Sie unsere Garantiebedingungen. Diese können Sie in aktuel-
ler Form unter den genannten Kontaktdaten anfragen.
8Entsorgungshinweise
Elektrische und elektronische Geräte dürfen nach der europäischen
WEEE Richtlinie nicht mit dem Hausmüll entsorgt werden. Deren
Bestandteile müssen getrennt der Wiederverwertung oder Entsor
gung zugeführt werden, weil giftige und gefährliche Bestandteile bei
unsachgemäßer Entsorgung die Gesundheit und Umwelt nachhaltig schädi-
gen können.
Sie sind als Verbraucher nach dem Elektrogesetz (ElektroG) verpichtet,
elektrische und elektronische Geräte am Ende ihrer Lebensdauer an den
Hersteller, die Verkaufsstelle oder an dafür eingerichtete, öffentliche Sam-
melstellen kostenlos zurückzugeben. Einzelheiten dazu regelt das jeweilige
Landesrecht. Das Symbol auf dem Produkt, der Betriebsanleitung oder/
und der Verpackung weist auf diese Bestimmungen hin. Mit dieser Art der
Stofftrennung, Verwertung und Entsorgung von Altgeräten leisten Sie einen
wichtigen Beitrag zum Schutz unserer Umwelt.
WEEE Nr.: 82898622
9EU-Konformitätserklärung
Mit dem CE Zeichen erklärt Goobay®, eine registrierte Handelsmar-
ke der Wentronic GmbH, dass das Produkt die grundlegenden
Anforderungen und Richtlinien der europäischen Bestimmungen
erfüllt.
55455_(51277)_NK_ZSU_IT_user_manual_DIN_A6_DACH_2018.indd 9-10 25.05.2018 10:35:00

11
User manual
12
USER MANUAL
BETRIEBSANLEITUNG ............................3
USER MANUAL .........................................11
MODE D‘EMPLOI ......................................19
ISTRUZIONI PER L‘USO ...........................27
1 Safety instructions
1.1 In general
• Read the user manual completely and carefully before use.
The user manual is part of the product and contains important information for
correct use.
• Keep this user manual.
The user manual must be available for uncertainties and passing the product.
• Use product, product parts and accessories only in perfect condition.
• Compare the specications of all used devices to ensure compatibility.
• In case of questions, defects, mechanical damage, trouble and other
problems, non-recoverable by the documentation, contact your dealer or
producer.
Overload
• Do not plug in a row.
• Do not operate irons, radiant heaters and similar devices that
pose a re hazard via the timer.
Risk of electric shock
• Voltage-free only with pulled plug.
• Do not open the housing.
• Do not modify product and accessories.
• Installation, assembly, maintenance and repair work must be
carried out only by trained electrical specialists.
• Do not short connectors and circuits.
Injury by cutting
• Securepackaging,smallpartsandinsulationagainstaccidentaluse.
Operation and storage conditions
• Do not rotate, bend or mechanically strain otherwise In inserted
state.
• For large temperature differences, wait a few minutes after
transport, to take the unit into operation.
• Avoid stresses such as heat and cold, moisture and direct sun-
light, vibration and mechanical pressure.
• Only use in dry ambience.
Battery hazards
The batteries are not replaceable.
• Leave leaked, deformed or corroded batteries inside the product
and dispose it by appropriate protectives.
1.2 Warning levels
Warnings against hazards that may result in injuries in
case of non-observance.
Warnings against hazards that may result in material
damage in case of non-observance.
Content
1Safety instructions.............................................................................. 12
1.1 In general..................................................................................... 12
1.2 Warning levels............................................................................. 12
2Description and Function ................................................................... 13
2.1 Time switches.............................................................................. 13
2.2 Scope of Delivery........................................................................ 13
2.3 Operating Elements .................................................................... 13
2.4 Specications.............................................................................. 13
3Intended Use ...................................................................................... 14
4Connecting ...................................................................................... 14
5Settings ...................................................................................... 14
5.1 Setting Time and Weekday......................................................... 14
5.2 12/24 h display ............................................................................ 14
5.3 Summer time function ................................................................. 15
5.4 Programming switching times..................................................... 15
5.5 Manually Settings........................................................................ 16
5.6 RANDOM Function ..................................................................... 16
6Maintenance, Care, Storage and Transport ...................................... 16
7Liability notice..................................................................................... 17
8Disposal Instructions.......................................................................... 17
9EU Declaration of Conformity ............................................................ 17
55455_(51277)_NK_ZSU_IT_user_manual_DIN_A6_DACH_2018.indd 11-12 25.05.2018 10:35:00

13
User manual
14
2 Description and Function
2.1 Time switches
• controls electronic devices precisely and conveniently
• perfect for recurring tasks such as blinds and aquariums
• 10 timer programs with 1-minute steps
• 16 different weekday combinations
• 12-hour or 24-hour time display
• childproof socket
• possibility of continuous operation
• includes back-up battery
2.2 Scope of Delivery
Time switch, User manual
2.3 Operating Elements
RANDOM: Switches the random function ON or OFF.
ON:
OFF: nothing displayed
CLOCK+WEEK:Setting the week.
CLOCK+HOUR: Setting the hour.
CLOCK+MINUTE: Setting the minute.
CLOCK+TIMER: Changing between 12 or 24 h.
CLOCK+ON/AUTO/OFF: Changing between winter and summer time.
TIMER+WEEK: Setting the weekdays of the programs.
TIMER+HOUR: Setting ON and OFF hour.
TIMER+MINUTE: Setting ON and OFF minute.
ON/AUTO/OFF: Select the function mode.
ON: Permanently ON
AUTO: Programs are activated.
OFF: Permanently OFF
RST/RCL: Deleting all programs.
MASTER CLEAR: Deleting all settings and programs.
2.4 Specications
Model 55455
Mains plug Type L (Italy)
Nominal voltage (V~ @ 50 Hz) 230
Operating display / Standby (W) Display / 1.0
Max. Power/Current 3600 W / 16 (2) A
Dimensions (mm) 120 x 88 x 57
Weight net / gross (g) 148 / 192
Clock (h) 12/24
Children
protection ; Shutter
Min. time intervall 1 Min.
Operating temperature -10 ~ +40 °C
Accuracy +/- 1 Min./Month
Backup battery NiMH 1.2 V >100 h
Protection class / level I / IP20
Tab.2: Specications
3Intended Use
We do not permit using the device in other ways like described in chapter
“Description and Function“ and „Safety Instructions“. Not attending to these
regulations and safety instructions might cause fatal accidents, injuries, and
damages to persons and property.
IP20 This product is protected against medium sized foreign objects, but
not against water ingress.
4Connecting
Plug the time switch into a well reachable mains socket.
5Settings
5.1 Setting Time and Weekday
1. Press the CLOCK button and hold it.
2. Press the WEEK button so often as needed by additionally hold CLOCK
button, until the correct weekday is displayed.
3. Press the HOUR button so often as needed by additionally hold CLOCK
button, until the correct hour is displayed.
4. Press the MINUTE button so often as needed by additionally hold
CLOCK button, until the correct minute is displayed.
5. Release all buttons.
Weekday and time are set.
5.2 12/24 h display
Press CLOCK and TIMER simultaneously.
The display changes between 12 and 24 h mode.
55455_(51277)_NK_ZSU_IT_user_manual_DIN_A6_DACH_2018.indd 13-14 25.05.2018 10:35:00

15
User manual
16
5.3 Summer time function
1. Press the CLOCK and ON/AUTO/OFF button simultaneously.
SUMMER is displayed.
Time is put forward by 1 hour.
2. Press both buttons again to change to winter time.
5.4 Programming switching times
There are maximum 10 switching time programs settable.
These can be set to a minimum of 1 per minute increments.
• Assure, that the set switching times do not overlap each other, especially
when programming week settings.
If switching times overlap, the time switch carries out ON or OFF according
the programmed switching times.
Is ON and OFF programmed simultaneously by 2 different program settings,
OFF will be carried out.
Programming is only available in AUTO mode.
1. Briey press the TIMER button.
ON_1 is displayed.
2. Set the switch-on time of the 1st program by WEEK, HOUR, and
MINUTE button.
3. Briey press the TIMER button again.
OFF_1 is displayed.
4. Set the switch-off time of the 1st program by WEEK, HOUR, and
MINUTE button.
5. Briey press the TIMER button again to nish the 1st program setting.
ON_2 is displayed.
• Repeat steps 1. to 5. to program further switching times.
• Press the CLOCK button to leave the program menu.
The time switch is ready set.
Example:
The time switch shall switch on at 17:15 and switch off at 22:30 each day.
1. Briey press the TIMER button.
ON_1 is displayed.
2. Press the WEEK button repeated until MO, TU, WE, TH, FR, SA, SU
is displayed.
3. Press the HOUR button repeated until 5:00 PM or 17:00 is displayed.
4. Press the MINUTE button repeated until 5:15 PM or 17:15 is displayed.
5. Briey press the TIMER button.
OFF_1 is displayed.
6. Repeat steps 3. to 5. until 10:30 PM or 22:30 is displayed.
If permanent holding the HOUR or MINUTE button, time setting will be faster.
5.5 Manually Settings
During programming, the operation mode cannot be changed.
1. Press the ON/AUTO/OFF button to change the operating mode.
The set programs will only be carried out in AUTO mode. In mode ON, the
connected device is permanently switched on. In mode OFF, the connected
device is permanently switched off.
If changing the from mode ON to AUTO, the connected device stays ON up to
the next off point.
5.6 RANDOM Function
Random Function activates programs with ON-settings after 6:30 PM and
before 6:00 AM between 10 and 31 minutes earlier.
The random function is only available in AUTO mode.
1. Press the RANDOM button.
is displayed. RANDOM is activated.
Example:
Program 1 has an ON-setting at 19:00 and a OFF-setting at 20:00. The time
switch is in AUTO mode. By activating the random function in addition, the
switching ON varies from 18:29-18:50. Switching OFF will be 1 hour after
switching ON.
2. Press the RANDOM button again to deactivate.
The previously displayed expires. The random function is deactivated.
6Maintenance, Care, Storage and Transport
The product is maintenance-free.
Battery hazards
The batteries are not replaceable.
• Leave leaked, deformed or corroded batteries inside the
product and dispose it by appropriate protectives.
Material damage
• Only use a dry and soft cloth for cleaning.
• Do not use detergents or chemicals.
• Store cool and dry.
• Store the product out the reach of children and in a dry and dust-protec-
ted ambience when not in use.
• Keep and use the original packaging for transport.
55455_(51277)_NK_ZSU_IT_user_manual_DIN_A6_DACH_2018.indd 15-16 25.05.2018 10:35:01

17
User manual
18
7Liability notice
We reserve the right to printing errors and changes to product,
packaging or product documentation.
• See our terms of warranty. These are available in their current form
under the given contact details.
8 Disposal Instructions
According to the European WEEE directive, electrical and elec-
tronic equipment must not be disposed with consumers waste. Its
components must be recycled or disposed apart from each other.
Otherwise contaminative and hazardous substances can pollute our
environment.
As a consumer, you are committed by law to dispose electrical and electronic
devices to the producer, the dealer, or public collecting points at the end of
the devices lifetime for free. Particulars are regulated in national right. The
symbol on the product, in the user`s manual, or at the packaging alludes
to these terms. With this kind of waste separation, application, and waste
disposal of used devices you achieve an important share to environmental
protection.
WEEE No: 82898622
9 EU Declaration of Conformity
With the CE sign Goobay®, a registered trademark of the Wentronic
GmbH ensures, that the product is conformed to the basic standards
and directives.
55455_(51277)_NK_ZSU_IT_user_manual_DIN_A6_DACH_2018.indd 17-18 25.05.2018 10:35:01

19
Mode d‘emploi
20
MODE D‘EMPLOI
BETRIEBSANLEITUNG ............................3
USER MANUAL .........................................11
MODE D‘EMPLOI ......................................19
ISTRUZIONI PER L‘USO ...........................27
1Consignes de sécurité
1.1 En général
• Lisez le mode d‘emploi attentivement et complètement avant de l‘utiliser.
Le mode d‘emploi fait partie intégrante du produit et comprend d‘importantes
informations pour une bonne installation et une bonne utilisation.
• Conservez soigneusement ce mode d‘emploi.
Le mode d‘emploi doit être disponible à des incertitudes et transfert du
produit.
• Utilisez le produit, pièces et accessoires des produits uniquement en
parfait état.
• Comparer les caractéristiques de tous les équipements à utiliser et pour
assurer la compatibilité.
• En cas de questions, les défauts, les dommages mécaniques, des
ingérences et d‘autres problèmes, non récupérables par la documentati-
on, contactez votre revendeur ou le producteur.
Surcharge
• Ne branchez pas dans une rangée.
• N‘utilisez pas de fers à repasser, de radiateurs radiants ou
d‘appareils similaires qui présentent un risque d‘incendie via la
minuterie.
Risque de choc électrique
• Sans surcharge de tension uniquement lorsque le bouchon
• Ne pas ouvrir le boîtier.
• Ne modiez pas produit et les accessoires.
• L‘installation, le montage, la maintenance et les réparations
moût être effectuées que par des spécialistes formés élec-
triques.
• Pas court-circuiter des connexions et circuits.
Blessure en coupant
• Emballage sécurisé, petites pièces et l‘isolation contre l‘utilisati-
on accidentelle.
Exploitation et les conditions de stockage
• Dans l‘état inséré ne tourne pas, plier ou de la souche par voie
mécanique.
• Attendez quelques minutes pour les grandes différences de
température après le transport, pour prendre l‘appareil en service.
• Éviter des conditions extrêmes, telles que la chaleur extrême et
froid, l‘humidité et de la lumière directe du soleil, ainsi que
microondes, des vibrations et de la pression mécanique.
• Utiliser uniquement dans une ambiance sèche.
Risques de batterie
Les batteries ne sont pas remplaçables.
• Donner des batteries qui ont coulé, déformés ou corrodés à
l‘intérieur du produit et de disposer par protecteurs appropriés.
1.2 Niveaux d‘alerte
Mises en garde contre les dangers pouvant entraîner
des blessures en cas de non respect.
Mises en garde contre les dangers pouvant entraîner
les dommages matériels en.
Contenu
1Consignes de sécurité........................................................................ 20
1.1 En général ................................................................................... 20
1.2 Niveaux d‘alerte .......................................................................... 20
2Description et fonction ....................................................................... 21
2.1 Interrupteurs horaires ................................................................. 21
2.2 Contenu de la livraison ............................................................... 21
2.3 Eléments de commande ............................................................. 21
2.4 Spécications.............................................................................. 21
3Utilisation prévue................................................................................ 22
4Connexion ...................................................................................... 22
5Réglages ...................................................................................... 22
5.1 Réglage de l‘heure et le jour....................................................... 22
5.2 12/24 h afchage......................................................................... 23
5.3 Fonction de l‘heure d‘été............................................................. 23
5.4 Programmation des temps de commutation .............................. 23
5.5 Réglages manuelle ..................................................................... 24
5.6 Fonction RANDOM (aléatoire).................................................... 24
6Maintenance, Entretien, Stockage et Transport ................................ 25
7Clause de responsabilité.................................................................... 25
8Instructions pour l’élimination ............................................................ 25
9UE Déclaration de conformité............................................................ 25
55455_(51277)_NK_ZSU_IT_user_manual_DIN_A6_DACH_2018.indd 19-20 25.05.2018 10:35:01

21
Mode d‘emploi
22
2Description et fonction
2.1 Interrupteurs horaires
• pour la commande précise et confortable d‘appareils électroniques
• idéal pour les tâches répétitives, comme l‘actionnement de volets rou-
lants ou d‘enseignes, ou encore la gestion d‘un aquarium
• 10 programmes de commutation à intervalles d‘1 minute
• 16 combinaisons différentes basées sur les jours de la semaine
• afchage 12/24 heures
• prise avec sécurité d‘enfants
• fonctionnement en continu possible
• batterie de secours incluse
2.2 Contenu de la livraison
Interrupteurs horaires, User manual
2.3 Eléments de commande
RANDOM: commute la fonction ON ou OFF aléatoire.
ON:
OFF: rien afché
CLOCK+WEEK:Réglage de la semaine.
CLOCK+HOUR: Réglage de l‘heure.
CLOCK+MINUTE: Réglage de la minute.
CLOCK+TIMER: Le changement entre 12 ou 24 h.
CLOCK+ON/AUTO/OFF: Changement entre l‘hiver et l‘heure d‘été.
TIMER+WEEK:Réglage des jours de semaine des
programmes.
TIMER+HOUR: Réglage ON et OFF heure.
TIMER+MINUTE: Réglage ON et OFF minute.
ON/AUTO/OFF: Sélectionnez le mode de fonctionnement.
ON: En permanence sous tension
AUTO: Les programmes sont activés.
OFF: En permanence éteint
RST/RCL: Suppression de tous les programmes.
MASTER CLEAR: Suppression de tous les paramètres et
programmes.
2.4 Spécications
Modèle 55455
Prise d‘alimentation Type L (Italie)
Tension nominale (V~ @ 50 Hz) 230
Afchage du fonctionnement /
veille (W) Afcher / 1.0
Max. Puissance / Courant 3600 W / 16 (2) A
Dimensions (mm) 120 x 88 x 57
Poids net / brut (g) 148 / 192
Horloge (h) 12/24
Protection des enfants ; Obturateur
Min. intervalle de temps 1 Min.
Température de fonctionnement -10 ~ +40 °C
exactitude +/- 1 Min./Month
Batterie de résérve NiMH 1.2 V >100 h
Classe de protection / niveau I / IP20
Tab.3: Specications
3 Utilisation prévue
Nous n’autorisons pas l’utilisation du dispositif d’une façon différente de celle
décrite au chapitre „Description et Fonctions“ et „Consignes de sécurité“.
Ne pas respecter ces instructions de sécurité et points de règlement est
susceptible de provoquer des accidents mortels, blessures et dommages à la
personne et à ses biens.
IP20 Ce produit est protégé contre les corps étrangers de taille moyenne,
mais pas contre les inltrations d‘eau.
4Connexion
Branchez l‘interrupteurs horaires dans une prise de courant bien accessible.
5Réglages
5.1 Réglage de l‘heure et le jour
1. Appuyez sur la touche CLOCK et maintenez.
2. Appuyez sur le bouton WEEK aussi souvent que nécessaire en outre
maintenez le bouton CLOCK, jusqu‘à ce que le bon jour de la semaine
est afché.
3. Appuyez sur le bouton HOUR aussi souvent que nécessaire en outre
maintenez le bouton CLOCK, jusqu‘à ce que l‘heure correcte est
afchée.
4. Appuyez sur le bouton MINUTE aussi souvent que nécessaire en outre
maintenez le bouton CLOCK, jusqu‘à ce que la minute correcte est
afchée.
5. Relâcher tous les boutons.
Le jour et l‘heure sont réglées.
55455_(51277)_NK_ZSU_IT_user_manual_DIN_A6_DACH_2018.indd 21-22 25.05.2018 10:35:01

23
Mode d‘emploi
24
5.2 12/24 h afchage
Appuyez sur CLOCK et TIMER simultanément.
L‘afchage change entre le mode 12 et 24 h.
5.3 Fonction de l‘heure d‘été
1. Appuyez simultanément sur ON / AUTO / OFF CLOCK et.
SUMMER est afché.
Le temps est mis en avant par 1 heure.
2. Appuyez sur les deux boutons à nouveau pour passer à l‘heure d‘hiver.
5.4 Programmation des temps de commutation
Il existe des 10 programmes de temps de commutation maximales pa-
ramétrables.
Ceux-ci peuvent être xés à un minimum d‘une minute par incréments.
• Assurer que les temps de commutation xes ne se chevauchent pas les
uns les autres, les paramètres de semaine en particulier lors de la pro-
grammation.
Si les temps de commutation se chevauchent, l‘interrupteur horaire effectue
ON ou OFF selon les temps de commutation programmés.
Est-ON et OFF programmé simultanément par 2 réglages de programmes
différents, OFF sera effectuée.
La programmation est disponible uniquement en mode AUTO.
1. Appuyer brièvement sur la touche TIMER.
ON_1 est afché.
2. Réglez l‘heure d‘allumage du 1er programme par SEMAINE, HOUR, et
bouton MINUTE.
3. Appuyez brièvement sur le bouton TIMER.
OFF_1 est afché.
4. Réglez l‘heure du premier programme par SEMAINE, HOUR, et le bou-
ton MINUTE switch-off.
5. Appuyez brièvement sur le bouton TIMER pour terminer le premier régla-
ge du programme.
ON_2 est afché.
• Répétez les étapes 1. à 5. pour programmer des temps de commutation
plus loin.
• Appuyez sur la touche CLOCK pour quitter le menu du programme.
L‘interrupteur horaire est réglé prêt.
Exemple:
Le commutateur de temps doit allumer à 17:15 et éteignez à 22:30 chaque
jour.
1. Appuyer brièvement sur la touche TIMER.
ON_1 est afché.
2. Appuyez sur le bouton WEEK répétée jusqu‘à ce que MO, TU, WE, TH,
FR, SA, SU est afché.
3. Appuyez sur le bouton HOUR répété jusqu‘à 17:00 est afché.
4. Appuyez sur le bouton MINUTE répété jusqu‘à 17:15 est afché.
5. Appuyer brièvement sur la touche TIMER.
OFF_1 est afché.
6. Répétez les étapes 3 à 5. jusqu‘à 22:30 est afché.
Si la tenue permanente sur le bouton HOUR ou MINUTE, réglage de l‘heure
sera plus rapide.
5.5 Réglages manuelle
Pendant la programmation, le mode de fonctionnement ne peut pas être
modiée.
1. Appuyez sur la / AUTO bouton ON / OFF pour changer le mode de foncti-
onnement.
Les programmes xes ne seront réalisés en mode AUTO. En mode ON,
l‘appareil connecté est allumé en permanence. En mode OFF, l‘appareil
connecté est éteint en permanence.
Si la modication du mode ON vers AUTO, l‘appareil connecté reste allumé
jusqu‘à le prochain point OFF.
5.6 Fonction RANDOM (aléatoire)
Fonction aléatoire active avec les programmes sur les paramètres après
18:30 et avant 06:00 entre 10 et 31 minutes plus tôt.
La fonction aléatoire est disponible uniquement en mode AUTO.
1. Appuyez sur la touche RANDOM.
est afché. RANDOM est activé.
Exemple:
Programme 1 a un réglage-ON à 19:00 et un réglage-OFF à 20:00. L‘horloge
est en mode AUTO. En activant la fonction aléatoire en outre, la mise en
route varie de 18:29-18:50. Mise à l‘arrêt sera 1 heure après l‘allumage.
2. Appuyez à nouveau sur la touche RANDOM pour désactiver.
Le précédemment afché expire. La fonction aléatoire est désactivée.
55455_(51277)_NK_ZSU_IT_user_manual_DIN_A6_DACH_2018.indd 23-24 25.05.2018 10:35:01

25
Mode d‘emploi
26
6Maintenance, Entretien, Stockage et Transport
Le produit est sans entretien.
Risques de batterie
Les batteries ne sont pas remplaçables.
• Donner des batteries qui ont coulé, déformés ou corrodés à
l‘intérieur du produit et de disposer par protecteurs appropriés.
Dommages matériels
• Utilisez uniquement un chiffon doux et sec pour le nettoyage.
• Ne pas utiliser de détergents et de produits chimiques.
• Conserver le produit hors de la portée des enfants et dans une ambiance
sèche et protégé de la poussière lorsqu‘il ne est pas en cours d‘utilisation.
• Endroit frais et sec.
• Conserver et utiliser l‘emballage d‘origine pour le transport.
7Clause de responsabilité
Nous nous réservons le droit des erreurs d‘impression et des chan-
gements à produit, l‘emballage ou de la documentation du produit.
• S‘il vous plaît voir nos conditions de garantie. Ceux-ci sont maintenant
disponibles dans leur forme actuelle, conformément aux coordonnées
gurant.
8Instructions pour l’élimination
Selon la directive européenne DEEE, la mise au rebut des appareils
électriques et électroniques avec les déchets domestiques est
strictement interdite. Leurs composants doivent être recyclés
éliminés de façon séparée. Autrement les substances contaminées
et dangereuses peuvent polluer notre environnement.
Vous, en tant que consommateur, êtes commis par la loi à la mise au rebut
des appareils électriques et électroniques auprès du fabricant, du distri-
buteur, ou des points publics de collecte à la n de la durée de vie des
dispositifs, et ce de façon gratuite. Les détails sont réglementés dans le
droit national. Le symbole sur le produit, dans le manuel d‘utilisation, ou sur
l‘emballage fait référence à ces termes. Avec ce genre de séparation des
déchets, d‘application et d‘élimination des déchets d‘appareils usagés, vous
réalisez une part importante de la protection de l‘environnement.
No DEEE : 82898622
9 UE Déclaration de conformité
En utilisant le marquage CE, Goobay®, nom commercial déposé de
Wentronic GmbH, déclare que l‘appareil est conforme aux
conditions et directives de base de la réglementation européenne.
55455_(51277)_NK_ZSU_IT_user_manual_DIN_A6_DACH_2018.indd 25-26 25.05.2018 10:35:01

27
Istruzioni per l‘uso
28
ISTRUZIONI PER L‘USO
BETRIEBSANLEITUNG ............................3
USER MANUAL .........................................11
MODE D‘EMPLOI ......................................19
ISTRUZIONI PER L‘USO ...........................27
1 Istruzioni per la sicurezza
1.1 Generalmente
• Leggere attentamente e completamente le istruzioni prima dell‘uso.
Le instruzioni per l‘uso è parte integrante del prodotto e contiene importanti
informazioni per un uso corretto.
• Conservare questo istruzioni per l‘uso.
Le istruzioni per l‘uso essere disponibile per le incertezze e trasferimento del
prodotto.
• Utilizzare il prodotto, le parti del prodotto e gli accessori solo in perfette
condizioni.
• Confrontare le speciche di tutti i dispositivi utilizzati per garantire la
compatibilità.
• In caso di domande, difetti, danni meccanici, interferenze e altri pro-
blemi, non recuperabili per la documentazione, rivolgersi al rivenditore o
produttore.
Sovraccarico
• Non collegare in la.
• Non utilizzare ferri da stiro, riscaldatori radianti e dispositivi
simili che presentano un rischio di incendio tramite il timer.
Pericolo di scossa elettrica
• Alleviare lo stress solo quando la spina è tirato.
• Non aprire la custodia.
• Non modicare prodotti e accessori.
• L‘installazione, montaggio, manutenzione e riparazione devono
essere eseguite esclusivamente da elettricisti specializzati
addestrati.
• Non corto do collegamenti e circuiti.
Lesioni tagliando
• Imballaggio sicuro, piccole parti e l‘isolamento contro l‘uso
accidentale.
Condizioni di funzionamento e di stoccaggio
• Nello stato inserito non ruotare, piegare o ceppo altrimenti
meccanicamente.
• Attendere qualche minuto per le grandi differenze di temperatu-
ra dopo il trasporto, per prendere in funzione l‘apparecchio.
• Evitare condizioni estreme, calore estremo e ispezionata la
freddezza, umidità e luce diretta del sole, così come forni a
microonde, vibrazioni e pressione meccanica.
• Utilizzare solo in un ambiente asciutto.
Pericoli della batteria
Le batterie non sono intercambiabili.
• Lascia batterie esaurite, deformate o corrose all‘interno del
prodotto e smaltire entro protettivi adeguati.
1.2 Livelli di allarme
Avvisi relativi a pericoli che possono tradursi in lesioni
in caso di inosservanza.
Avvisi relativi a pericoli che possono tradursi in danni
materiali in caso di inosservanza.
Contenuto
1 Istruzioni per la sicurezza .................................................................. 28
1.1 Generalmente.............................................................................. 28
1.2 Livelli di allarme........................................................................... 28
2Descrizione e Funzione...................................................................... 29
2.1 Interruttori tempo......................................................................... 29
2.2 Contenuto della confezione ........................................................ 29
2.3 Elementi di comando................................................................... 29
2.4 Speciche.................................................................................... 29
3Scopo d‘utilizzo .................................................................................. 30
4Collegamento ..................................................................................... 30
5Regolare ...................................................................................... 30
5.1 Regolare ora e giorno della settimana ....................................... 30
5.2 Display 12/24 ore ........................................................................ 31
5.3 Funzione di ora legale................................................................. 31
5.4 Programmazione dei tempi di commutazione............................ 31
5.5 Regolazione manuale ................................................................. 32
5.6 Funzione casuale (random) ........................................................ 32
6Manutenzione, cura, conservazione e trasporto............................... 32
7Liability notice..................................................................................... 33
8 Note per lo smaltimento ..................................................................... 33
9 UE Dichiarazione di conformità ......................................................... 33
55455_(51277)_NK_ZSU_IT_user_manual_DIN_A6_DACH_2018.indd 27-28 25.05.2018 10:35:02

29
Istruzioni per l‘uso
30
2 Descrizione e Funzione
2.1 Interruttori tempo
• per controllare in modo preciso e comodo i dispositivi elettronici
• ideale per azioni ricorrenti, ad es. tende a rullo, acquari e cartelli
pubblicitari
• 10 programmi da impostare a intervalli di 1 minuto
• 16 diverse combinazioni giornaliere
• indicazione 12 o 24 ore
• presa con protezione per bambini
• modalità di funzionamento continuo possibile
• incl. batteria di back-up
2.2 Contenuto della confezione
Interruttore tempo, Istruzioini per l‘uso
2.3 Elementi di comando
RANDOM: Attiva la funzione ON o OFF casuale.
ON:
OFF: niente mostrato
CLOCK+WEEK:Impostazione della settimana.
CLOCK+HOUR: Impostazione l‘ora.
CLOCK+MINUTE: Impostazione minuto.
CLOCK+TIMER: Cambiare tra 12 o 24 ore.
CLOCK+ON/AUTO/OFF: Commutare ora solare e l‘estate.
TIMER+WEEK:Impostazionedeigiorni ferialideiprogrammi.
TIMER+HOUR: Impostazione ON e OFF ora.
TIMER+MINUTE: Impostazione ON e OFF minuto.
ON/AUTO/OFF: Selezionare la modalità di funzionamento.
ON: Permanentemente ON
AUTO: I programmi sono attivati.
OFF: Permanentemente OFF
RST/RCL: Eliminazione di tutti i programmi.
MASTER CLEAR: Eliminazione di tutte le impostazioni e
programmi.
2.4 Speciche
Modello 55455
Spina di alimentazione Tipo L (Italia)
Tensione nominale (V~ @ 50 Hz) 230
Indicatore di esercizio / standby
(W) Display / 1.0
Max. Potenza / Corrente 3600 W / 16 (2) A
Dimensioni (mm) 120 x 88 x 57
Peso netto / lordo 148 g / 192 g
Orologio 12/24 h
Protezione dei bambini ; Otturatore
Min. tempo.
Intervallo 1 Min.
Temperatura di funzionamento -10 ~ +40 °C
Accuratezza +/- 1 Min./Mese
Batteria di backup NiMH 1.2 V >100 h
Classe di
protezione / livello I / IP20
Tab.4: Speciche
3Scopo d‘utilizzo
Non è consentito l’uso del dispositivo in modo diverso da quello descritto nel
capitolo „Descrizione e Funzione“ o „Istruzioni per la sicurezza“. La mancata
osservanza di queste regole e delle istruzioni per la sicurezza può provocare
incidenti fatali, lesioni e danni a persone e proprietà.
IP20 Questo prodotto è protetto contro i corpi estranei medie, ma non
contro le inltrazioni d‘acqua.
4Collegamento
Collegare l‘interruttore tempo in una presa di corrente ben raggiungibile.
5Regolare
5.1 Regolare ora e giorno della settimana
1. Premere il tasto CLOCK e tenerlo.
2. Premere il pulsante WEEK così spesso come necessario dal tasto
CLOCK Inoltre tenere, no a quando il giorno della settimana corretto
viene visualizzato.
3. Premere il tasto HOUR così spesso come necessario dal tasto CLOCK
inoltre tenere, no a visualizzare l‘ora corretta.
4. Premere il tasto MINUTE così spesso come necessario dal tasto CLOCK
inoltre tenere, no a quando i minuti viene visualizzato.
5. Rilasciare tutti i pulsanti.
Giorno della settimana e l‘ora sono impostate.
55455_(51277)_NK_ZSU_IT_user_manual_DIN_A6_DACH_2018.indd 29-30 25.05.2018 10:35:02

31
Istruzioni per l‘uso
32
5.2 Display 12/24 ore
Premere CLOCK e TIMER contemporaneamente.
Il display cambia tra la modalità 12 e 24 ore.
5.3 Funzione di ora legale
1. Premere il CLOCK e tasto ON/AUTO/OFF contemporaneamente.
L‘estate è visualizzato.
Il tempo viene messo avanti di 1 ora.
2. Premere di nuovo entrambi i pulsanti per passare alla stagione invernale.
5.4 Programmazione dei tempi di commutazione
Ci sono al massimo 10 programmi orari di commutazione impostabili.
Questi possono essere impostati per un minimo di 1 per incrementi di un
minuto.
• Assicurare che i set di tempi di commutazione non si sovrappongono a
vicenda, soprattutto quando di programmazione Impostazioni settimana.
Se i tempi di commutazione si sovrappongono, il timer effettua ON o OFF
secondo i tempi di commutazione programmati. È ON e OFF programmati
simultaneamente da 2 diverse impostazioni del programma, OFF sarà effet-
tuato. La programmazione è disponibile solo in modalità AUTO.
1. Premere brevemente il tasto TIMER.
Viene visualizzato ON_1.
2. Impostare il tempo di accensione del 1 ° programma per settimana, ora,
e il pulsante MINUTO.
3. Premere brevemente il tasto TIMER.
Viene visualizzato OFF_1.
4. Impostare il tempo di accensione del 1° programma per settimana, ora,
e il pulsante MINUTO.
5. Premere brevemente il tasto TIMER per completare l‘impostazione 1°
programma.
Viene visualizzato ON_2.
• Ripetere i punti 1. a 5. Per programmare i tempi di commutazione ulteri-
ormente.
• Premere il tasto CLOCK per uscire dal menu del programma.
L‘interruttore orario è impostato pronto.
Esempio:
L‘interruttore a tempo si accende alle 17:15 e spegnere alle 22:30 di ogni
giorno.
1. Premere brevemente il tasto TIMER.
Viene visualizzato ON_1.
2. Premere il pulsante viene visualizzato WEEK ripetuto no MO, TU, WE,
TH, FR, SA, SU.
3. Premere il tasto HOUR ripetuto no a quando viene visualizzato 5:00 PM
o 17:00.
4. Premere il pulsante MINUTO ripetuto no a quando viene visualizzato
5:00 PM o 17:15.
5. Premere brevemente il tasto TIMER.
Viene visualizzato OFF_1.
6. Ripetere i passaggi 3. a 5. no a visualizzare 10:30 PM o 22:30.
Se permanente tenendo premuto il pulsante ora o minuto, impostazione
dell‘ora sarà più veloce.
5.5 Regolazione manuale
Durante la programmazione, la modalità di funzionamento non può essere
modicata.
1. Premere il tasto ON/AUTO/OFF per cambiare la modalità di funzionamento.
I programmi impostati verranno eseguiti solo in modalità AUTO. In modalità
ON, il dispositivo collegato è permanentemente acceso. In modalità OFF, il
dispositivo collegato è permanentemente spento.
Se cambiare la modalità da ON a AUTO, il dispositivo collegato rimane ON
no al successivo punto di fuori.
5.6 Funzione casuale (RANDOM)
Casuale la funzione si attiva programmi con ON-impostazioni dopo 06:30 e
prima di 06:00 tra i 10 ei 31 minuti prima.
La funzione casuale è disponibile solo in modalità AUTO.
1. Premere il tasto RANDOM.
viene visualizzato. RANDOM viene attivato.
Esempio:
Programma 1 ha un ON-regolazione alle 19:00 e un OFF-regolazione alle
20:00. L‘interruttore orario è in modalità AUTO. Attivando la funzione random
in aggiunta, la commutazione ON varia da 18:29-18:50. Disattivazione sarà di
1 ora dopo l‘accensione.
2. Premere di nuovo il tasto RANDOM per disattivare.
La visualizzato in precedenza scade. La funzione casuale è disattivata.
6Manutenzione, cura, conservazione e trasporto
Il prodotto è esente da manutenzione.
Pericoli della batteria
Le batterie non sono intercambiabili.
• Lascia batterie esaurite, deformate o corrose all‘interno del
prodotto e smaltire entro protettivi adeguati.
Danni alla proprietà
• Utilizzare un panno asciutto e morbido solo per la pulizia.
• Non utilizzare detergenti e prodotti chimici.
• Conservare fresco e asciutto.
• Conservare il prodotto fuori dalla portata dei bambini e in un ambiente
asciutto e protetto dalla polvere quando non in uso.
• Conservare e utilizzare l‘imballaggio originale per il trasporto.
55455_(51277)_NK_ZSU_IT_user_manual_DIN_A6_DACH_2018.indd 31-32 25.05.2018 10:35:02

33
Istruzioni per l‘uso
34
7Liability notice
Ci riserviamo il diritto di farlo d‘errori di stampa e modiche al pro-
dotto, imballaggio o documentazione del prodotto.
• Si prega di consultare i nostri termini di garanzia. Questi sono ora dispo-
nibili nella loro forma attuale sotto le date informazioni di contatto.
8 Note per lo smaltimento
In conformità alla Direttiva Europea WEEE, le attrezzature
elettriche ed elettroniche non devono essere smaltite insieme ai
riuti urbani. I com ponenti devono essere riciclati o smaltiti sepa-
ratamente. Diversamente le sostanze contaminanti e pericolose
possono inquinare l’ambiente.
Il consumatore è obbligato per legge a portare le attrezzature elettriche ed
elettroniche presso punti di raccolta pubblici oppure presso il rivenditore o il
produttore al termine della loro durata utile. Devono anche essere osservate
tutte le leggi e le normative locali. Il simbolo apposto sul prodotto, nel ma-
nuale o sulla confezione richiama l’attenzione su questi termini. Con questo
tipo di raccolta differenziata e smaltimento dei prodotti usati si contribuisce in
modo sostanziale alla protezione dell’ambiente.
WEEE No: 82898622
9 UE Dichiarazione di conformità
Usando il marchio CE, Goobay®, un marchio registrato della
Wentronic GmbH, dichiarache il dispositivo è conforme ai requisiti di
base ed alle linee guida delle normative Europee.
55455_(51277)_NK_ZSU_IT_user_manual_DIN_A6_DACH_2018.indd 33-34 25.05.2018 10:35:02

Betriebsanleitung
User manual
Mode d‘emploi
Istruzioni per l‘uso
REV2018-05-25
V1.1
Goobay®
by Wentronic GmbH
Pillmannstraße 12
38112 Braunschweig
Germany
Made in China
© by Wentronic Deutschland
Hotline: +49 (0180) 5005882
E-Mail: info@goobay.de
Web: www.goobay.de
*(0,14 € / Minute aus dem deutschen Festnetz)
(0.14 € / minute from German landline)
(0,14 € / minute depuis un poste xe allemand)
(0,14 € / minuto dalla rete ssa tedesca)
Digitale Zeitschaltuhren
Digital time switches
Interrupteurs horaires numériques
Interruttori orari digitali
55455_(51277)_NK_ZSU_IT_user_manual_DIN_A6_DACH_2018.indd 35 25.05.2018 10:35:02
Table of contents
Languages:
Other Goobay Timer manuals

Goobay
Goobay NK ZSU 1 User manual

Goobay
Goobay NK ZSU 1 User manual

Goobay
Goobay 51277 User manual

Goobay
Goobay 59038 User manual

Goobay
Goobay 59038 User manual

Goobay
Goobay NK ZSU 2 User manual

Goobay
Goobay 51277 User manual

Goobay
Goobay 51276 User manual

Goobay
Goobay 73289 User manual

Goobay
Goobay NK SZU 2 User manual
Popular Timer manuals by other brands

Intermatic
Intermatic PB300EK Series Installation, operation & service manual

Eurochron
Eurochron EDT 3000 operating instructions

RainPoint
RainPoint ITV205 Faq

Enerlites
Enerlites HET01-3R installation instructions

Leviton
Leviton Decora 6124H user manual

brennenstuhl
brennenstuhl BDZ 44 DE 3655 operating manual