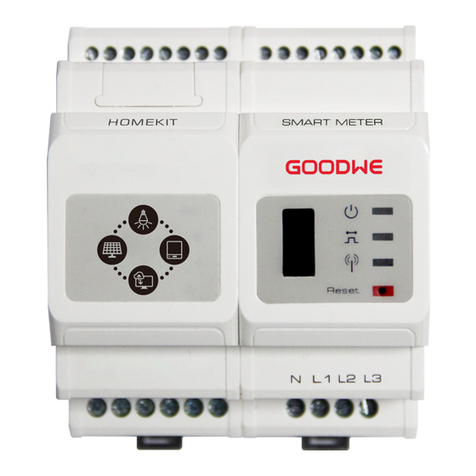
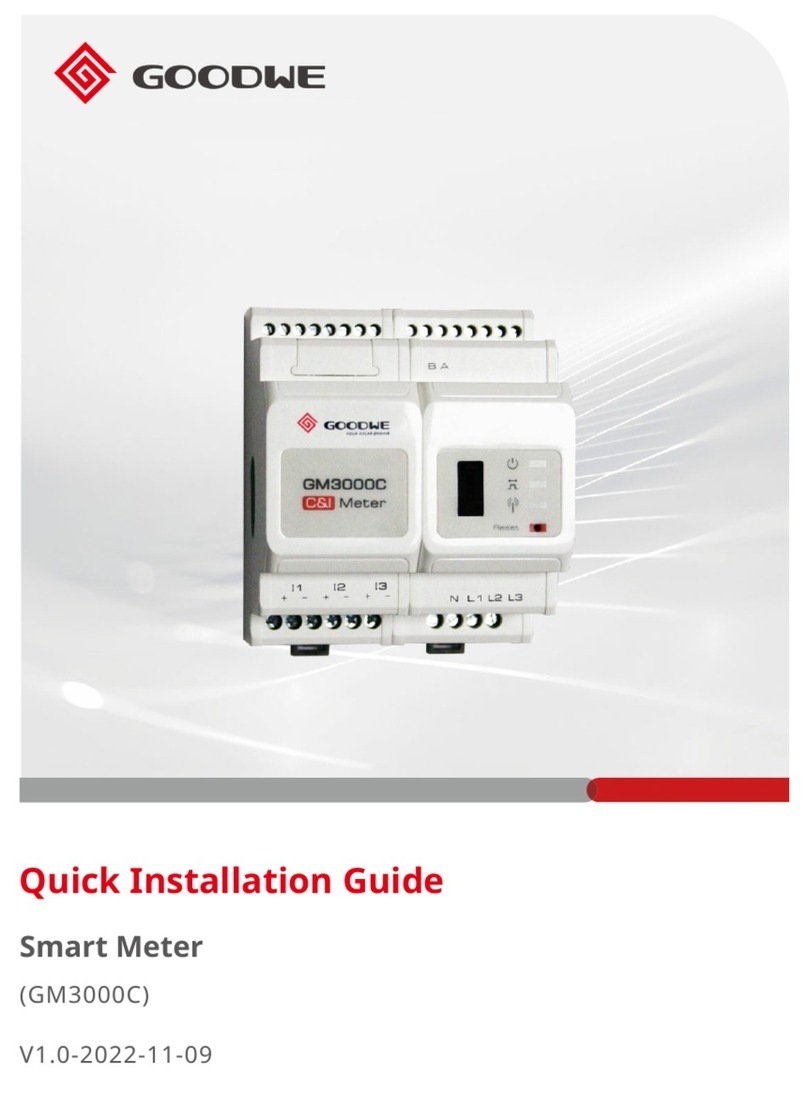
Goodwe ET Series User manual

User Manual
Hybrid Inverter
ET Series| ET Plus+ Series
V1.2-2022-03-24

2
CONTENT User Manual V1.2-2022-03-30
TABLE OF CONTENTS01 Product Introduction .................................................11.1 Operation Modes Introduction................................................................1
1.2 Safety and Warning...................................................................................2
1.3 Product Overview ......................................................................................4
02 Installation Instructions .............................................52.1 Unacceptable Installations.......................................................................5
2.2 Packing List ................................................................................................6
2.3 Mounting....................................................................................................6
2.3.1 Select Mounting Location.................................................................................6
2.3.2 Mounting ............................................................................................................8
2.4 Electrical Wiring Connection ....................................................................9
2.4.1 PE Cable Connection .........................................................................................9
2.4.2 PV Wiring Connection .....................................................................................10
2.4.3 Battery Wiring Connection .............................................................................10
2.4.4 On-Grid&Back-up Connection........................................................................12
2.5 Communication Connections.................................................................15
2.5.1 Smart Meter & CT Connections .....................................................................15
2.5.2 BMS Connection...............................................................................................16
2.5.3 COM Terminal Connection..............................................................................17
2.6 Earth Fault Alarm Connection................................................................21
03 MANUAL OPERATION ................................................253.1 Wi-Fi Conguration .................................................................................25
3.2 PV Master .................................................................................................26
3.2.1 Commissioning via PV Master........................................................................26
3.2.2 Load Control.....................................................................................................27
3.2.3 Battery Ready and Force Charge to Battery.................................................30
3.3 CEI Auto-Test Function............................................................................31
3.4 Startup/shutdown Procedure ................................................................31
3.5 SEMS Portal ..............................................................................................31

3
CONTENT
User Manual V1.2-2022-03-30
04 OTHERS ...................................................................324.1 Error Messages........................................................................................32
4.2 Troubleshooting ......................................................................................34
4.3 Disclaimer.................................................................................................38
4.4 Technical Parameters ............................................................................40
4.5 Quick Checklist To Avoid Dangerous Conditions.................................52
Appendix .....................................................................53

1
Product IntroductionUser Manual V1.2-2022-03-30
1.1 Operation Modes Introduction
01 Product Introduction
The ET series and ET Plus series, also called hybrid or bidirectional solar inverters, provides
energy management in a PV system that includes solar modules, a battery, loads, and utility grid
connection. Energy produced by the PV system is prioritized to supply loads and then any excess
energy to charge the battery. When the battery is fully charged, excess energy can be exported to
the utility grid (if permitted). The inverter power rate limit (WGra) is not applicable to operate the
mode of Changes in energy source operation.
The battery shall discharge to support loads when PV power is insucient to meet self-
consumption needs. If battery power is not sucient, the system will take power from the utility
grid to support loads.
The preceding introduction describes the general operation
of the ET system. The operation mode can be changed
with the PV Master app based on the system layout. The
possible operation modes for the ET system are shown
below.
ET system normally has the following operation modes based on your conguration and layout
conditions.
Mode I
The energy produced by the PV system is used
to optimize self-consumption needs. The excess
energy is used to recharge the batteries, any
remaining excess is then exported to the grid.
Mode III
(If backup function is included) When the grid
fails, the system will automatically switch
to back-up mode. The back-up loads can be
supplied by both PV and battery energy.
Mode II
If the PV system is currently not generating
any electricity and the battery is charged,
loads are supplied with electricity from the
battery and the grid.
Mode IV
Battery could be charged by grid, and
charge time/power could be set to various
options on the PV Master App.

2
Product Introduction User Manual V1.2-2022-03-30
1.2 Safety and Warning
WARNING!
The ET series and ET Plus series of inverters from GoodWe Technologies Co., Ltd. (also called
GoodWe) strictly complies with related safety rules for product design and testing. Please read
and follow all of the instructions and cautions appearing on the inverter or in the User Manual
during installation, operation and maintenance, as any improper operation might cause personal
injury or property damage.
These servicing instructions are for use by qualied personnel only.
To reduce the risk of electric shock, do not perform any servicing
other than that specied in the operating instructions.
Ces instructions d’entretien sont destinées uniquement au personnel
qualié. Pour réduire le risque de choc électrique, n’eectuez aucun
service autre que celui spécié dans les instructions d’exploitation.
Symbol Explanation
Danger - high voltage and electric shock!
Caution!
Failure to observe any warnings contained in this manual may result in injury.
Danger - hot surface!
The components of the product can be recycled.
This side up! This package must always be transported, handled and stored in such
a way that the arrows always point upwards.
No more than six (6) identical packages being stacked on each other.
Products shall not be disposed as household waste.
5min
Fragile - The package/product should be handled carefully and never be tipped over
or slung.
Refer to the operating instructions.
Keep dry! The package/product must be protected from excessive humidity and
must be stored under cover.
This symbol indicates that you should wait at least 5mins after disconnecting the inverter
from the utility grid and from the PV panel before touching any inner live parts.
CE mark.

3
Product IntroductionUser Manual V1.2-2022-03-30
Any installation or operations on the inverter must be performed by qualied electricians
in compliance with standards, wiring rules and the requirements of local grid authorities or
companies (such as AS 4777 and AS/NZS 3000 in Australia).
Never insert or remove the AC or DC connections when the inverter is running.
Before making any wiring connections or performing electrical operations on the inverter, all
DC and AC power must be disconnected from the inverter for at least 5 minutes to make sure
that the inverter is totally isolated to avoid electric shock.
The temperature of the inverter surface can exceed 60℃ during operation. Make sure it has
cooled down before touching it and make sure the inverter is out of reach of children.
Do not open the inverter cover or change any components without manufacturer's
authorization. Otherwise, the warranty for the inverter will be invalid.
The usage and operation of the inverter must follow the instructions in this User Manual.
Otherwise, the protection design might be impaired and the warranty for the inverter will be
invalid.
Appropriate methods must be adopted to protect the inverter from static electricity damage.
Any damage caused by static electricity is not warranted by the manufacturer.
PV negative (PV-) and battery negative (BAT-) on inverter side are not grounded as the default
design. Connecting either PV- or BAT- to EARTH is strictly forbidden.
Any PV modules used with the inverter must have an IEC61730 class A rating, and the total
open-circuit voltage of the PV string/array must be lower than the maximum rated DC input
voltage of the inverter. Any damage caused by PV overvoltage is not covered by the warranty.
When exposed to sunlight, the PV array generates dangerous high DC voltages.
Please operate the inverter according to these instructions, or danger to life may result.
The inverter, with a built-in RCMU, will prevent the possibility of DC residual currents up to
6mA. Thus, in the system, an external RCD (type A) can be used (≥30mA).
In Australia, the output of the backup side in the switchbox should be labelled "Main Switch
UPS Supply". The output on the normal load side in the switch box should be labelled "Main
Switch Inverter Supply".
In Australia, the inverter internal switching does not maintain neutral integrity, which must
be addressed by external connection arrangements like in the System connection diagrams.
Safety Warnings

4
Product Introduction User Manual V1.2-2022-03-30
1.3 Product Overview
1. DC Switch [1] 2. PV Input Terminal
(PV+/PV-)[2] 3. Battery Terminal
(BAT+/BAT-)
4. Communication Module
Port (WiFi or Bluetooth) 5. COM Terminal 6. METER
Communication Port
7. BMS Communication Port 8. AC Terminal
(ON-GRID and BACKUP) 9. WiFi Reset
10. Indicators 11. PE Terminal 12. Mounting Plate
[1] GW5KL-ET, GW6KL-ET, GW8KL-ET,GW10KL-ET: optional.
The DC switch of the inverters sold in Australia have to be installed by customers.
If the inverter is not equipped with a DC switch, an external DC breaker shall be added. The
external DC breaker shall be AU/NZ certied; Complied to AS60947.3:2018; Be classied as DC-PV
2; With ratings and properties suitable for the intended application conditions such as outdoor,
exposed to sunshine, on non-combustible material surface.
[2] GW8KL-ET and GW10KL-ET: 2 x PV+/PV-; 3 x PV+/PV- in Australia.
1 2 3 4 6 75
or
8910 11 12

5
Product IntroductionUser Manual V1.2-2022-03-30
LED Indicators
EXPLANATION
ON = System is ready
BLINK = System is starting up
OFF = System is not operating
ON = Back-up is ready / power available
OFF = Back-up is o / on power available
ON = Battery is charging
BLINK 1 = Battery is discharging
BLINK 2 = Battery is low / soc is low
OFF = Battery is disconnected / not active
ON = Grid is active and connected
BLINK = Grid is active but not connected
ON = Consuming energy from grid / buying
BLINK 1 = Supplying energy to grid / zeroing
BLINK 2 = Supplying energy to grid / selling
OFF = Grid not connected or system not operating
ON = BMS and meter communication ok
BLINK 1 = Meter communication ok, BMS communication fail
BLINK 2 = BMS communication ok, meter communication fail
OFF = BMS and meter communication fail
ON = WiFi connected / active
BLINK 1 = WiFi system resetting
BLINK 2 = WiFi not connect to router
BLINK 4 = WiFi server problem
OFF = WiFi not active
ON = Fault has occurred
BLINK1 = Overload of back-up / Output / reduce load
BLINK4 = CT wiring fault
OFF = No fault
OFF = Grid is not active
SYSTEM
INDICATOR COLOR STATUS
BACK-UP
BATTERY
GRID
ENERGY
COM
WiFi
FAULT
02 Installation Instructions
2.1 Unacceptable Installations
Please avoid the following installations which will damage the system or the Inverter.
The following installations should be avoided. Any damage caused will not be covered by the
warranty policy.
For the general version, backup cannot connect in parallel.
For advanced applications, please contact our after-sales
department.
Single PV string cannot connect to multiple inverters.
PVPVBackupBack-UpLoadOn-Grid

6
Installation Instructions User Manual V1.2-2022-03-30
The Inverter does not support o-grid
functions in gridless areas.
One meter cannot be connected
to multiple inverters. Dierent CTs
cannot connect to the same line cable.
The on-Grid or backup side cannot
be connected to any AC generator
directly.
The inverter battery input must not be
connected to incompatible batteries.
The backup side cannot be connected
to the grid.
One battery bank cannot be
connected to multiple inverters.
On-GridBatteryBackupOn-GridBackupBackupLoadSmart MeterBatteryIncompatible batteryGenerator2.2 Packing List
Upon receiving the hybrid inverter, please check if any of the components as shown below are
missing or broken.
Note: The COM Connector is for ET Plus Series only. Make sure that the connector is installed
correctly no matter you need the communication function or not.
2.3 Mounting
2.3.1 Select Mounting Location
For inverter's protection and convenient maintenance, mounting location for inverter should be
selected carefully based on the following rules:
Rule 1. Any part of this system shouldn't block the switch and breaker from disconnecting the
inverter from DC and AC power.
Rule 2. Inverter should be installed on a solid surface, where it is suitable for inverter's dimensions
and weight.
Rule 3. Inverter should be installed vertically with a max rearward tilt of 15°.
PINTerminal
PE
Terminal
ExpansionBolts
AC Cover
SpareScreworBATConnectors&&&InverterDocumentsSmart Meter with 3CTWall-MountingBracketBluetooth
(Optional)
COM
Module
COM
Connector
PV Connectors

7
Installation Instructions
User Manual V1.2-2022-03-30
Rule 4. Ambient temperature should be lower than 45°C (113°F). High ambient temperature will
cause power derating of inverter. The temperature and humidity at the installation site should be
within the appropriate range (60 °C for outdoor unconditioned with solar eects).
Rule 5. It is recommanded that the installation of the inverter should be prevented from direct
sunlight, snow, rain and other negative inuences which may cause function impact or life aging.
Accmulated snow
Keep away
from sunlight Keep dry Keep it clear
of snow Sun Rain
Rule 6. Inverter should be installed at eye level for convenient maintenance.
Rule 7. Product label on inverter should be clearly visible after installation. Do not damage the
lable.
Rule 8. Do not install the inverter when it is snowing or raining. If you have to, pay attention to
the waterproof and moisture-proof of the inverter and distribution box.
Rule 9. Leave enough space around the inverter according to the below gure for natural heat
dissipation.
Install the inverter away from high magnetic eld to avoid electromagnetic interference.
If there is any radio or wireless communication equipment below 30MHz near the
inverter, you have to:
1. Install the inverter at least 30m far away from the wireless equipment.
2. Add a low pass EMI lter or a multi winding ferrite core to the DC input cable or AC
output cable of the inverter.
300mm500mm
200mm200mm
UpwardDownwardFront Both sides---------- 300mm------ 500mm------------- 300mm-------- 200mm
300mm

8
Installation Instructions User Manual V1.2-2022-03-30
2.3.2 Mounting
The inverter must not be installed near ammable or explosive materials or near
equipment with strong electromagnetism.
The inverter is suitable for mounting on concrete or other non-combustible surfaces only.
Please use the mounting bracket as a template to drill 4 holes in the correct
positions (e.g. 10mm in diameter and 80mm in depth).
Use the expansion bolts in the accessory box and tightly attach the mounting
bracket to the wall.
Carry the inverter by holding the heat sink on two sides and place the inverter on
the mounting bracket.
Note: The bearing capacity of the wall must be greater than 25kg. Otherwise, the wall
may not be able to prevent the inverter from dropping.
wall bracket
expansion pipe
self-tapping screws
110mm 120mm
120mm
21Mounting Support Requirements
• The mounting support shall be nonammable and reproof.
• Make sure that the support surface is solid enough to bear the product weight load.
• Do not install the product on the support with poor sound insulation to avoid the noise
generated by the working product, which may annoy the residents nearby.

9
Installation Instructions
User Manual V1.2-2022-03-30
2.4 Electrical Wiring Connection
2.4.1 PE Cable Connection
• Disconnect the PE cable after dismantling the equipment if needed.
• To improve the corrosion resistance of the terminal, it is recommended to apply silica gel or
paint on the ground terminal after installing the PE cable.
• The PE cable should be prepared by customers. Recommended specications:
• Type: single-core outdoor copper cable.
• Conductor cross-sectional area S≥4mm2
L=L1+(1~2)mm L1
1
234
M5M5
1.2~2N·m1.2~2N·m
The inverters can be locked for anti-theft purposes if this is necessary for individual
requirements.
The lock is not included in the package
and can be purchased by the user.
1.2~2N·m
3

10
Installation Instructions User Manual V1.2-2022-03-30
MCMC
2
MC4 /QC4.10 SeriesAMPHENOL Series2.4.2 PV Wiring Connection
Before connecting PV panels/strings to the inverter, please make sure all requirements listed
below are followed:
• The total short-circuit current of a PV string must not exceed the inverter's max DC current.
(For models GW8KL-ET and GW10KL-ET, PV2 has 2 pairs of PV connectors which can accept 2PV
strings with a total short-circuit current of no more than 22A)
• The minimum impedance to earth of the PV module shall be greater than R. R=Max.Input
Voltage (V)/30mA, i.e. R=1100V/30mA=36.7KΩ or R=1000V/30mA=33.4KΩ).
• The PV string must not be connected to the earth/grounding conductor.
• Use the right PV plugs in the accessory box. (BAT plugs are similar to PV plugs. Please check
before using them.)
Note: There are MC4, QC4.10, or Amphenol plugs in the accessory box. The connection details are shown
below.
Prepare the PV cables and PV plugs.
Screw the cap on and plug it into the inverter side.
Connect the PV cable to the PV
connectors.
Note:
1. Please use the PV plugs and connectors from the
accessory box.
2. The PV cable should be a standard 2.5–4mm2.
Note: There will be a clicking sound if the connectors are
inserted correctly into the PV plugs.
Note:
1. Crimp the PV cable tightly onto the connectors.
2. For Amphenol connectors, the limit buckle cannot be
pressed.
3. There will be a clicking sound if the connectors are
inserted correctly into the PV plugs.
2.5-4mm27mm2.5-4mm27mm13The polarity of the PV strings must not be connected in a reverse manner. Otherwise, the
inverter could be damaged.
For the GW8KL-ET and GW10KL-ET models, use two separate PV plugs if the short-circuit
current of the PV array connected to inverter's PV2 input is greater than 15A.
Please be careful of any electric shock or chemical hazards. For batteries without a built-in DC
breaker, make sure that an external DC breaker (≥40A) connected.
Make sure the battery is under normal working condition (such as battery voltage and BMS
setting etc.) when the inverter and battery is to be used. If you need to use the hybrid inverter
as a Grid-tied inverter, please contact GoodWe after-sales.
2.4.3 Battery Wiring Connection

11
Installation Instructions
User Manual V1.2-2022-03-30
DCSize 152 Nm
B
click!
ABAT
1
4
2
3Make sure that the battery switch is o and that the nominal battery voltage meets ET
series or ET Plus series specications before connecting the battery to the inverter. Make
sure the inverter is totally isolated from both PV and AC power.
Please strictly follow the requirements and steps listed below. Using inappropriate wires
may cause bad contacts and high impedances, which are dangerous for the system.
Use the correct BAT plugs from the accessory box.
The maximum battery current is 25A. Please use the tin-plated cables for which the cross section
ranges from 4 to 6mm² (AWG 10). The battery cable requirements are shown in Figure 2.4.2-1.
Open the spring using a screwdriver. Carefully insert the stripped wire with
twisted litz wires all the way into (A). The
litz wire ends must be visible in the spring.
Close the spring. Make sure that the
spring is snapped into (B).
Insert the cable gland into the sleeve (C).
Tighten the cable gland to 2 Nm torque (D).
Use a suitable and calibrated torque wrench,
size 15. Use an open-jaw wrench, size 16, to
hold the connector in place.
Insert two BAT
connectors into
the inverter BAT
input. There will be
a clicking sound if
the connectors are
inserted correctly.
CAB
Figure 2.4.2-1Battery wiring connection process
Grade Description Value
A Outside diameter 5.5-8.0 mm
B Conductor core section 4-6 mm2
C Conductor core length 15 mm

12
Installation Instructions User Manual V1.2-2022-03-30
2.4.4 On-Grid&Back-up Connection
An external AC breaker is needed for on-grid connection to isolate the inverter from the utility
grid when necessary.
Note: Backup function is optional for the German market, even though the hardware connector is always
there. Backup function is standard in all other markets.
The requirements for the on-grid AC breaker are shown below.
Requirement of AC cable connected to On-Grid and Back-Up side.
Make sure the inverter is totally isolated from any DC or AC power before connecting the
AC cable.
Prepare the terminals and AC cables according to the correct table.
Note:
1. The neutral cable shall be blue, the line cable shall be black or brown (preferred), and the protective
earth cable shall be yellow-green.
2. For AC cables, the PE cable shall be longer than the N&L cables. This provides protection in case the
AC cable slips or is removed, the ensuring that the earth conductor will be the last cable to take the
strain.
Note: The absence of AC breaker will lead to inverter damage if an electrical short circuit happens on
grid side.
Conductor Core Section(Recommended)
1. Use separate AC breakers for individual
inverters.
AC breaker AC breaker
AC breaker
AC breaker
Grid
Grid Load
2. On the AC side, an individual breaker
should be connected between the inverter
and grid but before any loads.
Grade Description Value
A Outside diameter 13-18 mm
B Separated wire length 20-25 mm
C Conductor wire length 7-9 mm
D Conductor core section 4-6 mm2
Inverter Model AC Breaker Specication
GW5K/GW5KL-ET 25A/400V (e.g. DZ47-60 C25)
GW6.5K/GW6KL-ET 25A/400V (e.g. DZ47-60 C25)
GW8K/GW8KL-ET 32A/400V (e.g. DZ47-60 C32)
GW10K/GW10KL-ET 32A/400V (e.g. DZ47-60 C32)
ABCD1

13
Installation Instructions
User Manual V1.2-2022-03-30
3
2
CablesScrew CapAC Sheet CoverThe InsulatorSingle HoleSeal RingPlace the AC cable through the terminal cover
as shown in the gure.
Note: Please use the terminals in the accessory
box.
Press the connectors tightly on the cable conductor core.
Note: Make sure the cable jacket is not locked within the connector.
41. Connect the assembled AC cables to AC terminals with a fastening torque of
approximately 2.0-2.5 Nm.
Note: (If the inverter has backup function) Connect the backup terminals before connecting the on-
grid terminals. Make sure they are not connected to the wrong side.
2. Lock the cover and screw on the cap.
Use a screwing
torque of 2.0–
2.5Nm.
Special adjustable settings
The inverter has a eld where the user can set functions, such as trip points, trip time, time of
reconnection, active and invalid of QU curve, and PU curve. These functions can be adjusted by
using special software. If interested, please contact the after-sales department.

14
Installation Instructions User Manual V1.2-2022-03-30
Declarations for the backup function
The backup outputs of the inverters have overload capability.
For details please refer to the technical parameters.
The inverter has self-protection derating at high ambient temperatures.
The statement below lays out the general policies governing the series EH, EM, ES, ET, BH, BT
and SBP energy storage inverters.
1. For hybrid inverters (e.g. Series EH, EM, ES, and ET), a standard PV installation typically
consists connecting the inverter to both panels and batteries. When the system is not connected
to the batteries, the manufacturer strongly advises that the backup function not be used. The
manufacturer will not honour the standard warranty and will not be liable for any consequences
arising from users not following this instruction.
2. Under normal circumstances, the backup switching time is less than 10ms (e.g. the minimal
condition to be considered as a UPS-level switching). However, some external factors may cause
the system to fail in backup mode. Due to this, we recommend that users to be aware of these
conditions and follow the instructions as described below:
• Do not connect loads which are dependent on a stable energy supply for reliable operation.
• Do not connect the loads which may, in total, exceed the maximum backup capacity.
• Try to avoid those loads which may create very high start-up current surges such as inverters,
air conditioners, high-power pumps etc.
• Due to the battery condition itself, the battery current might be limited by factors including
but not limited to temperature and weather etc.
Acceptable loads are shown below:
• Inductive Loads: 1.5 P non-frequency conversion air conditioners can be connected to the
backup side. Two or more non-frequency conversion air conditioners connected to backup side
may cause the back-up mode to be unstable.
• Capacitive Loads: A total power ≤0.6 × nominal power of the model. (Any load with high
startup current is not acceptable.)
• For complicated applications, please contact the GoodWe Solar Academy.
Note:
For convenient maintenance, please install a SP 3T switch on both the backup and on-grid sides. Then it
is adjustable to support load by backup or by grid or default settings.
1. The backup load is supplied from backup
side.
2. The backup load is isolated.
3. The backup load is supplied from grid side.
Declarations for backup overload protection
The inverter will restart itself if overload protection is triggered. The preparation time for
restarting will be increasingly long (one hour at most) if an overload recurs. Take the following
steps to immediately restart the inverter.
Decrease the backup load power to within the maximum limitation.
On The PV Master App > Advanced Settings > Click "Reset Backup Overload History".
123Backup
Grid
On-Grid
Load 4Pole 3Throw

15
Installation Instructions
User Manual V1.2-2022-03-30
2.5 Communication Connections
2.5.1 Smart Meter & CT Connections
Make sure the AC cable is totally isolated from AC power before connecting the Smart
Meter and CT.
A Smart Meter with the CT in product box is compulsory for ET system installation. It can be
used to detect the grid voltages and current directions, provide the operating condition of the
ET inverter via RS485 communications, and limit the power exportation. GM3000 or SEC1000S
are suggested. For more detailed information of the Smart Meter, refer to the Smart Meter user
manual in https://en.goodwe.com.
Note:
1. The Smart Meter with CT is already congured ; please do not change any settings on the Smart
Meter.
2. One Smart Meter can be used with only one ET inverter.
3. Three CTs must be used for one Smart Meter and must be connected on the same phase with the
Smart Meter power cable.
Note:
1. Please use the Smart Meter with the 3 CTs contained in the product box.
2. The CT cable is 3m long as a default and can be extended to maximum of 5m.
3. The Smart Meter communication cable (RJ45) is attached on the inverter ("To Smart Meter" cable), and
be extended to a maximum length of 100m, and must use a standard RJ45 cable and plug, as shown
below:
Smart Meter & CT connection diagram
Power Meter
To Smart Meter
CT A
CT B
CT C
L1
L2
L3
N
PE
Detailed pin functions of each port on the ET
BMS: CAN communication is congured by default. If 485 communication is used, please contact
the after-sales service to replace this with the correct communication cable.
GM3000

16
Installation Instructions User Manual V1.2-2022-03-30
Position Color BMS Smart Meter EMS
1 Orange&white 485_A2 NC 485_A
2 Orange NC NC 485_B
3 Green&white 485_B2 485_B1 485_A
4 Blue CAN_H NC NC
5 Blue&white CAN_L NC NC
6 Green NC 485_A1 485_B
7 Brown&white NC 485_B1 NC
8Brown NC 485_A1 NC
Position Color BMS Smart Meter EMS
1 Orange&white 485_A2 NC 485_A
2 Orange 485_B2 NC 485_B
3 Green&white 485_A2 485_B2 485_A
4 Blue CAN_H NC NC
5 Blue&white CAN_L NC NC
6 Green 485_A2 485_A2 485_B
7 Brown&white NC 485_B2 NC
8Brown NC 485_A2 NC
Smart Meter LED indications
STATUS OFF ON Blinking
POWER Not working Working /
ENERGY / Importing Exporting
COM Single blink when data are transferred to the inverter
POWER
ENERGY
COM
2.5.2 BMS Connection
BMS is used to communicate with the connected compatible lithium battery.
There is a 3m communication cable marked "To Battery" on the inverter except ETR models. For
For GW5KN-ET, GW6.5KN-ET, GW8KN-ET, GW10KN-ET.
For GW5KL-ET, GW6KL-ET, GW8KL-ET, GW10KL-ET, GW5K-ET, GW6.5K-ET, GW8K-ET, GW10K-ET.

17
Installation Instructions
User Manual V1.2-2022-03-30
1 3 5 7 9 11 13 15 17
2 4 6 8 10 12 14 16 18
2.5.3 COM Terminal Connection
ET Plus Series
Follow the pin denition below to connect the communication cables. Do not remove the
resistor or short circuit wire unless you are going to use the corresponding PINs.
PIN Denition Function PIN Denition Function
1 485_A1 RS485 9 Remote Shutdown Remote
Shutdown
2 485_B1 10 GND-S
3 DRM 1/5 or DI_1
DRED or RCR
11 LG_EN+ LG Battery
Enabling
Signal
4 DRM 2/6 or DI_2 12 LG_EN-
5 DRM 3/7 or DI_3 13/14 N/A N/A
6 DRM 4/8 or DI_4 15/16
7COM/DRM0 or
REF_1 17 DO- Dry Contact of
Load Control
8 REFGEN or REF_2 18 DO+
ETR
ONLY
ETR models, the net cable should be prepared by the customer and should be no longer than
5m.
Connection steps
1. Conrm that the battery and inverter power cables are connected (refer to 2.4.2 Battery
Wiring Connections).
2. Connect the BMS communication cable of the inverter to the communication interface of the
lithium battery.
3. Select the corresponding battery via the APP (please refer to the user manual of the PV master
app).
Other manuals for ET Series
10
This manual suits for next models
13
Table of contents
Other Goodwe Measuring Instrument manuals

Goodwe
Goodwe HK3000 Original operating instructions

Goodwe
Goodwe GMK110 User manual

Goodwe
Goodwe HK1000 User manual

Goodwe
Goodwe GM2000 User manual

Goodwe
Goodwe GM1000D User manual

Goodwe
Goodwe GM3000C User manual

Goodwe
Goodwe HomeKit User manual

Goodwe
Goodwe GM3000C User manual

Goodwe
Goodwe HK1000 User manual

Goodwe
Goodwe HK1000 User manual