User guide
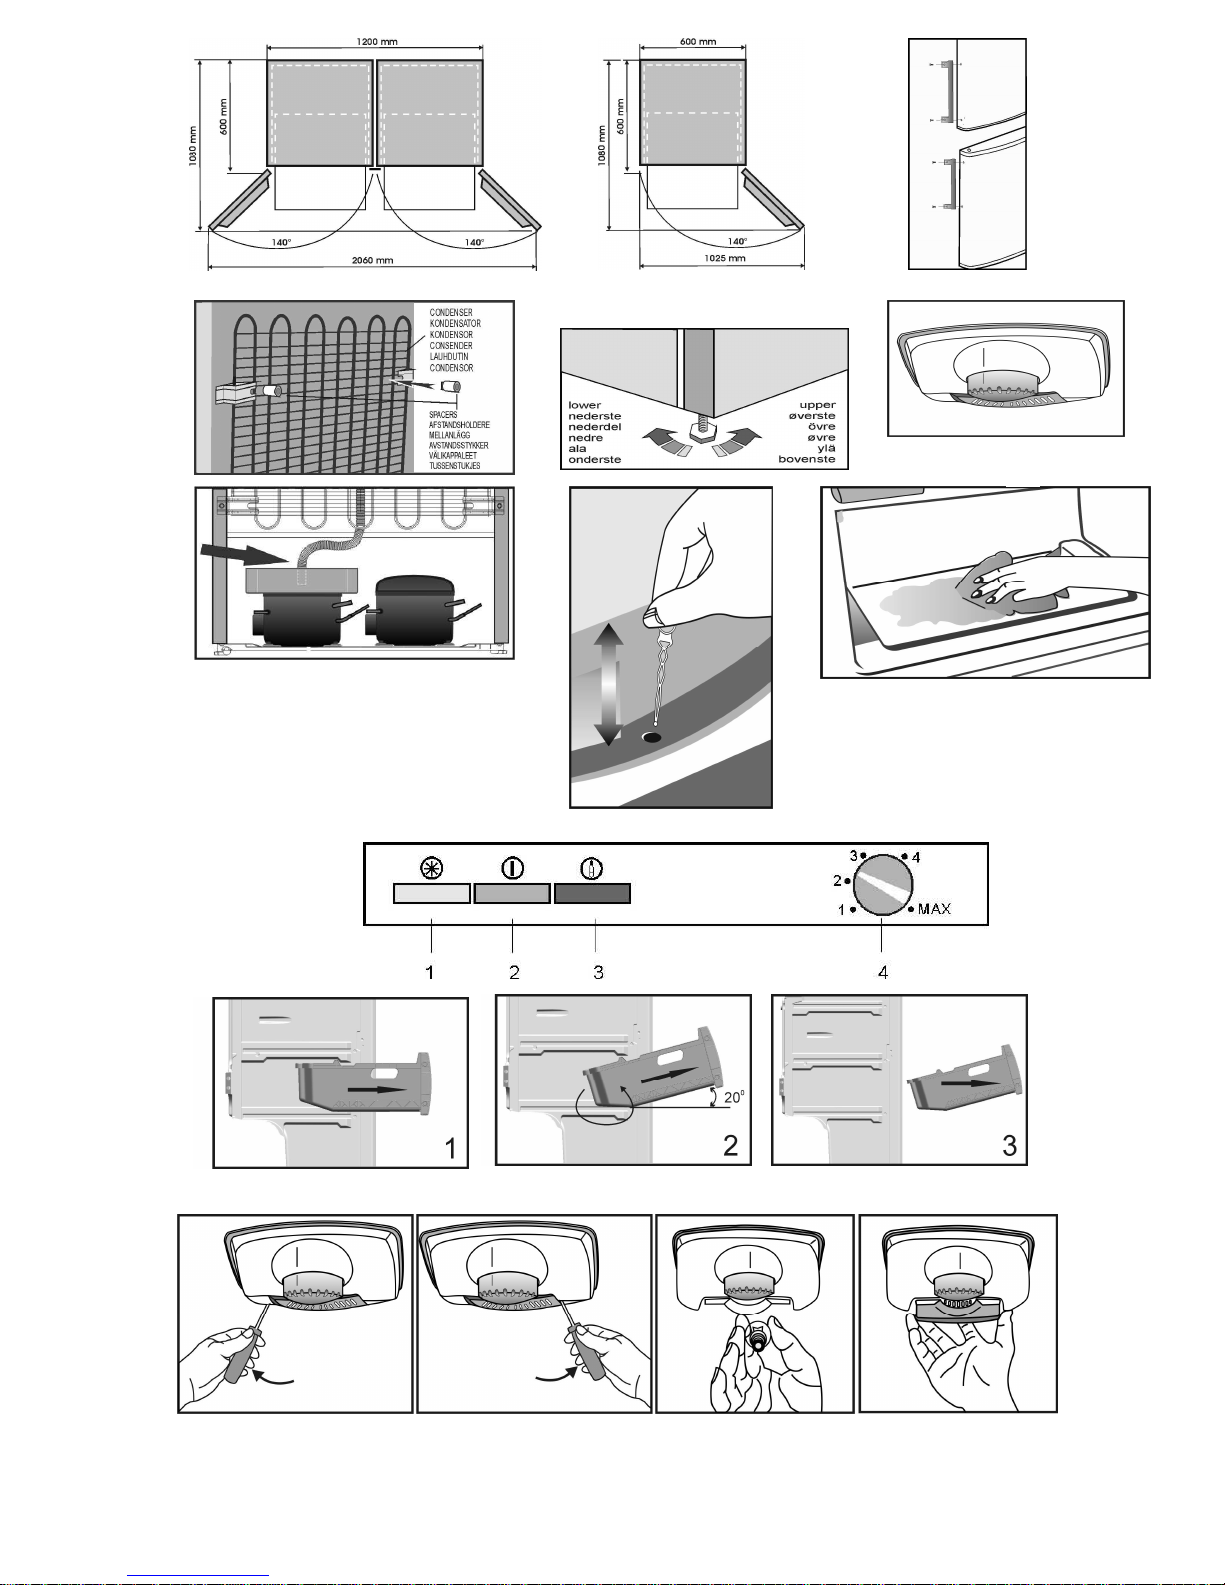
6. If you want to place two products side by
side, e.g. a refrigerator and a freezer, as a
side by side solution you have to use a
decoration kit which contains a small mat and
a decoration part. The mat is mounted on the
side of one of the products to create a space
between the products. The decoration part is
placed between the products to hide the gap
between the products (Fig 2). The decoration
kit is not a part of the product but can be
delivered as an accessory.
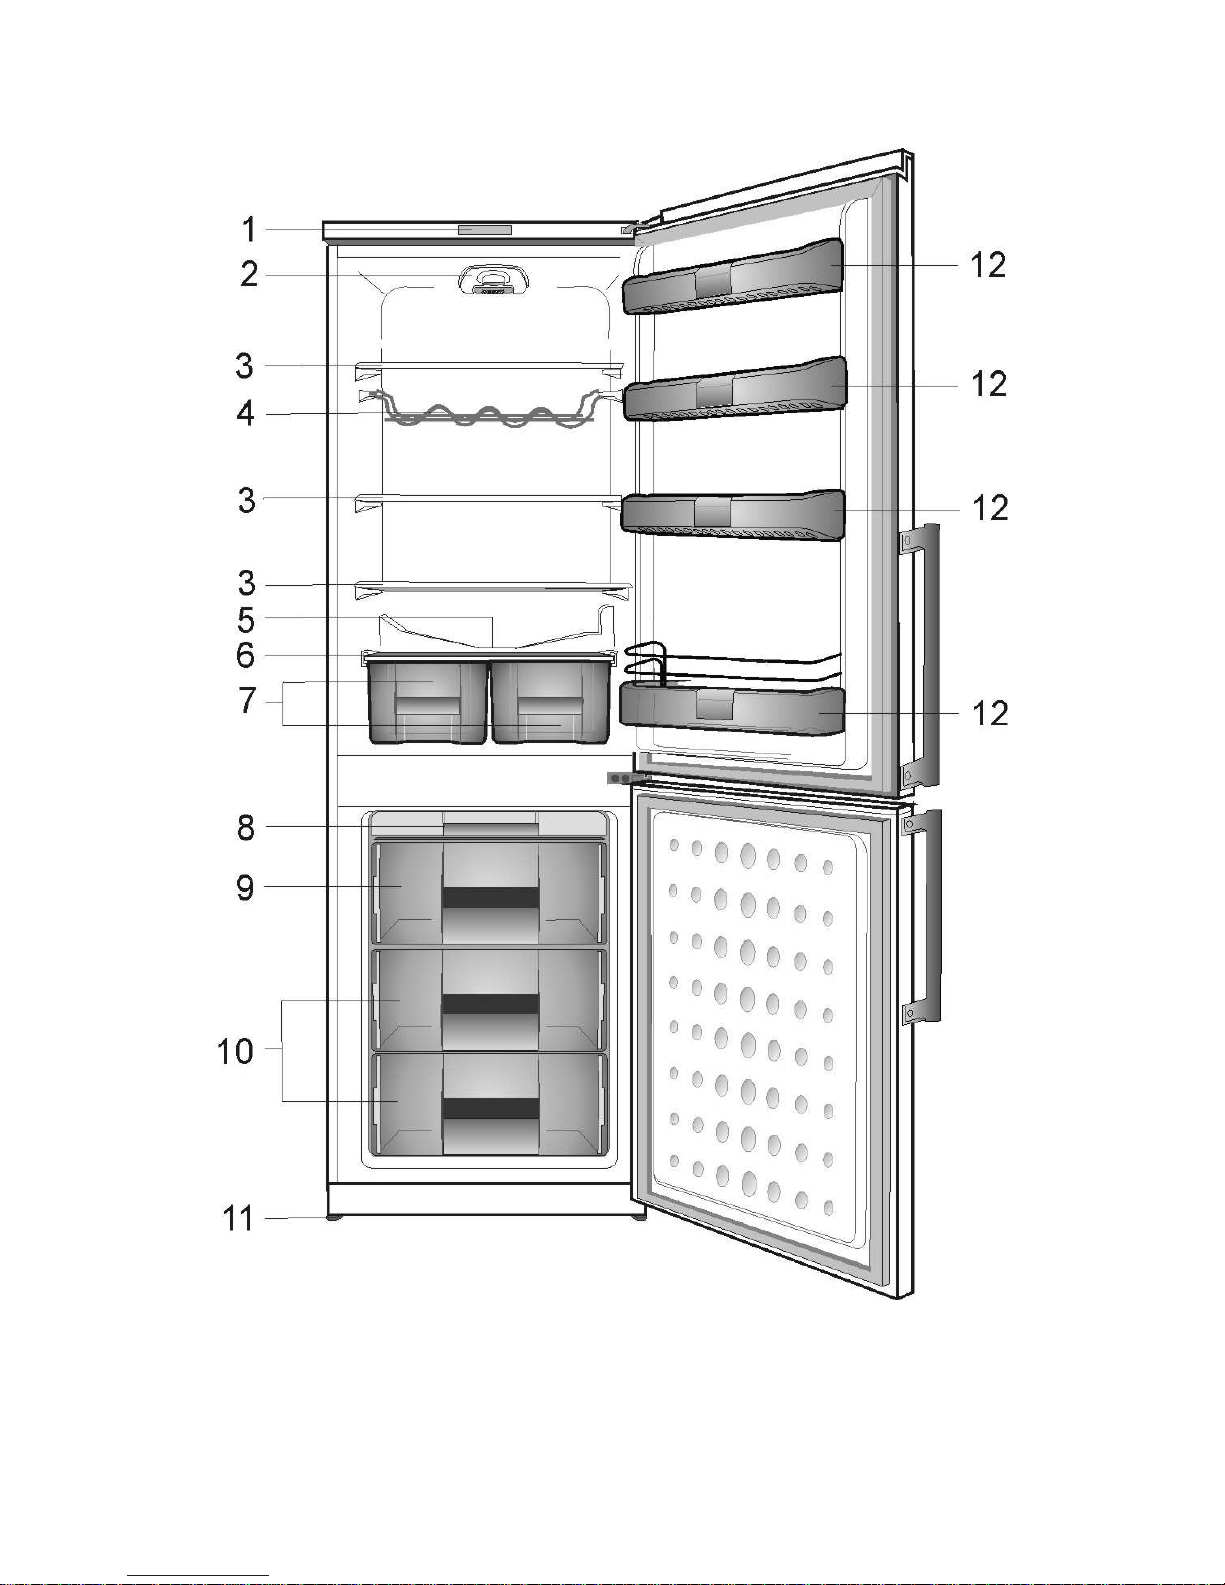
Getting to know your appliance
(Fig. 1)
1 - Control panel, display and adjustment
2 - Thermostat control and interior light
3 - Removable glass shelf
4 -Wine bottles support
5 - Water collector
6 - Glass shelf
7 - Vegetable drawer
8 - Ice cube tray support & ice cube tray
9 - Compartment for fast freezing
10 - Compartments for keeping frozen food
11 - Adjustable front legs
12 - Door shelves
Suggested arrangement of the food
in the appliance
Guidelines for obtaining optimum storage:
1. The fridge compartment is for the short-term
storage of fresh food and drinks.
2. The freezer compartment is rated
and suitable for the freezing and storage of
pre-frozen food.
The recommendation for storage as
stated on the food packaging should be
observed at all times.
3. Cooked dishes should be stored in airtight
containers.
4. Fresh wrapped produce can be kept on
the shelves
. Fresh fruit and vegetables should
be stored in the vegetable drawers.
5. Bottles can be kept in the door shelves or
on the bottle shelf.
6. To store fresh meat, wrap it in polythene
bags and place it in the coldest place in the
fridge compartment. Don’t let meat juice from
fresh meat come into contact with other types
of food. For safety, only store fresh meat for two
to three days.
7.
For maximum efficiency, the removable shelves
should not be covered with paper or other materials
to allowfree circulationof coolair.
8. Do not keep vegetable oil on the door
shelves. Keep the food packed, wrapped or
covered. Leftover canned food should not be
stored in the can.
9. To take out the drawers from the freezer
compartment please proceed as in Fig. 10.
Temperature control and adjustment
A) Fridge compartment
Operating temperatures are controlled by the
thermostat control (Fig. 5) and may be set at
any position between 1 and 5 (the coldest
position).
The average temperature inside the fridge
should be around +5°C (+41°F).
Therefore adjust the thermostat control
the desired temperature. Some sections of the
fridge may be cooler or warmer (such as the
vegetable drawer and the top part of the
cabinet) which is quite normal.
We recommend that you check the temperature
with an accurate thermome
storage compartments are kept to the desired
temperature.
Remember to read off the thermometer very
quickly as the
temperature on the thermometer will rise very
rapidly after you remove it from the freezer.
Please remember that each time the door is
opened cold air escapes and the internal
temperature rises. Therefore never leave the
door open and ensure that it is closed
immediately after food is put in or removed.
B) Freezer compartment
The control panel (Fig. 9 ) adjusts the
temperature in the freezer and has the following
functions:
1 - Orange LED indicator (1) - Fast freeze on
When you turn the thermostat control (4) to the
MAX position, the orange LED indicator is
switched on and the compressor will run
continuously. Remember to turn the thermostat
control back to its previous position once the
food is frozen.
3