Grundig GDT 310 User manual
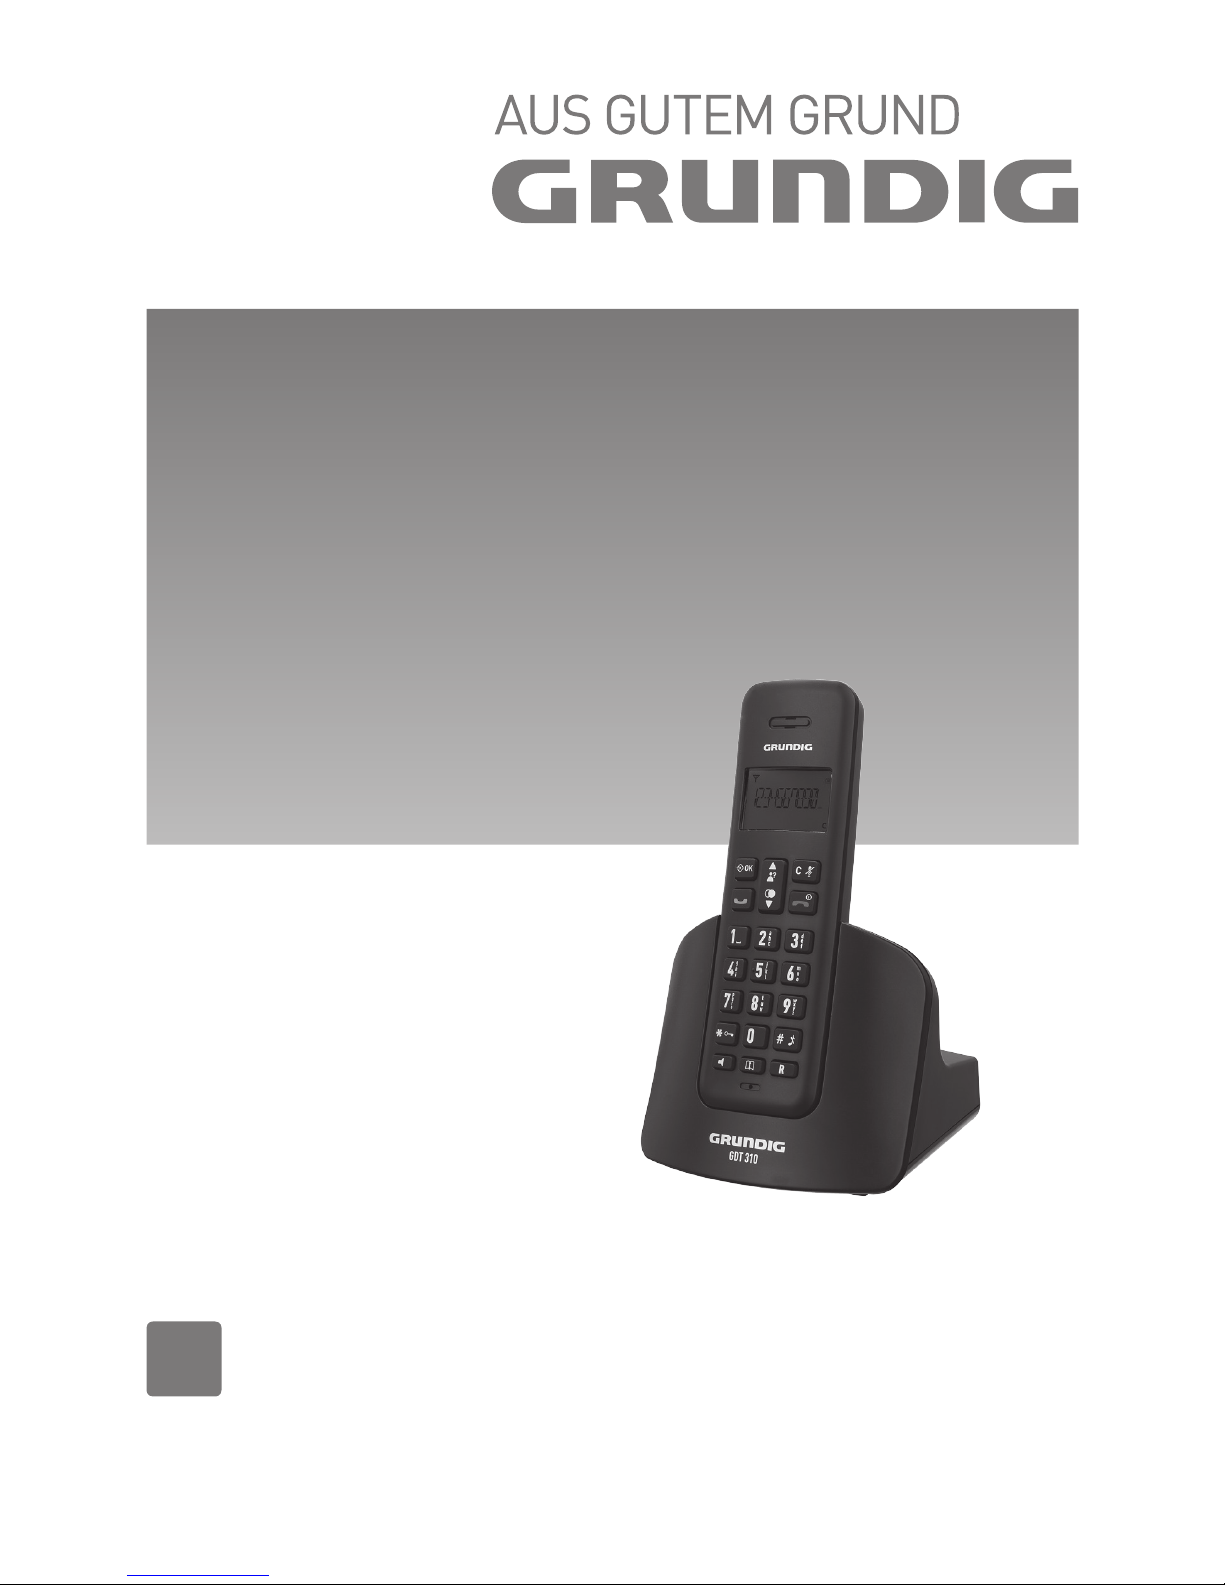
DECT TELEFON
GDT 310
EN

ENGLISH
2
CONTENTS ___________________________________________________
3 IMPORTANT SAFETY
INSTRUCTIONS
4 INSTALLING YOUR PHONE
4 Package contents
4 Connecting the base station
4 Installing and charging the batteries
5 GETTING TO KNOW YOUR
PHONE
5 Base Station Overview
9 Display Icons and Symbols
11 Text and Digit Entry Table
11 Character Set
12 USING YOUR PHONE
12 Make a Call
12 Answer a Call
12 End a Call
12 Adjust Earpiece and Handsfree
Volume
13 Mute a Call
13 Set the Silent Mode
13 Turn on the Keypad Lock
13 Redial the last number
14 Find the Handset
14 Make an Internal Call
16 PRIVATE PHONEBOOK
16 Add a New Phonebook Entry
16 Search a Phonebook Entry
16 View a Phonebook Entry
16 Edit a Phonebook Entry
17 Delete a Phonebook Entry
17 Delete the Entire Private Phone-
book
17 Check the Phonebook Usage
18 CALLER DISPLAY
18 View the Call List
18 Store a Call List Number into the
Phonebook
18 Delete an entry in the Call List
19 Delete the entire list of the Call List
19 View the Details of the Call List
Entry
20 VOICE MAIL
20 Access Voice Mail Messages
20 Delete VMWI Entries
21 PHONE SETTINGS
21 Date and Time Settings
22 Alarm Settings
23 Handset Settings
25 Base Settings
27 Registration
27 Reset Your Phone
28 DEFAULT SETTINGS
29 TECHNICAL FEATURES
31 TROUBLESHOOTING

ENGLISH
3
When using your telephone equipment,
basic safety precautions should always
be followed to reduce the risk of fire,
electric shock and injury, including the
following:
1 Read and understand all the instruc-
tions.
2 Follow all warnings and instructions
marked on the product.
3 Unplug this product from the wall
outlet before cleaning. Do not use
liquid cleaners or aerosol cleaners.
Use a damp cloth for cleaning.
4 Do not use this product near water
(for example, near a bath tub,
kitchen sink, swimming pool).
5 Do not overload wall outlets and
extension cords as this can result in
the risk of fire or electric shock.
6 Unplug this product from the wall
outlet and refer after sales service
under the following conditions:
█When the power supply cord or
plug is damaged or frayed.
█If the product does not operate
normally by following the operat-
ing instructions.
█If the product has been dropped
and the cabinet has been dam-
aged.
█If the product exhibits a distinct
change in performance.
7 Avoid using a telephone (other than
a cordless type) during an electrical
storm. There may be a remote risk
of electric shock from lightning.
8 Do not use the telephone to report a
gas leak in the vicinity of the leak.
9 Use only the supplied NiMH
(Nickel Metal Hydride) batteries!
The operation periods for the hand-
sets are only applicable with the
default battery capacities
10 The use of other battery types or
non-rechargeable batteries/primary
cells can be dangerous. These may
cause interference and/or unit dam-
ages. The manufacturer will not be
held liable for damage arising from
such non-compliance.
11 Do not use third party charging
bays . The batteries may be dam-
aged.
12 Please note the correct polarity
while inserting the batteries.
13 Do not immerse batteries in water,
do not place in fire.
14 Do not use third party power
adapter
IMPORTANT SAFETY INSTRUCTIONS _________
ENGLISH
4
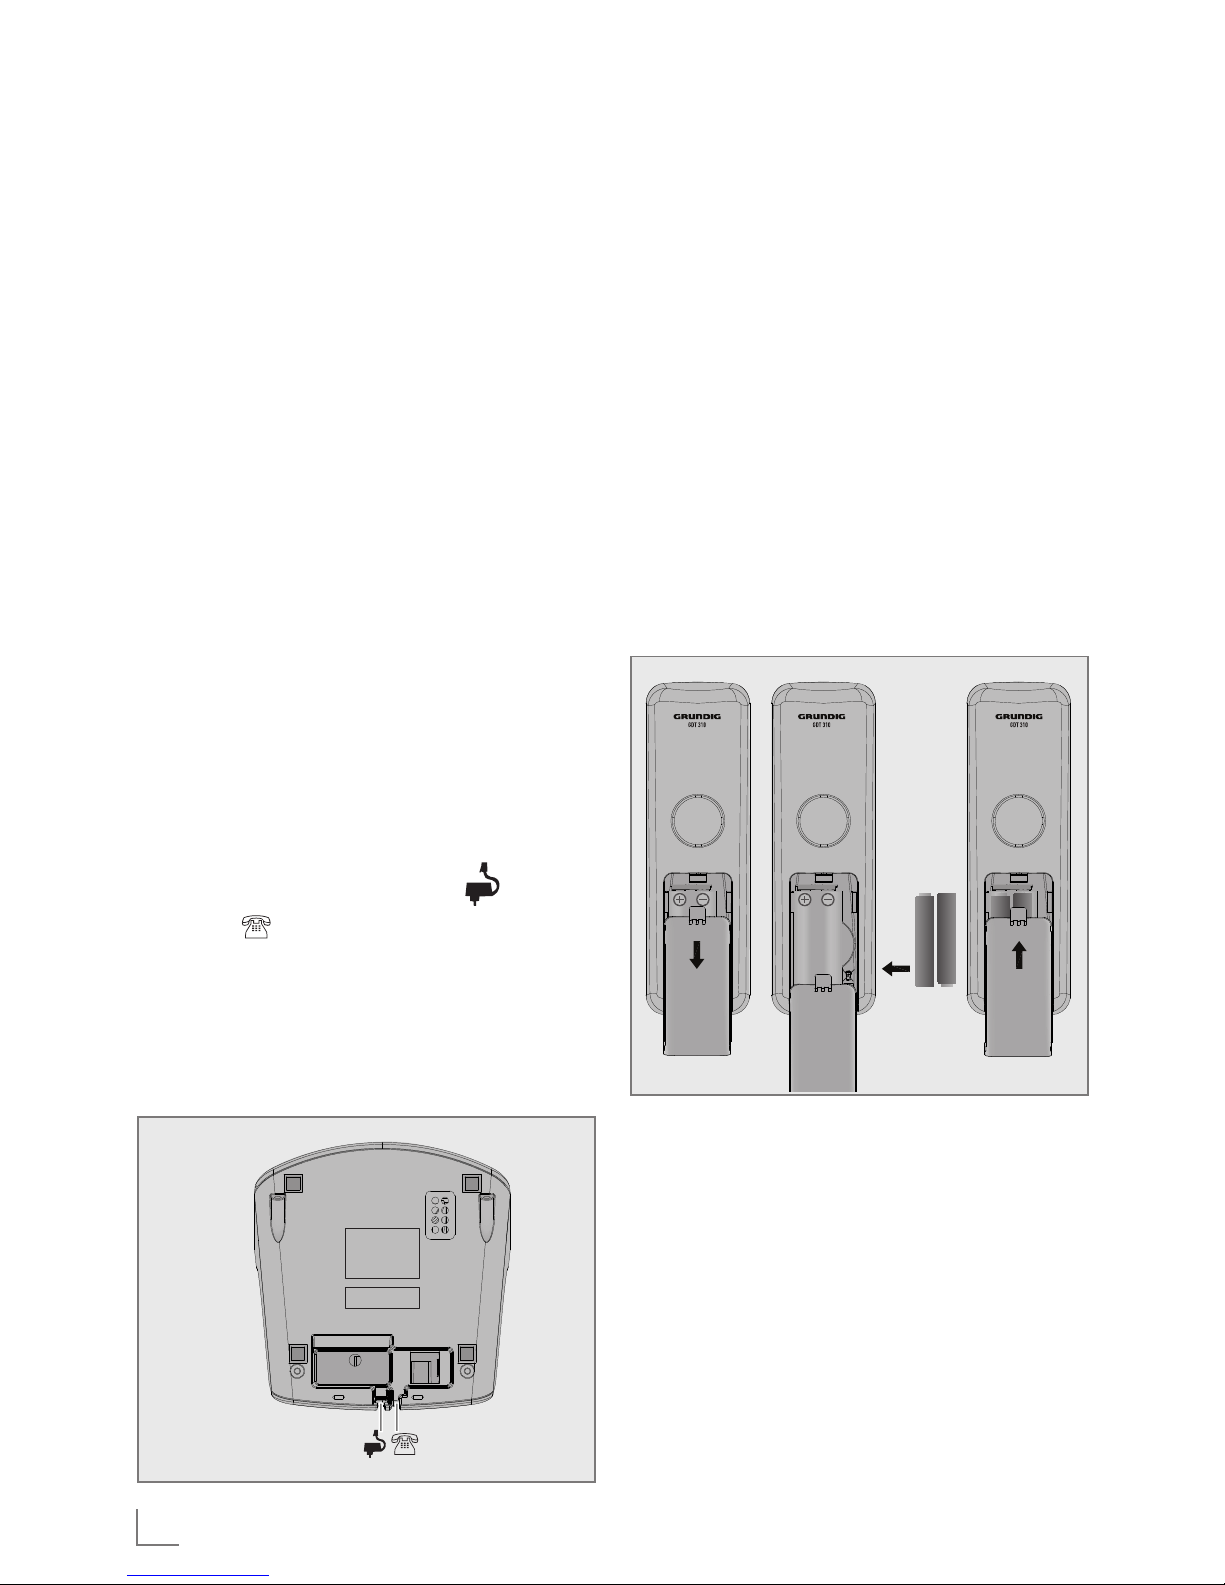
Installing and charging the
batteries
1 Slide open the battery compartment
cover.
2 Place the 2 batteries as indicated.
Respect polarity.
3 Slide the battery compartment cover
back.
4 Put the handset on the base and
charge for 14 hours first time. A beep
indicates that the handset is properly
placed on the base or charger.
Note:
█Use only the power pack pro-
vided for the base station.
█Use only NiMH rechargeable
batteries.
INSTALLING YOUR PHONE _________________________
Package contents
The package contains the following
items:
█1 Handset
█1 Base station
█1 AC power adapter
█1 Telephone line cord
█2 rechargeable batteries
█1 User manual
The maximum range between the base
station and the handset is approxi-
mately 300 meters. Depending on the
surrounding conditions as well as spa-
tial and structural factors, the range
may be reduced. The range indoors is
normally less than outdoors.
Connecting the base station
1 Plug the power supply »« & line
cord »« into the base station.
2 Plug the power supply & line cord
into the wall socket.
3 Always use the cables provided in
the box.

ENGLISH
5
GETTING TO KNOW YOUR PHONE ______
A
B
Base Station Overview
A PAGE
Press the Page »« on the base
station to page your handset. It will
ring for approximately 60 seconds.
B CHARGING CRADLE
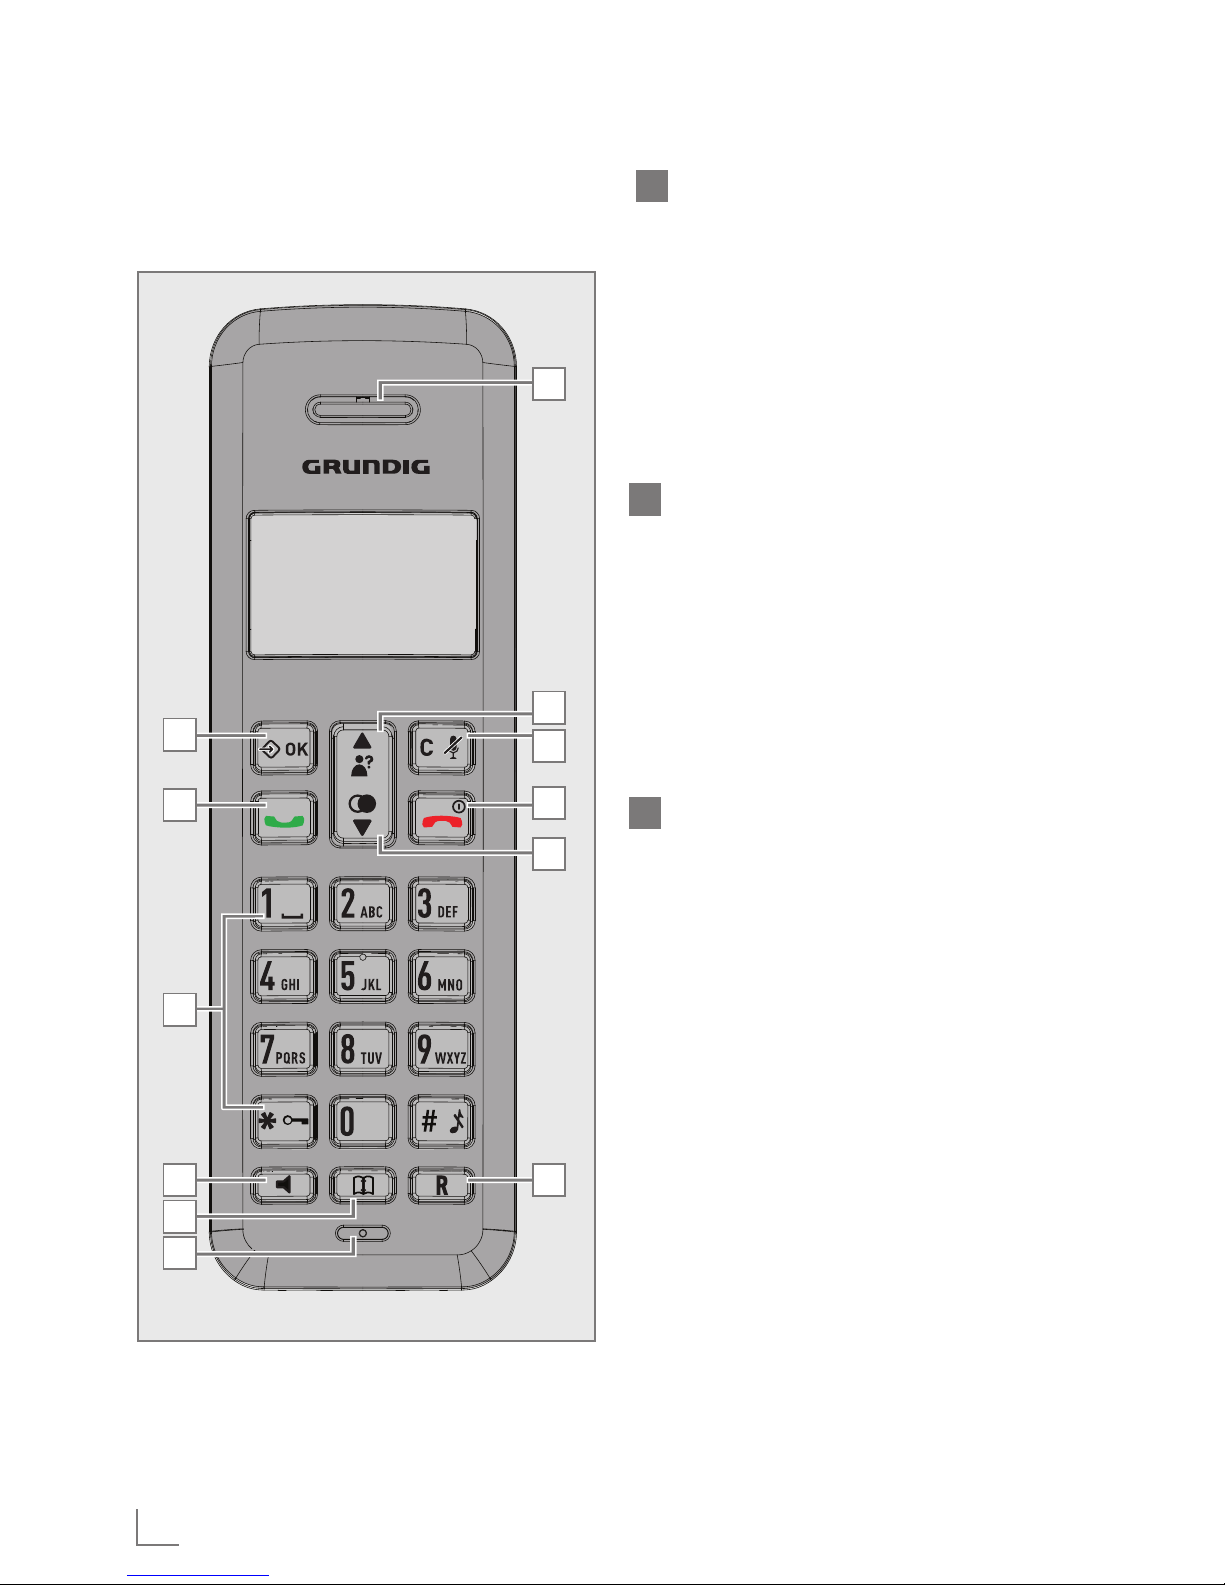
ENGLISH
6
A
G
H
I
J
K
L
B
C
D
E
F
A LEFT SOFT KEY (MENU/OK)
In idle mode: Press to access the
main menu
In sub-menu mode: Press to confirm
the selection.
During a call: Press to access Inter-
com/ Phonebook/ Redial List/ Call
List.
B TALK ON
In idle / predialing mode: Press to
make a call.
In Redial list / Call List / Phonebook
entry: Press to make a call to the
selected entry in the list.
During ringing: Press to answer a
call.
C ALPHANUMERIC KEYPAD,
* (STAR), # (HASH)
Press to insert a digit / character / *
/ #.
1 key in idle mode: Press and hold
to access the voice mail (for EU ver-
sion.
* key in idle mode: Press and hold
to enable or disable the keypad
lock.
* key during a call (in Pulse mode):
Press to switch to tone mode.
# key in Idle mode: Press and hold
to turn on / off the ringer.
0 key in idle / predialing / number
editing mode: Press and hold to insert
a pause.
# key in Call List mode: Press to re-
view caller’s number if applicable.
GETTING TO KNOW YOUR PHONE ______
Overview of the Handset
(for Speakerphone model)

ENGLISH
7
D SPEAKERPHONE
During a call: Press to turn on / off
the speakerphone.
In Idle mode / predialing mode /
Redial list / Call List / Phonebook
entry: Press to make a call with
speakerphone.
During ringing: Press to answer a
call with speakerphone.
E PHONEBOOK
In idle mode: Press to access the
phonebook list.
F MICROPHONE
G EARPIECE
H U P
In idle mode: Press to access the call list
In menu mode: Press to scroll up the
menu items.
In Phonebook list / Redial list / Call
List: Press to scroll up the list.
During a call: Press to increase the
volume.
In ringing: Press to increase the ringer
volume.
I RIGHT SOFT KEY (CLEAR/
BACK/MUTE/INTERCOM)
In main menu mode: Press to go
back to idle screen.
In sub-menu mode: Press to go back
to previous level.
In sub-menu mode: Press and hold
to go back to idle screen.
A
G
H
I
J
K
L
B
C
D
E
F
GETTING TO KNOW YOUR PHONE ______
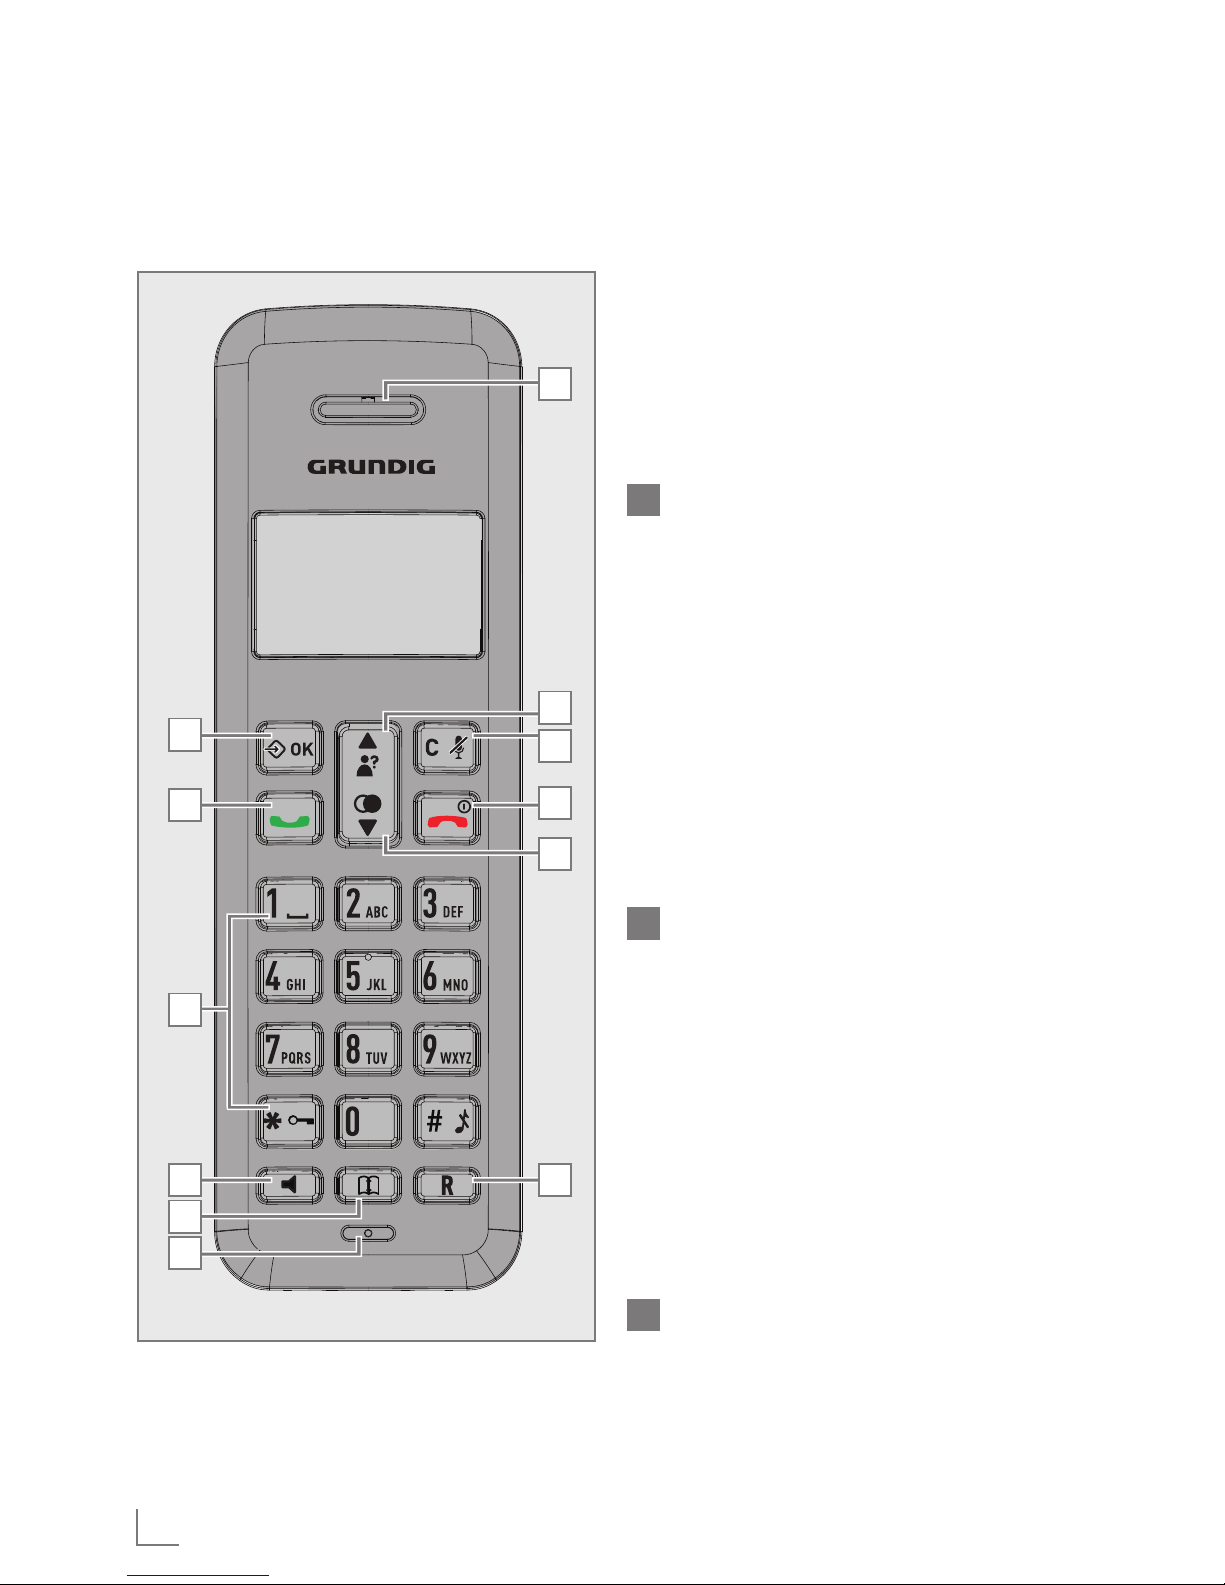
ENGLISH
8
A
G
H
I
J
K
L
B
C
D
E
F
GETTING TO KNOW YOUR PHONE ______
In editing / predialing mode: Press
to clear a character / digit.
In editing / predialing mode: Press
and hold to delete all the charac-
ters / digits.
During a call: Press to mute / un-
mute the microphone.
In idle mode: Press to intercom an-
other handset.
J TALK OFF
During a call: Press to end a call
and go back to idle screen.
In menu / editing mode: Press to go
back to previous menu.
In menu / editing mode: Press and
hold to go back to idle screen.
In idle mode: Press and hold to
power off the handset.
In idle mode (when the handset
is powered off): Press and hold to
power on the handset.
K DOWN
In idle mode: Press to access the
redial list.
In menu mode: Press to scroll down
the menu items.
In Phonebook list / Redial list / Call
List: Press to scroll down the list.
During a call: Press to decrease the
volume.
In ringing: Press to decrease the
ringer volume.
L FLASH
In idle / predialing mode: Press to
insert a flash.
During a call: Press to dial a flash.

ENGLISH
9
Display Icons and Symbols
Scroll up / down the menu items
/ Phonebook list / Redial list /
Call List
Steady when the handset is in
range of the base. Flash when out
of range of the base or not regis-
tered to the base.
Steady when an intercom is in
progress. Flash when there is an
incoming internal call.
Indicate a call is in progress.
Indicate that handsfree is being
used. (for speakerphone model
only)
Indicate that the ringer is switched
off.
Steady when an alarm is set. Flash
when the alarm time set before
reaches.
Indicate that the keypad is locked.
Indicate when the battery is fully
charged. Whole icon flashes when
the battery performs initial charg-
ing. Internal block icon flashes
when the battery is in final charg-
ing stage.
Indicate when the battery needs
charging. Flash when low battery
power level is detected.
Indicate when more characters are
existed before the text currently
displayed.
Indicate when more characters
are existed after the text currently
displayed.
Press to select more menu options
if applicable
Press to confirm the current selec-
tion if applicable.
Press to conduct Intercom call
when idle
Press to go back to previous menu
level or cancel the current action if
applicable
Press to clear a character or stop
the alarm if applicable, press to
mute / unmute during a call.
GETTING TO KNOW YOUR PHONE ______

ENGLISH
10
GETTING TO KNOW YOUR PHONE ______
Menu Structure
In idle mode, press »« will firstly access the Call List menu. Refer to the follow-
ing for the menu structure.
UP /
DOWN
Key Press Main Menu Sub Menu
MENU
CALL LIST Review Call List
Under a selected Call List entry:
ADD TO PB
DELETE
DELETE ALL
DETAILS
PHONEBOOK Review phonebook list
Under a phonebook entry:
ADD
VIEW
EDIT
DELETE
DELETE ALL
BS SETTINGS PB STATUS BS RINGER (Optional)
RING VOLUME (Optional)
DELETE HS
DIAL MODE
FLASH TIME
CHANGE PIN
HS SETTINGS ALARM
RING SETUP
TONE SETUP
LANGUAGE
RENAME HS
HS DISPLAY
AUTO ANSWER
DATE & TIME
REGISTRATION PIN?
DEFAULT PIN?
Other manuals for GDT 310
1
Table of contents
Other Grundig IP Phone manuals


