2
General Work Products LLC | 6000 Jefferson Hwy | Harahan, LA 70123 www.PalmerSafetyUS.com
•Fall Protection •Training •Netting •PPE
IMPORTANT:
Do not skip this instruction manual. Read the instruction manual carefully before using the equipment. Failure to do so
may cause serious injury or death. These instructions serve as the Manufacturer’s Instructions and are to be used as part
of an employee training program for the system, as required by OSHA.
Table of Contents
Overview........................................................................................................................................................2
Safety Standards ............................................................................................................................................2
Worker Denitions.........................................................................................................................................3
Applications ...................................................................................................................................................3
Limits ......................................................................................................................................................... 4-5
Components and Specications .....................................................................................................................6
Notes ..............................................................................................................................................................7
Installation and Use .......................................................................................................................................8
Maintenance, Cleaning, and Storage .............................................................................................................9
Inspection.......................................................................................................................................................9
Inspection Log .............................................................................................................................................10
Safety Information .......................................................................................................................................10
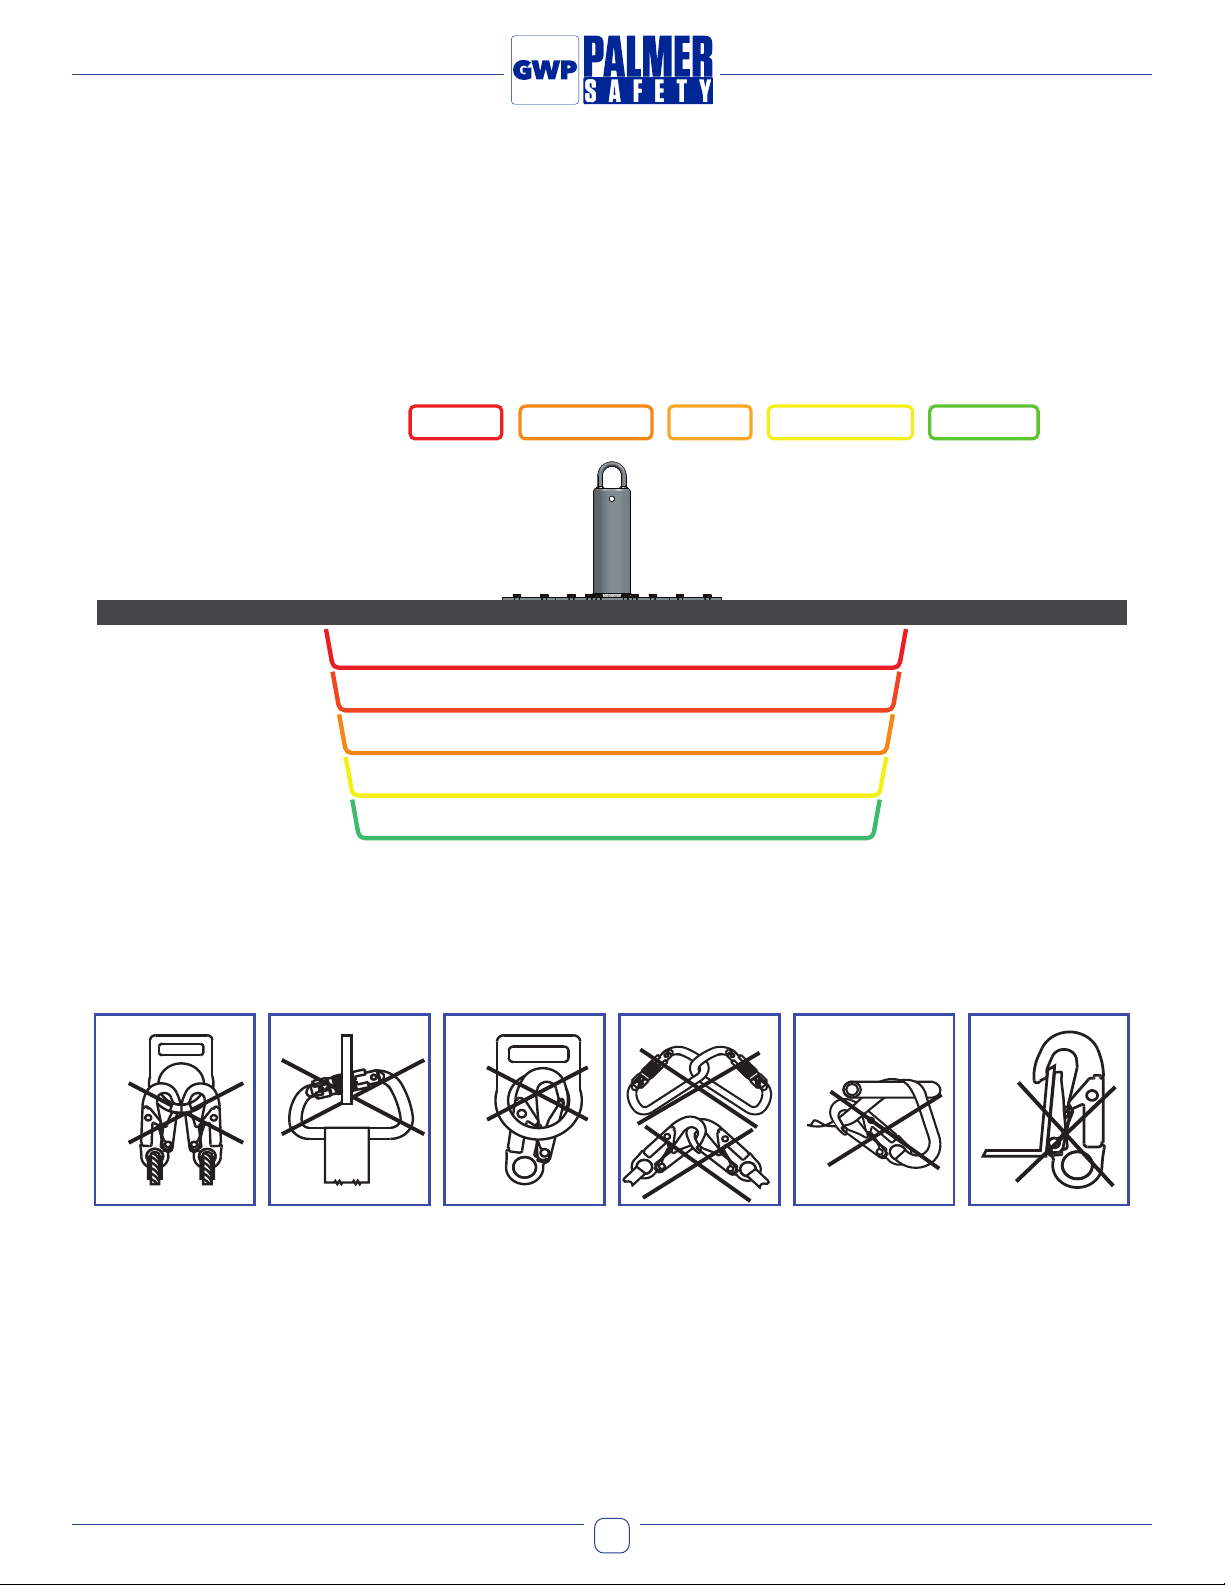
Overview
You have just purchased your very own Palmer Safety Fall Protection Roof Ridge Anchor. This manual must be read and
understood in its entirety, whereas any specied training course on fall protection can be utilized to provide the necessary
knowledge.
All of these instructions need to be made available to the user of the equipment. The user needs to understand how the
Roof Ridge Anchor works and how to use it safely. They also need a basic understanding of fall safety equipment used in
combination with the Roof Ridge Anchor, such as harnesses and lanyards.
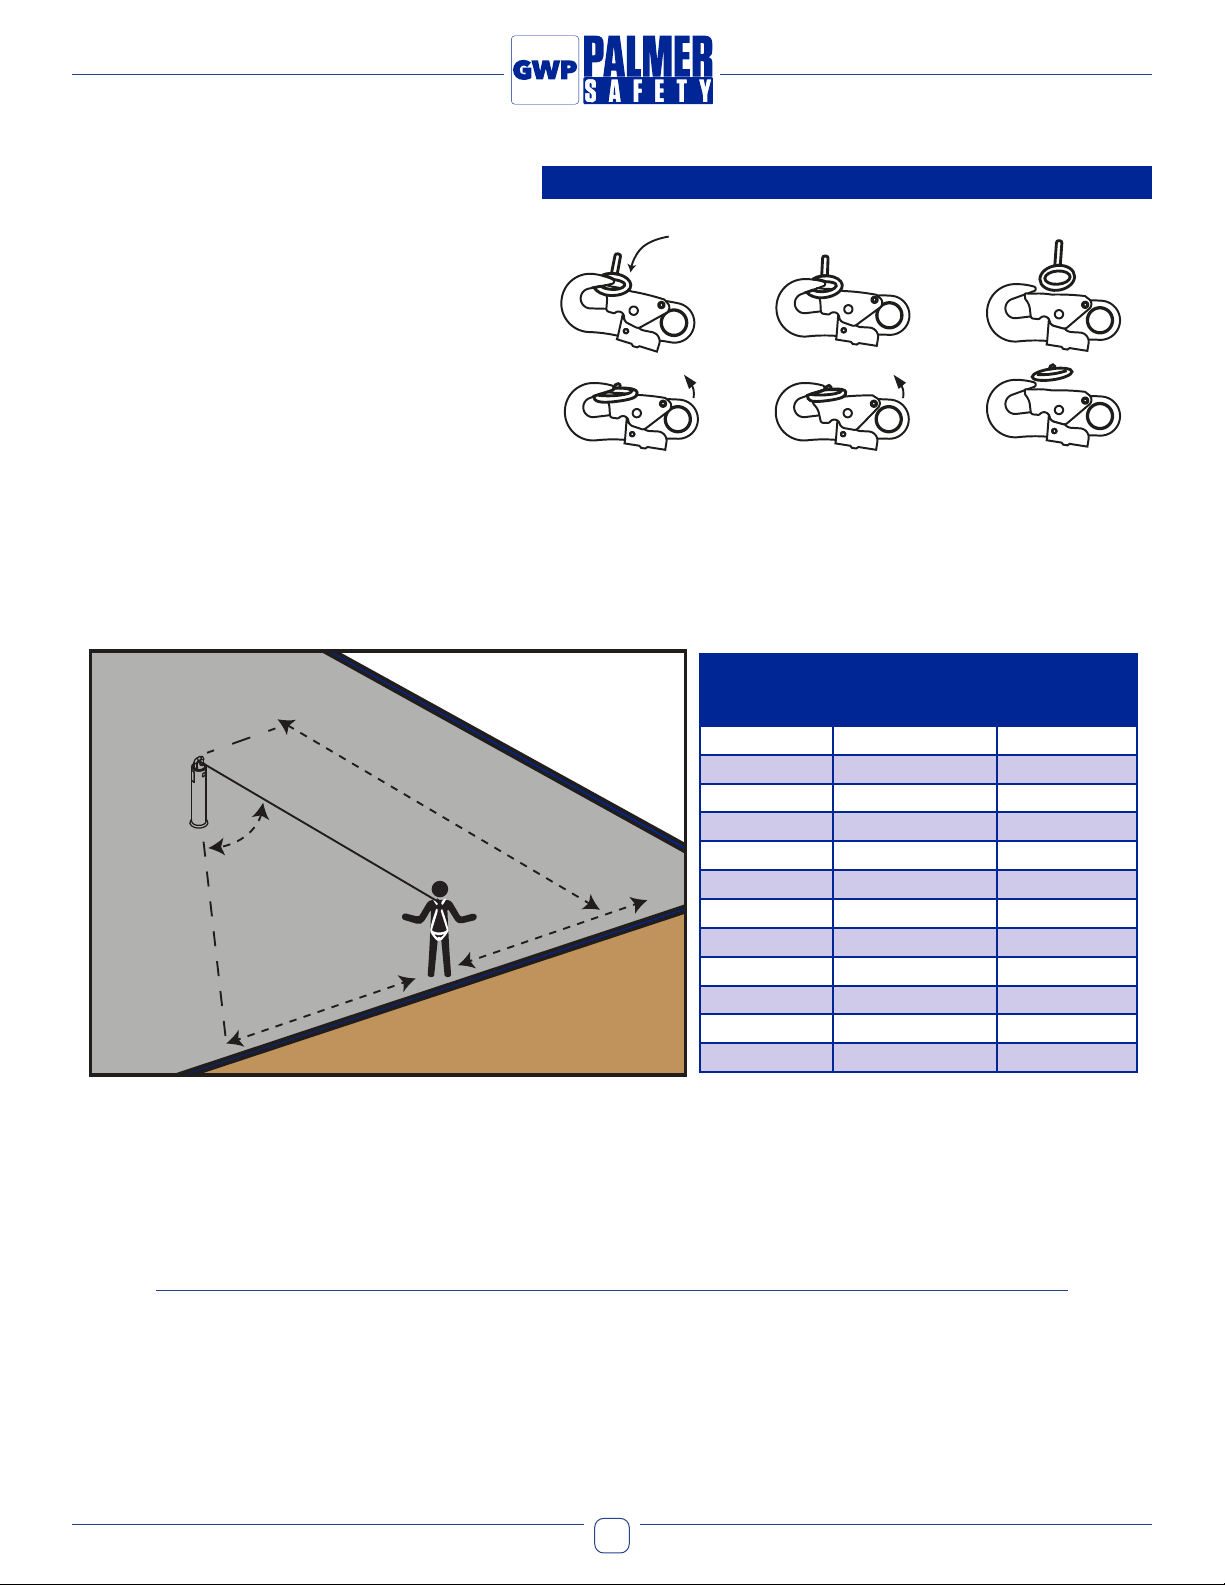
Safety Standards
All applicable OSHA 1926 Subpart M construction standard, OSHA 1910 general industrial standards for fall protection
are followed when this product is used as instructed. Standards are regulated depending on the type of work being done.
You can review all regulations at regulatory agencies for more information on fall protection systems, including any of the
state-specic regulations.