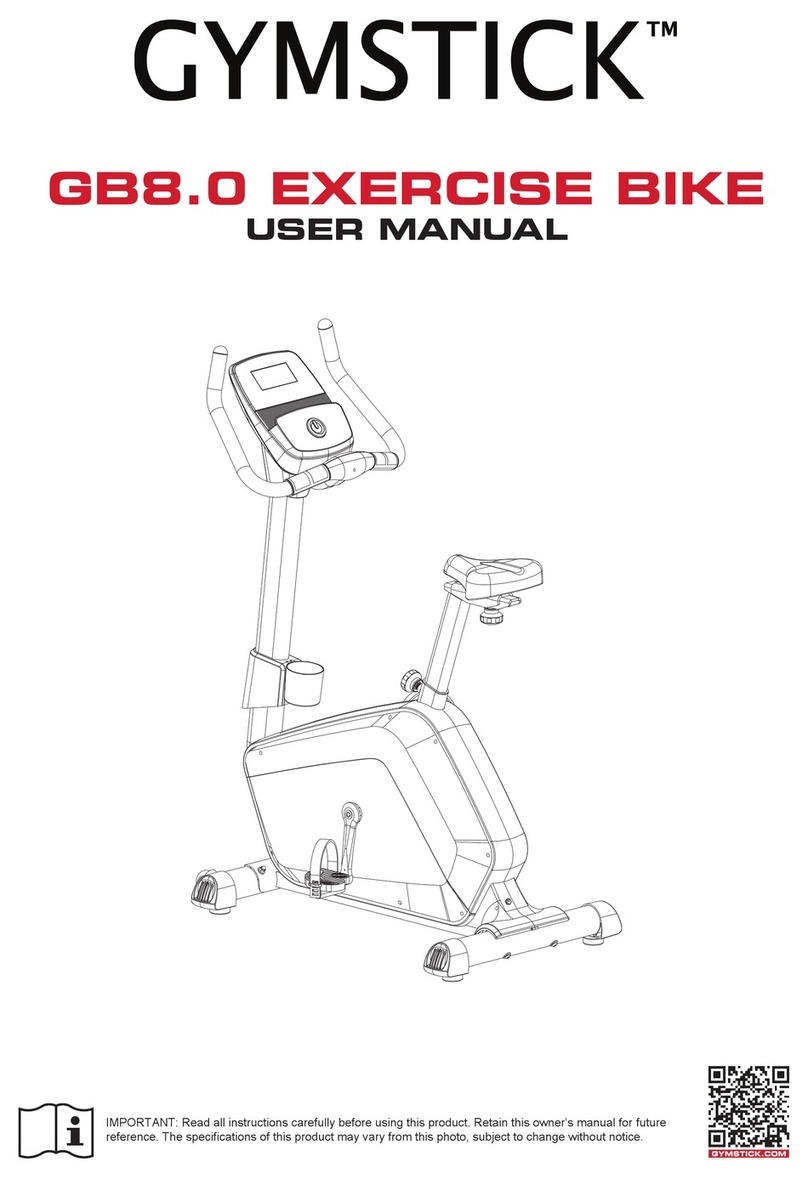
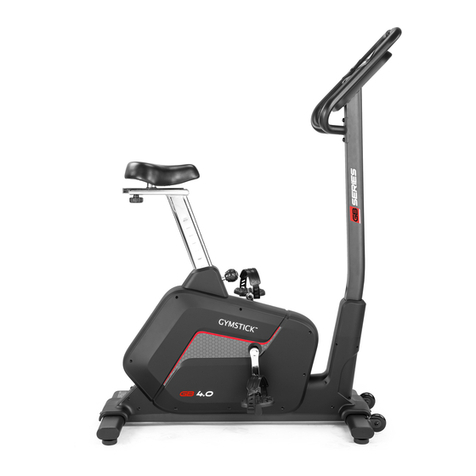
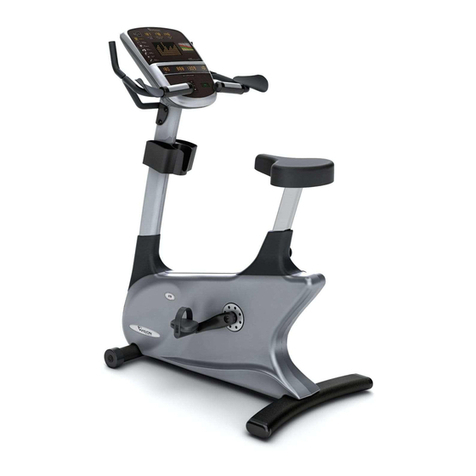
Gymstick GB6.0 User manual

GB6.0 EXERCISE BIKE
USER MANUAL
IMPORTANT: Read all instructions carefully before using this product. Retain this owner’s manual for future
reference. The specications of this product may vary from this photo, subject to change without notice.

2GB6.0 EXERCISE BIKE
BEFORE YOU BEGIN
Thank you for choosing the Gymstick GB6.0 Exercise Bike. We take great pride in producing this
quality product and hope it will provide many hours of eective exercise to make you feel better,
look better and enjoy life to its fullest.
TABLE OF CONTENT
1. SAFETY INSTRUCTIONS...................................................................................................3
2. EXPLODED DRAWING....................................................................................................... 4
3. PARTS LIST.........................................................................................................................6
4. HARDWARE PACKING LIST...............................................................................................8
5. ASSEMBLY INSTRUCTIONS..............................................................................................9
6. MOVING THE MACHINE.................................................................................................... 13
7. ADJUSTMENTS GUIDE......................................................................................................13
8. CONSOLE OPERATION INSTRUCTIONS..........................................................................14
9. WARM UP AND COOL DOWN ROUTINE...........................................................................18
10. IMPLIED WARRANTY......................................................................................................... 21
READ AND FOLLOW THE SAFETY INSTRUCTIONS. FAILURE TO FOLLOW THESE INSTRUCTIONS
CAN RESULT IN SERIOUS INJURY.
!
NOTIFICATION!

3GB6.0 EXERCISE BIKE
!
WARNING!
SAFETY INSTRUCTIONS
Basic precautions should always be followed, including the following safety instructions when using
this equipment: Read all instructions before using this equipment.
1. Keep children and pets away from the machine at all times. DO NOT leave unattended children in the
same room with the machine.
2. Handicapped or disabled persons should not use the machine without the presence of a qualied health
professional or physician.
3. If the user experiences dizziness, nausea, chest pain, or any other abnormal symptoms, STOP the
workout at once. CONSULT A PHYSICIAN IMMEDIATELY.
4. Before beginning training, remove all within a radius of 2 meters from the machine. DO NOT place any
sharp objects around the device.
5. Position the machine on a clear, level surface away from water and moisture. Place mat under the unit to
help keep the machine stable and to protect the oor.
6. Use the machine only for its intended use as described in this manual. DO NOT use any other
accessories not recommended by the manufacturer.
7. Assemble the machine exactly as the descriptions in the instruction manual.
8. Check all bolts and other connections before using the machine for the rst time and ensure that the
trainer is in the safe condition.
9. Hold a routine inspection of the equipment. Pay special attention to components which are the most
susceptible to wear o, i.e. connecting points and wheels. The defective components should be replaced
immediately. The safety level of this equipment can only be maintained by doing so.
10. NEVER operate the machine if it is not functioning properly.
11. This machine can be used for only one person’s training at a time.
12. Do not use abrasive cleaning articles to clean the machine. Remove drops of sweat from the machine
immediately after nishing training.
13. Always wear appropriate workout clothing when exercising. Running or aerobic shoes are also required.
14. Before exercising, always do warm-up and stretching rst.
15. Maximum user weight 120 kgs.
BEFORE BEGINNING THIS OR ANY EXERCISE PROGRAM, CONSULT YOUR PHYSICIAN FIRST.
THIS IS ESPECIALLY IMPORTANT FOR INDIVIDUALS OVER THE AGE OF 35 OR PERSONS WITH
PRE-EXISTING HEALTH PROBLEMS.

4GB6.0 EXERCISE BIKE
EXPLODED DRAWING
1
1a
1b
2
3
4
8
9
10
10
10
11
11
12
12
11
12
13 14
15
16 16
17
18
19
19
20
21
22 22
21
23
23
24
25
26
20
14
27
28
29
30
30
31
32
33
33
34
35
36
37
38
39
40
41
42
43
44
44
46
10 11
48
10
47
11 12
10
11
12
49
11
12
49
11
12
50L
50R
52
53
49
1112
49 11 12
6
7
44
44
33
33
33
33
34
34
34
34
34
51
45
5

5GB6.0 EXERCISE BIKE
EXPLODED DRAWING
57
57
58
58
59
60
61
62
33
33
33
33
33
33
34
34
34
34
34
34
63
63
64
64
65
65
66
66
67 68
69
70
71
71
72
72
73
7475
76
77
78
79
80 81 82
82
83
84
85
86
87 88
89
90
91
91
46
34
93
94
95
96
97
63 64
98
92
54
55
56
4
99

6GB6.0 EXERCISE BIKE
PARTS LIST
No. Description Qty.
1 Computer 1
2 Handlebar post 1
3 Trunk wire 1 1
4 Bolt M5*12 4
5 Adapter 1
6 End cap L 1
7 End cap R 1
8Handlebar connecting join 1
9 Pulse trunk wire 2
10 Bolt M8*20*S5 9
11 Spring washer D8 17
12 Washer d8*φ20*2 15
13 Knob M8*60*20 1
14 Grip foam 2
15 Handlebar 1
16 Round end cap 2
17 Elbow Pad L 1
18 Elbow Pad R 1
19 Bolt M6*16*S5 4
20 Arc Washer d6*φ16*1.5*R16 4
21 Lower pulse plate 2
22 Upper pulse plate 2
23 Bolt ST3*25*φ5 4
24 Lower pulse cover 1
25 Upper pulse cover 1
26 Handle pulse wire 2
27 Saddle 1
28 Saddle plate 1
29 Saddle tube 1
30 Elliptical end cap 2
31 Cover of Saddle plate R 1
No. Description Qty.
32 Cover of Saddle plate L 1
33 Bolt ST4.2*14*φ8 16
34 Bolt ST4.2*19*φ8 13
35 Spring Washer d12*φ24*2 1
36 Knob 1
37 Saddle tube cover 1
38 Bushing 1
39 Knob 1
40 Handlebar post cover 1
41 Front Stabilizer 1
42 End cap with transportation wheel R 1
43 End cap with transportation wheel L 1
44 Bolt ST4.2*25*φ10.5 4
45 End cap 1
46 Sensor 1
47 Main Frame 1
48 Arc washer d8*φ20*2.0*R30 2
49 Bolt M8*20*S13 8
50L/R Pedal L/R 1
51 Rear Stabilizer 1
52 Front cover L 1
53 Front cover R 1
54 Trunk wire 2 1
55 Resistance control cable 1
56 Motor 1
57 End cap 2
58 Nut M10*1.25 2
59 Crank L 1
60 Crank R 1
61 Chain cover L 1
62 Chain cover R 1

7GB6.0 EXERCISE BIKE
PARTS LIST
No. Description Qty.
63 Bolt M6*16*S10 6
64 Spring Washer d6 6
65 Washer d6*φ12*1 2
66 Washer d12 2
67 Axle of Magnetic plate 1
68 Magnetic plate 1
69 Tension spring φ1.5*φ15*47*12 1
70 Square magnet 1
71 Nut M10*1*H8*S15 2
72 Screws 2
73 Washer d10*φ20*2 1
74 Nut M10*1*H5*S17 1
75 End cap 1
76 Wave washer d10*φ15*0.3 1
77 Flywheel 1
78 Axle 1
79 Nut M10*1.0*H5*S17 1
80 Bolt M6*10*S10 1
81 Washer d6*φ16*1.5 1
82 Bearing 6001 2
No. Description Qty.
83 Idler 1
84 Wave Washer d12*φ15.5 1
85 Bolt M8*12 1
86 Washer d12*φ17 1
87 Idler rod 1
88 Nylon Nut M8*H7.5*S13 1
89 Tension spring φ2.0*φ12.2*62*20 1
90 Washer d17 1
91 Bearing 6203 2
92 Nylon nut M6*H6*S10 4
93 Bushing 1
94 Wave Washer d17*φ22 1
95 Belt 1
96 Round magnet 1
97 Belt plate 1
98 Middle axle 1
99 Adapter Trunk wire 1
A Wrench S5 1
BSpanner S13-14-15 1

8GB6.0 EXERCISE BIKE
HARDWARE PACKING LIST
#B S13-14-15 1PC
#A S5 1PC
#13 M8*60*20 1PC
#39 M16*1.5*24*φ56 1PC
#33 ST4.2×14×Ф8 2PCS
#34 ST4.2x19xФ8 1PC

9GB6.0 EXERCISE BIKE
ASSEMBLY INSTRUCTIONS
STEP 1.
Remove Bolts (49), Spring Washers (11), and Washers (12) from Front Stabilizer (41) and Rear
Stabilizer (51) using Spanner (B).
Attach Front Stabilizer (41) and Rear Stabilizer (51) to Main Frame (47) using Bolts (49), Spring
Washers (11), and Washers (12) that were removed. Tighten and secure with Spanner (B).
Tighten and secure the Left & Right Pedals (50L/R) on the Crank (59&60) with Spanner (B).
49
11
12
11
12
49
1112
49 11 12
41
47
49
51
50L
50R
#B S13-14-15 1PC
59
60
#49 M8*20*S13 8PCS
#11 d8 8PCS
#12 d8*φ20*2 8PCS

10GB6.0 EXERCISE BIKE
STEP 2.
Insert Handlebar post cover(40) to Handlebar post (2).
Connect Trunk Wire 1 (3) with Trunk wire 2 (46) as shown in picture A.
Remove Bolts (10), Spring Washers (11), Washers (12) and Arc Washers (48) from Main Frame
(47). Then attach Handlebar Post (2) to Main Frame (47) with Bolts (10), Spring Washers (11),
Washers (12) and Arc Washers (48) that were removed by Wrench (A).
Fix Handlebar Post Cover (40) to Front Cover (52&53).
10 11 48
10 1112
10
11
12
3
46
40
2
47
52
53
#A S5 1PC
#10 M8*20*S5 6PCS
#11 d8 6PCS
#12 d8*φ20*2 4PCS
#48 d8*Φ20*2*R30 2PCS
A
3
46
ASSEMBLY INSTRUCTIONS

11GB6.0 EXERCISE BIKE
ASSEMBLY INSTRUCTIONS
STEP 3.
Pull out Pulse Trunk Wire (9) from Handlebar Post (2).
Remove Bolts (10), Spring Washers (11) and Washers (12) from Handlebar Post (2) with Wrench
(A), then attach Handlebar Connecting Join (8) to Handlebar Post (2) with Bolts (10), Spring
Washers (11) and Washers (12) that were removed.
Fix Handlebar (15) to Handlebar Connecting Join (8) with Knob (13).
Connect Handle Pulse Wire (26) with Pulse Trunk Wire (9). Fix Upper Pulse Cover and Lower
Pulse Cover (24&25) to Handlebar (15).
Connect Pulse Trunk Wire (9) with Computer Wire (1b) and Connect Trunk Wire 1 (3) with
Computer Wire (1A).
Fix Computer (1) to Handlebar Post (2) with Bolts (4) using Spanner (B).
8
9
10
10
10
11
11
12
12
11
13
12
2
3
4
#A S5 1PC
15
26
24
25
1a 1b
1
A
3
92
8
15
25
24
13
1a
3
1b
9
B
#10 M8*20*S5 3PCS
#11 d8 3PCS
#12 d8*φ20*2 3PCS
#13 M8*60*20 1PC
#B S13-14-15 1PC
#4 M5*12 4PCS

12GB6.0 EXERCISE BIKE
ASSEMBLY INSTRUCTIONS
STEP 4.
Insert Saddle Tube Cover (37) to Main Frame (47). Attach Saddle Tube (29) to Main Frame (47)
with Knob (39).
Remove Knob (36) and Washer (35) from Saddle Plate (28). Fix Saddle Plate (28) to Saddle Tube
(29) with Knob (36) and Washer (35) that were removed.
Attach Saddle (27) to Saddle Plate (28) using Spanner (A).
Fix Cover of Saddle Plate (31&32) to Saddle Tube (29) with Bolts (33+34) using Spanner (A).
Insert Adapter Line (5) to power hole on the back of Main Frame (47), then plug the adapter into an
outlet.
The assembly is complete.
27
28
29
31
32
33
33
34
35
36
37
39
47
#33 ST4.2×14×Ф8 2PCS
#34 ST4.2x19xФ8 1PC
#35 d12*φ24*2 1PC
#36 M12*37*15*φ58 1PC
#39 M16*1.5*24*φ56 1PC
5
47

13GB6.0 EXERCISE BIKE
MOVING THE MACHINE
ADJUSTMENTS GUIDE
To move the machine, push the Handlebar Join (15) until the Transportation Wheels (42&43) on the
Front Stabilizer touch the ground. With the wheels on the ground, you can transport the bike to the
desired location with ease.
ADJUSTING THE BALANCE
When this product is on an uneven surface, please adjust both
foot pads on End Cap (6&7) according to the instruction picture.
ADJUSTING THE HANDLEBAR
Unlock the Knob (13), then adjust the angle of Handlebar (15) to
an available position according to the instruction picture.
ADJUSTING THE SATTLE
Rotate Knob (39) counter-clockwise to adjust the height
according to holes on Saddle Tube (29). Rotate Knob (36)
counter-clockwise to adjust the horizontal distance according to
the arrows on Saddle Plate (28).
15
43
6
13
15
36
39
29
28
27

14GB6.0 EXERCISE BIKE
CONSOLE OPERATION INSTRUCTIONS
I. Button Functions
II. Display Functions
START/STOP Start or stop workout.
RESET In stop mode, press this button to go back to main menu.
Hold this button for 2 seconds, the console will reboot.
UP (+) 1. Select workout.
2. Increase function setting value.
MODE In stop mode, press this button to conrm setting and enter program.
In running mode, it is invalid to press this button.
DOWN (-) 1. Select workout.
2. Decrease function setting value.
RECOVERY Test heart rate recovery status.
BODY FAT Test body fat.
TIME Display range 0:00 ~ 99:99; Setting range 5:00 ~ 99:00 minutes
DISTANCE Display range 0 ~ 99.99; Setting range 1.00 ~ 99.90 KM
CALORIES Display range 0 ~ 9999; Setting range 100 ~ 9900 Calorie
PULSE Display range P-30 ~ 230; Setting range 0-50 ~ 220
WATT Display range 0 ~ 999 watt; Setting range 10 ~ 350watt
SPEED 0.0 ~ 99.9 KM/H
RPM 0 ~ 999
BODY FAT BODY FAT

15GB6.0 EXERCISE BIKE
CONSOLE OPERATION INSTRUCTIONS
III. Operation
1. Install batteries (or press RESET KEY for 2 seconds), the BUZZER beep sound, and LCD full display 2
seconds (Figure 1). Then display wheel diameter, KM or ML, and Fat symbol “E” for 1 second (Figure 2).
The console will go to Standby mode (Figure 3). At this point, the motor reverses to Load 1.
2. In standby mode (Figure 3), press MODE/ENTER button to select mode:
MANUAL→P01→P02→P03→P04→P05→P06→P07→P08→P09→P10→
P11→P12→P13→P14→P15→P16→P17 (recyclable).
Figure 1. Figure 2. Figure 3.
Figure 4.
Figure 6.
Figure 5.
3. If user chooses “MANUAL” mode, press “MODE” button directly and go to “TIME” setting. Rotate knob
UP(+) /DOWN (-) to adjust value, then press “MODE". Go to next setting: set “Distance/ Calorie”
(Figure 5). After setting, press “START/STOP” button, console start to exercise and calculate.
Rotate knob UP (+) /DOWN (-)to adjust LOAD level.
4. P01 mode (Figure 6)- In any mode, user can press “START/STOP”button and then“RESET”button to go
back to main menu. “MANUAL” is ashing, rotate knob UP (+) once, go to “P01”mode, set target “TIME”,
rotate knob UP (+) /DOWN (-) to adjust the value or directly press START to start exercise. When the TIME
counts down to 0:00, system stop exercising automatically. User can also press “START/STOP” to stop
during workout.
5. The operation procedure of P02~P12 is same as P01.

16GB6.0 EXERCISE BIKE
CONSOLE OPERATION INSTRUCTIONS
6. P13 -P16 mode (H.R.C function) (Figure 7)- In any mode, user can press “START/STOP”button
and then“RESET”button to go back to main menu. “MANUAL” is ashing, rotate knob UP (+) to select
P13“H.R.C” mode. Press MODE to conrm and go to next step, rotate knob UP (+) /DOWN (-) to set target
“TIME”, press “MODE” to conrm and then set “AGE” (“HRC AGE SET”, setting range 10-99), press MODE
again to conrm and go to next step. Come to H.R.C TAG SET, rotate knob UP (+) /DOWN (-) , setting
range:0-50~220. After setting, press “START/STOP” Button, console start to exercise and calculate. User
also can press START to do exercise directly when entering this mode initially HRC (P13-P16). When the
TIME counts down to 0:00, system will remind with beep sound.
7. P17 mode (WATT function) (Figure 8) - In any mode, user can press “START/STOP” button and
then“RESET”button to go back to main menu. “MANUAL” is ashing, rotate knob UP (+) to select and
enter P17“WATT” mode. Press MODE to conrm and go to WATT setting. Rotate knob UP (+) /DOWN (-)
to set target TIME(1~99 minutes) and conrm by MODE button. Then set target WATT (range 10~350,
default=120), press MODE to conrm. Press START to start exercise; System will auto-adjust load level
based on target WATT value user input (Figure 9). Rotate knob UP(+)/DOWN(-) to adjust WATT value.
Figure 7.
Figure 8. Figure 9.
BEGINNER 1 BEGINNER 2 BEGINNER 3 BEGINNER 4
ADVANCE 1 ADVANCE 2
ADVANCE 3 ADVANCE 4
SPORTY 1SPORTY 2 SPORTY 3 SPORTY 4
PROGRAM DIAGRAM

17GB6.0 EXERCISE BIKE
8. RECOVERY function:
(1) Without PULSE input, it is invalid to press this button.
(2) With PULSE value displayed, press this key.
i. Only “TIME” and “PULSE” display, all other functions are disable (Figure 10).
ii. TIME window display "0:60" and start counting down (no matter pulse input or disappear prior to
TIME counting down to 0 ), PULSE will show actual heart rate. After counting down to 0:00, it shows
"FX"(X=1....6), and sound “bibi”. Press RECOVERY to reverse back to main menu.
(3) During RECOVERY function, user can press RECOVERY button to stop measure and go back to
previous page.
Figure 10.
CONSOLE OPERATION INSTRUCTIONS
9. BLUETOOTH FUNCTION
This device is equipped with an integrated Bluetooth® connectivity which allows it to work with Bluetooth®
heart rate chest belts and interactive applications such as KinoMap and Swift.
Heart Rate chest belt (not included)
a) Put on your Bluetooth heart rate chest belt.
b) If equipped, press the ON/OFF button to activate the belt. The console searches automatically for
devices nearby, and will connect to the belt when in range.
c) Your heart rate will be seen on the pulse window. You are ready to workout.
a) Download Kinomap APP from AppStore (iOS) or Google Play (Android).
b) Enable bluetooth from your phone or tablet settings.
c) Run the Kinomap APP.
d) Go to the “More” menu and tap on “Equipment management”. Tap on the “+” button.
e) Follow the instructions on the APP to complete the connection.
USB Charging
This console has a built-in USB Port which enables charging many USB Devices.
Please note! charging increases the power consumption and the power supplied from the USB port may not
be enough to operate the device and charge it at the same time. Use supplied adapter (9V 1.3A).

18GB6.0 EXERCISE BIKE
WARM UP AND COOL DOWN ROUTINE
A good exercise program consists of a warm-up, aerobic exercise, and a cool down. Do the entire program
at least two to three times a week, resting for a day between workouts. After several months you can increa-
se your workouts to four or ve times per week.
AEROBIC EXERCISE is any sustained activity that sends oxygen to your muscles via your heart and lungs.
Aerobic exercise improves the tness of your lungs and heart. Aerobic tness is promoted by any activity
that uses your large muscles eg: legs, arms and buttocks. Your heart beats quickly and you breathe deeply.
An aerobic exercise should be part of your entire exercise routine.
The WARM-UP is an important part of any workout. It should begin every session to prepare your body for
more strenuous exercise by heating up and stretching your muscles, increasing your circulation and pulse
rate, and delivering more oxygen to your muscles. ‘
COOL DOWN at the end of your workout, repeat these exercises to reduce soreness in tired muscles.
HEAD ROLLS
Rotate your head to the right for one count, feeling
the stretch up the left side of your neck, then rotate
your head back for one count, stretching your chin
to the ceiling and letting your mouth open. Rotate
your head to the left for one count, then drop your
head to your chest for one count.
SHOULDER LIFTS
Lift your right shoulder toward your ear for one
count. Then lift your left shoulder up for one count
as you lower your right shoulder.

19GB6.0 EXERCISE BIKE
SIDE STRETCHES
Open your arms to the side and lift them until they
are over your head. Reach your right arm as far
toward the ceiling as you can for one count. Repeat
this action with your left arm.
QUADRICEPS STRETCH
With one hand against a wall for balance, reach
behind you and pull your right foot up. Bring your
heel as close to your buttocks as possible. Hold for
15 counts and repeat with left foot.
INNER THIGH STRETCH
Sit with the soles of your feet together and your
knees pointing outward. Pull your feet as close to
your groin as possible. Gently push your knees
toward the floor. Hold for 15 counts.

20GB6.0 EXERCISE BIKE
HAMSTRING STRETCHES
Extend your right leg. Rest the sole of your
left foot against your right inner thigh. Stretch
toward your toe as far as possible. Hold for
15 counts. Relax and then repeat with left
leg.
CALF/ACHILLES STRETCH
Lean against a wall with your left leg in front of the
right and your arms forward. Keep your right leg
straight and the left foot on the floor; then bend the
left leg and lean forward by moving your hips
toward the wall. Hold, then repeat on the other
side for 15 counts.
TOE TOUCHES
Slowly bend forward from your waist, letting your
back and shoulders relax as you stretch toward your
toes. Reach as far as you can and hold for 15
counts.
Table of contents
Other Gymstick Exercise Bike manuals

Gymstick
Gymstick GB4.0 User manual

Gymstick
Gymstick CRANK BIKE X4 User manual

Gymstick
Gymstick 6100 User manual

Gymstick
Gymstick PRO20.0 User manual

Gymstick
Gymstick PRO20.0 User manual

Gymstick
Gymstick PRO FTR User manual

Gymstick
Gymstick VAPOR BIKE 10.0 User manual

Gymstick
Gymstick FTR7 INDOOR RACER User manual

Gymstick
Gymstick GB8.0 User manual

Gymstick
Gymstick AIR BIKE PRO User manual