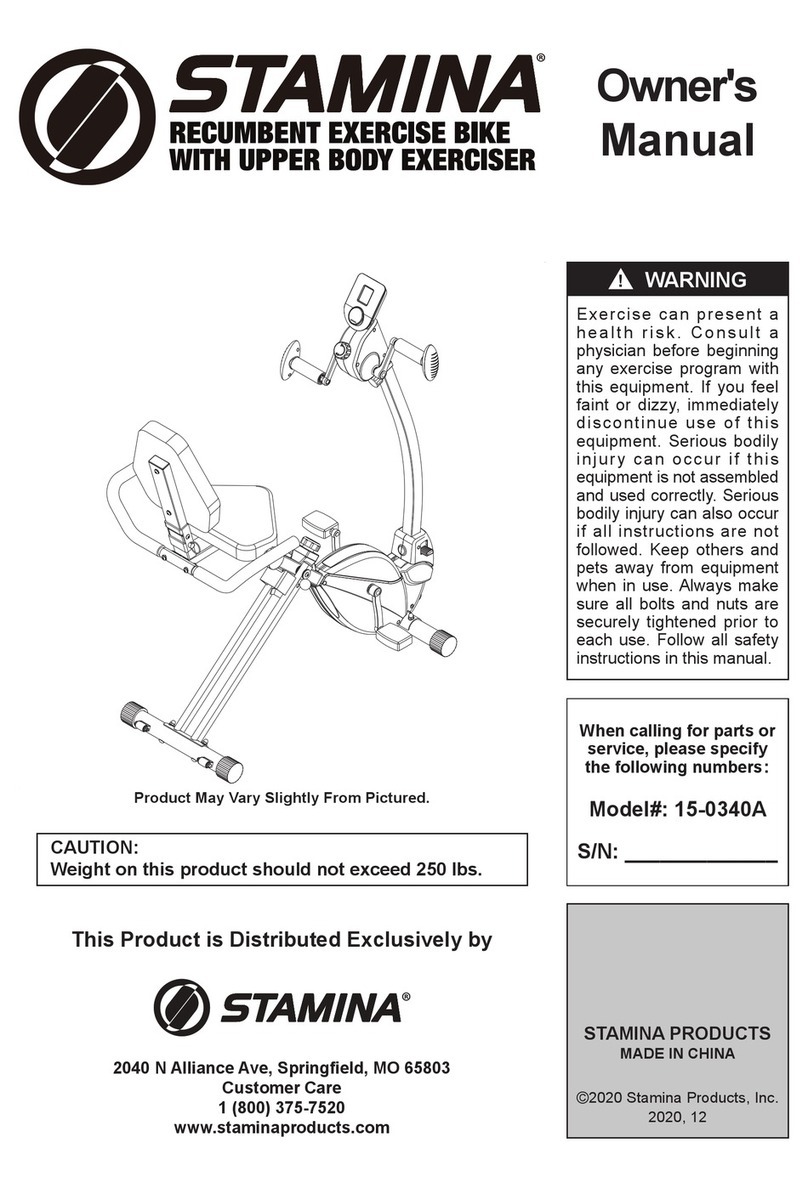
Gymstick GB8.0 User manual

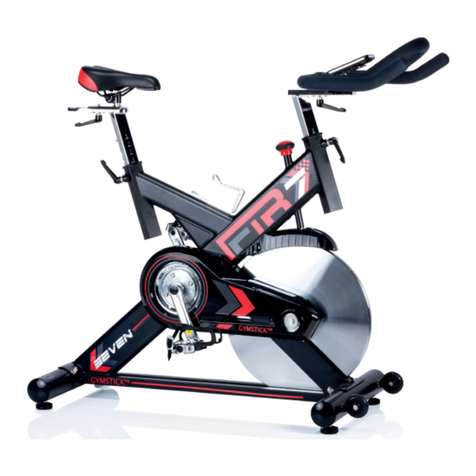
GB8.0 EXERCISE BIKE
USER MANUAL
IMPORTANT: Read all instructions carefully before using this product. Retain this owner’s manual for future
reference. The specications of this product may vary from this photo, subject to change without notice.

2GB8.0 EXERCISE BIKE
BEFORE YOU BEGIN
Thank you for choosing the Gymstick GB8.0 Exercise Bike. We take great pride in producing this
quality product and hope it will provide many hours of eective exercise to make you feel better,
look better and enjoy life to its fullest.
TABLE OF CONTENT
1. SAFETY INSTRUCTIONS ................................................................................................ 3
2. PARTS LIST ....................................................................................................................... 4
3. HARDWARE PACKING LIST ............................................................................................ 5
4. EXPLODED DRAWING .................................................................................................... 6
5. ASSEMBLY INSTRUCTION ............................................................................................. 7
6. COMPUTER OPERATION INSTRUCTIONS .................................................................... 12
7. MAINTENANCE ................................................................................................................ 18
8 TROUBLESHOOTING ...................................................................................................... 18
9. WARM UP AND COOL DOWN ROUTINE ........................................................................ 19
10. IMPLIED WARRANTY ....................................................................................................... 22
READ AND FOLLOW THE SAFETY INSTRUCTIONS. FAILURE TO FOLLOW THESE INSTRUCTIONS
CAN RESULT IN SERIOUS INJURY.
!
NOTIFICATION!

3GB8.0 EXERCISE BIKE
!
WARNING!
SAFETY INSTRUCTIONS
Basic precautions should always be followed, including the following safety instructions when using
this equipment: Read all instructions before using this equipment.
1. Keep children and pets away from the machine at all times. DO NOT leave unattended children in the
same room with the machine.
2. Handicapped or disabled persons should not use the machine without the presence of a qualied health
professional or physician.
3. If the user experiences dizziness, nausea, chest pain, or any other abnormal symptoms, STOP the
workout at once. CONSULT A PHYSICIAN IMMEDIATELY.
4. Before beginning training, remove all within a radius of 2 meters from the machine. DO NOT place any
sharp objects around the device.
5. Position the machine on a clear, level surface away from water and moisture. Place mat under the unit to
help keep the machine stable and to protect the oor.
6. Use the machine only for its intended use as described in this manual. DO NOT use any other
accessories not recommended by the manufacturer.
7. Assemble the machine exactly as the descriptions in the instruction manual.
8. Check all bolts and other connections before using the machine for the rst time and ensure that the
trainer is in the safe condition.
9. Hold a routine inspection of the equipment. Pay special attention to components which are the most
susceptible to wear o, i.e. connecting points and wheels. The defective components should be replaced
immediately. The safety level of this equipment can only be maintained by doing so.
10. NEVER operate the machine if it is not functioning properly.
11. This machine can be used for only one person’s training at a time.
12. Do not use abrasive cleaning articles to clean the machine. Remove drops of sweat from the machine
immediately after nishing training.
13. Always wear appropriate workout clothing when exercising. Running or aerobic shoes are also required.
14. Before exercising, always do warm-up and stretching rst.
15. The maximum weight capacity for this product is 135 kg.
BEFORE BEGINNING THIS OR ANY EXERCISE PROGRAM, CONSULT YOUR PHYSICIAN FIRST.
THIS IS ESPECIALLY IMPORTANT FOR INDIVIDUALS OVER THE AGE OF 35 OR PERSONS WITH
PRE-EXISTING HEALTH PROBLEMS.

4GB8.0 EXERCISE BIKE
PARTS LIST
ITEM DESCRIPTION QTY ITEM DESCRIPTION QTY
1 Main Frame 1 43 Bottle 1
2 Front Post 1 44 Console cover 1
3 Handlebar 1 45 Screw ST4.2x20 2
4 Seat Post 1 46 Connect the Sensor Wire 1
5Seat Sliding Tube 1 47 Power Supply Wire L=500mm 1
6 Front Stabilizer 1 48 Adapter 1
7 Rear Stabilizer 1 49 Seat Post Bushing 1
8 Stabilizer End Cap 4 50 Sensor L=400mm 1
9Adjust the foot Pad 4 51 Press Bracket 1
10 Nut M10*30 6 52 Bolt M8*18 1
11 Bolt M8*90 2 53 Press Wheel 1
12 Big Arc Washer Ф8*Ф20*2.0 6 54 Spring Hook Ф17 *62*Ф2.0 1
13 Bolt M8*90 2 55 Flywheel 1
14 Cap Nut M8 2 56 Nut M10*1.0*6 2
15 Bolt M8*32 2 57 Adjust Bolt M6*36 2
16 Bearing 608 4 58 U-Bracket 31*30*Ф1.0 2
17 Transportation wheel 2 59 Spring Washer Ф6 6
18 Bolt M6*12 2 60 Nut M6 2
19 Left Pedal 1 61 C-Clip Ф20*1.0 2
20 Right Pedal 1 62 Wave Washer Ф20xФ24*0.3 1
21 Round Knob M16*1.5*27 1 63 Bearing 6004-2Z 2
22 Round Knob Ф19*56*M10 1 64 Belt Pulley 1
23 Seat Cushion 1 65 Belt Pulley Shaft 1
24 Washer Ф16*Ф8*1.5 8 66 Bolt M6x15 4
25 Nut M8 5 67 Nut M6 4
26 Bolt M8*15 6 68 Belt 1
27 Big Flat Washer Ф8*Ф20*2.0 4 69 Plastic Bolt Ф8*32 1
28 Hand Pulse Sensor with Wire A
L=200mm
2 70 Left Chain cover 1
29 Hand Pulse Sensor with Wire B 2 71 Left Chain cover B 1
30 Self-tapping Screw ST4.2*10 4 72 Right Chain cover 1
31 Handlebar Foam GripФ38 2 73 Right Chain cover B 1
32 Handlebar End Cap Ф32x1.5 2 74 Crank cover cap 1
33 Handlebar cover A 1 75 Nut M10*1.25 1
34 Handlebar cover B 1 76 Left Crank 1
35 Self-tapping Screw ST2.9*16 4 77 Right Crank 1
36 Extension Pulse Wire L=300MM 2 78 Self-tapping Screw ST4.2x25
37 Extension Sensor Wire 1 79 Self-tapping Screw ST4.2x20
38 Oval End Cap 1 80 Washer Ф5xФ12x1.0
39 Bolt M8*15 4 81 Motor Tension Knob (L=500MM)
40 Computer 1 82 Nut M12
41 Bolt M5*10 4 83 Motor
42 Bottle Holder 1
5GB8.0 EXERCISE BIKE
HARDWARE PACKING LIST
(13) Pan Head Square Bolt M8x90
2PCS
(14) Cap Nut M8
2PCS
Multi Hex Tool wit Phillips Screwdriver
S10 S13 S14 S15
1 PC
Allen Wrench S6
1PC
(12) Big Curve Washer
Ф8xФ20x2.0
4PCS
(14) Cap Nut M8
2PCS
(35) Screw ST2.9x16
3PCS
(45) Screw ST4.2x20
2PCS

6GB8.0 EXERCISE BIKE
EXPLODED DRAWING

7GB8.0 EXERCISE BIKE
ASSEMBLY INSTRUCTION
STEP 1
Remove two M8x90 Bolt (11) and two M8x15 Bolt (26)
from the front and rear curve of the Main frame,
remove two Fixed Tube(A/B)from the Main Frame(1).
Please note these two Fixed Tube(A/B) are use for
xed the Frame to prevent break. The xed tube(A/B),
M8x90 Bolt (11) and M8x15 Bolt (26) can be discard.
STEP 2
Installing the stabilizers
Position four Foot Pad (9) onto the Front Stabilizer (6) and the Rear Stabilizer (7). Attach the Front Stabilizer
(6) onto the front curve of the Main Frame (1) with two M8x90 Bolts (13), two Big Curve Washer Ø8x Ø20
x2.0 (12) and two Cap Nut M8(14).
Position the Rear Stabilizer (7) behind the Main Frame (1) and align bolt holes. Attach the Rear Stabilizer
(7) onto the rear curve of the Main Frame (1) with two M8x90 Bolts (11) and two Big Curve Washer Ø8x Ø20
x2.0 (12).
Foot Pedals Installation
Insert the pedal shaft of Left Foot Pedal (19) into threaded hole in the left Crank (76). Turn the pedal shaft by
hand in the counter-clockwise direction until snug.
Insert the pedal shaft of Right Foot Pedal (20) into threaded hole in right Crank (77). Turn the pedal shaft by
hand in the clockwise direction until snug.
NOTE: The Cranks, Pedal Shafts and Pedal Straps are marked “R” for Right and“L” for Left.

8GB8.0 EXERCISE BIKE
Seat Post, Seat Cushion and Seat Sliding Tube Installation
Remove three M8 Nylon Nuts (25) and three Flat Washer Ø8 (24) from underside of the Seat Cushion (23).
Then attach the Seat Cushion (23) onto the triangle plate of Seat Sliding Tube (5) with three M8 Nylon Nuts
(25) and Flat Washer Ø8 (24) that were removed.
Attach the Seat Sliding Tube (5) onto the Seat Post (4) with Seat Adjustment Knob (22). Insert the Seat Post
(4) into the Seat Post Bushing (49) on the tube of the Main Frame (1) and then attach the Locking Knob (21)
onto the tube of the Main Frame (1) by turning it in a clockwise direction, lock the Seat Post (4) in the suitab-
le position.
Adjusting the seat post:
Turn the Locking Knob (21) in a counterclockwise direction until it can be pulled out. Pull out the Locking
Knob (21) and Lock the Seat Post (4) in place by releasing the Locking Knob (21) and sliding the Seat Post
(4) up or down slightly until the Locking Knob (21) down into the locked position. For added safety, tighten
the Locking Knob (21) in a clockwise direction.
NOTE: When adjusting the height of seat post, the maximum insert depth mark line cannot higher than the
edge of the seat post cover.
STEP 3

9GB8.0 EXERCISE BIKE
Handlebar Post, Handlebar Post Cover and tension knob Installation.
Remove Six M8x15 Bolts (26), Four Ø8xØ20x2.0 Big Washers (27) and two Ø8x Ø20x2.0 Big curve
Washer(12) from the Main Frame (1).
Slide the bottle (43) down to the bottle holder (42). Slide the Console cover (44) up to the handlebar Post (2)
according to the direction of the diagram. Slide the bottle holder (42) up to Handlebar Post (2) according to
the direction of the diagram.
Connect the Sensor Wire (46) from the Main Frame (1) to the Computer Extension Wire (37) from the Hand-
lebar Post (2). Insert the Handlebar Post (2) onto the tube of the Main Frame (1) and secure with Six M8x15
Bolts (26), Four Ø8xØ20x2.0 Big Washers (27) and two Ø8x Ø20x2.0 Big curve Washer(12) that were
removed.
STEP 4

10GB8.0 EXERCISE BIKE
Handlebar Installation
Remove four M8x15 Bolt (39) and four Flat washer Ø8x
Ø16x1.5 (24) from the handlebar (3).
Attached the handlebar (3) onto the Front Post (2) with
four M8x15 Bolt (39) and four Flat Washer Ø8x Ø16x1.5
(24) that were removed.
STEP 5
Handlebar cover Installation.
Attached Handlebar cover A(33) and handlebar cover
B(34) onto the handlebar (3) with three screw ST2.9x16
(35).
STEP 6
Computer Installation.
Remove four M5x10 Bolts(41) from the Computer (40).
Attach the Computer (40) onto the top end of the Front
Post (2) with four M5x10 Bolts (41) that were removed.
Connect the Hand Pulse Sensor Wires (36) and Computer
Extension Wire (37) to the wires that come from the
Computer (40). Tuck wires into the Handlebar Post (2).
Attach the Computer (40) onto the top end of the Handle-
bar Post (2) with two M5x10 Bolts (41) that were removed.
STEP 7

11GB8.0 EXERCISE BIKE
Computer Cover Installation
Slide the console cover (44) up to the top of front post (2) and x it with two Self tapping Self drilling Screw
ST4.2x20(45).
STEP 8
AC Adapter Installation
Plug one end of the AC Adapter (48) into the power jack of the Power Supply Wire (47) on the back of the
Left Shroud. Before plugging in, make sure to check carefully the specications on the Adapter. Plug the
other end of the AC Adapter (48) into the electrical wall outlet.
STEP 9

12GB8.0 EXERCISE BIKE
COMPUTER OPERATION INSTRUCTIONS
DISPLAY FUNCTIONS
TIME Count up - No preset target, Time will count up from 00:00 to maximum 99:59 with
each increment is 1 minute.
Count down - If training with preset Time, Time will count down from preset to 00:00.
Each preset increment or decrement is 1 minute between 00:00 to 99:00.
SPEED Displays current training speed. Maximum speed is 99.9 KM/H or ML/H.
RPM Displays the Rotation Per Minute. Display range 0~15~999
DISTANCE Accumulates total distance from 0.00 up to 99.99 KM or ML. The user may preset
target distance data by using UP/DOWN button.
Each preset increment or decrement is 0.1KM or ML between 0.00 to 99.90.
CALORIES Accumulates calories consumption during training from 0 to maximum 9999 calories.
(This data is a rough guide for comparison of dierent exercise sessions which can
not be used in medical treatment.)
PULSE User may set up target pulse from 0 - 30 to 230; and computer buzzer will beep when
actual heart rate is over the target value during workout.
WATTS Display current workout watts. Display range 0~999.
MANUAL Manual mode workout
BEGINNER 4 PROGRAM selection
ADVANCE 4 PROGRAM selection
SPORTY 4 PROGRAM selection
CARDIO Target HR training mode
WATT PROGRAM WATT constant training mode
KEY FUNCTIONS
UP Increase resistance level / Setting selection
DOWN Decrease resistance level / Setting selection
MODE/ENTER Conrm setting or selection
RESET Press and hold for 2 seconds, computer will reboot and start from user setting.
Reverse to main menu during preset workout value or stop mode.
START/STOP Start or Stop workout
RECOVERY Test heart rate recovery status
BODY FAT In stop mode, press it for body fat measurement

13GB8.0 EXERCISE BIKE
OPERATION
POWER ON
Plug in power supply, computer will power on and display all segments on LCD for 2 seconds.
WORKOUT SELECTION
Use UP or DOWN to select workout: Manual, Beginner, Advance, Sporty, Cardio or Watt.

14GB8.0 EXERCISE BIKE
MANUAL MODE
Press START in main menu may start workout in manual mode.
1. Use UP or DOWN (Encoder) to select workout program, choose Manual and press MODE / ENTER to get
into.
2. Use UP or DOWN (Encoder) to set TIME, DISTANCE, CALORIES or PULSE and press MODE / ENTER
to conrm.
3. Press START/STOP keys to start workout. Use UP or DOWN (Encoder) to adjust load level. Load level
display in WATT window, no adjusting for 3s, it will switch to display WATT.
4. Press START/STOP keys to pause workout. Press RESET to reverse to main menu.
BEGINNER MODE
1. Use UP or DOWN (Encoder) to select workout program, choose Beginner mode and press
MODE / ENTER to get into.
2. Use UP or DOWN (Encoder) to select Beginner program 1~4 and press MODE / ENTER to get into.
3. Use UP or DOWN (Encoder) to set TIME.
4. Press START/STOP key to start workout. Use UP or DOWN (Encoder) to adjust load level.
5. Press START/STOP key to pause workout. Use RESET to reverse to main menu.

15GB8.0 EXERCISE BIKE
ADVANCE MODE
1. Use UP or DOWN (Encoder) to select workout program, choose Advance mode and press
MODE / ENTER to get into.
2. Use UP or DOWN (Encoder) to select Advance program 1~4 and press MODE / ENTER to get into.
3. Use UP or DOWN (Encoder) to set TIME.
4. Press START/STOP key to start workout. Use UP or DOWN (Encoder) to adjust load level.
5. Press START/STOP key to pause workout. Use RESET to reverse to main menu.
SPORTY MODE
1. Use UP or DOWN (Encoder) to select workout program, choose Sporty mode and press MODE / ENTER
to get into.
2. Use UP or DOWN (Encoder) to select Sporty program 1~4 and press MODE / ENTER to get into.
3. Use UP or DOWN (Encoder) to set TIME.
4. Press START/STOP key to start workout. Use UP or DOWN (Encoder) to adjust load level.
5. Press START/STOP key to pause workout. Use RESET to reverse to main menu.
CARDIO MODE
1. Use UP or DOWN (Encoder) to select workout program, choose H.R.C. and press MODE / ENTER to
get into.
2. Use UP or DOWN (Encoder) to set Age.
3. Use UP or DOWN (Encoder) to select 55%, 75%, 90% or TAG (TARGET H.R.) (default: 100).
4. Use UP or DOWN (Encoder) to set workout TIME.
5. Press START/STOP key to start or stop workout. Use RESET to reverse to main menu.

16GB8.0 EXERCISE BIKE
WATT MODE
1. Use UP or DOWN (Encoder) to select workout program, choose WATT and press MODE / ENTER to
get into.
2. Use UP or DOWN (Encoder) to set WATT target. (default: 120, Drawing 18)
3. Use UP or DOWN (Encoder) to set TIME.
4. Press START/STOP key to start workout. Use UP or DOWN (Encoder) to adjust Watt level.
5. Press START/STOP key to pause workout. Use RESET to reverse to main menu.
RECOVERY
After exercising for a period, keep holding on hand grips or wearing chest strap and press RECOVERY
key. All function display will stop except “TIME” starts counting down from 00:60 to 00:00. Screen will disp-
lay your heart rate recovery status with the F1, F2…. to F6. F1 is the best, F6 is the worst. User may keep
exercising to improve the heart rate recovery status. (Press the RECOVERY button again to return the main
display.)
BODY FAT
1. In STOP mode, press the BODY FAT key to start body fat measurement.
2. Console will remind to input user GENDER, AGE, HEIGHT, WEIGHT, then begin to measure.
3. During measuring, users have to hold both hands on the hand grips. And the LCD will display “= ” “= = ”
for 8 seconds until computer nish measuring.
4. LCD will display BODY FAT advice symbol, BODY FAT percentage, BMI for 30 seconds.
5. Error message:
• The LCD displays “= = ” “ = =” means not hand the grip or wear chest strap correctly.
• E-1 - There is no heart rate signal input detected.
• E-4 - Occurs when FAT% is below 5 or exceeds 50 and BMI result is below 5 or exceeds 50.

17GB8.0 EXERCISE BIKE
WATT MODE
NOTE
1. After 4 minutes without pedaling or pulse input, console will enter into power saving mode. Press any key
may wake the console up.
2. When computer act abnormal, please plug out the adaptor and plug in again.

18GB8.0 EXERCISE BIKE
MAINTENANCE
CLEANING
The upright bike can be cleaned with a soft cloth and mild detergent. Do not use abrasives or solvents on
plastic parts. Please wipe your perspiration o the upright bike after each use. Be careful not get excessive
moisture on the computer display panel as this might cause an electrical hazard or electronics to fail.
Please keep the upright bike, specially, the computer console, out of direct sunlight to prevent screen
damage. Please inspect all assembly bolts and pedals on the machine for proper tightness every week.
STORAGE
Store the upright bike in a clean and dry environment away from children.
TROUBLESHOOTING
PROBLEM SOLUTION
The upright bike wobbles when in use. Turn the adjustable leveler on the rear sta-
bilizer as needed to level the upright bike.
There is no display on the computer
console.
1. Remove the computer console and
verify the wires that come from the
computer console are properly connected
to the wires that come from the handlebar
post.
2. Check if the batteries are correctly
positioned and battery springs are in
proper contact with batteries.
3. The batteries in the computer console
may be dead. Change to new batteries.
There is no heart rate reading or heart
rate reading or is erratic / inconsistent.
1. Make sure that the wire connections for
the hand pulse sensors are secure.
2. To ensure the pulse readout is more
precise, please always hold on to the
handlebar grip sensors with two hands
instead of just with one hand only when
you try to test your heart rate gures.
3. Gripping the hand pulse sensors too
tight. Try to maintain moderate pressure
while holding onto the hand pulse
sensors.
The upright bike makes a squeaking noise
when in use.
The bolts may be loose on the upright
bike. Please inspect the bolts and tighten
the loose bolts.

19GB8.0 EXERCISE BIKE
WARM UP AND COOL DOWN ROUTINE
A good exercise program consists of a warm-up, aerobic exercise, and a cool down. Do the entire program
at least two to three times a week, resting for a day between workouts. After several months you can increa-
se your workouts to four or ve times per week.
AEROBIC EXERCISE is any sustained activity that sends oxygen to your muscles via your heart and lungs.
Aerobic exercise improves the tness of your lungs and heart. Aerobic tness is promoted by any activity
that uses your large muscles eg: legs, arms and buttocks. Your heart beats quickly and you breathe deeply.
An aerobic exercise should be part of your entire exercise routine.
The WARM-UP is an important part of any workout. It should begin every session to prepare your body for
more strenuous exercise by heating up and stretching your muscles, increasing your circulation and pulse
rate, and delivering more oxygen to your muscles. ‘
COOL DOWN at the end of your workout, repeat these exercises to reduce soreness in tired muscles.
HEAD ROLLS
Rotate your head to the right for one count, feeling
the stretch up the left side of your neck, then rotate
your head back for one count, stretching your chin
to the ceiling and letting your mouth open. Rotate
your head to the left for one count, then drop your
head to your chest for one count.
SHOULDER LIFTS
Lift your right shoulder toward your ear for one
count. Then lift your left shoulder up for one count
as you lower your right shoulder.

20GB8.0 EXERCISE BIKE
SIDE STRETCHES
Open your arms to the side and lift them until they
are over your head. Reach your right arm as far
toward the ceiling as you can for one count. Repeat
this action with your left arm.
QUADRICEPS STRETCH
With one hand against a wall for balance, reach
behind you and pull your right foot up. Bring your
heel as close to your buttocks as possible. Hold for
15 counts and repeat with left foot.
INNER THIGH STRETCH
Sit with the soles of your feet together and your
knees pointing outward. Pull your feet as close to
your groin as possible. Gently push your knees
toward the floor. Hold for 15 counts.
Table of contents
Other Gymstick Exercise Bike manuals

Gymstick
Gymstick GB4.0 User manual

Gymstick
Gymstick 6100 User manual

Gymstick
Gymstick AIR BIKE PRO User manual

Gymstick
Gymstick GB6.0 User manual

Gymstick
Gymstick EB-DESK User manual

Gymstick
Gymstick PRO FTR User manual

Gymstick
Gymstick MINI BIKE 2.0 User manual

Gymstick
Gymstick FTR7 INDOOR RACER User manual

Gymstick
Gymstick PRO20.0 User manual

Gymstick
Gymstick CRANK BIKE X4 User manual
Popular Exercise Bike manuals by other brands

Sunny Health & Fitness
Sunny Health & Fitness ASUNA 6100 owner's manual

Domyos
Domyos VM 580 operating instructions

NordicTrack
NordicTrack 480 Csx Bike manual

NordicTrack
NordicTrack Audio Rider R400 Bike Manuel de l'utilisateur

Weslo
Weslo WLEX1076.0 user manual

Weslo
Weslo Pursuit T 39 Exercise Bike Manuel de l'utilisateur