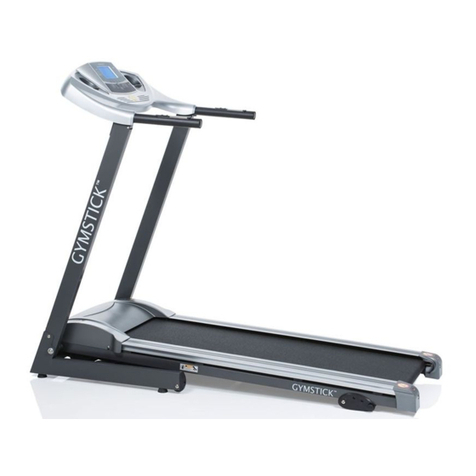
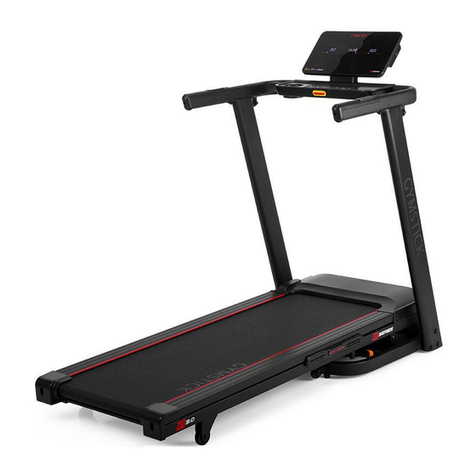
Gymstick GT4.0 User manual

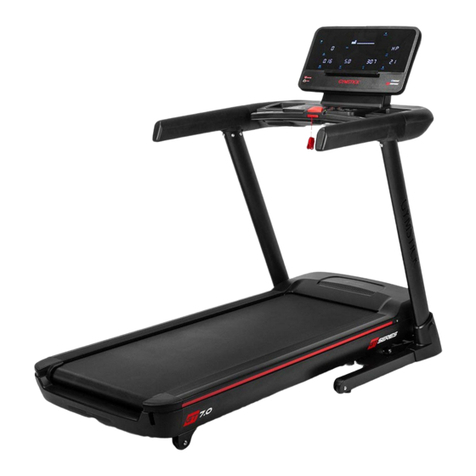
GT4.0 TREADMILL
USER MANUAL
IMPORTANT: Read all instructions carefully before using this product. Retain this owner’s manual for future
reference. The specications of this product may vary from this photo, subject to change without notice.

2GT4.0 TREADMILL
BEFORE YOU BEGIN
Thank you for choosing the Gymstick GT4.0 Treadmill. We take great pride in producing this quality
product and hope it will provide many hours of eective exercise to make you feel better, look
better and enjoy life to its fullest.
TABLE OF CONTENT
1. SAFETY INSTRUCTIONS ................................................................................................ 3
2. ASSEMBLY INSTRUCTION............................................................................................... 4
3. MOVING TREADMILL........................................................................................................ 8
4. IMPORTANT ELECTRICAL INFORMATION ..................................................................... 9
5. CONSOLE OPERATION INSTRUCTIONS .................................................................... 10
6. MAINTENANCE AND CARE ............................................................................................. 15
7. LUBRICATING THE TREADMILL ...................................................................................... 17
8. TROUBLESHOOTING ....................................................................................................... 18
9. EXPLODED DRAWING ..................................................................................................... 20
10. PARTS LIST ...................................................................................................................... 21
11. IMPLIED WARRANTY ...................................................................................................... 24
READ AND FOLLOW THE SAFETY INSTRUCTIONS. FAILURE TO FOLLOW THESE INSTRUCTIONS
CAN RESULT IN SERIOUS INJURY.
!
NOTIFICATION!

3GT4.0 TREADMILL
!
WARNING!
SAFETY INSTRUCTIONS
Basic precautions should always be followed, including the following safety instructions when using
this equipment: Read all instructions before using this equipment.
• Never leave the treadmill unattended. Unplug the unit from the power outlet when it is not in use.
• Do not allow children or those unfamiliar with its operation on or near the treadmill. Do not leave children or
persons with reduced physical or mental capabilities unsupervised around the treadmill.
• Please wear proper clothes and shoes when using this equipment; do not wear clothes that might catch
any part of the equipment.
• If you feel any chest pains, nausea, dizziness, or short of breath, you should stop exercising immediately
and consult your physician before continuing.
• Keep children and pets away from the equipment. This machine is designed for adults only.
• Only one person should be on the equipment while in use.
• Please make sure all parts are not damaged and xed well before use.
• Never operate the unit if it is damaged, if it is not working properly
• This equipment should be placed on a at surface when using. Using a mat or other covering material on
the ground is recommended. The minimum free space required for safe operation is 0,5 meter.
• Never block the air openings on the hood while operating the treadmill. Never drop or insert objects into
any opening.
• Use the treadmill only for its intended purpose as described in this manual.
• If the power cord of the machine is damaged, it must be replaced. Do not use the machine until the power
cord has been changed and properly attached.
• This equipment is for household use only. Do not use the equipment outdoors.
• This appliance is designed for use with ~220 - ~240 Volt rated voltage.
• The maximum weight capacity for this product is 120kgs.
BEFORE BEGINNING THIS OR ANY EXERCISE PROGRAM, CONSULT YOUR PHYSICIAN FIRST.
THIS IS ESPECIALLY IMPORTANT FOR INDIVIDUALS OVER THE AGE OF 35 OR PERSONS WITH
PRE-EXISTING HEALTH PROBLEMS.
4GT4.0 TREADMILL
ASSEMBLY INSTRUCTION
• Lift up and remove the box that surrounds the Treadmill.
• Check the following items are present. If any of the parts are missing, contact with the dealer.
Note: Each step number in assembly instructions tells you what you will be doing. Read and
understand all instructions thoroughly before assembling the treadmill.
!
WARNING!
USE CAUTION WHEN ASSEMBLING THIS TREADMILL. FAILURE MAY RESULT IN INJURY.
䈤᰾Җ
0;
0;
0;
0;
0;
MAIN BODY UPRIGHT POST (R/L) HARDWARE KIT
CONSOLE SAFETY KEY SILICONE BOTTLE MANUAL
ALLEN SCREW (M8x50x20) 4PCS L-SHAPE SPANNER S5 1PCS
HEXAGON SOCKET HEAD BOLT (MX20) 4PCS L-SHAPE SPANNER S6 1PCS
TAB BOLT 1PCS INNER HEXAGON BOLT (M8x20) 4PCS

5GT4.0 TREADMILL
ASSEMBLY INSTRUCTION
TREADMILL OVERVIEW
Rear cover
Console
Handle bar
Safety key
Upright post
Motor cover
Side rail
Running belt
Maximum load 120kg
Dimension (folded) 1104 x 815 x 1450mm
Dimension (unfolded) 1711 x 815 x 1389mm
Running surface 1420 x 500mm
Speed 1.0 - 18.0km/h
TECHNICAL INFORMATION
REMARK: We reserve the right to amed the product without prior notice.

6GT4.0 TREADMILL
ASSEMBLY INSTRUCTION
STEP 1
Take out the machine from box and put it on the at oor. (As shown),remove all PE bags and bags
wrapped on the machine.
STEP 2
Fold the machine up to make sure that the non-return pipe is rmly fastened. Take out the left and
right upright post, and use two inner Allen C.K.S.half thread screw tighten from the inside and out
respectively. Use a M8*20 with inner hexagon bolts from top to bottom for locking!
Note: when installing the right riser, pay attention to properly connecting the communication line
between the riser and the base, and avoid clamping it!

7GT4.0 TREADMILL
ASSEMBLY INSTRUCTION
STEP 3
Press the non-return pipe to expand the running table, take out the console and assembly it as
shown below! After aligning the hole position from inside to outside use the M8*20 Allen C.K.S. full
thread screw to lock in!
STEP 4
Lift up the console and x it from the left side of the watch with a TAB bolt.

8GT4.0 TREADMILL
ASSEMBLY INSTRUCTION
STEP 5
Finally, check the machine screw is locked. After all the screws are fastened, the machine installati-
on is completed.
MOVING THE TREADMILL

9GT4.0 TREADMILL
IMPORTANT ELECTRICAL INFORMATION
This treadmill requires a right power source in order to properly operate. For your safety, as well as the
safety of others, please verify that the power source is correct before plugging the equipment. Any incorrect
power source could cause signicant damage to the equipment and or user.
GROUNDING METHODS:
This product must be grounded. Grounding provides the least resistance for electrical current and will
reduce the risk of electric shock. The plug must be plugged into an appropriate outlet that is properly
installed and grounded in accordance with all local codes and ordinances. Ensure that the product is
connected to an outlet which contains the same conguration as the plug. Do not use an adaptor for this
product.
This product is for use on a nominal circuit and has a grounding plug that looks like the plug illustrated in the
below picture. Make sure that the product is connected to an outlet having the same conguration as the
plug. No adapter should be used with this product.
Improper connection of the equipment-grounding conductor can result in risk of electric shock. Check with
a certied electrician if you are in doubt as to whether the product is properly grounded. Do not modify the
plug provided with the product. If it will not t the outlet, have a proper outlet installed by an electrician.
1. NEVER use a ground fault circuit interrupt (GFCI) wall outlet with this treadmill. Route the power cord
away from any moving part of the treadmill including the elevation mechanism and transport wheels.
2. NEVER operate the treadmill using a generator or UPS power supply.
3. NEVER remove any cover without rst disconnecting power.
4. NEVER expose the treadmill to rain or moisture. This treadmill is not designed for use outdoors, near
pools or in any other high humidity environment
!
WARNING!
!
DANGER!
!
WARNING!

10GT4.0 TREADMILL
CONSOLE OPERATION INSTRUCTIONS
CONSOLE FUNCTION INSTRUCTION
1. P0 is manual program for user. P1-P36 is for the built-in automatic training program, three
user’s “U” and FAT program.
2. 0.56 inch LED display screen, 12 touch operation keys;
3. Running speed range:1.0~18.0KM/H, inclination: 0-15%
4. Self-test System, abnormal information prompt function.
5. Speed, distance conversion function
6. MP3 (optional)
7. HRC
8. Bluetooth
DISPLAY WINDOW INSTRUCTION
1. SPEED and PULSE to show the value of the velocity and the heart rate
2. TIME and CALORIES to show time, calorie value
3. DISTANCE and INCLINE to show distance and ascension data
KEYBOARD OPERATION INSTRUCTION
1. PROG: Program selection key, stop state, loop selection program P1~P36, U01, U02, U03
and FAT.
2. MODE: When selected to the initial state of is normal mode, press mode key can cycle
select the manual mode of countdown mode-> counting calorie mode-> inverted distance
mode -> positive timing mode; Reset key in P01-P36 for default value (30 minutes) between
countdown.
3. START/STOP: Start / stop key, start the treadmill in the stop state, stop the treadmill in the
running state.
4. + Speed pass key: In the state of stopping or measuring fat, adding keys for setting
parameters and adding keys for speed in running state.
5. - The speed decline key, in the state of stopping or measuring fat, is the key of setting the
parameter decline, and in the running state, it is the key of the decline of the speed.

11GT4.0 TREADMILL
CONSOLE OPERATION INSTRUCTIONS
6. The gradient incline key, the gradient addition in a running state.
7. The gradient decline key, in the running state, is the gradient decline key.
INTRODUCTION TO THE CONVERSION OF KM TO MILE
1. Unlocking the safety key and pressing the ”program” and ”mode” keys at the same time, the
display screen shows a 0.6 means conversion from km to mile;
2. Unlocking the safety key and pressing the ”program” and ”mode” keys at the same time, the
display screen shows a 1. 0 means conversion from mile to kilometer;
CONSOLE OPERATION INSTRUCTION
1. Put the power cord into the electrical outlet with 10A. Flip this switch to the “ON” position. The
screen shines with prompt sound and then the safety key is recognized.
2. Put the safety key in the position on the console, clip the safety key to the clothes in front of
the chest, and the screen will appear for 2 seconds and then enter default working mode. All
the counters are zero, the set value is reset, The treadmill is in the positive timing mode of the
P0 Normal Mode.
3. Press PROG key to cycle select the program P1~P36, U1,U2,U3 and FAT.
4. P1 is user program. Press MODE cycle select four training mode. User can select the speed
and inclination. Speed default is 1.0km/h, inclination default is 0%.
5. Training model 1: Positive counting of time, time, distance and calories. The select function is
closed.
6. Training model 2: Time Countdown, under selecting, time window icker, press “+” or ”-“ to
modify the value. The range is 5-99 minute. Default is 30:00.
7. Training model 3: Calories Countdown. Under selecting, calories window icker, press “+” or ”-“
to modify the value. The range is 20-9990CAL. Default is 50CAL.
8. Training mode 4: Distance Countdown. Under selecting, Distance window icker, press “+” or
”-“ to modify the value. The range is1.0-99.0km. Default is1.0KM.
9. P1-P36 (preset programs). Only for Time Countdown mode. Under selecting, time window
icker, press “+” or ”-“ to select. The range is 5-99 minute. Default is 30:00. Press “MODE” key to
return to Defaults.
10. Press START after setting up training mode, screen display 5 seconds into the countdown,
accompanied by ve hint sound, after the countdown to 1, treadmill start gently; speed up
slowly to the display, then the constant speed operation smoothly.
11. During running, press the “+ “ or “–” or quick speed key to adjust the speed you want.
12. For P1 - P36, Speed is divided into 10 segments. Each segment has same time. The speed
after selecting will be avail in current segment. When run to next segment. It will sound 3 times
in advance. When nish 10 segments, the motor will stop with a long prompt sound.
13. Press START key when on standby mode, the motor will start working.
14. Press “STOP” key when running, the treadmill will slowly till stop. All will return to the default
state.
15. In any state, pull-out safety locks, window displays: E-07and sound buzzer. The treadmill stop.
16. The electric control system is always under inspection. Treadmill will stop once the abnormal
case happen. Window will show the ERR message and sound.
17. BODY FAT FUNCTION. When the treadmill is stopped, press the PROG key until select FAT
and enter into body fat function, on the left side DISTANCE window display program number,
press MODE key to select, on the right side, SPEED window display parameters, press or
to set up parameters.

12GT4.0 TREADMILL
CONSOLE OPERATION INSTRUCTIONS
18. F1 means Sex, the 1means male, 2 means female. select ”Male”, the original is Male.
19. F2, means Age, the setting range is 1-99, and the original is 25.
20. F3, means Height, the range is 100-220CM(39-87inch), the original is 170CM(67inch)
21. F4, means Weight, the range is 20-150KG(44-330pound), the original is 70KG (154pound)
22. F5, mean BMI, show you have nished the set item , and enter into body fat function. Put two
hands on the handle bar, wait for 8 seconds, and the window will show the BMI.
BMI under 18 is under weight;
Between 18 and 24 is normal weight;
Between 25 and 28 is over weight;
BMI over 29 is obesity, default:24. (This number is only for sport reference)
MP3 (optional)
1. Console built-in dual-channel sound, switching power supply and no signal mute function, with
the distribution of audio adaptor line connected to the mp3 headphone Jack and electronic watch
audio input hole can be played, this is external sound play;
2. USB is for charging port, the Bluetooth symbol is USB Bluetooth port, not used for low voltage
charging.
HRC
1. HRC default to three groups, HRC1 limit the speed of 9 km per hour, HRC2 limit speed of
11 km/h, HRC3 limit of 13 km/h (this machine only has HRC1 because of the conguration).
2. HRC setting method, sequence, parameter range, press the program key to display HRC, press
the mode to conrm and enter the next set of settings, press the speed key adjustment, set the
last parameter to start.
3. Age setting range: 15-80 years old, default 25 years old.
4. Default target heart rate (THR): (220 - age) x 0.6.
5. Target HRC rate can be modied, modify the range: 80-180.
6. Set the time, the default 30 minutes, modify the range: 5-99 minutes.
7. Speed change relationship.
8. Change the frequency, HRC every 30 seconds to detect heart rate (heart rate has been shown).
9. The user’s heart rate lower than the target heart rate 30 times/min, the speed increase of
2.0 km/h.
10. The user’s heart rate is lower than the target heart rate 6-29 beats / min, the speed increase of
1.0 km / h.
11. The user’s heart rate is higher than the target heart rate 30 times / min, the speed is reduced
2.0 km / h.
12. The user’s heart rate is higher than the target heart rate 6-29 times / min, the speed is reduced
by 1.0 km/h.
13. The user’s heart rate higher or lower than the target heart rate 0-5 times / minute, the speed
remains unchanged
14. Decelerate to the minimum speed within 20 seconds when the following conditions occur, and
stop at the lowest speed for 15 seconds and then ring once per second.
15. Every 30 seconds to detect heart rate, heart rate when two consecutive undetected.
16. 1 km/h (0.6 mph), heart rate slows down.
17. When the heart rate exceeds (220-year-old).
18. Speed of 1 km/h (0.6 mph), not less than 1 km/h (0.6 mph) during deceleration, eg: 1 km/h
(0.6 mph) for treadmills, Running at 1.6 km/h (1.0 mph), the heart rate resulted in a
deceleration of 1.0 (2.0) km/h, then decelerated to 1 km/h (0.6 mph).

13GT4.0 TREADMILL
CONSOLE OPERATION INSTRUCTIONS
19. Incline is not controlled by heart rate and can be adjusted manually. Treadmill is not controlled
by heartbeat one minute before it starts running, and starts running according to the built-in
formula after running for one minute.
BLUETOOTH FUNCTION
Please refer one of these APP’s: Kinomap, Run on Earth, iRunning or Fit Console.
SAFETY KEY FUNCTION DESCRIPTION
The safety key is made up of Copper insert, clamp and nylon rope. It has the function of
emergency shutdown. In any state, as long as the safety key is removed, the treadmill stops
running, the console keyboard is disabled, and the screen displays ”E-07” with a prompt sound.
Then put well the safety lock, the screen will appear for 2 seconds and then enter the default
working state of the system (the equivalent of clearing reset).
SPEED AND INCLINE OF THE AUTOMATIC PROGRAM (P1-P36)
Stage
program
1 2 3 4 5 6 7 8 9 10
P1 SPEED 1.0 3.0 5.0 5.0 5.0 7.0 7.0 5.0 3.0 2.0
INCLINE 2 2 8 6 6 4 4 6 2 2
P2 SPEED 2.0 3.0 5.0 8.0 5.0 5.0 6.0 8.0 4.0 3.0
INCLINE 3 3 2 2 8 8 4 4 4 4
P3 SPEED 2.0 3.0 7.0 8.0 5.0 5.0 5.0 8.0 4.0 3.0
INCLINE 1 2 5 7 7 4 4 6 2 2
P4 SPEED 2.0 2.0 5.0 8.0 8.0 8.0 8.0 5.0 3.0 2.0
INCLINE 3 3 9 9 9 9 9 6 2 2
P5 SPEED 3.0 4.0 8.0 9.0 10.0 10.0 10.0 7.0 4.0 3.0
INCLINE 2 2 8 6 6 6 6 6 1 1
P6 SPEED 3.0 4.0 6.0 7.0 7.0 7.0 9.0 10.0 5.0 3.0
INCLINE 1 8 8 7 7 7 7 5 3 1
P7 SPEED 3.0 4.0 4.0 10.0 4.0 9.0 4.0 11.0 3.0 2.0
INCLINE 1 1 6 6 6 8 8 10 6 2
P8 SPEED 3.0 5.0 7.0 9.0 3.0 5.0 7.0 5.0 11.0 5.0
INCLINE 3 3 3 7 7 3 3 3 5 5
P9 SPEED 3.0 7.0 10.0 4.0 7.0 11.0 5.0 4.0 12.0 6.0
INCLINE 3 6 7 3 8 8 3 8 4 4
P10 SPEED 3.0 5.0 9.0 10.0 6.0 6.0 9.0 6.0 11.0 3.0
INCLINE 2 7 5 5 8 8 8 8 4 4
P11 SPEED 4.0 5.0 11.0 9.0 6.0 8.0 9.0 11.0 6.0 5.0
INCLINE 1 6 3 3 7 7 4 4 6 6
P12 SPEED 4.0 6.0 10.0 10.0 10.0 7.0 7.0 10.0 6.0 5.0
INCLINE 3 8 9 5 5 8 8 4 4 4
P13 SPEED 2.0 4.0 6.0 6.0 6.0 8.0 8.0 6.0 4.0 3.0
INCLINE 3 3 9 7 7 5 5 7 3 3

14GT4.0 TREADMILL
CONSOLE OPERATION INSTRUCTIONS
P14 SPEED 3.0 4.0 6.0 9.0 6.0 6.0 7.0 9.0 5.0 4.0
INCLINE 4 4 3 3 9 9 5 5 5 5
P15 SPEED 3.0 4.0 8.0 9.0 6.0 6.0 6.0 9.0 5.0 4.0
INCLINE 2 3 6 8 8 5 5 7 3 3
P16 SPEED 3.0 3.0 6.0 9.0 9.0 9.0 9.0 6.0 4.0 3.0
INCLINE 4 4 10 10 10 10 10 7 3 3
P17 SPEED 4.0 5.0 9.0 10.0 11.0 11.0 11.0 8.0 5.0 4.0
INCLINE 3 3 9 7 7 7 7 7 2 2
P18 SPEED 4.0 5.0 7.0 8.0 8.0 8.0 10.0 11.0 6.0 4.0
INCLINE 2 9 9 8 8 8 8 6 4 2
P19 SPEED 4.0 5.0 5.0 11.0 5.0 10.0 5.0 12.0 4.0 3.0
INCLINE 2.0 2 7 7 7 9 9 11 7 3
P20 SPEED 4.0 6.0 8.0 10.0 4.0 6.0 8.0 6.0 12.0 6.0
INCLINE 4 4 4 8 8 4 4 4 6 6
P21 SPEED 4.0 8.0 11.0 5.0 8.0 12.0 6.0 5.0 12.0 7.0
INCLINE 4 7 8 4 9 9 4 9 5 5
P22 SPEED 4.0 6.0 10.0 11.0 7.0 7.0 10.0 7.0 12.0 4.0
INCLINE 3 8 6 6 9 9 9 9 5 5
P23 SPEED 5.0 6.0 12.0 10.0 7.0 9.0 10.0 12.0 7.0 6.0
INCLINE 2 7 4 4 8 8 5 5 7 7
P24 SPEED 5.0 7.0 11.0 11.0 11.0 8.0 8.0 11.0 7.0 6.0
INCLINE 4 9 10 6 6 9 9 5 5 5
P25 SPEED 3.0 5.0 7.0 7.0 7.0 9.0 9.0 7.0 5.0 4.0
INCLINE 4 4 10 8 8 6 6 8 4 4
P26 SPEED 4.0 5.0 7.0 10.0 7.0 7.0 8.0 10.0 6.0 5.0
INCLINE 5 5 4 4 10 10 6 6 6 6
P27 SPEED 4.0 5.0 9.0 10.0 7.0 7.0 7.0 10.0 6.0 5.0
INCLINE 3 4 7 9 9 6 6 8 4 4
P28 SPEED 4.0 4.0 7.0 10.0 10.0 10.0 10.0 7.0 5.0 4.0
INCLINE 5 5 11 11 11 11 11 8 4 4
P29 SPEED 5.0 6.0 10.0 11.0 12.0 12.0 12.0 9.0 6.0 5.0
INCLINE 4 4 10 8 8 8 8 8 3 3
P30 SPEED 5.0 6.0 8.0 9.0 9.0 9.0 11.0 12.0 7.0 5.0
INCLINE 3 10 10 9 9 9 9 7 5 3
P31 SPEED 5.0 6.0 6.0 12.0 6.0 11.0 6.0 12.0 5.0 4.0
INCLINE 3 3 8 8 8 10 10 12 8 4
P32 SPEED 5.0 7.0 9.0 11.0 5.0 7.0 9.0 7.0 12.0 7.0
INCLINE 5 5 5 9 9 5 5 5 7 7
P33 SPEED 5.0 9.0 12.0 6.0 9.0 12.0 7.0 6.0 12.0 8.0
INCLINE 5 8 9 5 10 10 5 10 6 6
P34 SPEED 5.0 7.0 11.0 12.0 8.0 8.0 11.0 8.0 12.0 5.0
INCLINE 4 9 7 7 10 10 10 10 6 6
P35 SPEED 6.0 7.0 12.0 11.0 8.0 10.0 11.0 12.0 8.0 7.0
INCLINE 3 8 5 5 9 9 6 6 8 8
P36 SPEED 6.0 8.0 12.0 12.0 12.0 9.0 9.0 12.0 8.0 7.0
INCLINE 5 10 11 7 7 10 10 6 6 6

15GT4.0 TREADMILL
HOW TO USE
General cleaning will help prolong the life and performance of your treadmill. Keep the unit clean and
maintained by dusting the components on a regular basis. Clean both sides of the running belt to prevent
dust from accumulating underneath the belt. Keep your running shoes clean so that dirt from your shoes
does not wear out the running board and belt. Clean the surface of the running belt with a clean damp cloth.
• To make the cleaning easier it is recommended to use a mat for the treadmill. Shoes can leave dirt on the
striding belt that can fall beneath the treadmill. Clean the mat under the treadmill once a week.
• To better maintain the treadmill and prolong its life it is suggested that the machine be powered o for 10
minutes every 2 hours and fully powered o whenever not in use.
• A loose Running Belt will result in the runner sliding o when running, while too tight of a Running Belt will
result in decrease to the motors performance and also create more friction between the roller and running
belts. The most suitable tightness for the belts is pulled out 50-75mm from the Running Board.
MAINTENANCE AND CARE
1. Turn the power on , keep the treadmill spread out at its lowest position and check its function if normal.
2. Clip the safety key cord with your clothes.
3. Ensure and check its function and stability before use .
Standing on the Running belt to get it started is not allowed. The correct way to start is standing on side rails
with hands on the handle bar. After normal working, you can exercise with the treadmill.
Hold the handle bar when press the START key, the treadmill running at the speed of 1.0km/h after
5 seconds. Then press +Key to 2.5-3.5 km/h which is the comfort speed for running. Both of hands are
supposed to catch handle bar at the same time and feet step to the running belt successively to start
running. Running as quickly as running belt soon.
4. After several minutes, you can speed up by pressing +key or slow down by -key meanwhile holding the
handle bar.
5. When running ,press speed value,you can enter into the xed speed you want .
6. Pressing STOP key to make the motor stop.
PRE-SETTING USE
• Connect the power .Turn the power on.
• Press CHOOSE key to select what mode you want.
• Press START key to get started in your selected mode.
• You can press +or - to change the speed or STOP key to make it stop.
HRC TESTING
After the treadmill is powered on, hold your hands on the metal pulse sensors, then you can see HRC value
on the display window.
NOTE: When safety key pull out ,the treadmill will stop immediately. And thecomputer can not work,
the window shows “__”.

16GT4.0 TREADMILL
MAINTENANCE AND CARE
CENTERING THE RUNNING BELT:
Place the treadmill on level ground and set it at 6-8kph to check if the Running Belt drifts.
2. If the Running Belt moves to the left,
turn the adjusting bolts on the left side ¼of
a turn clockwise,then turn the right
adjustment bolt ¼ turn counter-clockwise. If
the belt does not move, repeat this step until
it centers. Refer to figure B.
3. Over time the Running Belt will loosen.
To tighten the belt turn the Left & Right side
adjustment bolts one full turn clockwise,
check the tension of the belt. Continue this
process until belt is at the correct tension.
Make sure to adjust both sides equally to
ensure correct belt alignment. Refer to
figure C.
1. If the Running Belt moves to the right,
turn the adjusting bolt on the right side ¼
turn clockwise, then turn the left adjustment
bolt ¼ turn counter-clockwise. If the belt
does not move,repeat this step until it
centers. Refer to figure A.

17GT4.0 TREADMILL
LUBRICATING THE TREADMILL
IMPORTANT NOTE:
The treadmill is factory-lubricated. However, it is recommended to check the lubrication of the treadmill regu-
larly, to ensure an optimal operation of the treadmill.
RUNNING BELTS & TREADMILL LUBRICANT:
Lubricating the running board and running belt is essential as the friction between the two aects the life
span and function of the treadmill, therefore it is suggested that the running board and belt be inspected
regularly.
Always unplug the treadmill from the electrical outlet before cleaning, lubricating or repairing the unit.
HOW TO LUBRICATE:
1. Raise the belt up on one side and apply lubricant to the running deck. Use a rag to thoroughly wipe the
lubricant over the running deck. Repeat this process for the other side.
2. The moving parts should turn freely and quietly. Abnormality of moving parts will aect the safety of the
equipment. Inspect and tighten bolts regularly.
3. To better maintain the treadmill and prolong its lifespan, it is suggested that maintenance be done on a
regular basis.
!
WARNING!
The following time table is recommended:
Light user less than 3 hours/week every six months
Medium user 3-5 hours/week every three months
Heavy user more than 5 hours/week every two months
STORAGE
Store you treadmill in a clean and dry environment. Ensure the master power switch is o and is un-plugged
from the electrical wall outlet.

18GT4.0 TREADMILL
TROUBLESHOOTING
TREADMILL
Item Reason Maintenance
Treadmill didn’t
work
a no power Plug into socket
b safety key isn’t in the
right position Replace the safety key
c broken circuit signal
system Check the controller input and signal wire
d switch off
Place the power switch in the
“NO”position.
e fuse burnt out Change the fuse
The running belt
does not run
smoothly.
a no enough
lubrication Use the Silicone oil
b running belt too
tight Adjust the tightness of running belt
Running belt slips
a running belt too
loose Adjust the tightness of running belt
b motor belt too
loose Adjust the tightness of motor belt
The keys
malfunctionbroken keys
1. Change the key board and wire;
2.Change the mainboard;
3.Change the console
Stop abruptly under
normal state
a. Safety key drop out Replace the safety key
b. broken system Ask serviceman to repair it

19GT4.0 TREADMILL
TROUBLESHOOTING
CONSOLE
Item trouble Maintenance
E1
Communication
abnormal:The
communication
between the
controller and the
electronic watch is
abnormal after
power is applied.
Broken controller couldn’t working. Console display
fault code and the buzzer sounded 3 times.
Reason: the poor communication between controller
and console. Checking each connection of
communication wire between console and controller.
Make sure each core is completely inserted. Check
the connection wire, if it was broken, change it.
E3
The motor line is not
connected properly
The treadmill stop working and enter a fault state when
the buzzer sounded 9 times. The console display fault
code while the rest areas do not display anything. If
console discovery normal state and enter standby state
after treadmill stop working, the treadmill can restart.
Reason: make sure the well connection of the motor
wire and connect the wire again. If the controller has
peculiar smell, replace the controller.
No signal of speed
sensor: a voltage from
controller is output to
the DC motor. The
motor speed feedback is
not continuously
received for more than 3
seconds.
The treadmill stop working and enter a fault state when
the buzzer sounded 9 times. The console display fault
code while the rest areas do not display anything. After
maintaining the fault state for about 10 seconds, enter
the standby state and restart the machine.
Reason: no speed sensor signal is detected for 3
consecutive seconds, check whether the sensor plug is
not plugged in or damaged, plug it in or replace the
sensor.
E4
Ascending by self
learning Check whether the induction line of the lifting motor is
plugged in properly and plug the connector again to
make it reliable. Check whether the AC line of the
lifting motor is plugged correctly, and the AC line of
the lifting motor is correctly numbered with the mark on
the controller. Check whether the connecting wire of the
motor is damaged or open, replace the connecting wire
or lift the motor; After checking all, press the learning
key on the control to learn again.
E5
Over current
protection ˖under the
running state, the down
control continuously
detects that the DC
motor current is greater
than the rated current
+6A for more than 3
seconds.
The treadmill stop working and enter a fault state when
the buzzer sounded 9 times. The console display fault
code while the rest areas do not display anything. After
maintaining the fault state for about 10 seconds, enter
the standby state and restart the machine.
Reason: over - rated load leads to over-current and
self-protection of the system, or a certain part of the
treadmill is stuck, resulting in motor failure, over-load
and over-current and self-protection of the system.
Adjust the treadmill and restart it. Check whether the
motor has over-current sound or burnt smell when
running, and replace the motor; Or check whether the
controller has burnt smell and replace the controller; Or
check whether the power supply voltage specification is
inconsistent or low, and retest with the correct voltage
specification.
E6
Explosion - proof
protection: abnormal
power supply voltage or
abnormal motor will
cause damage to the
drive motor circuit.
The treadmill stop working and enter a fault state when
the buzzer sounded 9 times. The console display fault
code while the rest areas do not display anything. After
maintaining the fault state for about 10 seconds, enter
the standby state and restart the machine.
Reasons: check whether the power supply voltage is
lower than 50% of the normal voltage, please retest
with the correct voltage specification; Check whether
the controller has peculiar smell and replace the
controller; Check whether the motor line is connected
properly and reconnect the motor line.
LCD display
no value of
pulse
A. The handle
communication wire
didn’t plug well or
broken handle wire
Check and connect the wire well or change handle
wire.
B. Broken wire of
console
Change the console
Console
incomplete
display or
lack of
strokes
A. Loose screw of
display board
Tighten the screw
B. Broken system Change the console

20GT4.0 TREADMILL
EXPLODED DRAWING 1
Table of contents
Other Gymstick Treadmill manuals

Gymstick
Gymstick GT7.0 User manual

Gymstick
Gymstick PRO20.0 User manual

Gymstick
Gymstick PRO10.0 User manual

Gymstick
Gymstick GT1.0 User manual

Gymstick
Gymstick TITANIUM RUN 2.0 User manual

Gymstick
Gymstick GT3.0 User manual

Gymstick
Gymstick WalkingPad TM-WPAD User manual

Gymstick
Gymstick RUN 10.0 User manual

Gymstick
Gymstick PRO20.0 User manual

Gymstick
Gymstick RUN 3.0 User manual