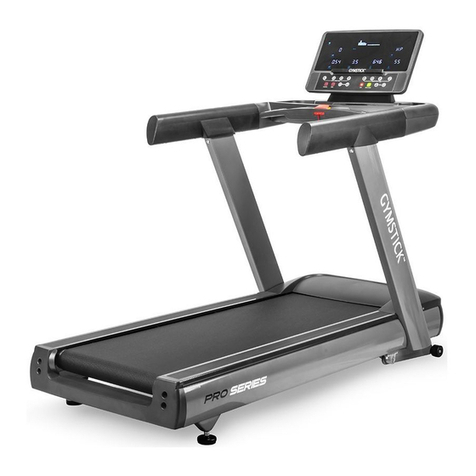
Gymstick PRO20.0 User manual

PRO20.0 TREADMILL
USER MANUAL
IMPORTANT: Read all instructions carefully before using this product. Retain this owner’s manual for future
reference. The specications of this product may vary from this photo, subject to change without notice.

2PRO20.0 TREADMILL
BEFORE YOU BEGIN
Thank you for choosing the Gymstick PRO20.0 Treadmill. We take great pride in producing this
quality product and hope it will provide many hours of eective exercise to make you feel better,
look better and enjoy life to its fullest.
TABLE OF CONTENT
1. SAFETY INSTRUCTIONS...................................................................................................3
2. EXPLODED DRAWING....................................................................................................... 4
3. PARTS LIST.........................................................................................................................5
4. ASSEMBLY INSTRUCTIONS ............................................................................................8
5. MOVING THE TREADMILL................................................................................................. 14
6. CONSOLE INSTRUCTIONS............................................................................................... 15
7. PROGRAM SPEED/INCLINE TABLE..................................................................................20
8. HOW TO USE......................................................................................................................21
9. IMPORTANT ELECTRICAL INFORMATION....................................................................... 23
10. CENTERING THE RUNNING BELT.................................................................................... 24
11. LUBRICATING THE TREADMILL........................................................................................25
12. MAINTENANCE AND CARE............................................................................................... 26
13. TROUBLESHOOTING.........................................................................................................27
14. IMPLIED WARRANTY......................................................................................................... 29
READ AND FOLLOW THE SAFETY INSTRUCTIONS. FAILURE TO FOLLOW THESE INSTRUCTIONS
CAN RESULT IN SERIOUS INJURY.
!
NOTIFICATION!

3PRO20.0 TREADMILL
!
WARNING!
SAFETY INSTRUCTIONS
Basic precautions should always be followed, including the following safety instructions when using
this equipment: Read all instructions before using this equipment.
• Never leave the treadmill unattended. Unplug the unit from the power outlet when it is not in use.
• Do not allow children or those unfamiliar with its operation on or near the treadmill. Do not leave children or
persons with reduced physical or mental capabilities unsupervised around the treadmill.
• Please wear proper clothes and shoes when using this equipment; do not wear clothes that might catch
any part of the equipment.
• If you feel any chest pains, nausea, dizziness, or short of breath, you should stop exercising immediately
and consult your physician before continuing.
• Keep children and pets away from the equipment. This machine is designed for adults only.
• Only one person should be on the equipment while in use.
• Please make sure all parts are not damaged and xed well before use.
• Never operate the unit if it is damaged, if it is not working properly
• This equipment should be placed on a at surface when using. Using a mat or other covering material on
the ground is recommended. The minimum free space required for safe operation is 0,5 meter.
• Never block the air openings on the hood while operating the treadmill. Never drop or insert objects into
any opening.
• Use the treadmill only for its intended purpose as described in this manual.
• If the power cord of the machine is damaged, it must be replaced. Do not use the machine until the power
cord has been changed and properly attached.
• Do not use the equipment outdoors.
• This appliance is designed for use with ~220 - ~240 Volt rated voltage.
• The maximum weight capacity for this product is 160kgs.
BEFORE BEGINNING THIS OR ANY EXERCISE PROGRAM, CONSULT YOUR PHYSICIAN FIRST.
THIS IS ESPECIALLY IMPORTANT FOR INDIVIDUALS OVER THE AGE OF 35 OR PERSONS WITH
PRE-EXISTING HEALTH PROBLEMS.
4PRO20.0 TREADMILL
EXPLODED DRAWING

5PRO20.0 TREADMILL
PARTS LIST
Item Description Specication QTY
1 base frame 1
2 Incline motor frame 1
3 upright post left 1
4 upright post right 1
5 console frame 1
6 screen frame 1
7 motor base 1
8 hand pulse frame left (PVC coated) 1
9 hand pulse frame right (PVC coated) 1
10 xed base t25×120×60(zinc plating-white) 2
11 front roller Φ150×Φ85×Φ25×715 1
12 rear roller Φ85×Φ25×638×705 1
13 running board 1410×680×25 1
14 running belt 3460×580×t3.2 tyre pattern 1
15 motor belt 270J10 1
16 motor A.C 3.0HP 1
17 Incline motor 1
18 inverter 1
19 cylinder cushion pad φ30×30×M8×8 4
20 cushion pad with base 80×54×40(red) 4
21 aluminium side rail 128×49×1400 2
22 rubber pad of side rail 100×8×700 4
23 motor cover 810×595×68 1
24 Front cover of motor cover 810×114×192 1
25 hand pulse set cylinder length 133(hand pulse
bracket included) 2
26 upright post cover left 1
27 upright post cover right 1
28 Rear cover 855×163×195 1
29 Rear cover accessory left 78×34×155 1
30 Rear cover accessory right 78×34×155 1
Item Description Specication QTY
31 foot pad Φ74×86×M12 2
32 PU hand bar left 1
33 PU hand bar right 1

6PRO20.0 TREADMILL
PARTS LIST
Item Description Specication QTY
34 console upper housing 924×403×117 1
35 console lower housing 926×377×129 1
36 fan mounting board 404×28×57 1
37 console mounting seat 432×208×227 1
38 TFT panel 588×22×360 1
39 display back cover 586×82×359 1
40 console back cover 5550EA/408×123×316 1
41 power connected base 250V/10A/red L-60/black L-150/
yellow green L-320 1
42 fuse seat with wire FP-ZHY-8(6.35×30)/15A 1
43 switch XW604(20A)1
44 power cord 3×1.5mm2×2000 1
45 Powder metallurgical sheath Φ35×Φ30×Φ20×27 2
46 wheel φ78×φ12.2×t23 4
47 safety key press piece 83.5×42.7×33.2 1
48 round bushing 2
49 hexagon lock nut M12 3
50 at washer Φ12 3
51 allen c.k.s half thread screw M12×80×20 2
52 allen c.k.s half thread screw M12×70×20 1
53 allen c.k.s half thread screw M10×40×20 1
54 allen cylinder full thread screw M8×75 3
55 allen cylinder full thread screw M8×25 8
56 allen cylinder full thread screw M10×35 4
57 allen cylinder full thread screw M8×80 8
58 allen cylinder full thread screw M8×10 8
59 allen c.k.s full thread screw M8×20 12
60 allen cylinder full thread screw M8×15 4
Item Description Specication QTY
61 allen cylinder full thread screw M8×55 2
62 at washer Φ8 16
63 spring washer Φ10 4
64 at washer Φ10 8

7PRO20.0 TREADMILL
PARTS LIST
Item Description Specication QTY
65 hexagon lock nut M10 4
66 safety key mounting board 106×54×24 1
67 safety key plug piece 60.5×42×12 1
68 compressed spring φ11.8×φ0.8×24 1
69 Connected wire (earth) L-150mm
70 incline quick switch 32×25×52 1
71 speed quick switch 32×25×52 1
72 philips c.k.s full thread screw M5×15(steel nail) 2
73 philips c.k.s self-tapping screw ST4×20 8
74 philips c.k.s self-tapping screw ST4×16 72
75 philips c.k.s full thread screw M4×16(steel nail) 24
76 philips self-drilling full thread screw M3×28 4
77 quick switch wire L-700mm 2
78 communication wire 5552EA/L-900mm 1
79 communication wire 5552EA/L-1200mm 1
80 communication wire 5552EA/L-800mm 1
81 power connection wire L-800mm/1.5mm2/ red 1
82 power connection wire L-800mm/1.5mm2/black 1
83 wire (earth) L-200mm/1.5mm2 3
84 serrated lock washers Φ5 6
85 lter 10A(F7252) 1
86 magnet ring φ35×φ22×t15.0 1
87 power connection wire L-450mm/1.5mm2/black 1
88 power connection wire L-450mm/1.5mm2/red 1

8PRO20.0 TREADMILL
WARNING: Use extreme caution when assembling this treadmill. Failure to do so could result in
injury.
NOTE: Each step number in the assembly instructions tells you what you will be doing. Read and
understand all instructions thoroughly before assembling the treadmill.
UNPACK AND VERIFY THE CONTENTS OF THE BOX:
● Lift up and remove the box that surrounds the Treadmill.
● Check the following items are present. If any of the parts are missing, contact with the dealer.
Platform frame
Upright posts Console rear cover
Left upright post cover Right upright post cover
Console frame
LED-panel
ASSEMBLY INSTRUCTIONS
UNPACKING AND ASSEMBLY
PACKAGE CONTENTS

9PRO20.0 TREADMILL
User manual
Rear cover
Running board
Rear roller
Silicone oil
Motor
Side rail
Motor belt Incline motor
Hardware bag
Motor cover
Running belt
Front roller
M8X65
M8X65
M8X65
M8X65
M8X15
ASSEMBLY INSTRUCTIONS
PACKAGE CONTENTS
MAIN PARTS
PRO20.0 TREADMILL
USER MANUAL
IMPORTANT: Read all instructions carefully before using this product. Retain this owner’s manual for future

10PRO20.0 TREADMILL
59
70
69
44
45
57
29
30
42
37
24
25
27
27
27
27
27
27
27
27
19
19
67
54
47
48
36
36
21
36
36
21
20
50
5
61
27
27
27
27
27
27
27
27
27
27
27
27
27
27
49
60
44
2
1
3
4
6
8
7
7
14
13
11
11
12
12
15
15
15 32
16
16
17
17
17
17
18
18
19
31
75
31
31
75
31
21
21
23
23
23
23
23
23
23
23
26 26
26 26
67
37
24 37
37
24 37
24
24
25
25
25
25
25
25
25
25
24
24
28
28
28
27
27
32
32
32
32
33
33
34
34
35
34
35
35
35
38
38
39
39
39
40
40 41
41
46
51 53
53
52
56
56
58
62
62
63
64
66
66
68
68
68
68
71
72
55
55
9
10
19
22
22
28
10
10
10
73
73
73
73
75
75
34
34
34
76
77
27
27
27
27
65
78
80
27
79
24
24
27
27
32
48
32
32
32
32 32 32
32
32
32
32
32
32
32
47
54
86
89
87 88
28
91
92
93
90
94
1817 26
49
28
28
28
9695
81
25
74
74
82
83
84
85
65
65
65
65
65
65
T-shaped wrench L-shaped spanner Cross open wrench
Philips C.K.S self-tapping screw
(ST4*15) 10 pcs
Allen C.K.S. half thread screw
(M8*20) 8pcs
Philips C.K.S full thread screw
(ST4*16) 4pcs
Allen socket full thread screw
(M8*80) 8pcs
ASSEMBLY INSTRUCTIONS
HARDWARE BAG

11PRO20.0 TREADMILL
ASSEMBLY INSTRUCTIONS
TREADMILL INTRODUCTION
Upright post
Console
Handle bar
Safety key
Side rail
Running belt
Rear cover
Motor cover
Foldable Dimensions 2145*930*1680mm
Running Area 1580*600mm
Speed 1.0 - 25.0km/h
Incline 0 - 15%
Note: We reserve the right to amend the product without prior notice.

12PRO20.0 TREADMILL
ASSEMBLY INSTRUCTIONS
STEP 1
Take out the machine from box and put it on the at oor. (As shown)
Insert the upright post into clamping ring on the both side of the main frame with 4 pcs of M8*80
screws. Connect well the communication wire before upright post assembly.
STEP 2
Connect communication wires (on the right) well with right upright post. Put the console onside the
upright post and x it with 4 pcs of M8*20 screws.

13PRO20.0 TREADMILL
ASSEMBLY INSTRUCTIONS
STEP 3
Connect communication wire too before inserting the led panel to the led seat and then x the
console with 4 pcs of M8*20 screws.
STEP 4
Fix left upright post cover onto base frame with 2 pcs of M4 *15 screws and then connect to the
motor cover with 2 pcs of St4*15 screws. It’s the same way to assembly right upright post cover.
Fix the console back cover with 4 pcs of ST4*15 screws. Assembly is done.

14PRO20.0 TREADMILL
The treadmill can be moved around in house safely in its fold-up position by using the transport
wheels.
When moving this machine, following things must be determined:
1.The main frame has been fallen to the lowest point.
2.The power switch has been closed.
3.The power plug has been pulled out of the power socket.
After specifying the above points, grasp the end of the platform with both hands and lift the mach-
ine up. Stand up straight and move the machine forward or backward slowly. After moving to the
right place, allow deck to begin slowly dropping before releasing hands.
MOVING THE TREADMILL

15PRO20.0 TREADMILL
CONSOLE INSTRUCTIONS
Quick speed buttonQuick incline button
Start / Pause buttonStop button
FUNCTIONS
1.1 P0 is the manual program for user. P1-P36 is the preset auto program for training. U1~U3
(user-dened program), HRC1~HRC3 , body fat function.
1.2 1 LED dot matrix screen , 6 digital displays, 24 operation keys .
1.3 Speed Range:1.0~25.0KM/H. Incline Range: 0~15 %.
1.4 Controller with Inverter.
1.5 Self-checking system, and warning function of abnormal information.
1.6 Available shift between metric and imperial in program of speed and distance.
1.7 MP3 (Optional)
1.8 Fan (Optional)
Display Window Description
“SPEED” window: display the value of speed.
“TIME” window: display the value of time.
“DISTANCE” window: display the value of distance and steps.
“CALORIES” window: display the value of calories.
“PULSE” window: display the value of pulse.
“INCLINE”window: display the value of incline.

16PRO20.0 TREADMILL
CONSOLE INSTRUCTIONS
1. P is PROGRAM key. User can select program P0~P36, U1~U3(user dened program),
HRC1~HRC3, FAT(body fat function) circularly when the treadmill is under STOP state.
2. M is MODE key. When you select Manual mode, the initial state is normal. Press Mode key to
select three dierent countdown operation modes: Time countdown mode --> distance
countdown mode --> calorie countdown mode --> normal. The Reset key of default time
countdown(30 mins) is in P1-P36.
3. START is START/PAUSE key. Press the key to start the treadmill when it’s under stop states.
Press the key to pause the treadmil when it’s running.
4. STOP key. Under running state, press STOP key and the treadmill will go to a slow stop.
5. “+/-” SPEED control key. Adjust running speed of the treadmill by pressing “+/-” key when the
treadmill is under the running states. While under the stop or body fat testing states, pressing
“+/-” key to adjust the setup of the parameter.
6. Speed Shortcut key 3,6,9,12/ 14,16,18,20: In the running state, user can adjust the running
speed directly to the key specied value as the shortcut shows.
7. INCLINE control key. In the running state, user can adjust the incline level by pressing / .
8. Incline Shortcut key 2,4,6,8,10,12,15: In the running state, user can adjust the incline level
directly to the key specied value as the shortcut shows. Shift between Metric and Imperial
Pull out the safety key, press PROGRAM and MODE key at the same time, M displays in the
screen which means it shifts to Imperial system already. Pull out the safety key, press
PROGRAM and MODE key at the same time, KM displays in the screen which means it shifts to
Metric system already.
Safety Key function
The safety key consists of a tact switch, a clothes peg and a nylon cord, and has a safety feature
for emergency stop. In any state, once the safety key is pulled out, motor will stop urgently and
E-07 display in the screen with a buzzer sound. The console keys will ban to operate. Every time
the safety key is replaced, the screen will fully display for 2 seconds and system will enter into
default working state.
OPERATION INSTRUCTION
1. Put the power cord to a grounded power outlet with 8 amps. Turn on the power switch, the
console screen displays fully and accompanying with prompt sound, then identicates the safety
key.
2. Put the safety key in the right position and clip the clothespin to the clothes on the chest. The
system will enter into the default working state after the screen fully displayed for 2 seconds. All
counters and setting value will be reset to original state. The treadmill is in positive timing mode
of the manual program P0.
3. Press PROGRAM key to select program P0~P36/ U1~U3/ HRC1~HRC3/ FAT circularly.

17PRO20.0 TREADMILL
CONSOLE INSTRUCTIONS
3.1 P0 is customized program for user. Press MODE key to select four training modes circularly.
Training speed and incline is set by user. Default value of speed is 1.0km/h and default value of
incline is 0%.
• Training Mode 1 - Normal: Time, distance and calories are all counted positively, disable setting
function.
• Training Mode 2 - Time countdown: Time window ashes under setting state. Press +/- key to
modify the setting value. Setting range from 5mins~99mins and default 30mins.
• Training Mode 3 - Calorie countdown: Calorie window ashes under setting state. Press button
+/- to modify the setting value. Setting range from 20cal to 9990cal and default 50cal.
• Training Mode 4 - Distance countdown: Distance window ashes under setting state. Press
button +/- to modify the setting value. Setting range from 1.0km to 99.0km and default 1.0km.
3.2 P1~P36 is setting program of the system and only available for the training under the mode of
time countdown. Time window ashes under setting state. Press button +/- to modify setting
value. Time setting range is from 5mins to 99mins and default 30:00
3.3 Press START button after complete training mode setting. The screen starts to display a
5-second countdown and accompanying prompt tone for ve times. Whent counting down to 1,
the treadmill starts gently, slowly accelerate to the displayed speed and go into running with
constant speed smoothly.
3.3.1 Press button +/- or QUICK SPEED key to adjust the running speed when it’s under running
state.
3.3.2 In P1~P36, the speed and incline of each program will be divided into 16 segments. Time of
each segment is divided equally in the setting time. Adjusted speed or incline is only eective
in the current segment. There’s 3 buzzer sounds 3sec ahead of the conversion between the
segments. The motor will stop automatically accompanying with a long alert tone after the
program runs the whole 16 segments.
3.3.3 When motor is in running state, press START button to pause the motor. If press the key
again, and the treadmill resume running. Running data and progress still remains.
3.4 When the motor is in running state, press STOP button to stop the motor slowly till it stops
smoothly. All settings will return to the default state.
3.5 In any state, the motor will stop urgently when the safety key is pulled out and E-07 display in
the window with a buzzer sound.

18PRO20.0 TREADMILL
3.6 The electric control system is in safety monitoring at any time. The running treadmill will stop
in an emergency when abnormity is found. The screen will display abnormal information and
accompany with alert tone.
3.7 There’re three selections in USER mode USER1~USER3. User can access or set up his/her
own motion program. Press PROGRAM key to USER mode USER1~USER3, it’ll ash in TIME
display window at the moment. User can press speed key +/- to set up exercise time. Press
MODE key after time setup, it’ll ash both in the display window of SPEED & INCLINE. User
can set up his/her own program in 16-segment of speed and incline. Press speed key +/- to
set up the speed of each segment of exercise, and press / to set up the incline level of
each segment of exercise. After setting, user can press START to begin the exercise. User’s
specied program will be saved and can be accessed to use directly in next time.
3.8 Body Fat test method: Press the PROGRAM key to select FAT, the DISTANCE window displays
setting project number, then press the MODE key to select project number. TIME display
window in the right side displays the parameter of the setting item. Press button +/- to adjust
the parameters.
F1 (sex): dened as gender. Parameter range is 1~2. 1 dened as male, 2 dened as
female. Default 1.
F2 (Age): dened as age. Parmeter range is 1~99 years old. Default 25 years old.
F3 (Height): dened as height. Parameter range is 100~220cm. Default is 170cm.
F4 (Weight): dened as body weight. Parameter range is 20~150kg. Default is 70kg.
F5 (BMI): dened the completion of parameter setting and entering into body fat testing
state. Please hold the heart rate sensor of the handlebar by both hands for 8 seconds,
body fat percentage (BMI) of the test will display in the parameter window. According
to European standards, it’s is considered as thin if BMI less than 18.5. It’s considered as
ideal weight if BMI between 18.5 and 24.9. It’s considered as overweight if BMI between
25 and 29.9. And it’s considered obese if BMI is over 30. BMI default 24.
FAN Function (Optional)
Press FAN key to start or stop it.
MP3 Function (Optional)
The console is with built-in double-channel sound, regulated power supply with switch-mode and
mute function for no signal. Connect MP3 headphone jack and audio input of the console through
the provided audio line can play music by speaker. Insert the headphone cable to the headphone
jack of the console. Only wear the headphone can hear the music.The USB interface beside the
headphone jack is used to play music. The system will play music by reading data automaticlly
after Inserting the multimedia product that’s with USB port.
CONSOLE INSTRUCTIONS

19PRO20.0 TREADMILL
CONSOLE INSTRUCTIONS
HRC
1. There’re three groups as default HRC. HRC1 with limited speed 9 km/h. HRC2 with limited
speed 11 km/h. HRC3 with limited speed 13 km/h.
2. HRC setting method/ sequence/ parameter range. Press PROGRAM key to display HRC,
conrming the mode to enter to next setting and press speed key +/- for parameter adjusting.
Till complete the setting of last parameters then can start.
Setting range for AGE: 5~80 years old, default 25 years old
Default THR (target heart rate): (220 - Age)*0.6
THR can be modied with modifying range: 80~180
Time setting: Default 30 minutes. Modifying range: 5~99 minutes
3. Relationship with Speed Variation
A. Frequency of change. The HRC detects heart rate every 30 seconds.
B. Speed increases by 2km/h when heart rate is 30 beats/min below the target H.R.
C. Speed increases by 1km/h when heart rate is 6~29 beats/min below the target H.R.
D. Speed decreases by 2km/h when heart rate is 30 beats/min above the target H.R.
E. Speed decreases by 1km/h when heart rate is 6~29 beats/min above the target H.R.
F. Speed remains the same When the heart rate is 0~5 beats/min below or above the target H.R.
4. Under the following situations, the speed of treadmill will slow down to lowest within 20 seconds
and stop after running at the lowest speed for 15 seconds with alarm sound every second.
A. Detect the heart rate per every 30 seconds and couldn’t detect the heart rate for twice.
B. 1 km/h (0.6 mph), heart rate leads to deceleration.
C. The heart rate exceed (220 - the setting age).
5. Deceleration can not be lower than 1 km/h (0.6 mph) when the speed is above 1km/h (0.6 mph).
For example: The lowest speed of treadmill is 1 km/h (0.6 mph), when it runs at 1.6 km/h (1.0
mph) and with deceleration 1.0 (2.0) km/h caused by heart rate, then the speed will slow down
to 1 km/h (0.6 mph).
6. Incline won’t be controlled by the heart rate but by manual. The treadmill won’t be controlled by
heartbeat for 1 minute before starting running, and only starts running according to the built-in
formula after running for 1 minute.

20PRO20.0 TREADMILL
PROGRAM SPEED/INCLINE TABLE (KMH)
Other manuals for PRO20.0
4
Table of contents
Other Gymstick Treadmill manuals

Gymstick
Gymstick WalkingPad TM-WPAD User manual

Gymstick
Gymstick GT7.0 User manual

Gymstick
Gymstick PRO20.0 User manual

Gymstick
Gymstick TITANIUM RUN 2.0 User manual

Gymstick
Gymstick GT3.0 User manual

Gymstick
Gymstick GT1.0 User manual

Gymstick
Gymstick RUN 3.0 User manual

Gymstick
Gymstick RUN 10.0 User manual

Gymstick
Gymstick GT4.0 User manual

Gymstick
Gymstick PRO10.0 User manual