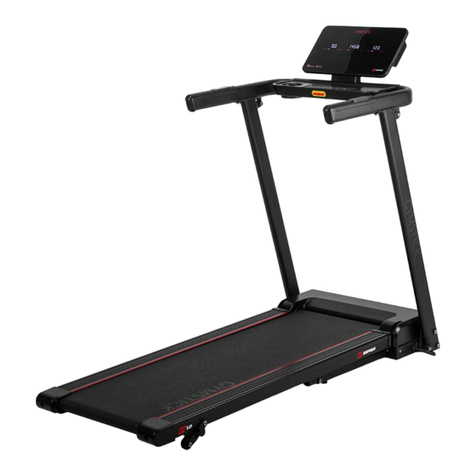
Gymstick GT7.0 User manual

GT7.0 TREADMILL
USER MANUAL
IMPORTANT: Read all instructions carefully before using this product. Retain this owner’s manual for future
reference. The specications of this product may vary from this photo, subject to change without notice.

2GT4.0 TREADMILL
BEFORE YOU BEGIN
Thank you for choosing the Gymstick GT7.0 Treadmill. We take great pride in producing this quality
product and hope it will provide many hours of eective exercise to make you feel better, look
better and enjoy life to its fullest.
TABLE OF CONTENT
1. SAFETY INSTRUCTIONS ................................................................................................ 3
2. ASSEMBLY INSTRUCTION............................................................................................... 4
3. SETTING UP YOUR TREADMILL ..................................................................................... 10
4. IMPORTANT ELECTRICAL INFORMATION ..................................................................... 11
5. GETTING STARTED ......................................................................................................... 12
6. CONSOLE OPERATION INSTRUCTIONS ................................................................. 14
7. MAINTENANCE AND CARE .............................................................................................. 20
8. TROUBLESHOOTING ....................................................................................................... 23
9. EXPLODED DRAWING ..................................................................................................... 24
10. PARTS LIST ...................................................................................................................... 25
11. IMPLIED WARRANTY ...................................................................................................... 28
READ AND FOLLOW THE SAFETY INSTRUCTIONS. FAILURE TO FOLLOW THESE INSTRUCTIONS
CAN RESULT IN SERIOUS INJURY.
!
NOTIFICATION!

3GT4.0 TREADMILL
!
WARNING!
SAFETY INSTRUCTIONS
Basic precautions should always be followed, including the following safety instructions when using
this equipment: Read all instructions before using this equipment.
• Never leave the treadmill unattended. Unplug the unit from the power outlet when it is not in use.
• Do not allow children or those unfamiliar with its operation on or near the treadmill. Do not leave children or
persons with reduced physical or mental capabilities unsupervised around the treadmill.
• Please wear proper clothes and shoes when using this equipment; do not wear clothes that might catch
any part of the equipment.
• If you feel any chest pains, nausea, dizziness, or short of breath, you should stop exercising immediately
and consult your physician before continuing.
• Keep children and pets away from the equipment. This machine is designed for adults only.
• Only one person should be on the equipment while in use.
• Please make sure all parts are not damaged and xed well before use.
• Never operate the unit if it is damaged, if it is not working properly
• This equipment should be placed on a at surface when using. Using a mat or other covering material on
the ground is recommended. The minimum free space required for safe operation is 0,5 meter.
• Never block the air openings on the hood while operating the treadmill. Never drop or insert objects into
any opening.
• Use the treadmill only for its intended purpose as described in this manual.
• If the power cord of the machine is damaged, it must be replaced. Do not use the machine until the power
cord has been changed and properly attached.
• This equipment is for household use only. Do not use the equipment outdoors.
• This appliance is designed for use with ~220 - ~240 Volt rated voltage.
• The maximum weight capacity for this product is 130kgs.
BEFORE BEGINNING THIS OR ANY EXERCISE PROGRAM, CONSULT YOUR PHYSICIAN FIRST.
THIS IS ESPECIALLY IMPORTANT FOR INDIVIDUALS OVER THE AGE OF 35 OR PERSONS WITH
PRE-EXISTING HEALTH PROBLEMS.

4GT4.0 TREADMILL
ASSEMBLY INSTRUCTION
• Lift up and remove the box that surrounds the Treadmill.
• Check the following items are present. If any of the parts are missing, contact with the dealer.
Note: Each step number in assembly instructions tells you what you will be doing. Read and
understand all instructions thoroughly before assembling the treadmill.
!
WARNING!
USE CAUTION WHEN ASSEMBLING THIS TREADMILL. FAILURE MAY RESULT IN INJURY.
0;
0;
0;
0;
0;
MAIN BODY UPRIGHT POST (R/L) CONSOLE REAR COVER
CONSOLE UPRIGHT POST COVER (R/L) BASE FRAME COVER
MANUAL HARDWARE KIT LUBRICATION OIL
SAFETY KEY
PACKING LIST

5GT4.0 TREADMILL
ASSEMBLY INSTRUCTION
MAIN PARTS
MOTOR COVER CONSOLE MOTOR MOTOR BELT
RUNNING BELT RUNNING DECK SIDE RAIL INCLINE MOTOR
FRONT ROLLER REAR ROLLER REAR COVER
HARDWARE BAG
Allen C.K.S half thread screw (M8*60*20 x 4pcs) Allen C.K.S full thread screw (M8*15 x 8pcs)
Allen C.K.S full thread screw (M8*20 x 2pcs) Philips C.K.S. self-taping screw (ST4*12 x 2pcs)
Philips C.K.S. self-taping screw (ST4*16 x 4pcs) Allen C.K.S half thread screw (M8*30*20 x 2pcs)
T shaped wretch (S6 x 1PCS) Cross Wrench (1pcs)

6GT4.0 TREADMILL
ASSEMBLY INSTRUCTION
TREADMILL OVERVIEW
Safety key
Handle bar
Upright post
Console
Side rail
Rear cover
MotorCover
Runningbelt
Maximum load 130kg
Dimension (folded) 1402 x 925 x 1541mm
Dimension (unfolded) 1925 x 925 x 1470mm
Running surface 1530 x 550mm
Speed 0.5 - 20.0km/h
TECHNICAL INFORMATION
REMARK: We reserve the right to amed the product without prior notice.

7GT4.0 TREADMILL
ASSEMBLY INSTRUCTION
STEP 1
Take out the machine from box and put it on the at oor. (As shown),remove all PE bags and bags
wrapped on the machine.
STEP 2
Connect communication wire of the console with the right upright post. Insert the left and right
upright post on the base frame, and then x the each upright post with 2pcs M8*60*20 screw and
1pc M8*20 screw.

8GT4.0 TREADMILL
ASSEMBLY INSTRUCTION
STEP 3
Fold up the treadmill, (Note: Before xing the base frame cover, please ensure the screws for base
frame and upright post are xed completely.) Put the base frame covers in the left and right side of
upright post, then clip-on the covers together. Last, x the covers by 1pc ST4*12 screw.
STEP 4
Insert the console on the upright post. See above picture. (Note: Please connect the
communication cables in the right handlebar and upright post, avoid damaging the cable.) Use
2pcs M8*15 screw to x each upright post, and then use 1pc M8*30*20 screw to x the hole under
each handlebar. (Note: The screw M8*30*20 is for adjusting the handlebar, it can not be xed
tightly, or else the tube will be damaged.)

9GT4.0 TREADMILL
ASSEMBLY INSTRUCTION
STEP 5
Put the display on the console, and lock the two parts together with 4pcs M8*16 screw.
STEP 6
Place the rear cover on the rear of console, and x it with 4pcs M8*16 screw.
LAST STEP
Check all screws were xed rightly. Make sure the treadmill was assembled stably.

10GT4.0 TREADMILL
SETTING UP YOUR TREADMILL
To make exercise a desirable daily activity for you, the treadmill should be placed in a comfortable and con-
venient setting. This treadmill is designed to use minimal oor space and to go nicely in your home.
• Do not place the treadmill outdoors.
• Do not place the treadmill near water or in high moisture content environment.
• Make sure power cord is not in the path of heavy trac.
• If your room is carpeted, check the clearance to make sure there is enough space between the
carpet ber and the treadmill deck. If you are uncertain, it is best to place a mat beneath your
treadmill.
• Locate the treadmill at least 4 feet from walls or furniture.
• Allow a safety area of 2m X 1m behind the treadmill so that you can easily get on and o the
treadmill without getting trapped during an emergency.
Occasionally after extended use you will nd a ne black dust below your treadmill. This is normal wear and
DOES NOT mean there is anything wrong with your treadmill. This dust can be easily removed with a va-
cuum cleaner. If you wish to prevent this dust from getting on your oor or carpet, place a mat beneath your
treadmill.
USE DEDICATED CIRCUIT
The outlet selected should be a dedicated circuit. It is particularly important that No sensitive electrical
equipment, such as computer or TV, share the same circuit.
Make sure the running deck is level to the ground. If the deck is positioned on uneven surface, it would
cause premature damage to the electronic system. Read this manual before operating this treadmill.
!
CAUTION!

11GT4.0 TREADMILL
IMPORTANT ELECTRICAL INFORMATION
This treadmill requires a right power source in order to properly operate. For your safety, as well as the
safety of others, please verify that the power source is correct before plugging the equipment. Any incorrect
power source could cause signicant damage to the equipment and or user.
GROUNDING METHODS:
This product must be grounded. Grounding provides the least resistance for electrical current and will
reduce the risk of electric shock. The plug must be plugged into an appropriate outlet that is properly
installed and grounded in accordance with all local codes and ordinances. Ensure that the product is
connected to an outlet which contains the same conguration as the plug. Do not use an adaptor for this
product.
This product is for use on a nominal circuit and has a grounding plug that looks like the plug illustrated in the
below picture. Make sure that the product is connected to an outlet having the same conguration as the
plug. No adapter should be used with this product.
Improper connection of the equipment-grounding conductor can result in risk of electric shock. Check with
a certied electrician if you are in doubt as to whether the product is properly grounded. Do not modify the
plug provided with the product. If it will not t the outlet, have a proper outlet installed by an electrician.
1. NEVER use a ground fault circuit interrupt (GFCI) wall outlet with this treadmill. Route the power cord
away from any moving part of the treadmill including the elevation mechanism and transport wheels.
2. NEVER operate the treadmill using a generator or UPS power supply.
3. NEVER remove any cover without rst disconnecting power.
4. NEVER expose the treadmill to rain or moisture. This treadmill is not designed for use outdoors, near
pools or in any other high humidity environment
!
WARNING!
!
DANGER!
!
WARNING!

12GT4.0 TREADMILL
GETTING STARTED
TURN POWER ON
Put the power cord into the electrical outlet with 10A. Flip this switch to the “ON” position. The screen shines
with prompt sound.
SAFETY KEY AND CLIP
The safety key is designed to cut the main power to the treadmill should your fall. Therefore, the safety key
is designed to bring the treadmill to an immediate stop. At high speeds, it may be uncomfortable and so-
mewhat dangerous to come to a complete stop immediately. So, use the safety key as emergency top only.
To bring the treadmill to a complete stop safely and comfortably, use the red stop button.
Your treadmill will not start unless the safety key is properly inserted into the key holder in the middle of the
console. The other end of the safety key should be securely clipped to your clothing so that in the case that
you fall, you will pull the safety key from the console, which will stop the treadmill immediately to minimize
injury. For your safety, never use the treadmill without securing the safety key clipped to your clothing. Pull
on the safety key clip to make turn it will not come o your clothing.
GETTING ON AND OFF THE TREADMILL
Handle with care when getting on or o the treadmill. Try to use the handlebars while getting on or o. While
you are preparing to use the treadmill, do not stand on the running belt. Straddle the running belt by placing
your feet on both side rails of the treadmill deck. Place your foot on the belt only after the belt has begun to
move at a consistent slow speed.
During exercise, keep your body and head facing forward at all times. Never attempt to turn around on the
treadmill when the running belt is still moving. When you have nished exercising, stop the treadmill by
pressing the red stop button. Wait until the treadmill comes to a complete stop before attempting to get o
the treadmill.
Never use this treadmill without rst securing the safety tether clip to our clothing.
For your safety, step onto the belt when the speed is no more than 3km/h.
!
WARNING!
!
WARNING!

13GT4.0 TREADMILL
GETTING STARTED
TREADMILL USE INSTRUCTION
1. Power on, the treadmill will start to the lowest position, check the machine is normal.
2. Attach the safety lock clip to the skirt of the sportsman’s chest.
3. Before running, must conrm the stability of the treadmill and function is normal. It is strictly prohibited to
stand on the run belt start, should stand on the side bar, handle bar, once conrm everything well then
start running. When power on, put one hand to seize the handlebars, press the ”START ” button,
treadmill delay start 5 seconds to 1.0km / h speed. Press the ”speed” ”+” key, the motor speeds up to
2.5 ~ 3.5km / h (this is a most suitable running speed), both hands grab handlebars, feet have to step on
the running belt, can run with the same speed.
4. After a few minutes, you can speed up the running, the growth rate of the requirements is holding hands
with the handlebars, press the ”speed” - ”” key to run slowly.
5. During the running time, press the speed shortcut keys, you can quickly enter the running speed you
need.
6. Press ”Stop” key to stop the motor at any time during running.
7. Preset mode: Press the ”Select” button to select one of the automatic operation modes as the current
running mode. Press the ”Start” key to start the treadmill. The treadmill starts to run automatically
according to the selection mode. In operation, you can press the ”speed” + ”” key or ”speed” - ”” key to
change the current time period running speed. Press ”Stop” to stop the motion.
8. HRC test (optional): switch on the treadmill, the hands holds the HRC metal sensor chip, a few seconds
after the heart rate display window will display the user’s heart rate value. (Note: this value is not as
medical data, only as a sports reference).
MOVING THE TREADMILL

14GT4.0 TREADMILL
CONSOLE OPERATION INSTRUCTIONS
KEY DEFINITION & DISPLAY INSTRUCTION
1. START/PAUSE key: When the treadmill is stopped, press the START key to turn on the treadmill.
Press START key when running, it will pause.
2. STOP key: when the treadmill is running, stop the treadmill slowly by pressing the STOP key.
3. SPEED +and -key: decrease or increase the running speed.
4. SPEED shortcut keys: in the treadmill running state, set the speed directly to the key specied
value; the speed range is 0.5~20.0KM/H.
5. INCLINE keys: decrease or increase the inclination.
6. INCLINE shortcut keys (3, 5, 8 and 12): in the treadmill running state, set the incline directly to
the key specied value; the incline range is 0~15%.
7. Volume adjusted key: decrease or increase music volumn.
8. MODE (M): When the manual mode is selected, the normal mode is selected. Press the MODE
key to cycle through the countdown mode in manual mode -> countdown to calorie mode ->
countdown distance mode -> positive timing mode; in P1-P36, it is the reset button to countdown
time default value (30 minutes).
9. Smart speed key (optional function): Adjust the speed intelligently.
10. PROGRAM (P) Program select key, select the program P0~P36, U01,U02, U03, HRC1~HRC3,
FAT when the treadmill is stopped.
DISPLAY WINDOW INSTRUCTION
SPEED window display speed data
TIME window display time data
DISTANCE window display distance data, steps data
CALORIES window display calories data
PULSE window display heart rate data
INCLINE window display incline data
SAFETY KEY INSTRUCTION
Safety key is made with the touch switch, clothespin and nylon rope composition, with emergency

15GT4.0 TREADMILL
CONSOLE OPERATION INSTRUCTIONS
shutdown safety precautions. In any state, as long as the safety key is out of position, treadmill to
stop running, console keyboard prohibits operation, re-put the safety key, the screen enter into the
system default working state.
MP3 OPERATION INSTRUCTION (optional)
The console is with built-in double channel audio, switching regulated power Supply, connect the
adapter wire of audio with the audio source and MP3 input port of the console, then MP3 starts to
operate.
SAFETY GUIDE
1. Put the power cord into the electrical outlet with 10A. Flip this switch to the “ON” position. The
screen shines with prompt sound.
2. Put the safety key on the correct position, connect the safety key with your cloth in front of your
chest.
3. Press +or - key or QUICK SPEED key to adjust treadmill speed.
4. START/PAUSE key: When the treadmill is stopped, press the START key to turn.
5. Press START key when running, it will pause.
6. STOP key. When the treadmill is running, stop the treadmill slowly by pressing the STOP key. All
setting returns to default state.
7. Press or key or QUICK INCLINE key to adjust treadmill incline.
8. In any state, pull-out safety locks, window displays: ”E7” and sound buzzer DI-DI-DI. Treadmill
stops running.
9. Electric control system is in the security monitoring at any time, as long as there is any
abnormal information, the treadmill will stop running urgently, the screen displays abnormal
information prompts, and accompanied by a tone.
10. Press STOP key when screen displays abnormal information, the motor start to slow down to
stop, all data will be clear.
MANUAL MODE
1. How to enter manual mode:
a) Switch on, enter normal manual mode.
b) When power o, press MODE key to enter manual mode.
2. Three setting function of manual mode: Time setting, Distance setting,calories setting; Enter
manual mode, press ‘MODE’ key to set dierent mode, then press ‘START’ to restart the treadmill.
User can set the speed and incline. Default speed: 1.0KM/H, Incline: 0%.
Normal mode, time countdown, distance countdown, calories countdown; set any one mode, set-
ting date starts counting down.
a) When enter manual setting, Time window display 0:00, Count time, distance, calories is
in positive counting status. Close setting function, when the motor running, press‘ STOP’
key, the motor start to slow down to stop, all setting return to default state.
b) Under standard manual mode, press ‘MODE’ key to enter time countdown mode, window
display time with shining when standby, when in setting mode, TIME window display time
with shining, initial time is 30:00 minute, press ‘ +’ or ‘-’ to setting the speed. Time setting
range: 5:00-99:00, walk only for 1:00.

16GT4.0 TREADMILL
CONSOLE OPERATION INSTRUCTIONS
c) In time countdown mode, press ‘ MODE’ to enter distance countdown mode, the distance
window shines.Initial distance is 1.0 km, press speed key ‘+’ and ‘0 ’to set the distance
and range. Setting range: 1.0-99.0KM, work for 1.KM.
d) When in distance countdown mode, press ‘ MODE’ to set the calories, calorie window
shines. Initial window shines. Initial calorie displays: 50, Default 50Cal, press speed
key ‘+’ and ‘-’to set the calorie range: 20-9990CAL
PROGRAM SETTING
P1-P36 is system program setting +or - key, only used under time countdown mode, setting time
window shines, press to adjust the setting status, press MODE to return to the default status, time
window shines when in setting status, initial time: 30 minutes, setting range: 5:00 - 99:00. Press
speed +or - key to adjust the setting status.
1. In P1-P36, the speed and slope of each program is divided into 16 segments.
2. A chirp will sound when switching between segments.
3. When the motor is running, press the start key, the motor stops running, the various
parameters remain unchanged.
4. Press the start key again, and the tempo will run at the speed in the automatic program.
5. Set the time to zero, the speed slowly reduced until the stop, the middle window shows End, the
buzzer to alarm;
6. Pull o the safety key to stop the motor running, the time window displays ”E07”, and the buzzer
will sound a short alarm.
BODY FAT FUNCTION
When the treadmill is stopped, press the PROG key until select FAT and enter into body fat
function, then press MODE key to set the parameter.
a) F1 means Sex, the 1 (male), 2 (female). If the window display 1, which shows you,
selects ”Male”, the original is Male.
b) F2, means Age, the range is 1-99, and the original is 25.
c) F3, means Height, the range is 100-220CM (39-87inch), the original is 170CM (67inch)
d) F4, means Weight, the range is 20-150KG (44-330bound), the original is 70KG
(154bound)
e) F5, mean BMI, show you enter into body fat function. Put two hands on the handle bar,
wait for 8 seconds, and the window will show the BMI.
BMI under 18 is under weight
Between 18 and 24 is normal weight
Between 25and 28 is over weight
And over 29 is obesity
METRIC-INCH INTERCONVERSION FUNCTION
1. Pull out the safety key and press the PROGRAM key and MODE key at the same time, LED
displays M, it changes kilometers into miles.
2. Pull out the safety key and press the PROGRAM key and MODE key at the same time, LED
displays KM, it changes miles into kilometers.

17GT4.0 TREADMILL
CONSOLE OPERATION INSTRUCTIONS
HRC PROGRAM
1. HRC defaults to three parts, HRC1 limits the speed of 9 km / h, HRC2 limits the speed of 11
km/h, HRC3 is limited to 13 km/h
2. HRC set method,sequence, parameter range, press the program key to display HRC, press the
mode to conrm and enter the next setting, press the speed key to adjust, set the last
parameters to start.
3. Age setting range: 13-80 years old
4.Target HRC setting range: 80-180
5. Max HRC data: not over 220 - Age
6. Bad HRC: (Target HRC, User’s HRC)
7. Speed change relationship
a) Change frequency, HRC test the heart rate data every 30 seconds (Heart rate data keep
displaying)
b) When the user’s heart rate is lower than the target heart rate of 30 beats / min, the speed
increases by 2.0 km / h.
c) When the user’s heart rate is lower than the target heart rate 6-29 times / minute, the
speed increased by 1.0 km / h.
d) When the user’s heart rate is higher than the target heart rate 30 times / min, the speed
reduced by 2.0 km / h.
e) When the user’s heart rate is higher than the target heart rate 6-29 times / min, the speed
reduced by 1.0 km / h.
g) When the user’s heart rate is higher or lower than the target heart rate 0-5 times / minute,
the speed remains the same.
8. When the following conditions occur, the treadmill decelerates to a minimum within 20 seconds
and stops after 15 seconds at the lowest speed and rings every second.
a) Every 30 seconds to detect a heart rate, when the two consecutive heart rate can not be
detected.
b)1 km / h (0.6 mph), heart rate leads to deceleration.
c) When the heart rate exceeds (220 - set the age).
1 km / h (0.6 mph), deceleration can not be less than 1 km / h (0.6 mph), such as: treadmill mini-
mum speed of 1 km / h (0.6 mph), when the treadmill run at 1.6 km / h (1.0 mph) and slow down to
1 km / h (0.6 mph) when the heart rate is decelerating 1.0 (2.0) km / h.
Incline not change when running, can be manually set. It will start to caculate in1 minute.
ECO FUNCTION
Press the ECO key to enter into ECO mode. The treadmill will increase 3 levels based on the
current incline level. The min. incline level is 3. Press again the ECO key to quit the ECO mode.
Treadmill will decrease 3 levels based on the current incline, the min. incline is 0. In every time
using, the default of treadmill is not in the ECO mode.

18GT4.0 TREADMILL
CONSOLE OPERATION INSTRUCTIONS
SPEED / INCLINATION CHART
SEG
PROG CLS
1 2 3 4 5 6 7 8 9 10 11 12 13 14 15 16
P1 SPEED 1.0 3.0 3.0 7.0 7.0 5.0 5.0 5.0 7.0 7.0 5.0 5.0 5.0 5.0 3.0 2.0
INCLINE 2 2 6 6 8 8 6 6 4 4 4 6 6 2 2 2
P2 SPEED 2.0 3.0 3.0 6.0 5.0 5.0 8.0 5.0 5.0 6.0 8.0 8.0 8.0 5.0 4.0 3.0
INCLINE 3 3 9 9 9 2 2 8 8 4 1 1 4 4 4 4
P3 SPEED 2.0 3.0 5.0 5.0 7.0 7.0 8.0 5.0 5.0 6.0 8.0 8.0 8.0 5.0 4.0 3.0
INCLINE 1 2 3 4 5 5 7 7 4 4 4 4 6 3 2 2
P4 SPEED 2.0 2.0 3.0 5.0 5.0 5.0 8.0 8.0 8.0 8.0 5.0 5.0 5.0 3.0 3.0 2.0
INCLINE 3 3 6 6 6 9 9 9 9 9 9 6 6 6 2 2
P5 SPEED 3.0 4.0 5.0 6.0 7.0 8.0 9.0 10.0 10.0 10.0 9.0 8.0 7.0 5.0 4.0 3.0
INCLINE 2 2 4 4 8 8 6 6 6 6 8 7 6 5 1 1
P6 SPEED 3.0 4.0 5.0 5.0 6.0 6.0 7.0 7.0 7.0 9.0 9.0 10.0 10.0 11.0 5.0 3.0
INCLINE 1 8 8 8 8 8 7 7 7 7 7 5 5 3 3 1
P7 SPEED 3.0 4.0 9.0 4.0 11.0 4.0 10.0 4.0 9.0 4.0 8.0 4.0 11.0 5.0 3.0 2.0
INCLINE 1 1 4 4 4 6 6 6 8 8 8 10 10 10 6 2
P8 SPEED 3.0 5.0 8.0 3.0 5.0 7.0 9.0 3.0 5.0 7.0 10.0 3.0 5.0 7.0 11.0 5.0
INCLINE 3 3 8 8 3 3 7 7 3 3 6 6 3 3 5 5
P9 SPEED 3.0 7.0 9.0 4.0 7.0 10.0 4.0 7.0 11.0 5.0 7.0 12.0 4.0 7.0 12.0 6.0
INCLINE 3 6 6 3 7 7 3 8 8 3 9 9 3 3 7 7
P10 SPEED 3.0 5.0 6.0 6.0 6.0 9.0 10.0 6.0 6.0 9.0 10.0 6.0 6.0 6.0 11.0 3.0
INCLINE 2 7 7 7 5 5 5 8 8 8 8 8 8 4 4 4
P11 SPEED 4.0 5.0 7.0 9.0 10.0 11.0 9.0 6.0 8.0 9.0 10.0 10.0 11.0 9.0 6.0 5.0
INCLINE 1 6 6 6 3 3 3 7 7 4 4 4 4 6 6 6
P12 SPEED 4.0 6.0 10.0 10.0 7.0 10.0 10.0 10.0 7.0 7.0 10.0 10.0 10.0 10.0 6.0 5.0
INCLINE 3 8 8 6 9 9 5 5 8 8 8 4 4 4 4 4
P13 SPEED 4.0 12.0 4.0 12.0 4.0 12.0 4.0 12.0 4.0 12.0 4.0 12.0 4.0 12.0 4.0 12.0
INCLINE 4 8 10 12 4 8 10 12 4 8 10 12 4 8 10 12
P14 SPEED 2.0 3.0 3.0 6.0 9.0 11.0 3.0 6.0 9.0 11.0 3.0 6.0 9.0 11.0 3.0 6.0
INCLINE 5 9 11 12 5 9 11 12 5 9 11 12 5 9 11 12
P15 SPEED 4.0 6.0 11.0 11.0 9.0 6.0 11.0 11.0 9.0 6.0 11.0 11.0 9.0 6.0 11.0 11.0
INCLINE 2 3 4 5 6 8 7 8 8 7 7 6 5 4 3 2
P16 SPEED 2.0 4.0 4.0 12.0 4.0 12.0 4.0 12.0 4.0 12.0 4.0 12.0 4.0 12.0 4.0 12.0
INCLINE 2 4 5 6 2 4 5 6 2 4 5 6 2 4 5 6
P17 SPEED 2.0 2.0 2.0 4.0 6.0 6.0 9.0 11.0 11.0 2.0 4.0 6.0 6.0 11.0 11.0 9.0
INCLINE 2 4 6 8 10 12 12 12 12 12 12 10 8 6 4 2
P18 SPEED 3.0 6.0 3.0 6.0 6.0 3.0 6.0 6.0 3.0 6.0 6.0 3.0 6.0 6.0 3.0 6.0

19GT4.0 TREADMILL
CONSOLE OPERATION INSTRUCTIONS
SPEED / INCLINATION CHART
INCLINE 2 6 8 2 6 8 2 6 8 2 6 8 2 6 8 2
P19 SPEED 4.0 12.0 4.0 12.0 4.0 12.0 4.0 12.0 4.0 12.0 4.0 12.0 4.0 12.0 4.0 12.0
INCLINE 10 8 6 4 10 8 6 4 10 8 6 4 10 8 6 4
P20 SPEED 5.0 13.0 5.0 13.0 5.0 13.0 5.0 13.0 5.0 13.0 5.0 13.0 5.0 13.0 5.0 13.0
INCLINE 12 8 2 12 8 2 12 8 2 12 8 2 12 8 2 2
P21 SPEED 2.0 6.0 2.0 6.0 11.0 2.0 6.0 11.0 2.0 6.0 11.0 2.0 6.0 11.0 2.0 6.0
INCLINE 12 9 3 12 9 3 12 9 3 12 9 3 12 9 3 3
P22 SPEED 4.0 6.0 11.0 6.0 2.0 11.0 6.0 2.0 11.0 6.0 2.0 11.0 6.0 2.0 11.0 6.0
INCLINE 2 4 10 2 4 10 2 6 12 6 8 12 6 8 12 2
P23 SPEED 4.0 6.0 11.0 6.0 6.0 2.0 11.0 6.0 6.0 2.0 11.0 6.0 6.0 2.0 11.0 6.0
INCLINE 2 3 4 5 6 6 7 8 10 11 12 12 12 12 10 2
P24 SPEED 4.0 6.0 11.0 6.0 4.0 11.0 6.0 4.0 11.0 6.0 4.0 11.0 6.0 4.0 11.0 6.0
INCLINE 4 4 5 6 7 8 10 10 12 12 12 12 12 12 10 2
P25 SPEED 5.0 13.0 5.0 13.0 5.0 13.0 5.0 13.0 5.0 13.0 5.0 13.0 5.0 13.0 5.0 13.0
INCLINE 5 9 11 12 5 9 11 12 5 9 11 12 5 9 11 12
P26 SPEED 3.0 4.0 4.0 7.0 10.0 12.0 4.0 7.0 10.0 12.0 4.0 7.0 10.0 12.0 4.0 7.0
INCLINE 6 10 12 12 6 10 11 12 6 10 12 12 6 10 12 12
P27 SPEED 5.0 7.0 12.0 12.0 10.0 7.0 12.0 12.0 10.0 7.0 12.0 12.0 10.0 7.0 12.0 12.0
INCLINE 3 4 5 6 7 9 8 9 9 8 8 7 6 5 4 3
P28 SPEED 3.0 5.0 5.0 13.0 5.0 13.0 5.0 13.0 5.0 13.0 5.0 13.0 5.0 13.0 5.0 13.0
INCLINE 3 5 6 7 3 5 6 7 3 5 6 7 3 5 6 7
P29 SPEED 3.0 3.0 3.0 5.0 7.0 7.0 10.0 12.0 12.0 3.0 5.0 7.0 7.0 12.0 12.0 10.0
INCLINE 3 5 7 9 11 12 12 12 12 12 12 11 9 7 5 3
P30 SPEED 4.0 7.0 4.0 7.0 7.0 4.0 7.0 7.0 4.0 7.0 7.0 4.0 7.0 7.0 4.0 7.0
INCLINE 3 7 9 3 7 9 3 7 9 3 7 9 3 7 9 3
P31 SPEED 5.0 13.0 5.0 13.0 5.0 13.0 5.0 13.0 5.0 13.0 5.0 13.0 5.0 13.0 5.0 13.0
INCLINE 11 9 7 5 11 9 7 5 11 9 7 5 11 9 7 5
P32 SPEED 6.0 14.0 6.0 14.0 6.0 14.0 6.0 14.0 6.0 14.0 6.0 14.0 6.0 14.0 6.0 14.0
INCLINE 12 9 3 12 9 3 12 9 3 12 9 3 12 9 3 3
P33 SPEED 3.0 7.0 3.0 7.0 12.0 3.0 7.0 12.0 3.0 7.0 12.0 7.0 7.0 12.0 3.0 7.0
INCLINE 12 10 4 12 10 4 12 10 4 12 10 4 12 10 4 4
P34 SPEED 5.0 7.0 12.0 7.0 3.0 12.0 7.0 3.0 12.0 7.0 3.0 12.0 7.0 3.0 12.0 7.0
INCLINE 3 5 11 3 5 11 3 7 12 7 9 12 7 9 12 3
P35 SPEED 5.0 7.0 12.0 7.0 7.0 3.0 12.0 7.0 7.0 3.0 12.0 7.0 7.0 3.0 12.0 7.0
INCLINE 3 4 5 6 7 7 8 9 11 12 12 12 12 12 11 3
P36 SPEED 5.0 7.0 12.0 7.0 5.0 12.0 7.0 5.0 12.0 7.0 5.0 12.0 7.0 5.0 12.0 7.0
INCLINE 5 5 6 7 8 9 11 11 12 12 12 12 12 12 11 3

20GT4.0 TREADMILL
General cleaning will help prolong the life and performance of your treadmill. Keep the unit clean and
maintained by dusting the components on a regular basis. Clean both sides of the running belt to prevent
dust from accumulating underneath the belt. Keep your running shoes clean so that dirt from your shoes
does not wear out the running board and belt. Clean the surface of the running belt with a clean damp cloth.
• To make the cleaning easier it is recommended to use a mat for the treadmill. Shoes can leave dirt on the
striding belt that can fall beneath the treadmill. Clean the mat under the treadmill once a week.
• To better maintain the treadmill and prolong its life it is suggested that the machine be powered o for 10
minutes every 2 hours and fully powered o whenever not in use.
• A loose Running Belt will result in the runner sliding o when running, while too tight of a Running Belt will
result in decrease to the motors performance and also create more friction between the roller and running
belts. The most suitable tightness for the belts is pulled out 50-75mm from the Running Board.
• The device corresponds to current safety standards. The device is only suitable for home use. Any other
use is impermissible and possibly even dangerous. We cannot be held liable for damages that were
caused by improper usage.
• Please consult your GP before starting your exercise session to clarify whether you are in suitable
physical health for exercising with this device. The doctor’s diagnosis should be the basis for the structure
of your exercise program. Incorrect or excessive training could be harmful to your health.
• Carefully read through the following general tness tips and the exercise instructions. If you have pain,
shortness of breath, feel unwell or have other physical complaints, break o the exercise immediately.
Consult a doctor immediately if you have prolonged pain.
• This tness device is not suitable for professional or medical use, nor may it be used for therapeutic
purposes.
• The pulse sensor is not a medical device. it is meant for your information purposes only and is designed
to give an average pulse rate. It is not intended to oer medical advice nor will it measure pulse accurately
every time, due to diering environmental and human conditioning factors.
STORAGE
Store you treadmill in a clean and dry environment. Ensure the master power switch is o and is un-plugged
from the electrical wall outlet.
MAINTENANCE AND CARE
!
NOTE!
Table of contents
Other Gymstick Treadmill manuals

Gymstick
Gymstick WalkingPad TM-WPAD User manual

Gymstick
Gymstick RUN 3.0 User manual

Gymstick
Gymstick PRO20.0 User manual

Gymstick
Gymstick GT3.0 User manual

Gymstick
Gymstick PRO10.0 User manual

Gymstick
Gymstick GT1.0 User manual

Gymstick
Gymstick GT4.0 User manual

Gymstick
Gymstick PRO20.0 User manual

Gymstick
Gymstick TITANIUM RUN 2.0 User manual

Gymstick
Gymstick RUN 10.0 User manual