manuals.online logo
Brands
  1. Home
  2. •
  3. Brands
  4. •
  5. H3C
  6. •
  7. Computer Hardware
  8. •
  9. H3C FAN-40-5-A User manual

H3C FAN-40-5-A User manual

2
1
1
2
H3C FAN-40-5-A 风扇手册-5PW101
BOM: 3101A0R1
风扇模块介绍
FAN-40-5-A 风扇模块为吹风风扇(气流方向:由风扇侧到电源侧),包含五个独立运行风扇。
该风扇模块具有功耗低、散热快、可热插拔,并可根据设备温度自动进行风速调整等特点,能为
设备提供强劲的散热降温功能。
风扇模块的安装和拆卸
风扇模块的安装
风扇模块规格
风扇模块示意图
1. 用一只手捏住风扇模块拉手,另
一只手托住风扇模块底部,拿起风
扇模块并对准风扇插槽。将风扇模
块沿着插槽导轨水平插入,直到风
扇模块完全进入插槽,并且与背板
连接器端子接触良好。
2. 用螺丝刀沿顺时针方向拧紧风扇模
块上的松不脱螺钉,将风扇模块固
定好。
• 在安装和拆卸风扇模块时,操作者需自行准备并佩戴防静电腕带,请确保防静电腕带
已经正确接地并与皮肤良好接触。
• 请不要接触风扇模块中露出的任何导线、端子部分。
• 请不要将风扇模块放置在潮湿的地方,也不要让液体进入风扇模块内部。
• 当风扇模块内部线路或元器件出现故障时,请移交维修人员进行检修,不要随意拆卸风扇模块上
的部件。
• 在安装风扇模块前,请确认风扇模块型号与设备匹配且风扇模块的风道方向和安装环境的通风方
向要求一致。
• 为了避免损坏风扇模块或背板的连接器端子,风扇模块插入过程中动作要缓慢,如果插入过程阻
力较大或风扇模块位置出现偏斜,必须先拔出风扇模块,然后重新插入。
风扇模块的拆卸
• 更换风扇框建议在30s内完成,超时可能会引起设备过热触发保护性重启。
• 在设备运行状态下更换风扇模块时,请注意用电安全。
• 在设备运行状态下更换风扇模块时,请不要接触转动中的风扇,避免被旋转中的风扇划伤。
• 在风扇停止转动后,建议不要碰触风扇扇叶和旋转轴,以免损害风扇的动平衡,导致风扇运转时
噪音加大。
• 请将拆卸下来的风扇模块及时放置到防静电垫上或防静电袋中。
项目
风扇数量
风道方向
最大风扇转速
最大风量
最大功耗
工作电压
工作环境温度
工作环境相对湿度
存放环境温度
存放环境相对湿度
5个40×40×28mm风扇
从风扇侧向电源侧吹风
22000 R.P.M
110 CFM
50 W
7.0 V to 13.8 V
–20°Cto +55°C (–4°F to +131°F), (长期)
55°C to 60°C (131°F to 140°F), (短期)
5% RH to 95% RH, (无冷凝)
–40°C to +70°C (–40°F to +158°F)
0% RH to 100% RH, (无冷凝)
规格
风扇模块指示灯
指示灯状态
绿灯常亮
红灯常亮
常灭
风扇模块运行正常
风扇模块运行异常
风扇模块没有上电
含义
1. 使用螺丝刀沿逆时针方向拧松风扇
模块上的松不脱螺钉
。
2. 用一只手捏紧风扇模块的拉手,将
风扇模块拉出一部分。用另一只手
托住风扇模块底部,同时沿着插槽
导轨水平缓慢地向外拉出风扇模块。
拉手
防静电腕带插孔
松不脱螺钉
风扇状态指示灯
Copyright © 2019 新华三技术有限公司 版权所有,保留一切权利
本文档中的信息如有更改,恕不另行通知
如需了解产品及安装方面的更多信息,请登录H3C网站 www.h3c.com
H3C FAN-40-5-A Fan Tray User Guide-5PW101
BOM: 3101A0R1
Overview
The FAN-40-5-A fan tray contains five fans. It blows air from the fan tray side to the
power module side. It is hot swappable, and provides low power consumption, fast heat
dissipation and automatic speed adjustment.
Installing or removing a fan tray
Installing a fan tray
Specifications
Views
1. Hold the fan tray handle with one
hand, support the fan tray bottom
with the other, and align the fan
tray with the fan tray slot. Slide the
fan tray along the guide rails into
the slot until the fan tray seats in
the slot and has a firm contact with
the connectors on the backplane.
2.
Fasten the captive screw on the
fan tray with a Phillips screwdriver
to secure the fan tray.
• Before you install or remove a fan tray, wear an ESD wrist strap and make
sure the wrist strap has good skin contact and is reliably grounded.
• Do not touch any naked wire or terminal.
• Do not place the fan tray in a damp environment and prevent liquid from flowing into
the fan tray.
• When an internal circuit or component is faulty, do not remove any components from
the fan tray. Contact H3C Support.
• Before you install a fan tray, make sure the fan tray model is compatible with the
device and the airflow direction is as required by the installation site.
•
To avoid damaging the fan tray and the backplane connector, insert the fan tray slowly.
If you encounter a resistance or the fan tray tilts, remove the fan tray and reinsert it.
Removing a fan tray
• To avoid device reboot caused by over-temperature, finish replacing a fan tray within
30 seconds.
• Ensure electricity safety when you remove a fan tray on an operating device.
• Never touch a rotating fan on an operating device.
• To prevent an unbalanced fan from causing loud noise, do not touch the fan, even if
it is not rotating.
• Place the removed fan tray in an anti-static mat or bag.
Handle
ESD jack
Captive screw
Fan status LED
Item
Fans
Airflow direction
Max fan speed
Max wind volume
Max power consumption
Voltage
Operating temperature
Operating humidity
Storage temperature
Storage humidity
Five 40 × 40 × 28 mm (1.57 × 1.57 × 1.10 in) fans
From the fan tray side to the power module side
22000 R.P.M
110 CFM
50 W
7.0 V to 13.8 V
–20°Cto +55°C (–4°F to +131°F), long-term
55°C to 60°C (131°F to 140°F), short-term
5% RH to 95% RH, non-condensing
–40°C to +70°C (–40°F to +158°F)
0% RH to 100% RH, non-condensing
Specification
Alarm LED for the fan trays
Status
Steady green
Steady red
Off
The fan tray is operating correctly.
A problem has occurred on the fan tray.
The fan tray does not have power input.
Description
1. Loosen the captive screw on the
fan tray with a Phillips screwdriver.
2. Hold the fan tray handle with one
hand and pull the fan tray part
way out of the slot. Supporting
the fan tray bottom with the
other hand, gently pull the fan
tray along the guide rails out of
the slot.
2
1
1
2
Copyright © 2019, New H3C Technologies Co., Ltd.
The information in this document is subject to change without notice.
Other H3C Computer Hardware manuals

H3C LSWM116Q User manual

H3C

H3C LSWM116Q User manual

H3C BT1004E User manual

H3C

H3C BT1004E User manual

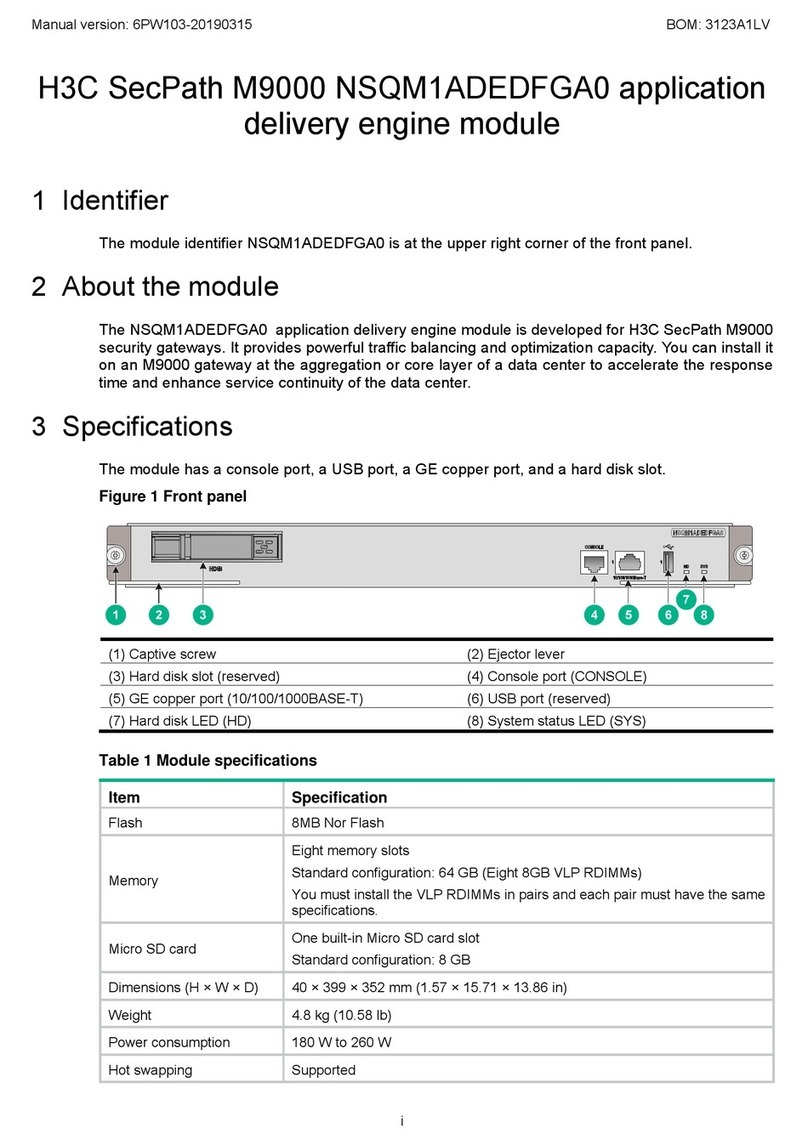
H3C SecPath M9000 NSQM1ADEDFGA0 Instruction Manual

H3C

H3C SecPath M9000 NSQM1ADEDFGA0 Instruction Manual

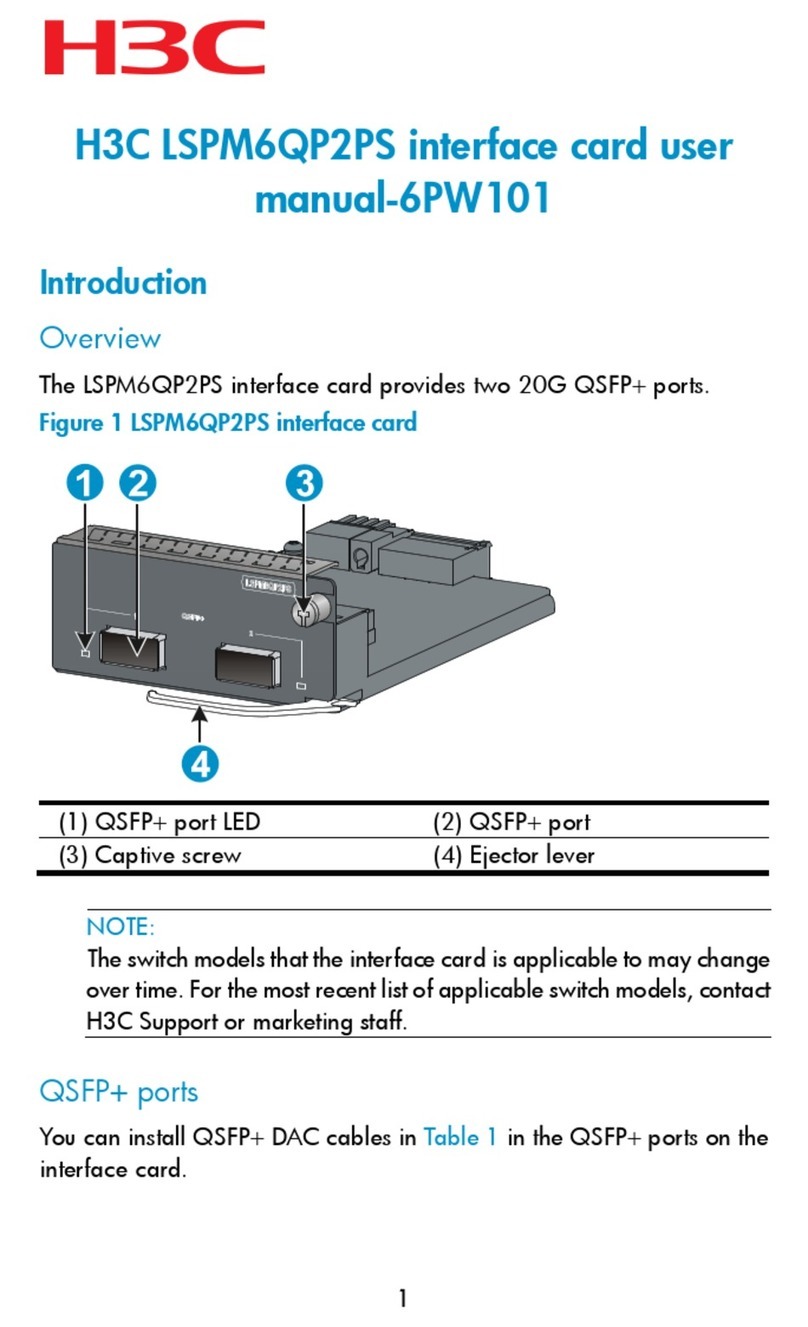
H3C LSPM6QP2PS User manual

H3C

H3C LSPM6QP2PS User manual

H3C LSXM1SFF16C1 Instruction Manual

H3C

H3C LSXM1SFF16C1 Instruction Manual

H3C LSXM108CFAN User manual

H3C

H3C LSXM108CFAN User manual

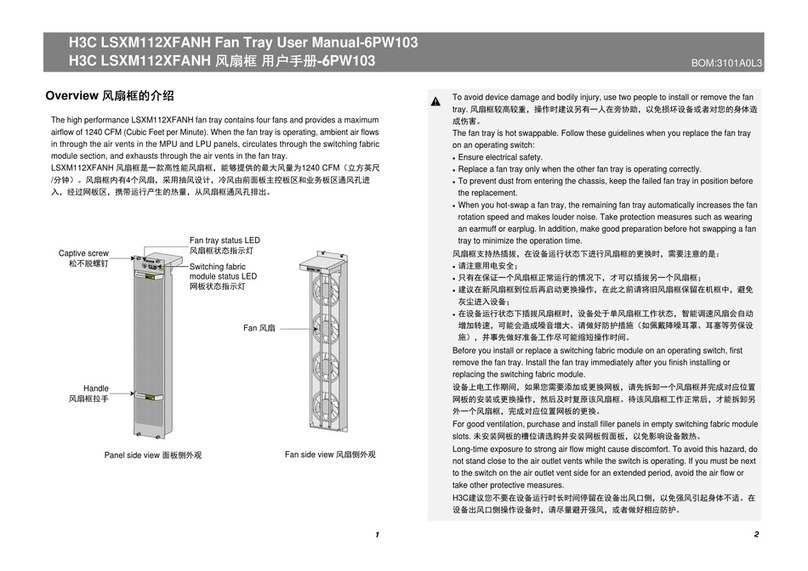
H3C LSXM112XFANH User manual

H3C

H3C LSXM112XFANH User manual

H3C LSWM124TG2H User manual

H3C

H3C LSWM124TG2H User manual

H3C LSVM1FANSC User manual

H3C

H3C LSVM1FANSC User manual

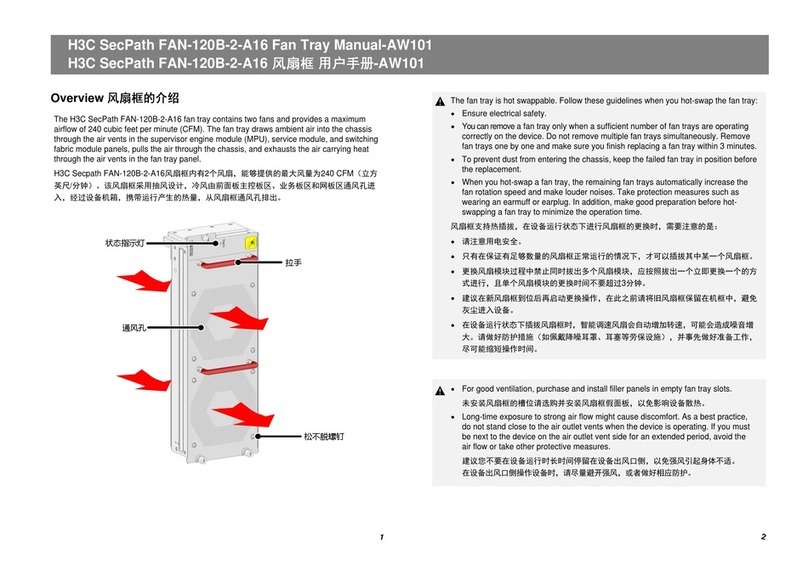
H3C SecPath FAN-120B-2-A16 User manual

H3C

H3C SecPath FAN-120B-2-A16 User manual

H3C LSWM116FC User manual

H3C

H3C LSWM116FC User manual

H3C H3C S7500E-X User manual

H3C

H3C H3C S7500E-X User manual

H3C LSWM124XG2QFC User manual

H3C

H3C LSWM124XG2QFC User manual

H3C LSXM1SFF08B1 Instruction Manual

H3C

H3C LSXM1SFF08B1 Instruction Manual

H3C NIC-FC730i-Mb-2-32G User manual

H3C

H3C NIC-FC730i-Mb-2-32G User manual

H3C SecPath F5000-A5 NSQ1MPUA0 User manual

H3C

H3C SecPath F5000-A5 NSQ1MPUA0 User manual

H3C LSPM1FAN User manual

H3C

H3C LSPM1FAN User manual

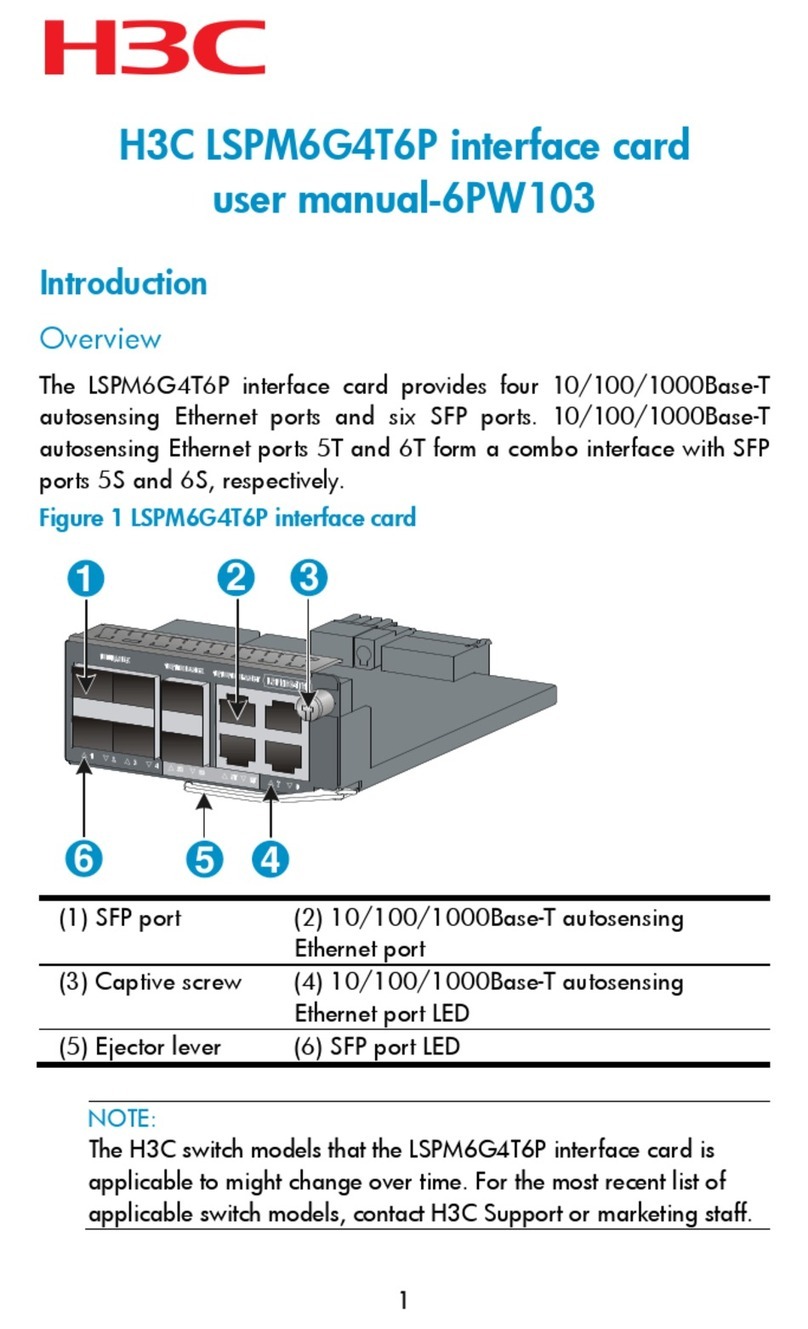
H3C LSPM6G4T6 User manual

H3C

H3C LSPM6G4T6 User manual

Popular Computer Hardware manuals by other brands

BIG TREE TECH S42C user manual

BIG TREE TECH

BIG TREE TECH S42C user manual

TV One CORIOview MWP-4Hi-1Y quick start guide

TV One

TV One CORIOview MWP-4Hi-1Y quick start guide

7th Sense Juggler user guide

7th Sense

7th Sense Juggler user guide

digitalview HD-3000v2 manual

digitalview

digitalview HD-3000v2 manual

Ebmpapst 4114 N/2H operating manual

Ebmpapst

Ebmpapst 4114 N/2H operating manual

Corsair H80 Installation

Corsair

Corsair H80 Installation

Asus BOXER-8222AI-B Installation & user guide

Asus

Asus BOXER-8222AI-B Installation & user guide

3Com PC Card user guide

3Com

3Com PC Card user guide

Matrox RT.X100 Xtreme Installation and user guide

Matrox

Matrox RT.X100 Xtreme Installation and user guide

Advantech PCA-6742 Series Startup manual

Advantech

Advantech PCA-6742 Series Startup manual

Mellanox Technologies ConnectX-6 user manual

Mellanox Technologies

Mellanox Technologies ConnectX-6 user manual

SIGMA TEK CP 212-1 operating manual

SIGMA TEK

SIGMA TEK CP 212-1 operating manual

Smacq Technologies PCI-3000 Series user manual

Smacq Technologies

Smacq Technologies PCI-3000 Series user manual

ST X-NUCLEO-SRC1M1 user manual

ST

ST X-NUCLEO-SRC1M1 user manual

IXXAT PC-I 04/PCI manual

IXXAT

IXXAT PC-I 04/PCI manual

Exsys EX-1072 user manual

Exsys

Exsys EX-1072 user manual

Embedded Computer EBC-I855C Operation manual

Embedded Computer

Embedded Computer EBC-I855C Operation manual

Data Aire DAP III Integration Information

Data Aire

Data Aire DAP III Integration Information

manuals.online logo
manuals.online logoBrands
  • About & Mission
  • Contact us
  • Privacy Policy
  • Terms and Conditions

Copyright 2025 Manuals.Online. All Rights Reserved.