manuals.online logo
Brands
  1. Home
  2. •
  3. Brands
  4. •
  5. hager
  6. •
  7. Lock
  8. •
  9. hager 3200 Series Service manual

hager 3200 Series Service manual

3200 Series ANSI Grade 2 Deadbolt
Installation Instructions
Meets ANSI 156.5
I-LS00764
For use on doors 1-3/8” to 1-3/4” (35 mm - 45 mm) thick
REV 2 Page 1 of 2
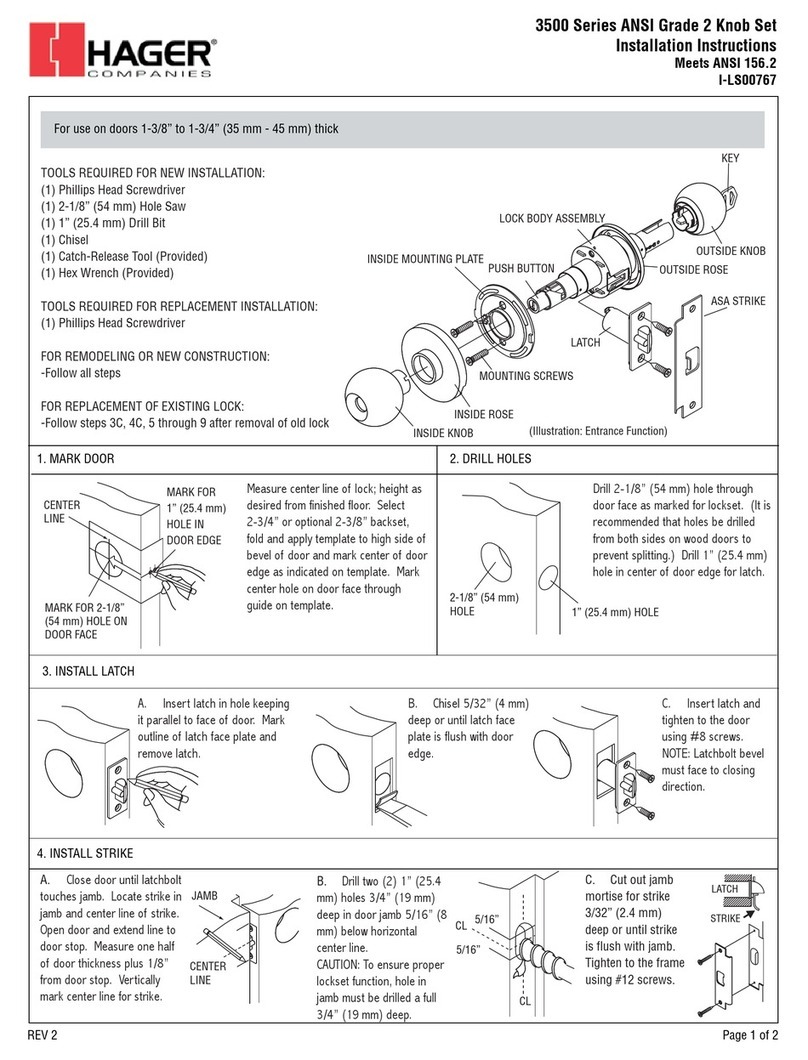
1. MARK DOOR
TOOLS REQUIRED FOR NEW
INSTALLATION:
(1) Phillips Head Screwdriver
(1) 2-1/8” (54 mm) Hole Saw
(1) 1” (25.4 mm) Drill Bit
(1) Chisel
TOOLS REQUIRED FOR
REPLACEMENT
INSTALLATION:
(1) Phillips Head Screwdriver
FOR REMODELING OR NEW
CONSTRUCTION:
-Follow all steps
FOR REPLACEMENT OF
EXISTING LOCK:
-Follow steps 3C, 4C, and 5
(single cylinder) or 6 (double
cylinder) after removal of old
lock
NOTE: When installing an IC
Core single cylinder deadbolt
to a 1-3/8” thick door, you
must install provided spacer
ring behind the cylinder
assembly for proper spacing.
Measure center line of lock; height as
desired from finished floor. Select
2-3/4” or optional 2-3/8” backset, fold
and apply template to high side of bevel
door and mark center of door edge as
indicated on template. Mark center hole
on door face through guide on template.
2. DRILL HOLES
Drill 2-1/8” (54 mm) hole through door
face as marked for deadbolt. (It is
recommended that holes be drilled from
both sides on wood doors to prevent
splitting.) Drill 1” (25.4 mm) hole in
center of door edge for latch.
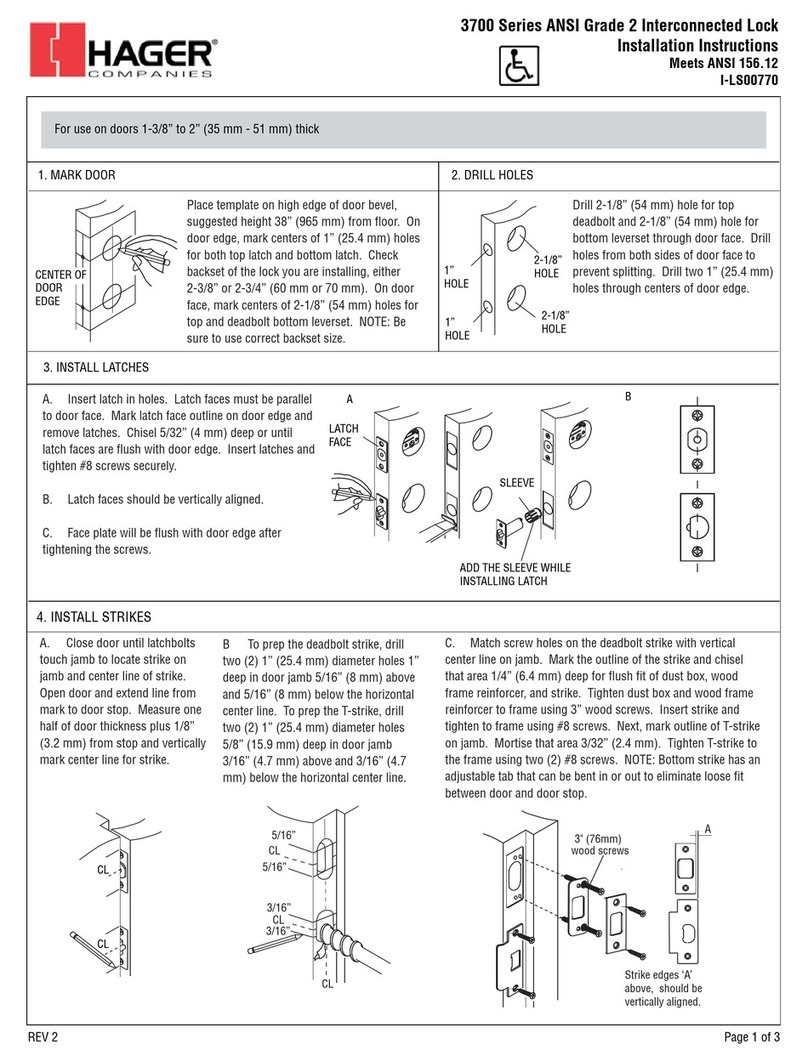
3. INSTALL LATCH
A. Insert latch in
hole keeping it
parallel to face of
door. Mark outline
of latch face plate
and remove latch.
B. Chisel 5/32” (4
mm) deep or until
latch face plate is
flush with door
edge.
C. Insert latch and
tighten to the door
using #8 screws.
4. INSTALL STRIKE
A. Close door. Locate strike in jamb and center
line of strike. Open door and extend line to door
stop. Measure one half of door thickness plus 1/8”
from door stop. Vertically mark center line for strike.
B Drill two 1” (25.4 mm) holes 1-1/4” (32 mm)
deep in door jamb and 5/16” (8 mm) above and
5/16” (8 mm) below horizontal center line.
CAUTION: To ensure proper lockset function, hole in
jamb must be drilled a full 1-1/4” (32 mm) deep.
C. Match screw holes on strike with vertical
centerlines on jamb. Mark outline of strike and
chisel 1/4” (6.4 mm) deep for flush fit of dust box,
wood frame reinforcer, and strike. Place dust box
and wood frame reinforcer into mortised area and
tighten to the frame using 3” wood screws. Insert
the strike and tighten to the frame with #8 screws.
NOTE: Mortise 5/64” (2 mm) deep if mounting strike plate only.
MARK FOR
1” (25.4 mm)
HOLE IN
DOOR EDGE
MARK FOR 2-1/8”
(54 mm) HOLE ON
DOOR FACE
CENTER LINE
1” (25.4 mm) HOLE
2-1/8” (54 mm)
HOLE
JAMB
CENTER
LINE
5/16”
CL
5/16”
CL
KEYS
OUTSIDE CYLINDER
OUTSIDE ROSE
OUTSIDE CYLINDER COLLAR
FIRE/SECURITY SHIELD
MOUNTING
SCREWS
LATCH
INSIDE CYLINDER COLLAR
INSIDE ROSE
INSIDE CYLINDER
MOUNTING SCREWS
DEADBOLT
STRIKE
WOOD FRAME REINFORCER
STRIKE MOUNTING SCREWS
WOOD SCREWS #10 X 3”
DUST BOX
(ILLUSTRATION: DOUBLE CYLINDER FUNCTION)
3200 Series ANSI Grade 2 Deadbolt
Installation Instructions
Meets ANSI 156.5
I-LS00764
REV 2 Page 2 of 2
5. INSTALL SINGLE CYLINDER (SKIP TO STEP 6 IF USING DOUBLE CYLINDER)
A. Retract deadbolt to unlock position. Insert exterior tail piece
horizontally through latch crank.
6. INSTALL DOUBLE CYLINDER
A. Retract deadbolt to unlock position. Insert exterior tail
piece horizontally through latch crank.
B. Press exterior cylinder flush against door. Install inside thumb
turn unit and tighten mounting screws.
B. Press exterior cylinder flush against door. Install
interior tail piece vertically through latch crank. Press
interior cylinder flush against door and tighten mounting
screws.
EXTERIOR CYLINDER
EXTERIOR TAILPIECE
LATCH CRANK DEADBOLT
EXTERIOR CYLINDER
INSIDE THUMB
TURN UNIT
MOUNTING
SCREWS
EXTERIOR CYLINDER
EXTERIOR TAILPIECE
LATCH CRANK
EXTERIOR TAILPIECE
DEADBOLT MOUNTING SCREWS
EXTERIOR CYLINDER
EXTERIOR TAILPIECE
INTERIOR TAILPIECE
INTERIOR CYLINDER

Other hager Lock manuals

hager 2951 User manual

hager

hager 2951 User manual

hager 3220 Service manual

hager

hager 3220 Service manual

hager 3500 Series Service manual

hager

hager 3500 Series Service manual

hager 2941 User manual

hager

hager 2941 User manual

hager 3470 User manual

hager

hager 3470 User manual

hager EQ38E User manual

hager

hager EQ38E User manual

hager XEVS500 Operating and safety instructions

hager

hager XEVS500 Operating and safety instructions

hager 2942 Service manual

hager

hager 2942 Service manual

hager 3800 Series User manual

hager

hager 3800 Series User manual

hager 3600 Series Service manual

hager

hager 3600 Series Service manual

hager 3400 Series Service manual

hager

hager 3400 Series Service manual

hager I-LS02688 User manual

hager

hager I-LS02688 User manual

hager 9458 Service manual

hager

hager 9458 Service manual

hager 3700 Series Service manual

hager

hager 3700 Series Service manual

hager 3800 Series User manual

hager

hager 3800 Series User manual

Popular Lock manuals by other brands

Ideal Security Decibel Ultra HD SL3001 quick start guide

Ideal Security

Ideal Security Decibel Ultra HD SL3001 quick start guide

schmersal AZM201B-SK-T-1P2PW-A-DU Operation and assembly instructions

schmersal

schmersal AZM201B-SK-T-1P2PW-A-DU Operation and assembly instructions

inVue L410 manual

inVue

inVue L410 manual

Velleman Perel BG80051 user manual

Velleman

Velleman Perel BG80051 user manual

COMPX National D150CB instruction sheet

COMPX

COMPX National D150CB instruction sheet

COMPX T8871 Dimensional drawing

COMPX

COMPX T8871 Dimensional drawing

Schlage SchlageTouch BE375 installation instructions

Schlage

Schlage SchlageTouch BE375 installation instructions

Rently Blue RKDB02 user manual

Rently Blue

Rently Blue RKDB02 user manual

COMPX Stock Locks C2174-2DC-KD Dimensional drawing

COMPX

COMPX Stock Locks C2174-2DC-KD Dimensional drawing

MYLOQ Kodcylinder MYLOQ 1101 FITTING INSTRUCTION

MYLOQ

MYLOQ Kodcylinder MYLOQ 1101 FITTING INSTRUCTION

Swinnus iLock-S200 user guide

Swinnus

Swinnus iLock-S200 user guide

Tecnosicurezza Pulse Pro T6630/GRP installation instructions

Tecnosicurezza

Tecnosicurezza Pulse Pro T6630/GRP installation instructions

Assa Abloy eCLIQ operating instructions

Assa Abloy

Assa Abloy eCLIQ operating instructions

Sandleford PKSS70 operating instructions

Sandleford

Sandleford PKSS70 operating instructions

COMPX CB084-184 instruction sheet

COMPX

COMPX CB084-184 instruction sheet

Milocks PSGH quick guide

Milocks

Milocks PSGH quick guide

Richelieu 57000290 Calibrations and Settings

Richelieu

Richelieu 57000290 Calibrations and Settings

Securam SafeLogic Basic Series operating instructions

Securam

Securam SafeLogic Basic Series operating instructions

manuals.online logo
manuals.online logoBrands
  • About & Mission
  • Contact us
  • Privacy Policy
  • Terms and Conditions

Copyright 2025 Manuals.Online. All Rights Reserved.