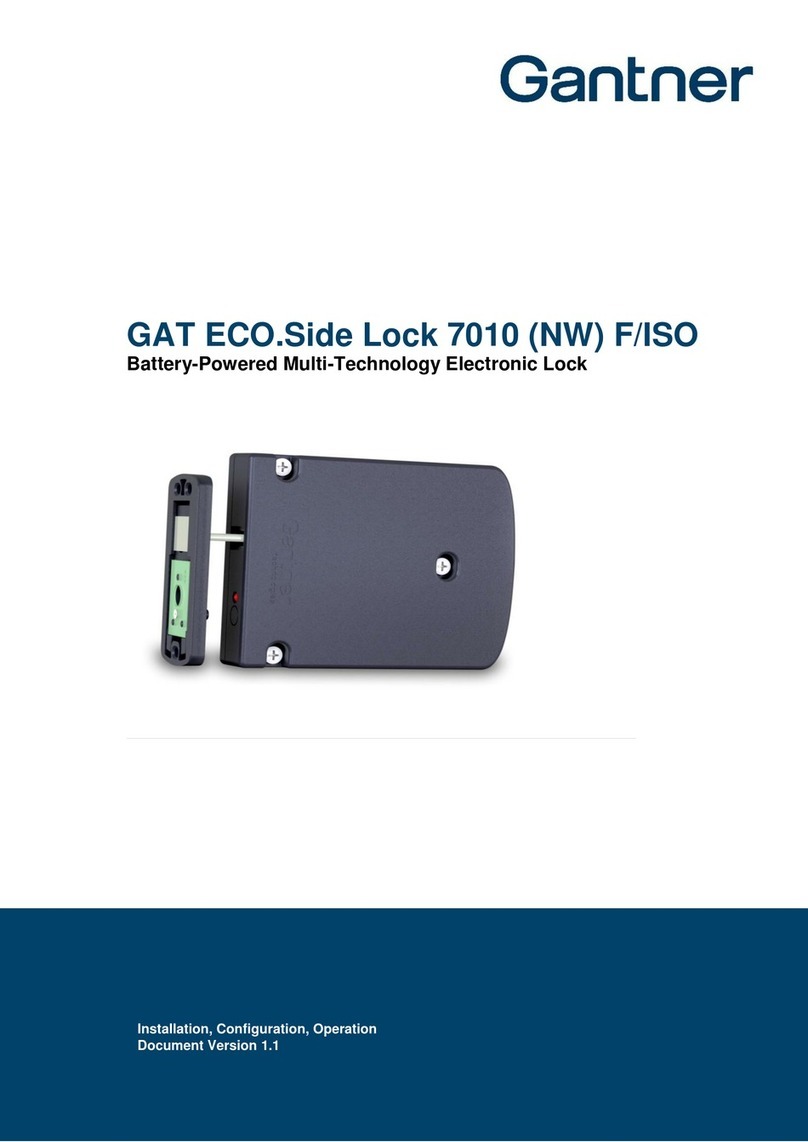
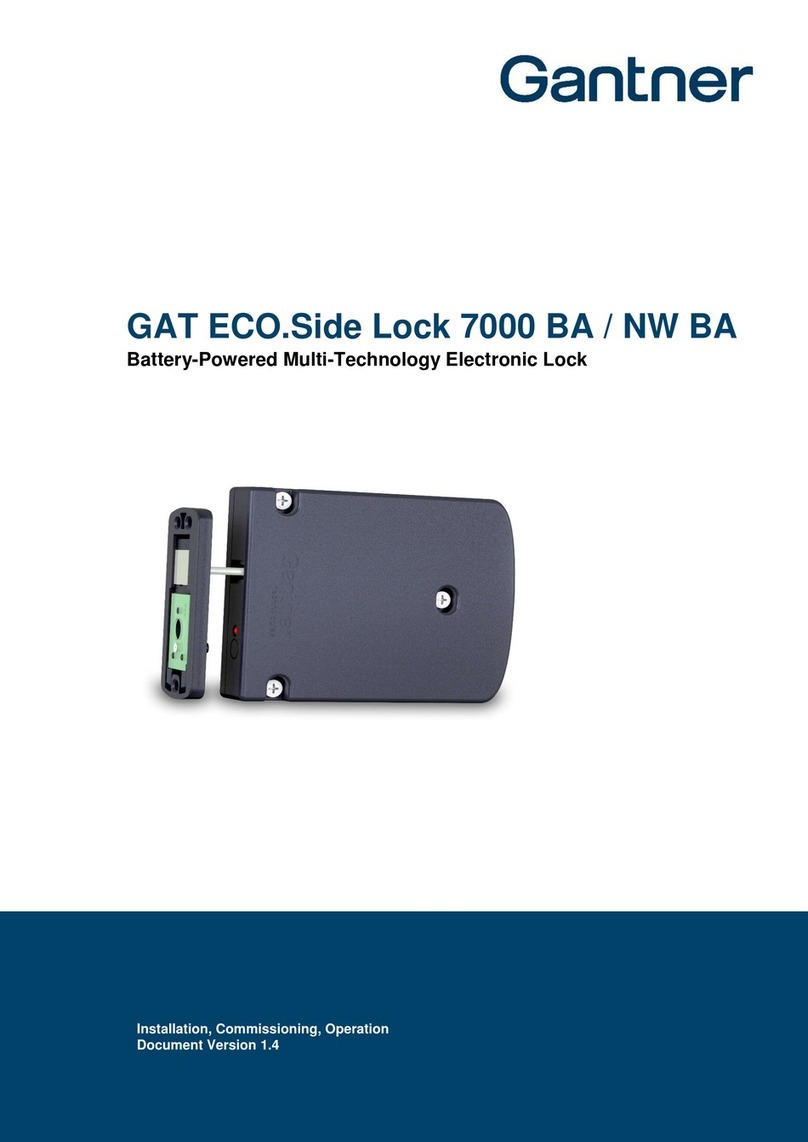
Gantner Mifare Gat ECO.Lock 7 F/ISO Series Quick guide

www.gantner.com
HB_GAT-ECOLock-7xxxFISO--EN_12
1
GAT ECO.Lock 7xxx F/ISO
Battery-Powered Electronic Lock MIFARE®and ISO 15693
Installation, Configuration, Operation
Document Version 1.2
Installation, Configuration, Operation
Document Version 1.1

GAT ECO.Lock 7xxx F/ISO
2
HB_GAT-ECOLock-7xxxFISO--EN_12
www.gantner.com
Copyright 2017-2018 by GANTNER Electronic GmbH, Schruns (Austria).
Operating instructions, manuals and software are protected by copyright. All rights are reserved. Copying, duplication, translation,
installation in any electronic medium or machine-readable form in whole or in part is prohibited. The sole exception is represented
by creation of a back-up copy of software for own use as a safeguard, so far as this is technically possible and recommended by
us. Any infringement will render the party committing such infringement liable to compensation payment.
Liability
Any claims against the manufacturer based on the hardware or software products described in this manual shall depend
exclusively on the conditions of the guarantee. Any further-reaching claims are excluded, and in particular the manufacturer
accepts no liability for the completeness or accuracy of the contents of this manual. The right is reserved to make alterations, and
alterations may be made at any time without prior notice being given.
Trademarks
Attention is drawn at this point to markings and registered trademarks used in this manual. All product and company names, which
are mentioned in this manual, are only used for identification and explanation purposes. Some of these names may be trademarks
or registered trademarks of the corresponding company.
Contact
The contact information for questions regarding this product or for general enquiries is listed below:
Contact address of manufacturer:
GANTNER Electronic GmbH
Montafonerstrasse 8
6780 Schruns, Austria
Phone: +43 5556 73784 - 0
Fax: +43 5556 73784 - 8020
Website: www.gantner.com

GAT ECO.Lock 7xxx F/ISO
www.gantner.com
HB_GAT-ECOLock-7xxxFISO--EN_12
3
General Warning and Safety Instructions
Dear Customer,
We congratulate you on selecting a product (appliance or software) from GANTNER Electronic GmbH. Our aim is to ensure our
product operates with safety and to your complete satisfaction. To achieve this aim, please take this opportunity to familiarize
yourself with the following guidelines:
1. The installation, commissioning, operation, and maintenance of the product must be carried out in accordance with the
technical conditions of operation as described in the corresponding product documentation.
2. Before installing, commissioning, operating, or maintaining the product, it is essential to read the corresponding chapter of this
manual and observe the instructions and information therein.
3. If there are some points which are not entirely clear, please do not take a chance. All queries can be clarified by your
GANTNER representative or by ringing the GANTNER support hotline.
4. Where not otherwise specifically documented, the appropriate installation, commissioning, operation and maintenance of the
product is the customer’s responsibility.
5. Directly on receipt of the goods, inspect both the packaging and the product itself for any signs of damage. Also check that the
delivery is complete and includes all accessories, documentation, auxiliary devices, etc.
6. If the packaging or product has been damaged in transport, or should you suspect that it may have a fault, the product must
not be put into service. Contact your GANTNER representative who will resolve the problem as quickly as possible.
7. The installation, commissioning, and servicing of our products must be performed by suitably trained personnel. In particular,
electrical connections must only be made by correspondingly qualified specialists. Always observe the relevant installation
regulations in accordance with the national Electrical Engineers Association (e.g., ÖVE [Austrian], VDE [Germany]).
8. Where not otherwise stated, installation and maintenance work on our products must be carried out when disconnected from
the power supply. This applies in particular to appliances that are normally supplied by low-voltage current.
9. It is prohibited to alter the products or remove protective shields and covers.
10. Do not attempt to repair a product after a defect, failure, or damage is detected. In addition, do not put the product back into
operation. In such cases, it is essential to contact your GANTNER representative or the GANTNER support hotline.
11. GANTNER Electronic GmbH accepts no responsibility for any injuries or damage caused as a result of improper use.
12. Although care is taken and we are continuously aiming for improvement, we cannot completely exclude the possibility of errors
appearing in our documentation. GANTNER Electronic GmbH therefore accepts no responsibility for the completeness or the
accuracy of this manual. The right is reserved to make alterations at any time without prior notice.
13. Should you discover any fault with the product or in its accompanying documentation, or you have any suggestions for
improvement, you may confidently inform your GANTNER representative or GANTNER Electronic GmbH directly.
14. We especially look forward to hearing from you if you just want to tell us that everything is functioning perfectly.
We wish you a successful experience with our product and look forward to welcoming you again as a customer soon.

GAT ECO.Lock 7xxx F/ISO
4
HB_GAT-ECOLock-7xxxFISO--EN_12
www.gantner.com
The GAT ECO.Lock 7xxx (NW) F/ISO locks were developed and fabricated under the quality management standard ISO 9001 and
GANTNER Electronic GmbH is also certified according to standard ISO 14001.
This product is in conformity with the following EC directives, including all applicable amendments:
- 1999/5/EC (Radio equipment and telecommunication terminal equipment)
The complete text of the CE Declaration of Conformity is available on the following internet link:
http://www.gantner.com/en/downloads-gat-ecolock7xxx_hh74dol985
GANTNER is committed to meeting or exceeding the requirements of the RoHS directive (2011/65/EU). The RoHS
directive requires that manufacturers eliminate or minimize the use of lead, mercury, hexavalent chromium,
cadmium, polybrominated biphenyls and polybrominated diphenyl ethers in electrical and electronic equipment sold
in the EU after July 1, 2006.
The WEEE symbol on GANTNER products and their packaging indicates that the corresponding material must not
be disposed of with normal household waste. Instead such marked waste equipment must be disposed of by
handing it over to a designated electronic waste recycling facility. Separating and recycling this waste equipment at
the time of disposal will help to conserve natural resources and ensure that it is recycled in a manner that protects
human health and the environment. Please contact your local authority for further details of your nearest electronic
waste recycling facility.
WARNING!
This is a Class A device. This device can cause radio interference in the home. In this case, the operator may be required to take
appropriate measures.
FCC INFORMATION (U.S.A.)
Note:
Thisequipment has been tested and foundto comply with the limits for a Class B digital device, pursuant topart 15 oftheFCC Rules.
These limits are designed to provide reasonable protection against harmful interference in a residential installation. This equipment
generates, uses, and can radiate radio frequency energy and, if not installed and used in accordance with the instructions, may cause
harmful interference to radio communications. However, there is no guarantee that interference will not occur in a particular installation. If
this equipmentdoes cause harmfulinterference to radio or television reception, which can be determined by turning the equipment off and
on, the user is encouraged to tryto correct the interference by one or more ofthefollowing measures:
- Reorient or relocate the receiving antenna.
- Increase the separation between the equipment and receiver.
- Connect the equipment into an outlet on a circuit different from that of which the receiver is connected.
- Consult the dealer or an experienced radio/TV technician for help.
FCC Warning Statement:
[Any] changes or modifications not expressly approved by the party responsible for compliance could void the user's authority to
operate the equipment.
Compliance Statement:
INDUSTRY CANADA INFORMATION
This device complies with Industry Canada’s licence-exempt RSSs. Operation is subject to the following two conditions:
(1) This device may not cause interference; and
(2) This device must accept any interference, including interference that may cause undesired operation of the device.
Le présent appareil est conforme aux CNR d’Industrie Canada applicables aux appareils radio exempts de licence. L’exploitation
est autorisée aux deux conditions suivantes :
1) l’appareil ne doit pas produire de brouillage;
2) l’appareil doit accepter tout brouillage radioélectrique subi, même si le brouillage est susceptible d’en compromettre le onctionnement.
ICES Statement (Canada)
This Class B digital apparatus complies with Canadian ICES-003.
Cet appareil numérique de la classe B est conforme à la norme NMB-003 du Canada.
FCC ID: XYZ-ABCDEFGH
This device complies with Part 15 of the FCC Rules.
Operationis subject to the following two conditions: (1)
This device must not cause harmful interference, and (2)
this device must accept any interference received,
including interference that may cause undesired operation.

GAT ECO.Lock 7xxx F/ISO
Table of Contents
www.gantner.com
HB_GAT-ECOLock-7xxxFISO--EN_12
5
TABLE OF CONTENTS
1
INTRODUCTION ............................................................... 7
1.1 About this Manual.....................................................................................................................................7
1.2 Terminology..............................................................................................................................................7
1.3 Formatting.................................................................................................................................................8
1.4 Contact & Inquiries ...................................................................................................................................8
2
GENERAL INFORMATION................................................. 9
2.1 Functional Description..............................................................................................................................9
2.2 Highlights..................................................................................................................................................9
2.3 RFID Technology....................................................................................................................................10
2.4 System Components ..............................................................................................................................11
2.5 GAT ECO.Lock 7xxx F/ISO Dimensions and Components....................................................................13
3
INSTALLATION .............................................................. 14
3.1 Test Installation.......................................................................................................................................14
3.2 Replacement after a Burglary Attempt ...................................................................................................14
3.3 Metallic and Non-Metallic Doors.............................................................................................................14
3.4 Door Width and Thickness......................................................................................................................15
3.5 Definition of the Door Hinge (Right of Left-Hinged Door).......................................................................16
3.6 Conversion for Right or Left-Hinged Door..............................................................................................17
3.7 Installation in Lockers with Non-Metallic Doors......................................................................................18
3.7.1 Measurements for the Button Drill Hole...............................................................................................18
3.7.2 Measurements for the Button Drill Hole...............................................................................................19
3.7.3 Installation Instructions for Non-Metallic Doors....................................................................................20
3.8 Installation in Lockers with Metallic Doors..............................................................................................21
3.8.1 Measurements for the Button Drill Hole...............................................................................................21
3.8.2 Measurements for Installation..............................................................................................................22
3.8.3 Installation Instructions for Metallic Doors ...........................................................................................23
3.9 Attaching the Door Labels ......................................................................................................................24
3.10 Door Handle Installation (Optional) ........................................................................................................25
4
START-UP...................................................................... 27
4.1 Power Supply..........................................................................................................................................27
4.1.1 Battery Information...............................................................................................................................27
4.1.2 Inserting the Batteries..........................................................................................................................27
4.1.3 Replacing the Batteries........................................................................................................................28
4.2 USB Connection.....................................................................................................................................29
5
OPERATION ................................................................... 31
5.1 General...................................................................................................................................................31
5.2 Operating Modes....................................................................................................................................31
5.2.1 Free Locker Mode (with or without Duration of Use Function) ............................................................32
5.2.2 Free Locker Universal Mode................................................................................................................33
5.2.3 Free Locker Unique Number Mode......................................................................................................34
5.2.4 Personal Locker Programming Card Mode..........................................................................................34
5.2.5 Personal Locker Expiry Date Mode .....................................................................................................35
5.3 GAT ECO.Basic Set F/ISO.....................................................................................................................37
5.4 Summary of System Data Carriers.........................................................................................................37
5.4.1 Master Data Carrier..............................................................................................................................37
5.4.2 Program Data Carrier...........................................................................................................................38
GAT ECO.Lock 7xxx F/ISO
Table of Contents
6
HB_GAT-ECOLock-7xxxFISO--EN_12
www.gantner.com
5.4.3 Battery Data Carrier ............................................................................................................................ 38
5.4.4 Reset Data Carrier............................................................................................................................... 38
5.4.5 Service Data Carrier............................................................................................................................ 38
5.5 Summary of LED Signals....................................................................................................................... 39
6
CONFIGURATION........................................................... 41
6.1 General Information............................................................................................................................... 41
6.2 Setup for Configuration in GAT Config Manager................................................................................... 41
6.3 View and Edit the GAT ECO.Lock 7xxx F/ISO Configuration Settings.................................................. 43
6.4 Upload Configuration Settings to the GAT ECO.Lock 7xxx F/ISO........................................................ 44
6.5 Configuration Settings of the GAT ECO.Lock 7xxx F/ISO..................................................................... 45
6.5.1 Operating Mode................................................................................................................................... 45
6.5.2 Locker Number.................................................................................................................................... 45
6.5.3 Auto-Unlock......................................................................................................................................... 45
6.5.4 Duration of Use.................................................................................................................................... 46
6.5.5 Pre-Lock Personal Locker................................................................................................................... 46
6.5.6 RF Standards ...................................................................................................................................... 46
6.5.7 Master Cards....................................................................................................................................... 46
6.5.8 Configuration Settings Table............................................................................................................... 47
7
TECHNICAL DATA ......................................................... 49
7.1 Power Supply......................................................................................................................................... 49
7.2 Reading Field......................................................................................................................................... 49
7.3 Memory and Time Management............................................................................................................ 49
7.4 Control and Display Elements................................................................................................................ 49
7.5 Interface................................................................................................................................................. 50
7.6 Housing.................................................................................................................................................. 50
7.7 Environmental Conditions...................................................................................................................... 50

GAT ECO.Lock 7xxx F/ISO
Introduction
www.gantner.com
HB_GAT-ECOLock-7xxxFISO--EN_12
7
1
INTRODUCTION
1.1 About this Manual
This manual provides information on the functionality of the GAT ECO.Lock 7xxx F/ISO and includes an overview of
how to configure the lock using GAT Config Manager configuration software. There is a separate manual available
for GAT Config Manager that explains in greater detail all functions associated with the software.
In chapter 2 "GENERAL INFORMATION", a functional description of the GAT ECO.Lock 7xxx F/ISO, the RFID
technologies supported by the device, key terms used in this manual, and a summary of system components can be
found.
Chapter 3 "INSTALLATION" contains the measurement diagrams and information required to install the GAT
ECO.Lock 7xxx F/ISO into lockers with metallic and non-metallic doors.
Chapter 4 "START-UP" describes how to put the GAT ECO.Lock 7xxx F/ISO into operation and includes
information on the batteries used to power the lock and the USB connection used for PC connection and
configuration.
Chapter 5 "OPERATION" describes the different operating modes of the GAT ECO.Lock 7xxx F/ISO. The system
data carriers required to maintain the locker system and the LED signaling are also explained in this section.
In chapter 6 "CONFIGURATION", you will find information on how to configure the GAT ECO.Lock 7xxx F/ISO
using GAT Config Manager. The main configuration settings for the lock are explained and a table listing every
setting is available here.
Chapter “7 TECHNICAL DATA" contains all the relevant technical information for the GAT ECO.Lock 7xxx F/ISO.
1.2 Terminology
Several key terms that are used often in this manual are defined below.
Computer / PC
These terms refer to all desktop and laptop computers running a Microsoft®Windows®operating system.
Data Carrier
A data carrier is a form of identification media that is used by staff and visitors in a facility for identification. Data
carriers are available in a variety of different forms such as plastic wristbands and chip cards. Data carriers are also
available to suit different RFID technologies (LEGIC, MIFARE®, ISO 15693).
FID (Company ID) and Site Key
The FID and site key are unique numbers assigned to every facility installation. The site key is a combination of the
FID and the read and write keys. The site key is used in MIFARE® and ISO 15693 systems and is encoded in every
data carrier and device used in the facility thereby ensuring that data carriers from one installation cannot be used in
other installations.

GAT ECO.Lock 7xxx F/ISO
Introduction
8
HB_GAT-ECOLock-7xxxFISO--EN_12
www.gantner.com
GAT Config Manager
GANTNER developed PC software that is used to configure GANTNER devices such as the GAT ECO.Lock 7xxx
F/ISO. A separate manual is available and integrated into the software. While the software is open, click on the
“Help” drop-down menu and select “How Do I”.
Lock
General term for the GAT ECO.Lock 7xxx F/ISO.
Locker
The term "locker" is used to describe all possible locker applications that can be fitted with a GANTNER electronic
lock. Typical applications include a changing room locker, a deposit box, or a private box.
RFID (Radio-Frequency Identification)
Identification over a short distance using radio frequency. An RFID data carrier is used to identify users in
GANTNER systems.
User / Guest / Visitor
These general terms refer to the people in a facility who use the locker system, i.e., the GAT ECO.Lock 7xxx F/ISO,
data carriers and other GANTNER devices.
1.3 Formatting
Important, function-critical information is displayed in this manual using the following formatting (with sample text).
These instructions must be read and followed.
NOTE! This signal word is used to indicate important information, relating to the current topic, which must be read
and followed in order to complete a task.
Important, but not safety-critical, information and helpful tips are formatted as follows (with sample text).
The text next to this symbol contains interesting information relating to the current topic. The information will
help you better understand the description in this section or provide interesting tips for using the software.
Action steps, to be performed by the reader, and the results of these actions are formatted as follows.
►This symbol represents an action or instruction that you must follow.
oThis symbol represents the result after executing the previous action.
1.4 Contact & Inquiries
For all inquiries concerning the GAT ECO.Lock 7xxx F/ISO please get in touch with your local GANTNER
representative/distributor or directly with one of the GANTNER Technology branch offices. The addresses, phone
and fax numbers are listed on the inner side of the manual cover.

GAT ECO.Lock 7xxx F/ISO
General Information
www.gantner.com
HB_GAT-ECOLock-7xxxFISO--EN_12
9
2
GENERAL INFORMATION
2.1 Functional Description
The GAT ECO.Lock 7xxx F/ISO is the ideal solution for the convenient electronic locking of lockers in facilities such
as leisure facilities, universities, companies, depots, and other individual company applications. The GAT ECO.Lock
7xxx F/ISO is locked / unlocked using contactless RFID (Radio Frequency Identification) data carriers. Data carriers
that use MIFARE®and ISO 15693 RFID technology are supported by the GAT ECO.Lock 7xxx F/ISO.
The GAT ECO.Lock 7xxx F/ISO is installed on the inner side of the locker door and is suitable for most types of
locker material, e.g., sheet metal, wood, HPL, and solid plastic. The GAT ECO.Lock 7xxx F/ISO can be used with
left- and right-hinged locker doors alike. Due to its mechanical compatibility with the GAT Lock 6xxx series locks
and identical locks from other manufacturers, existing locker installations can be effortlessly updated using the GAT
ECO.Lock 7xxx F/ISO.
The GAT ECO.Lock 7xxx F/ISO is powered by three 1.5 V AA batteries, which provide an operating life of up to five
years* (at room temperature) before requiring replacement. The lock connects to a computer via USB and
configured using GAT Config Manager configuration software. The lock can operate in one of five operating modes
thereby providing flexibility for different locking requirements within a facility.
Using a locker
To use a locker, the user closes the door of their locker and while holding the door shut, presses the button of the
GAT ECO.Lock 7xxx F/ISO in using their data carrier. The GAT ECO.Lock 7xxx F/ISO reads the data carrier
information and determines whether the user is authorized to use the locker. When the user is authorized, the GAT
ECO.Lock 7xxx F/ISO locks the locker door. The LED ring surrounding the button signals the locking action and the
button remains in the pressed-in position.
To unlock a previously locked locker, the user presses their data carrier onto the lock button. The GAT ECO.Lock
7xxx F/ISO reads the data carrier and checks that it has valid authorization before automatically unlocking the
locker door.
* Different operating modes or configurations can reduce the battery lifespan.
2.2 Highlights
- Status displayed via the button position
- Operation displayed via multi-colored, circular LED
- Free locker selection, assigned lockers, or rental locker function configurable
- Time-controlled use
- Automatic unlocking function
- Configuration via PC/computer, data carrier, or NFC
- Recording of the last 150 bookings
- Secure data transmission between RFID reader and data carrier
- NFC ready
- Mechanical locking and unlocking with motorized locking catch for highest reliability
- Existing lockers easily retrofitted (compatible with GAT Lock 6010 locks)

GAT ECO.Lock 7xxx F/ISO
General Information
10
HB_GAT-ECOLock-7xxxFISO--EN_12
www.gantner.com
- One model for left and right-hinged locker doors and various locker materials
- Vandal-proof installation
- Optional wireless network
- Emergency power supply when the batteries become empty
2.3 RFID Technology
Identification of users by GANTNER devices within a facility is achieved via RFID (radio-frequency identification)
technology using a frequency of 13.56 MHz. Various types of RFID technologies are available with a letter(s) added
to the GANTNER model identifier to indicate the type of technology the device supports:
- "B": LEGIC
- "F": MIFARE®
- "ISO": ISO 15693
The GAT ECO.Lock 7xxx F/ISO can operate with data carriers using MIFARE® and ISO 15693technologies. It is
necessary for all devices and data carriers in a facility to use the same technology. The information in this manual is
applicable for the following RFID technologies that can be used with the GAT ECO.Lock 7xxx F/ISO.
MIFARE®(manufacturer NXP/Infineon)
- MIFARE®Classic (1k and 4k)
- DESFire EV1 and EV2®
- MIFARE Ultralight®
ISO 15693
- The GAT ECO.Lock 7xxx F/ISO functions with all currently known ISO 15693 data carriers.
In addition to the different RFID technologies, data carriers are available in a variety of shapes and sizes. The GAT
ECO.Lock 7xxx F/ISO is designed to operate with all different types of data carrier media.

GAT ECO.Lock 7xxx F/ISO
General Information
www.gantner.com
HB_GAT-ECOLock-7xxxFISO--EN_12
11
2.4 System Components
The GAT ECO.Lock 7xxx F/ISO system consists of the following components. See the following page for a
description of each component. For indoor lockers
For outdoor lockers (ext. temp. range, IP 64)
For metallic lockers
Figure 2.1 –Components of the GAT ECO.Lock 7xxx F/ISO system
1. GAT ECO.Lock 7100 F/ISO
2. GAT ECO.Lock 7100 NW F/ISO
3. GAT ECO.Lock 7150 F/ISO
4. GAT ECO.Lock 7150 NW F/ISO
5. GAT ECO.Lock
7200 Adapter
9. 1.5V Alkaline Battery
Alkaline
7. GAT ECO.Lock 7000
- Battery Key GEA
6. GAT ECO.Basic Set F/ISO
10. GAT Lock 6010 GANTNER Front Label
11. GAT Lock 6010 BED Front Label
8. GAT Lock Door Handle

GAT ECO.Lock 7xxx F/ISO
General Information
12
HB_GAT-ECOLock-7xxxFISO--EN_12
www.gantner.com
1. GAT ECO.Lock 7100 F/ISO (Part No. 728429)
Battery-powered RFID locker lock for MIFARE®and ISO 15693 data carriers, 22 mm locker door hole, without
door label, without batteries.
2. GAT ECO.Lock 7100 NW F/ISO (Part No. 728227)
Battery-powered RFID locker lock for MIFARE®and ISO 15693 data carriers, 22 mm locker door hole, with
wireless interface, without door label, without batteries.
3. GAT ECO.Lock 7150 F/ISO (Part No. 728328)
Battery-powered RFID locker lock for MIFARE®and ISO 15693 data carriers, 22 mm locker door hole, extended
temperature range, IP 64 (locked door), without door label, without batteries.
4. GAT ECO.Lock 7150 NW F/ISO (Part No. 728126)
Battery-powered RFID locker lock for MIFARE®and ISO 15693 data carriers, 22 mm locker door hole, extended
temperature range, IP 64 (locked door), with wireless interface, without door label, without batteries.
5. GAT ECO.Lock 7200 Adapter (Part No. 614322)
Adapter for GAT ECO.Lock 7100 to cover a 38 mm drilling in metal doors. No screws required.
6. GAT ECO.Basic Set F/ISO (Part No. 812528)
Accessory set for configuring and maintaining the GAT ECO.Lock 7xxx F/ISO system. Contains system data
carriers, 3 m USB cable, configuration software and GANTNER lanyard.
7. GAT ECO.Lock 7000 –Battery Key GEA (Part No. 832122)
Tool to open the battery compartment.
8. GAT Lock Door Handle (Part No. 610217)
Optional door handle for the GAT ECO.Lock 7xxx F/ISO with placeholder for an additional label, anthracite gray.
9. Batterie 1.5V Alkali (Part No. 308819)
GANTNER-approved battery for the GAT ECO.Lock 7xxx F/ISO. Three batteries required for operation. Batteries
supplied per battery.
10. Front label for the GAT Lock 6010
Self-adhesive locker door labels in GANTNER design available with or without printed locker numbers:
- Frontfolie GAT Lock 6010 GANTNER o.Nr (Part No. 666834)
Front label without numbering
- Frontfolie GAT Lock 6010 GANTNER m.Nr (Part No. 666329)
Front label with numbering
11. Front Label GAT Lock 6010 BED (Part No. 666430)
Self-adhesive locker door label with graphical operating instructions.

GAT ECO.Lock 7xxx F/ISO
General Information
www.gantner.com
HB_GAT-ECOLock-7xxxFISO--EN_12
13
2.5 GAT ECO.Lock 7xxx F/ISO Dimensions and Components
Non-metallic door Metallic door
1. Battery cover
4. LED ring
2. Locking bolt
5. Lock electronics
3. Button
6. Booster
Figure 2.2 –GAT ECO.Lock 7xxx F/ISO dimensions and components (dimensions in mm –inches shown in brackets)

GAT ECO.Lock 7xxx F/ISO
Installation
14
HB_GAT-ECOLock-7xxxFISO--EN_12
www.gantner.com
3
INSTALLATION
NOTE! These installation instructions describe how to install the GAT ECO.Lock 7xxx F/ISO electronic lock. Please
read this section carefully prior to working on the lockers or installing the locks.
3.1 Test Installation
As the GAT ECO.Lock 7xxx F/ISO is suitable for a wide range of installation applications, always perform a test
installation including functional testing of the GAT ECO.Lock 7xxx F/ISO in a sample locker from the facility before
starting with the mass production of lockers.
Ensure that the door shackle slides easily in and out of the opening in the locker body. Also test that the GAT
ECO.Lock 7xxx F/ISO locks and unlocks as required, ideally using a data carrier of the same type to be used with
the locker system to ensure that the data carrier functions as required.
3.2 Replacement after a Burglary Attempt
If a burglary (forced opening) is attempted or occurs at a locker, the entire GAT ECO.Lock 7xxx F/ISO must be
replaced with a new one.
3.3 Metallic and Non-Metallic Doors
The GAT ECO.Lock 7xxx F/ISO is suitable for locker doors made of metal and non-metallic materials, and is also
suitable for indoor and outdoor installations. GANTNER provides six different models to suit these varying
installation applications. See section “2.4 System Components” for more information.
The installation procedure is different for lockers with metallic doors and lockers with non-metallic doors. See
section “3.7 Installation in Lockers with Non-Metallic Doors” or “3.8 Installation in Lockers with Metallic Doors” for
the relevant installation instructions.

GAT ECO.Lock 7xxx F/ISO
Installation
www.gantner.com
HB_GAT-ECOLock-7xxxFISO--EN_12
15
3.4 Door Width and Thickness
The GAT ECO.Lock 7xxx F/ISO is suitable for locker doors with a maximum door leaf thickness of 28 mm (1.1´´).
When installing the GAT ECO.Lock 7xxx F/ISO into lockers with narrow doors, ensure that the lock housing does
not contact the locker body when opening and closing the door (see below).
Figure 3.1 –Width and thickness of the locker door

GAT ECO.Lock 7xxx F/ISO
Installation
16
HB_GAT-ECOLock-7xxxFISO--EN_12
www.gantner.com
3.5 Definition of the Door Hinge (Right of Left-Hinged Door)
For installation, it is important to determine whether the locked door is hinged on the left or right side, which is
defined as follows:
Right-hinged door Left-hinged door
Figure 3.2 –Locker door hinge definition (left/right)
The position of the locking bolt and button of the GAT ECO.Lock 7xxx F/ISO is different for right and left-hinged
doors. You can make this change yourself (see next section).
The installation for right-hinged doors is described in the following pages. The installation process for left-hinged
doors is the same as for right-hinged doors, only with the GAT ECO.Lock 7xxx F/ISO and locker door rotated180°.

GAT ECO.Lock 7xxx F/ISO
Installation
www.gantner.com
HB_GAT-ECOLock-7xxxFISO--EN_12
17
3.6 Conversion for Right or Left-Hinged Door
Converting the GAT ECO.Lock 7xxx F/ISO to suit a right or left-hinged locker door can be carried out easily by
completing the following steps.
►Lift the lock electronics out of the lock housing.
►Rotate the lock electronics 180°.
►Reinsert the lock electronics into the lock housing.
oThe GAT ECO.Lock 7xxx F/ISO is now converted to the opposing locker hinge type.

GAT ECO.Lock 7xxx F/ISO
Installation
18
HB_GAT-ECOLock-7xxxFISO--EN_12
www.gantner.com
3.7 Installation in Lockers with Non-Metallic Doors
For lockers with non-metallic doors, the GAT ECO.Lock 7xxx F/ISO is mounted on the left or right inner-side of the
locker door depending on whether the door is right or left-hinged. A drill hole is required in the locker door for the
button of the GAT ECO.Lock 7xxx F/ISO.
NOTE! Before installing all locks in a new locker system, a test installation of one lock into a completed locker and
a function check must be performed. See section “3.1. Test Installation”.
3.7.1 Measurements for the Button Drill Hole
A hole must be drilled into the locker door for the button. For non-metallic locker doors, the diameter of the button
hole is 23 mm (0.9´´).
Figure 3.3 –Diameter of the button drill hole for non-metallic doors
The following diagram shows the position of the button drill hole in relation to the housing mounting holes.
Right-hinged door Left-hinged door
Figure 3.4 - Position of the button drill hole for non-metallic doors

GAT ECO.Lock 7xxx F/ISO
Installation
www.gantner.com
HB_GAT-ECOLock-7xxxFISO--EN_12
19
3.7.2 Measurements for the Button Drill Hole
NOTE! A
During installation, it is important to ensure that the GAT ECO.Lock 7xxx F/ISO does not brush against the locker
body when the locker door is opened. The distance of 4 mm (0.16 inch) indicated between the lock housing and the
locker body is valid for locker doors that are wider than 240 mm (9.45´´) and with a maximum door leaf thickness of
28 mm (1.1´´). For locker doors that do not adhere to these measurements, or for doors with an unfixed pivot point
(depending on the type of hinge used), the distance between the lock and the body of the locker must be
recalculated.
NOTE! B
To increase break-in protection, a security bolt can be installed on the locker body that inserts into the locker door
when the door is closed.
Use the following measurements to position the button drill hole depending on whether the locker door is left or
right-hinged.
Figure 3.5 –Installation measurements for right-hinged doors
Figure 3.6 –Installation measurements for left-hinged doors

GAT ECO.Lock 7xxx F/ISO
Installation
20
HB_GAT-ECOLock-7xxxFISO--EN_12
www.gantner.com
3.7.3 Installation Instructions for Non-Metallic Doors
Complete the following steps to install the GAT ECO.Lock 7xxx F/ISO into lockers with non-metallic doors.
►Drill 1 hole into the locker door for the lock button. Position the button hole according to the measurements in
Figure 3.4 and Figure 3.5 (for right-hinged doors) or Figure 3.6 (for left-hinged doors).
►Mark out 4 mounting holes on the inside of the locker door for the lock housing. Position the holes according to
the measurements in Figure 3.4 and Figure 3.5 (for right-hinged doors) or Figure 3.6 (for left-hinged doors).
►For harder doors, where the screws cannot be screwed in easily, the holes must be pre-drilled. If necessary,
pre-drill the mounting holes for the lock housing.
NOTE! Do not drill the holes for the screws completely through the door.
►If you are also using the optional GAT Lock Door Handle, this must be installed before the GAT ECO.Lock 7xxx
F/ISO. See "3.10 Door Handle Installation (Optional)" for more information.
►Mount the GAT ECO.Lock 7xxx F/ISO onto the inside locker door using 4 screws. Hardware recommendation:
- For wooden or HPL doors: ABC Spax 5 x 35 mm (0.2´´ x 1.38´´) wood screws.
- For wooden or HPL doors under heavy load or in public areas: screw-in or glue-in M5 threaded sleeves with
5 x 35 mm (0.2´´ x 1.38´´) cylinder head screws.
- The maximum allowed tightening torque of the screws is 2 Nm (1.47 lb-ft).
►Attach the door label(s) to the door front as shown in section “3.9 Attaching the Door Labels”.
Testing
►Check that there is no pressure applied to the button shaft of the GAT ECO.Lock 7xxx F/ISO in its assembled
state, e.g., by a part of the locker door, as this could lead to malfunction.
►Ensure that the lock button is centrally aligned in the drill hole.
►Ensure that the GAT ECO.Lock 7xxx F/ISO housing does not contact the inside of the locker body when
opening/closing the locker door.
►Ensure that the battery cover can open and is not hindered by other components.
See section “4 START-UP” for instructions on inserting the batteries and putting the GAT ECO.Lock 7xxx
F/ISO into operation.
This manual suits for next models
5
Table of contents
Other Gantner Lock manuals

Gantner
Gantner GAT NET.Lock 7020 System Quick guide

Gantner
Gantner GAT ECO.Side Lock 7000 BA Guide

Gantner
Gantner GAT SMART.Lock 7000 System Quick guide

Gantner
Gantner GAT Lock 6010 F User manual

Gantner
Gantner GAT Lock 6010 B User manual

Gantner
Gantner GAT ECO.Side Lock 7010 F/ISO Quick guide

Gantner
Gantner GAT ECO.Side Lock 7000 User manual