manuals.online logo
Brands
  1. Home
  2. •
  3. Brands
  4. •
  5. hager
  6. •
  7. Switch
  8. •
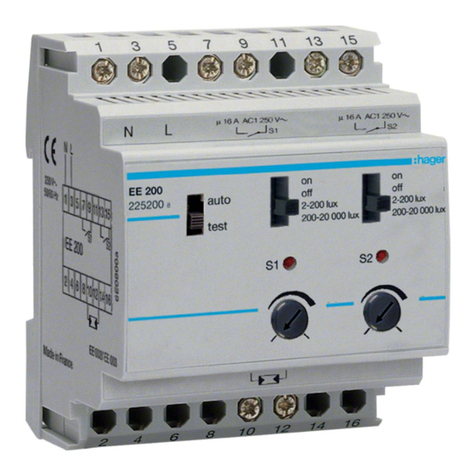
  9. hager EE 200 User manual

hager EE 200 User manual

S1 S2
EE 200
225200
8
auto
200-20 000 lux
2-200 lux
test
on
off
200-20 000 lux
2-200 lux
on
off
Notice d’instructions
User instructions
Bedienungsanleitung
Bedieningshandleiding
Interrupteur crépusculaire 2 voies
Light sensitive switch 2 channels
Dämmerungsschalter 2 Kanal
20 kLx
Schemerschakelaar 2 kringen
EE 200, EE 201
6E 7535.b
FGB
Spécifications techniques
1
F
GB
D
NL
6E 7535.b
Présentation du produit
L'interrupteur crépusculaire 2 voies EE 200/
EE 201 commande des circuits d'éclairage en
fonction de l'éclairement naturel.
Pour chaque voie, l'utilisateur fixe le seuil de
déclenchement et la cellule photorésistante
mesure l'intensitélumineuse.
Les sorties du EE 200/EE 201 seront :
•actives, si la mesure est inférieure au
seuil fixé,
•inactives, lorsque la mesure est supérieure
au seuil,
•forcées dans l’état ON ou OFF si un
forçage est sélectionné.
Une temporisation àl’enclenchement et au
déclenchement permet d’éviter les commuta-
tions intempestives lors de variations brutales
de luminosité: éclairs, phares de voitures etc...
Installation de la cellule
Pour un bon fonctionnement de l’appareil, la
cellule ne doit pas être exposée directement au
soleil ou près d’une source lumineuse et doit être
installée àl’abri de la poussière et de l’humidité.
En cas de coupure de la liaison entre la cellule et
l’interrupteur crépusculaire, les voyants S1 et S2
clignotent.
Caractéristiques électriques
- alimentation : 230V~+10-15% 50/60 Hz
- consommation : 1,5 VA max.
- sortie : 1 contact libre de potentiel/voie
pouvoir de coupure :
•AC1: 16A 250 V~
•lampe àincandescence / halogène : 2300 W
•tube fluorescent :
-non compensé: 2000 W
-compensé// (110µF) : 1000 W
•ampoule fluo compact : 10 x 20 W
•fluo ballast électronique : 1000 W
Caractéristiques fonctionnelles
- 2 gammes de mesure : 2 à200 lux,
200 à20000 lux.
- temporisation àl’allumage et àl’extinction :
30 s.
- température de fonctionnement :
-30°C à+60°C (cellule),
-0°C à+45°C (boîtier)
- température de stockage : -20 °C à+60 °C
- degréde protection (cellule) : IP54
- classe d’isolation (cellule) : II
- Hystérésis : 10 %
- distance entre boîtier et cellule : max. 50 m.
- distance entre 2 boîtiers : max. 50 m.
Capacité de raccordement
- boîtier modulaire : 0,5 à4mm2
- cellule : 0,75 à2,5 mm2
Réglage du seuil de luminosité
La position "test" du commutateur ➀facilite
le réglage du seuil d´éclairement en suppri-
mant la temporisation àl’enclenchement
et au déclenchement.
Sélectionner la plage de sensibilite corres-
pondant àl’application (commutateur ➁)
2 à200 lux (faible luminosité) exemple
d’applications : commande d’éclairage
public, d’enseignes, de vitrines....
200 à20000 lux (forte luminosité)
exemple d’applications : commande de
stores.
Mettre le commutateur ➀en position "test";
au moment choisi de la journée, tourner le
potentiomètre de réglage ➃jusqu’au seuil de
commutation (allumage du voyant ➂) ;
remettre le commutateur en position “auto”
mode normal de fonctionnement de l’appareil.
Setting of the working level
The test position of the override selector ➀
makes easier the setting of the working level,
it removes the ON and OFF delay.
Select the sensitivity range that suits the
application (selector ➁).
2 to 200 lux (low light level) application
examples: public lighting, shop windows,
signals....
200 to 20000 lux (high light level)
application examples: control of shades
At the appropriate moment of the day, put the
selector ➀in test position;
turn the potentiometer ➃up to the switching
point (the indicator ➂ lights);
put the selector back to position “auto”, the
normal operating mode of the device.
Product Features
The 2-way light sensitive switch EE 200/
EE 201 controls lighting circuits based on
natural light.
The user sets the threshold of release for each
way and the light sensitive cell measures the
light intensity.
The output of EE 200/EE 201 will be:
•ON, when the measured level is lower
than the set light level,
•OFF, when the measured level is higher
than the set light level,
•Priory set output in ON or OFF state if a
priority setting is selected.
A time delay on switching and release prevents
undesirable switching when sudden changes
of brightness occur: lightning, headlights of
cars, etc.
Composition du kit EE 201
Le EE 201 est composéde :
- 1 interrupteur crépusculaire EE 200
- 1 sonde de luminositésaillie EE 003.
Lors du raccordement de la cellule, ou avant
toute intervention sur celle-ci, couper
l’alimentation 230V de l’interrupteur
crépusculaire.
Kit EE 201
Kit EE 201 includes:
- 1 light sensitive switch EE 200
- 1 wall-mounted light sensor EE 003.
6E 7535.b2
Technical specification
Mounting of the cell
To ensure a good working of the light sensitive
switch, the cell must not be influenced by
artificial light or direct solar radiation and has
to be sheltered from dust and humidity.
In case of failure of the connection between
the cell and the light sensitive switch, the
indicators S1 and S2 flicker.
24 mois contre tous vices de matières ou de fabrication, àpartir de
leur date de production. En cas de défectuosité, le
produit doit être remis au grossiste habituel.
La garantie ne joue que si la procédure de retour via l’installa-
teur et le grossiste est respectée et si après expertise notre ser-
vice contrôle qualiténe détecte pas un défaut dûàune mise en
œuvre et/ou une utilisation non conforme aux règles de l’art.
Les remarques éventuelles expliquant la défectuositédevront
accompagner le produit.
Garantie F
A warranty period of 24 months is offered on hager products,
from date of manufacture, relating to any material of manufac-
turing defect. If any product is found to be defective it must
be returned via the installer and supplier (wholesaler).
The warranty is withdrawn if :
- after inspection by hager quality control dept the device is
found to have been installed in a manner which is contrary to
IEE wiring regulations and accepted practice within the
industry at the time of installation.
- the procedure for the return of goods has not been followed.
Explanation of defect must be included when returning goods.
Warranty GB
L
N
auto
200-20 000 lux
2-200 lux
test
on
off
200-20 000 lux
2-200 lux
on
off
S1 S2
1 5 7
3911
161210 14
13 15
2468
S1 S2
Schéma de raccordement électrique - electrical connection
EE 003 EE 002
➀Commutateur du mode de fonctionnement
auto/test.
Switch of operating mode auto/test.
➁Commutateur 4 positions pour la
sélection de la gamme de luminosité
et pour le forçage.
4-position switch for the selection of the
brightness range and for priority setting.
➂Voyant pour la visualisation de l'état de
sortie.
Indicator to show output switching.
➃Potentiomètre pour le réglage du seuil
de luminosité.
Potentiometer to set light level.
EV 100
auto
200-20 000 lux
2-200 lux
test
on
off
200-20 000 lux
2-200 lux
on
off
S1 S2
EE 200
1 5 7
3911
161210 14
13 15
2468
1
2
4
3
Description du produit - Product description
Electrical specification
- Voltage rating: 230V~+10/-15% 50 Hz
- Consumption: 1,5 VA max.
- Output: 1 voltage free contact/channel
Max. breaking capacity:
•AC1: 16A 250 V~
•Incandescent lamp/ Halogen lamp:
2300 W
•Fluorescent lamp:
-uncompensated: 2000 W
-// compensated (110µF): 1000 W
•Compact fluo bulb: 10 x 20 W
•Electronic fluo ballast: 1000 W
Functional characteristics
- 2 sensitivity ranges: 2 to 200 lux,
200 to 20000 lux.
- ON and OFF delay: 30 s.
- working temperature:
•-30°C to +60°C (cell),
•-0°C to +45°C (Modular device)
- storage temperature: -20 °C to +60 °C
- Protection class (cell): IP54
- Insulation class (cell): II
- Hysteresis: 10 %
- Max lenght between cell and modular
device: max. 50 m.
- Max lenght between 2 modular devices:
max. 50 m.
Connection capacity
- modular device: 0,5 to 4mm2
- cell: 0,75 to 2,5 mm2
Make sure the light sensitive switch is
unplugged before connecting the cell.
S1 S2
EE 200
225200
8
auto
200-20 000 lux
2-200 lux
test
on
off
200-20 000 lux
2-200 lux
on
off
Notice d’instructions
User instructions
Bedienungsanleitung
Bedieningshandleiding
EE 200, EE 201
6E 7035.b
DNL
3
F
GB
D
NL
6E 7535.b
Installation der Fotozelle
Um den sicheren Betrieb des
Dämmerungsschalters zu gewährleisten, sollte die
Fotozelle nicht direkt der Sonne oder einer sonsti-
gen Lichtquelle ausgesetzt werden. Sie sollte auch
vor Staub und Feuchtigkeit geschützt werden.
Bei Unterbrechung der Verbindung zwischen
Fotozelle und Dämmerungsschalter blinken die
Kontrolleuchten S1 und S2.
Einstellen des Helligkeitswertes
In der Position "test" des Schalters ➀
arbeitet das Produkt ohne Ein- und
Ausschaltverzögerung. Dies erleichtert das
Einstellen der Schaltschwellen.
Auswahl des Helligkeitsbereiches entsprechend
der Anwendung (Schalter ➁).
2 bis 200 lux (niedrige Helligkeit)
Anwendungsbeispiele: Steuerung von
Straßen-, Transparent-,
Schaufensterbeleuchtung...
200 bis 20000 lux (starke Helligkeit)
Anwendungsbeispiele: Steuerung von
Markisen...
Den Schalter ➀auf Position “test“stellen; bei
Erreichen des gewünschten Helligkeitswertes
(Tageslicht) das Potentiometer ➃bis zum
Aufleuchten der LED ➂ drehen; den Schalter
wieder auf Position auto stellen, d.h. in den
normalen Betriebsmodus setzen.
Instelling van de belichtingswaarde
De "test" -stand van schakelaar ➀vergemak-
kelijkt de instelling van de belichtingswaarde
door de vertraging bij in- en uitschakelen op
te heffen.
Kies het gevoeligheidsbereik dat overeen-
stemt met de toepassing (schakelaar ➁).
2 tot 200 lux (kleine lichtsterkte)
toepassingsvoorbeeld : sturing van
openbare verlichting, reclameverlichting,
etalageverlichting....
200 tot 20000 lux (grote lichtsterkte)
toepassingsvoorbeeld : sturing van
gordijnen.
Schakelaar ➀in de "test" -stand plaatsen ; op
het gewenste ogenblik van de dag de poten-
tiometer ➃draaien tot LED ➂gaat branden ;
de schakelaar opnieuw in de “auto”-stand
plaatsen, d.i. de normale bedieningsmodus
van het toestel.
Interrupteur crépusculaire 2 voies
Light sensitive switch 2 channels
Dämmerungsschalter 2 Kanal
20 kLx
Schemerschakelaar 2 kringen
Produktbeschreibung
Der Dämmerungsschalter 2 Kanal EE 200/
EE 201 steuert die angeschlossen Stromkreise
in Abhängigkeit von der erfassten Helligkeit
(Tageslicht).
Vom Anwender kann für jeden Kanal getrennt
eine Helligkeitsschwelle eingestellt werden.
Der Ausgang des Dämmerungsschalters
EE 200/EE 201 ist:
•eingeschaltet, wenn der gemessene
Wert niedriger ist als der eingestellte Wert,
•augeschaltet, wenn der gemessene
Wert höher liegt als der eingestellte Wert,
•Zwangsbetrieb (ON oder OFF), wenn
Zwangsbetrieb gewählt wurde.
Durch die integrierte Zeitverzögerung beim
Ein- und Ausschalten werden häufige
Schaltvorgänge, die beispielsweise bei Blitz,
Aufleuchten von Autoscheinwerfern usw.
auftreten könnten, vermieden.
Voorstelling van het product
De schemerschakelaar met 2 kanalen EE 200/
EE 201 stuurt verlichtingskringen afhankelijk
van de lichtsterkte van het daglicht.
De gebruiker kan voor elk kanaal de
uitschakeldrempel bepalen en de
fotoweerstandcel meet de lichtsterkte.
De uitgangstoestand van de EE 200/EE 201
wordt :
•ingeschakeld als de gemeten waarde
kleiner is dan de ingestelde waarde,
•uitgeschakeld als de gemeten waarde
groter is dan de ingestelde waarde,
•geforceerd in de toestand ON of OFF als
een geforceerde bediening werd geselecteerd.
Door een tijdvertraging bij het in- en uitschakelen
kunnen ongewenste omschakelingen worden
vermeden bij plotse veranderingen in de
lichtsterkte zoals bij bliksem, opflikkeren
van koplampen enz...
Technische Daten
Elektrische Daten
- Nennspannung: 230V~+10-15% 50/60 Hz
- Leistungsaufnahme: 1,5 VA max.
- Ausgang: 1 potentialfreier Kontakt pro Kanal.
Max. Schaltleistung:
•AC1: 16A 250 V~
•Glühlampe/Halogenlampe: 2300 W
•Leuchtstofflampen:
-unkompensiert: 2000 W
-parallelkompensiert (110µF): 1000 W
•Kompaktleuchtstofflampe: 10 x 20 W
•Leuchtstofflampe mit elektronischem
Vorschaltgerät: 1000 W
Betriebsdaten
- 2 Hellikeitsbereiche: 2 bis 200 lux
200 bis 20000 lux.
- Verzögerungszeit beim Ein-und Ausschalten: 30 s.
- Betriebstemperatur:
•-30°C bis +60°C (Zelle),qs
•-0°C bis +45°C (Modulargerät)
- Lagertemperatur: -20 °C bis +60 °C
- Schutzgrad (Zelle): IP54
- Schutzklasse (Zelle): II
- Hysterese: 10 %
- Maximale Länge zwischen Dämmerungsschalter
und Helligkeitsfühler: max. 50 m.
- Maximale Länge zwischen 2 Dämmerungs-
schaltern: max. 50 m.
Anschlußgrößen
- Modulargerät: 0,5 bis 4 mm2
- Helligkeitsfühler: 0,75 bis 2,5 mm2
Lieferumfang EE 201
- 1 Dämmerungsschalter EE 200
- 1 Aufbaufühler EE 003.
Vor dem Anschluss der Fotozelle oder
sonstigem Eingriff an der Fotozelle, 230 V
Versorgungspannung des
Dämmerungsschalters ausschalten.
Samenstelling van de kit EE 201
De EE 201 bestaat uit :
- 1 schemerschakelaar EE 200
- 1 opbouwlichtsensor EE 003.
6E 7535.b4
Installatie van de cel
Om de goede werking van het toestel te
garanderen, mag de cel niet rechtstreeks in
het zonlicht of in de buurt van een lichtbron
worden geplaatst en moet ze tegen stof en
vocht worden beschermd.
Bij onderbreking van de verbinding tussen de
fotocel en de schemerschakelaar knipperen
de lampjes S1 en S2.
Hager 04.2003
Waarborg NL
Es gelten die Allgemeinen Geschäfstbedingungen der Hager
Electro GmbH. bzw. die gesetzliche Regelung.
Garantie D
24 maanden tegen elk materiaal- of fabricagegebrek, en dit
vanaf de fabricagedatum. In geval van defect, moet het pro-
duct, aan uw verdeler overhandigd worden.
De waarborg is enkel geldig indien de procedure van terugzen-
ding installateur/verdeler nageleefd wordt en indien na onder-
zoek door onze controledienst geen enkel gebrek vastgesteld
werd wegens het verkeerd in werking stellen en/of het niet
gebruiken volgens de regels van de kunst.
Eventuele opmerkingen betreffende het gebrek moeten het
product begeleiden.
Hager électro S.A. - 132, bld d’Europe - BP3 - 67 215 Obernai cedex - Tél. 03.88.49.50.50 - www.com
L
N
auto
200-20 000 lux
2-200 lux
test
on
off
200-20 000 lux
2-200 lux
on
off
S1 S2
1 5 7
3911
161210 14
13 15
2468
S1 S2
Anschlußbild - Elektrische aansluiting
EE 003 EE 002
➀Betriebsartenwahlschalter auto/test.
Schakelaar voor de werkingsmodus
auto/test.
➁4-Positionen-Wählschalter für
die Auswahl des Helligkeitsbereiches/
Zwangsbetrieb.
4-standenschakelaar voor de keuze
van het helderheidsbereik en voor de
geforceerde bediening.
➂LED zur Schaltzustandsanzeige.
LED om de uitgangstoestand weer te
geven.
➃Potentiometer zur Einstellung des
Helligkeitsschwellwertes.
Potentiometer voor de instelling van de
belichtingswaarde.
EV 100
auto
200-20 000 lux
2-200 lux
test
on
off
200-20 000 lux
2-200 lux
on
off
S1 S2
EE 200
1 5 7
3911
161210 14
13 15
2468
1
2
4
3
Produktbeschreibung - Beschrijving van het product
Technische specificaties
Elektrische karakteristieken
- voeding : 230V~+10/-15% 50 Hz
- verbruik : 1,5 VA max.
- uitgang : 1 potentiaalvrije contact per kring.
max. verbrekingsvermogen :
•AC1 : 16A 250 V~
•gloeilamp/halogeenlamp : 2300 W
•fluorescente buislamp :
-niet gecompenseerd : 2000 W
-parallel gecompenseerd (110µF) : 1000 W
•compacte fluorescentielamp : 10 x 20 W
•fluorescentielamp met elektronisch
voorschakelapparaat : 1000 W
Werkingskarakteristieken
- 2 meetbereiken : 2 tot 200 lux,
200 tot 20000 lux.
- vertraging bij in- en uitschakelen : 30 s.
- werktemperatuur :
•-30°C tot +60°C (cel),
•-0°C tot +45°C (modulair apparaat)
- opslagtemperatuur : -20 °C tot +60 °C
- beschermingsgraad (cel) : IP54
- isolatieklasse (cel) : II
- Hysteresis : 10 %
- maximum afstand tussen apparaat en
cel : max. 50 m.
- maximum afstand tussen 2 apparaten
max. 50 m.
Aansluitingscapaciteit
- modulair apparaat : 0,5 tot 4 mm2
- cel : 0,75 tot 2,5 mm2
Voordat de fotocel wordt aangesloten of
voordat er enige bewerking op de fotocel
wordt uitgevoerd, moet de voeding van
230V van de schemerschakelaar worden
uitgeschakeld.

This manual suits for next models

1

Other hager Switch manuals

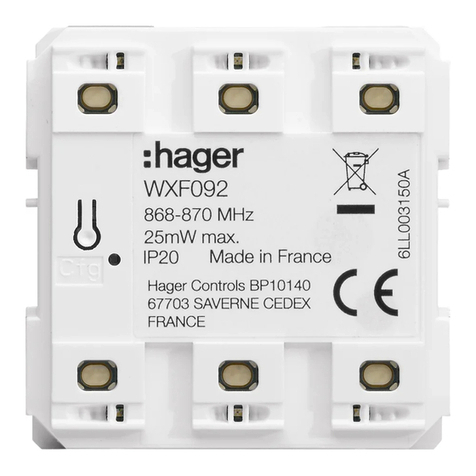
hager WXF092 User manual

hager

hager WXF092 User manual

hager TX 025 User manual

hager

hager TX 025 User manual

hager EG 103 Installation instructions

hager

hager EG 103 Installation instructions

hager EE701 User manual

hager

hager EE701 User manual

hager EG170 Installation instructions

hager

hager EG170 Installation instructions

hager NH000 User manual

hager

hager NH000 User manual

hager EG 470 Installation instructions

hager

hager EG 470 Installation instructions

hager EH712 User manual

hager

hager EH712 User manual

hager EEN003 User manual

hager

hager EEN003 User manual

hager kallysta WKT30 R Series User manual

hager

hager kallysta WKT30 R Series User manual

hager WHT390 User manual

hager

hager WHT390 User manual

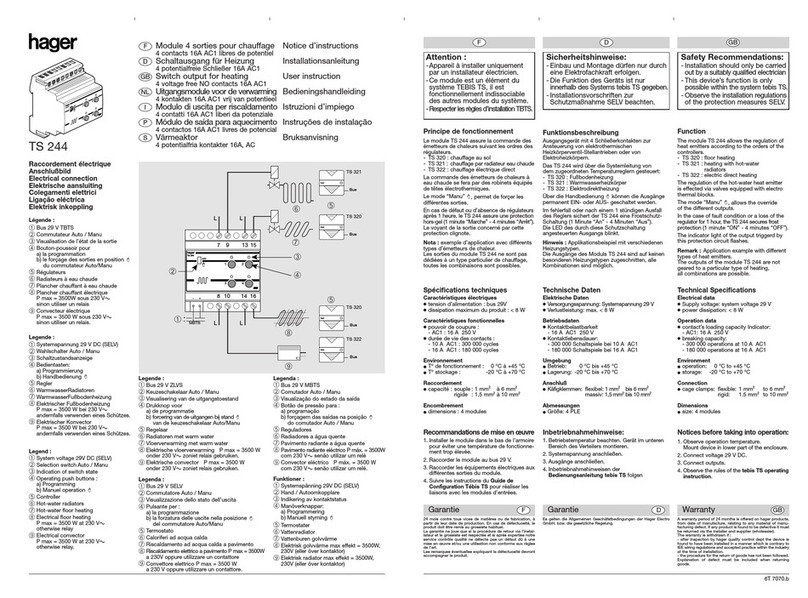
hager TS 244 Operator's manual

hager

hager TS 244 Operator's manual

hager EE171 User manual

hager

hager EE171 User manual

hager TX 206A User manual

hager

hager TX 206A User manual

hager HXA031H User manual

hager

hager HXA031H User manual

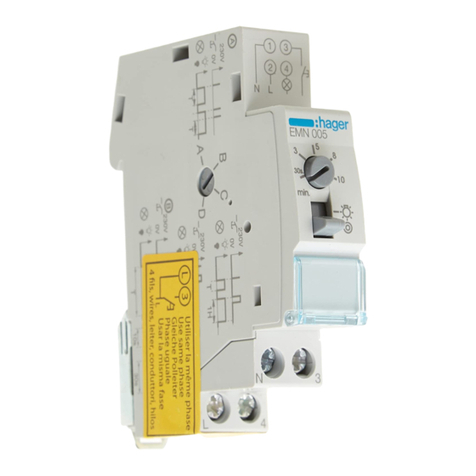
hager EMN005 User manual

hager

hager EMN005 User manual

hager EGN100AU User manual

hager

hager EGN100AU User manual

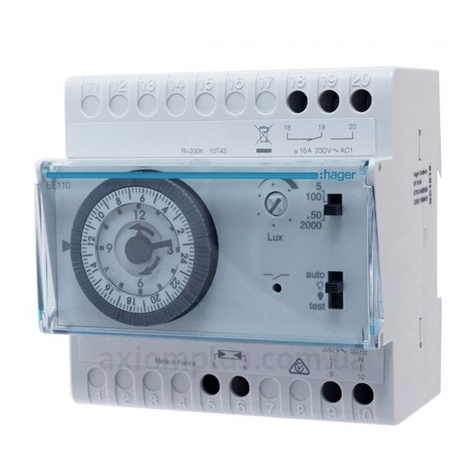
hager EE110 User manual

hager

hager EE110 User manual

hager SR000AO User manual

hager

hager SR000AO User manual

hager HIM302 User manual

hager

hager HIM302 User manual

hager HI460 User manual

hager

hager HI460 User manual

hager 2978 Service manual

hager

hager 2978 Service manual

hager HXE030H User manual

hager

hager HXE030H User manual

hager EG071 User manual

hager

hager EG071 User manual

Popular Switch manuals by other brands

Comtech EF Data SMS-758 Installation and operation manual

Comtech EF Data

Comtech EF Data SMS-758 Installation and operation manual

EMP-Centauri MS5/5+12ECP5dB-4 instruction manual

EMP-Centauri

EMP-Centauri MS5/5+12ECP5dB-4 instruction manual

e+p HDMS 121 instruction manual

e+p

e+p HDMS 121 instruction manual

Cisco IOS XE Release 3SE Configuration guide

Cisco

Cisco IOS XE Release 3SE Configuration guide

Phason PCH installation guide

Phason

Phason PCH installation guide

KinAn KCM 1200U user manual

KinAn

KinAn KCM 1200U user manual

IDEC HS6B Series instruction sheet

IDEC

IDEC HS6B Series instruction sheet

Intermatic EMRS-W-D installation guide

Intermatic

Intermatic EMRS-W-D installation guide

National Instruments SCXI-1127 Getting started guide

National Instruments

National Instruments SCXI-1127 Getting started guide

TRENDnet TEG-S41SX Specifications

TRENDnet

TRENDnet TEG-S41SX Specifications

KanexPro HDSC12 user manual

KanexPro

KanexPro HDSC12 user manual

Dell Networking S5000 Getting started guide

Dell

Dell Networking S5000 Getting started guide

artisan VX414C user manual

artisan

artisan VX414C user manual

ZyXEL Communications XS3800-28 user guide

ZyXEL Communications

ZyXEL Communications XS3800-28 user guide

D-Link DGS-1008P user guide

D-Link

D-Link DGS-1008P user guide

Linksys Etherfast EF24G2M Specifications

Linksys

Linksys Etherfast EF24G2M Specifications

Allied Telesis WebSmart AT-FS750/48 installation guide

Allied Telesis

Allied Telesis WebSmart AT-FS750/48 installation guide

Vimar Eikon manual

Vimar

Vimar Eikon manual

manuals.online logo
manuals.online logoBrands
  • About & Mission
  • Contact us
  • Privacy Policy
  • Terms and Conditions

Copyright 2025 Manuals.Online. All Rights Reserved.