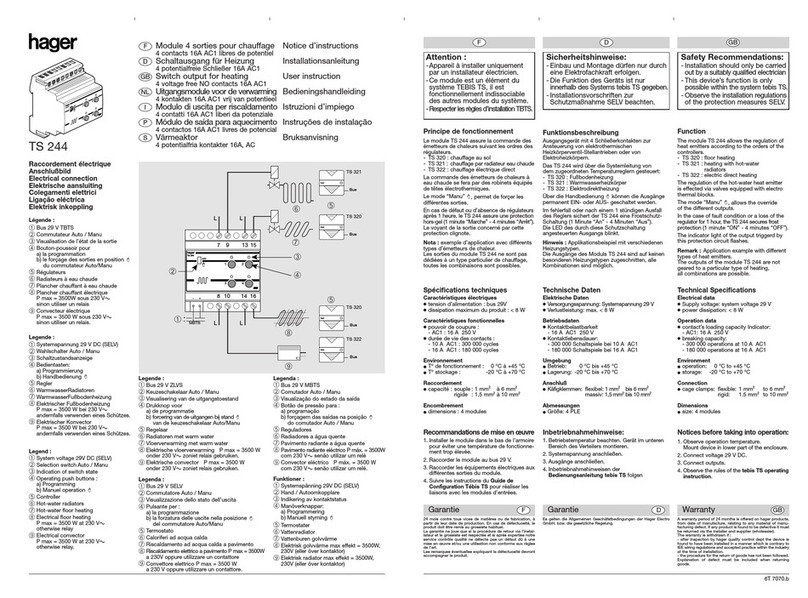
hager WXF092 User manual

6LE002995B
6LE002995B
1
cfg
J
WXF092, WXF094,
WXF096
Description / DescriptionMontage / Assembly
WXF092
WXE302x
WXF094
WXE304x
WXF096
WXE306x
Caractéristiques techniques / Technical characteristics
AZ
Alimentation Supply voltage 1x CR 2430 3 VDC
Durée de vie
approximative de la pile Battery approximate life duration 8 ans / 8 years
Fréquence d’émission Transmission frequency 868 - 870 MHz
Récepteur de catégorie Receiver category 2
Dimensions L x l x h Dimensions I x w x h 92 x 88 x 12,6 mm
Indice de protection Degree of protection IP20
T° de fonctionnement Operating temperature -5 °C —> + 45 °C
T° de stockage Storage temperature -25 °C —> + 70 °C
Puissance d’émission RF max Maximum output power RF 25 mW
/
;,N
b
Cfg
Cfg
Montage de la pile / Battery insertion
Support mural (gallery & essensya)
Wall support (gallery & essensya) Plaque décorative (gallery & essensya)
Decorative plate (gallery & essensya)
Mécanisme
Technical module
Enjoliveur
Rocker
Boutons poussoirs /Pushbutton
Bouton et LED de configuration R/
Button and Rconfiguration LED
Fixation / Fixing
Changement de la pile / Battery replacement
1 2 3 4
Cfg
WXA450R
gallery
WE450R
essensya
cfg
J
cfg
J
Attention à la polarité
Attention to the polarity
WXA450R WXPxxxx
WE450R WE4xx
aPoussoir radio, 2, 4, 6 entrées à pile
zPush button radio, 2-, 4-, 6-, keys
with battery

Hager Controls S.A.S., 33 rue Saint-Nicolas, B.P. 10140, 67703 SAVERNE CEDEX, France - www.hager.com OHager 05.19 6LE002995B2
a
• Appareil à installer uniquement par un
installateur électricien selon les normes
d’installation en vigueur dans le pays.
• Ne pas installer ce module à l’extérieur du
bâtiment.
Présentation du produit
Les poussoirs WXF09x sont des émetteurs qui
permettent de piloter les modules de sortie.
Ils transmettent, via la radio, des commandes d’éclai-
rage, chauffage, volets, des scénarios, et commu-
niquent par radio fréquence.
Ils s’utilisent avec les enjoliveurs WXE30x et s’asso-
cient aux plaques décoratives gallery et essensya.
Fonctions
• 2, 4 ou 6 entrées indépendantes.
• Alimentation par pile.
• Visualisation de l’émission radio par un voyant
témoin.
• Porte étiquette (livré avec l’enjoliveur) pour repérer
les circuits.
Les fonctions précises de ces produits dépendent de
la conguration et du paramétrage.
Instructions de conguration
quicklink
Description
quicklink
: désigne le mode configuration sans
outil utilisant les boutons fonction T, conguration
Ret les LEDs situés sur les produits.
Tous les produits congurables en mode
quicklink
sont compatibles entre eux et peuvent être exploités
au sein d’une même installation.
Ces produits permettent de réaliser des commandes
d’éclairage, d’ouvrants (volets roulants / stores ) et
de chauffage.
La conguration consiste à attribuer une fonction à
chaque entrée d’un émetteur puis de le lier à un ou
plusieurs récepteurs à commander.
Pour plus d’information, se reporter à la notice de
“Conguration quicklink” livrée avec les produits
récepteur.
Montage de la pile
1Insérer délicatement la batterie dans son empla-
cement. Ne pas endommager les contacts de la
batterie. Veiller à respecter la polarité de la pile
lors de son installation (le signe + doit être visible).
2Poussez délicatement la pile vers les contacts
latéraux jusqu’à ce qu’elle s’enclenche.
Fixation
2 types de montage sont possibles:
• Par vissage sur une cloison ou une boîte d’encas-
trement.
• Par collage en utilisant l’adhésif double face fourni.
Le montage sur une cloison métallique peut dégra-
der les performances du produit.
Changement de la pile
1. Démonter la plaque décorative.
2. Déclipser le mécanisme à l’aide d’un tournevis.
3. Retirer la pile, puis insérer la nouvelle pile en
respectant la polarité.
4. Remonter le mécanisme puis la plaque décorative.
Fonctionnement de la LED
de conguration
• La LED s’allume de manière xe lorsque vous
appuyez sur le bouton de conguration : démar-
rage de la procédure de conguration.
• La LED clignote pendant 1s lorsque vous appuyez
sur un bouton poussoir : l’entrée n’est pas con-
gurée.
• La LED s’allume pendant 100 ms lorsque vous
appuyez sur un bouton poussoir: l’entrée est con-
gurée, la commande est transmise.
• La LED clignote rapidement pendant 2 secondes
lorsque vous appuyez sur un bouton poussoir: le
niveau de la pile est faible.
• La LED reste éteinte: la pile est vide.
Retour usine
Maintenir le bouton R (> 10 s) jusqu’au clignote-
ment de la LED cfg puis relâcher. La n du retour
usine est signalée par l’extinction de la LED cfg.
Cette opération provoque l’effacement complet de la
conguration du produit.
Par la présente Hager Controls déclare que le bouton poussoir
radio 2, 4, 6 entrées à pile est conforme aux exigences
essentielles et aux autres dispositions pertinentes
de la directive 2014/53/UE.
La déclaration CE peut être consultée sur le site:
www.hagergroup.com
Utilisable partout en Europe
å
et en Suisse
Comment éliminer ce produit (déchets d’équipements
électriques et électroniques). (Applicable dans les pays de
l’Union Européenne et aux autres pays européens dispo-
sant de systèmes de collecte sélective). Ce symbole sur le
produit ou sa documentation indique qu’il ne doit pas être
éliminé en fin de vie avec les autres déchets ménagers. L’élimina-
tion incontrôlée des déchets pouvant porter préjudice à l’environne-
ment ou à la santé humaine, veuillez le séparer des autres types de
déchets et le recycler de façon responsable. Vous favoriserez ainsi
la réutilisation durable des ressources matérielles. Les particuliers
sont invités à contacter le distributeur leur ayant vendu le produit
ou à se renseigner auprès de leur mairie pour savoir où et comment
ils peuvent se débarrasser de ce produit afin qu’il soit recyclé en
respectant l’environnement. Les entreprises sont invitées à contacter
leurs fournisseurs et à consulter les conditions de leur contrat de
vente. Ce produit ne doit pas être éliminé avec les autres déchets
commerciaux.
z
• This device must be installed only by
a qualied electrician according to the
installation’s standards.
• Not to be installed outside.
Product description
WXF09x pushbuttons are transmitters designed to
control output modules.
They transmit messages for lighting, heating,
shutters and scenarios via radio.
These products communicate by radio.
They are used with decorative plates WXE30x and
gallery and essensya frames.
Functions
• 2, 4 or 6 independent inputs.
• Power supply by battery.
• Display of radio transmission and end of battery
lifetime.
• Label holder (supplied with the decorative plate) to
mark the circuits or the push button “function”.
The functions of these products depend on congu-
ration and set-up.
quicklink
Conguration instructions
Description
quicklink
: designates the tool-free conguration
mode, using the buttons function T and cong-
uration Rand its LEDs, located directly on the
products. All products congurable in
quicklink
mode are compatible with another and can be oper-
ated within the same installation.
These products are used to control lighting,
opening elements (roller shutters/blinds) and heating
elements.
Configuration means assigning a function to each
input of a transmitter and then linking it to one or
more output modules to be controlled.
For more information, refer to the “quicklink
Configuration manual” supplied with the output
modules.
Battery montage
1Insert the battery carefully into the battery
compartment. Do not damage the battery
contacts. Make sure that the polarity of the
battery is correct (+ marking must be visible).
2 Push the battery carefully towards the side
contacts until it click into place.
Fixing
2 types of mounting are possible:
• Screw mounting.
• Fixing by using double-sided tape.
The installation on a metal surface can degrade the
performances of the product.
Battery replacement
1. Unclip decorative plate from front face.
2. Remove technical module with screwdriver.
3. Insert new battery ensuring polarity.
4. Clip technical module back on base plate then clip
decorative plate.
Operation of the conguration LED
• The LED lights continuously when you press the
setup button: start the setup procedure.
• The LED ashes for 1 s when you press a push
button: the input is not congured.
• The LED lights up for 100 ms when you press a
push button: the input is congured, the command
is transmitted.
• The LED ashes rapidly for 2 seconds when you
press a push button: the battery level is low.
• The LED remains off: the battery is empty.
Factory reset
Hold the R pushbutton pressed (> 10 s) until cfg
LED ickers, then release it. LED cfg turns off to
signal the end of factory reset.
This operation removes the entire product congu-
ration.
Hereby, Hager Controls, declares that this pushbutton 2-, 4-, 6-
keys with battery is in compliance with the essential requirements
and other relevant provisions of Directive 2014/53/UE.
The declaration can be consulted on the site
www.hagergroup.com
Usable in all Europe
å
and in Switzerland
Correct Disposal of This product (Waste Electrical & Elec-
tronic Equipment). (Applicable in the European Union and
other European countries with separate collection systems).
This marking shown on the product or its literature indicates
that it hould not be disposed with other household wasted
at the end of its working life. To prevent possible harm to the envi-
ronment or human health from uncontrolled waste disposal, please
separate this from other types of wastes and recycle it responsibly
to promote the sustainable reuse of material resources. Household
users should contact either the retailer where they purchased this
product, or their local government office, for details of where and
how they can take this item for environmentally safe recycling.
Business users should contact their supplier and check the terms
and conditions of the purchase contract. This product should not be
mixed with other commercial wastes of disposal.
This manual suits for next models
2
Other hager Switch manuals
hager
hager EE200 User manual
hager
hager EGN200AU User manual

hager
hager EG 470 Installation instructions
hager
hager SP 801 User manual
hager
hager WBMSLL User manual
hager
hager EGN100 User manual
hager
hager TS 204B User manual
hager
hager WHT20 Series User manual
hager
hager EE171 User manual
hager
hager HZI815 User manual
