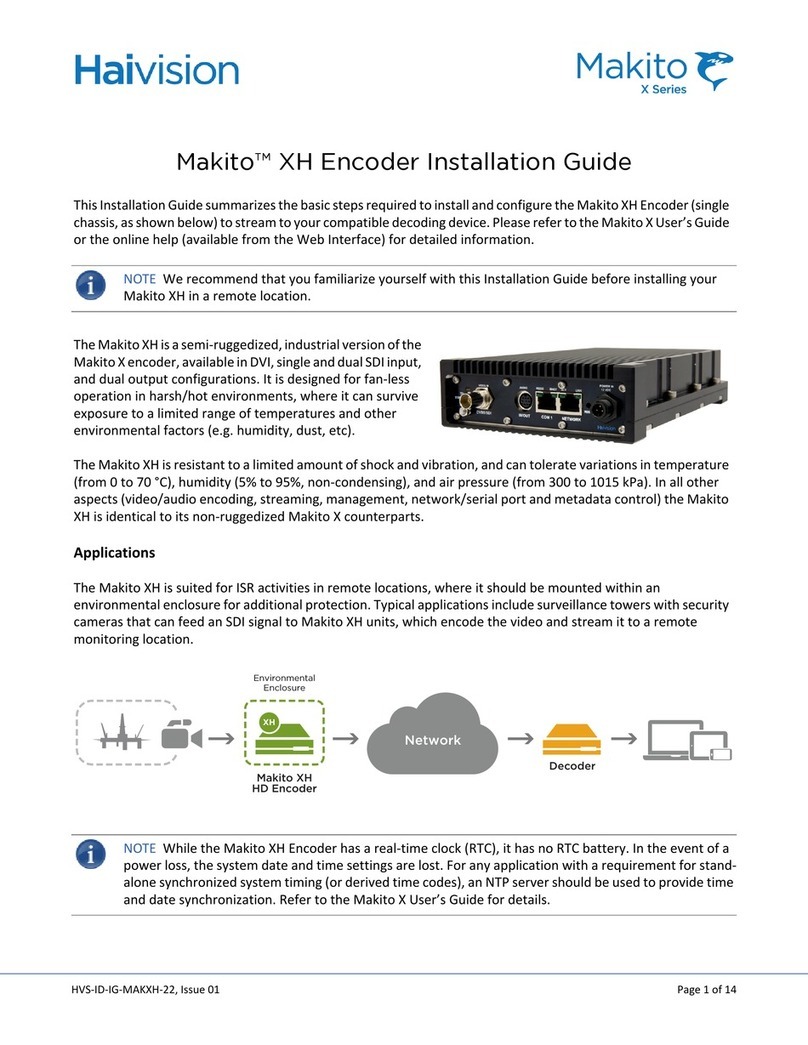
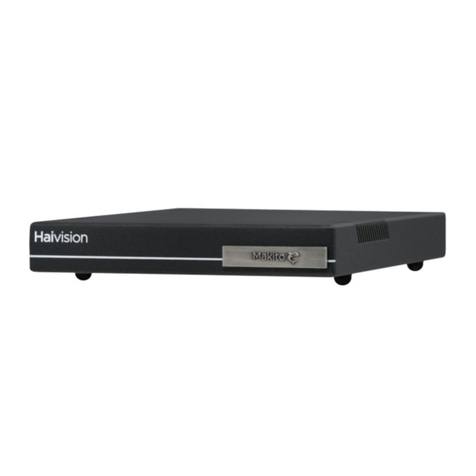
Haivision Makito XH User manual

HVS-ID-IG-MAKXHD-21, Issue 01 Page 1 of 14
Makito™ XH Decoder Installation Guide
This Installation Guide summarizes the basic steps required to install and configure the Makito XH “Harsh” HD/SD
H.264 Video Decoder (single chassis, as shown below) to decode and display compatible IP video streams. Please
refer to the Makito X Decoder User’s Guide or the online help (available from the Web Interface) for detailed
information.
NOTE We recommend that you familiarize yourself with this Installation Guide before installing your
Makito XH Decoder in a remote location.
The Makito XH Decoder is a semi-ruggedized, industrial version
of the Makito X Decoder, available in a dual SDI plus HDMI
output configuration. It is designed for fan-less operation in
harsh/hot environments, where it can survive exposure to a
limited range of temperatures and other environmental factors
(e.g. humidity, dust, etc.).
The Makito XH Decoder is resistant to a limited amount of
shock and vibration, and can tolerate variations in temperature
(from 0 to 70 °C), humidity (0% to 95%, non-condensing), and air pressure (from 300 to 1015 kPa). In all other
aspects (video/audio decoding, management, network/serial port and metadata control) the Makito XH Decoder
is identical to its non-ruggedized Makito X Decoder counterparts.
Applications
The Makito XH Decoder is suited for ISR activities in remote locations, where it should be mounted within an
environmental enclosure for additional protection. Typical applications include providing on-site decoding of
video streams for border patrol operations, and fan-less decoding in noise-sensitive environments (e.g. a
broadcast booth at a live sporting event).
NOTE While the Makito XH Decoder has a real-time clock (RTC), it has no RTC battery. In the event of a
power loss, the system date and time settings are lost. For any application with a requirement for stand-
alone synchronized system timing (or derived time codes), an NTP server should be used to provide time
and date synchronization.
<Sbe]`Y
3\Q]RS`
;]PWZS
Ac`dSWZZO\QS
B]eS`
;OYWb]F6
622SQ]RS`
F6
3\dW`]\[S\bOZ
3\QZ]ac`S

Makito XH Decoder Installation Guide
Makito XH Decoder Characteristics
HVS-ID-IG-MAKXHD-21, Issue 01 Page 2 of 14
Makito XH Decoder Characteristics
The table below describes some basic characteristics of the Makito XH Decoder. For complete specifications,
please refer to the data sheet available from the Haivision web site.
Power Supply Characteristics
The table below details the minimum requirements for an adapter or battery to be used as a power source for the
Makito XH Decoder. The power adapter provided by Haivision (P-292-XH-PS-AC) is subject to high quality
standards, and meets or exceeds these minimum requirements in all respects.
CAUTION The use of a power adapter or battery that is not compliant with these specifications may
cause irreparable damage to your Haivision appliance.
Product Numbers
CAUTION We strongly recommend that you install the Makito XH Decoder and power adapter in an en-
closure for protection against weather and other environmental stresses. The ambient temperature in-
side the enclosure should be between 0 and 70°C, and the relative humidity between 0 and 95%
(without condensation). If you have specific questions regarding the suitability of the Makito XH Decod-
er in your operating environment, please contact Haivision Technical Support.
Dimensions Chassis: 5.4” (13.72 cm) W x 8” (20.32 cm)
D x 1.75” (4.45 cm) H
Storage Temperature -10 °C to +70 °C
Material Chassis: Aluminum 6061-T6
All materials are compliant with directive
2011/65/EU (RoHS2 / RoHS RECAST).
Working Temperature 0 °C to +70 °C, no derating
Working Humidity 0 to 95% non-condensing
Weight Approximately 4.0 lbs. (1.8 kg) Pressure 300 to 1015 kPa
Finish External: Black anodized, as per MIL-A-
8625F, Type 2, Class 2
Internal: Chemical conversion as per MIL-
DTL-5541F Type 2, Class 3
IP Rating IP42
Nominal Output Voltage 12 VDC Maximum Output Ripple 100 mV
Minimum Output Load 1.7 A Minimum Operational Temperature Range 0 °C to +70 °C
Maximum Output Regulation +/- 5% Minimum Operational Humidity Range 0 - 95% (non-condensing)
S-292D-X2H Dual channel Makito XH “Harsh” decoder
P-292-XH-PS-AC Commercial AC to +12V DC / 30 watt PSU supporting 0 °C to 70 °C operation

Makito XH Decoder Installation Guide
Before You Begin
HVS-ID-IG-MAKXHD-21, Issue 01 Page 3 of 14
Before You Begin
1. Unpack the box and visually inspect the package contents for any evidence of shipping damage. [See the
Important Notice document in the box for a list of contents.]
2. In addition to the contents of the Makito XH Decoder box, you may need to have the following items
available:
• Environmental enclosure
• Four #8-32 screws or stainless steel, harsh-environment cable ties
• Coaxial cabling with BNC connectors for audio/video sources
• HDMI cabling
• Cabling for analog audio output (mini-DIN-8 connector)
• Ethernet cable for a network connection
• Sealant gel (e.g. X-Sealant Gel — http://www.xmultiple.com/xwebsite-sealant.htm)
• Laptop with web browser and Telnet client
3. In order to be able to test the output from the Makito XH Decoder, make sure you have an encoding device
or application that is able to support the UDP Transport Stream format.
NOTE If the Makito XH Decoder is to be installed in a remote location (e.g. a mobile platform), we recom-
mend that you follow the instructions in this Installation Guide to perform an initial setup in a “staging”
environment, such as a lab or control center. Once the decoder has been set up and is demonstrated to
be operating normally, you can then move it to the remote location.
CAUTION Before installing the Makito XH Decoder, please refer to the section on “Safety Guidelines” in
the Makito X Decoder User’s Guide. Only connect the unit to a compatible power source. If an electrical
fault occurs, disconnect the unit and contact Haivision Technical Support. Never try to force the connec-
tions when setting up the system as this may damage the unit.
CAUTION Hot surface. Avoid contact. The chassis can achieve a surface temperature 95°C in poorly
ventilated environments, and may cause personal injury if touched.
ATTENTION Surface chaude. Éviter le contact. Le châssis peut atteindre une température de surface de
95°C dans des environnements mal ventilés et peut causer des blessures en cas de contact.
WARNING This unit is intended for installation in restricted access areas. A restricted access area can
be accessed only through the use of a special tool, lock and key, or other means of security.
AVERTISSEMENT Ce produit est destiné à être installé dans une zone d'accès restreint. Les zones d'accès
limité sont protégées par un mécanisme spécifique, une serrure et une clé ou tout autre dispositif de sé-
curité.
Makito XH Decoder Installation Guide
Installing the Makito XH Decoder
HVS-ID-IG-MAKXHD-21, Issue 01 Page 4 of 14
Installing the Makito XH Decoder
1. Position the appliance against a solid base, with the connectors facing downwards.
CAUTION The surface temperature of the chassis can reach 95°C in poorly ventilated environments. We
recommend that you fasten the appliance to a metal (cold) plate to increase heat dissipation.
CAUTION The chassis and power adapter must be positioned with the connectors facing downwards to
minimize the possibility of water penetration.
2. Fasten the appliance to its support base with four screws (size 8-32, or 6 mm). Alternatively, you can use
stainless steel, harsh-environment cable ties, which can be passed through slots in the chassis.
3. Fasten a grounding wire (10 AWG minimum) to the grounding lug using the nut and lock washer provided.
CAUTION The chassis must be properly grounded in order to provide protection against lightning strikes
and other power surges.
4 holes for
fastening unit
with #8-32 screws
4 slots for
fastening unit
with cable ties
Unit should be installed
with connectors facing
downwards
Power adapter should be installed with
AC receptacle facing downwards
Grounding lug with
#8-32 thread
Conxall power
input connector
(12 VDC, 2.5 A)

Makito XH Decoder Installation Guide
PSU Power Cable Product Numbers
HVS-ID-IG-MAKXHD-21, Issue 01 Page 5 of 14
PSU Power Cable Product Numbers
PSU Pinouts
The pinouts for the power supply unit (PSU) provided with the Makito XH Decoder are as follows:
Connecting the Decoder to the Network and A/V Sources
1. Connect video, audio, serial and network cables, referring to the images below:
2. Connect the Makito XH Decoder’s Ethernet port to the IP network using a Type Cat 5E cable.
3. 3G-SDI Video Output with Embedded Audio: Connect one or both of the decoder’s
SDI outputs to TV or display monitors, using the HD-BNC to BNC Adapter Cable(s)
(included in the package for appliances).
4. HDMI Video Output with Embedded Audio: Connect the decoder’s HDMI output to a
TV or display monitor, using an HDMI connector (refer to the Makito X Decoder User’s
Guide for the HDMI connector pinouts).
NOTE By default, HDMI displays the SDI1 content. To monitor the SDI2 channel, see “Configuring the
HDMI Video Display” in the Makito X Decoder User’s Guide.
16282-3SG-311 Conxall cable O.D. range: .09 – .14”
16282-3SG-315 Conxall cable O.D. range: .15 – .17”
16282-3SG-318 Conxall cable O.D. range: .18 – .20” (custom grommet required if cable O.D. is over .200”)
Dot indicates Pin #1
REAR VIEW
(solder side)
FRONT VIEW
(contact)
Pin #1 (N/C)
Pin #2
Pin #3
Common (GND)
12 VDC (+V)
Makito XH Decoder Dual SDI Output
Ethernet port for network
communications (stream
output; web interface)
Audio port for analog
audio output and input
(future use)
HD-BNC connectors for video
output (including embedded
audio and/or metadata)
HDMI port for
video/audio output
Status
LED

Makito XH Decoder Installation Guide
Connecting the Decoder to the Network and A/V Sources
HVS-ID-IG-MAKXHD-21, Issue 01 Page 6 of 14
5. Analog Audio Out: Connect the decoder’s audio output to the audio sound system/speakers, using the
audio 8-pin Mini-DIN connector.
• For unbalanced audio, use the 8-pin audio to 3-RCA female cable adapter (included in the package).
• A balanced audio cable adapter is available from Haivision upon request.
• Refer to the Makito X Decoder User’s Guide for the balanced/unbalanced audio pinouts.
6. (Optional) Add a sealant gel around the decoder connectors in order to further protect them from water,
humidity, sand and dust.
7. Power up the unit. Note that there is no power switch on the Makito XH Decoder. The power is
automatically on when the unit is plugged in. The power supply cord is used as the main disconnect device.
CAUTION To prevent damage to the decoder and/or power supply, be sure to connect the power supply
to the chassis first and then to the AC source.
CAUTION The power supply cord is used as the main disconnect device. Ensure that the socket-outlet
is located/installed near the equipment and is easily accessible.
ATTENTION Le cordon d'alimentation est utilisé comme interrupteur général. La prise de courant doit
être située ou installée à proximité de l'équipement et être facile d’accès.
• Insert the 3-pin connector on the 12V power supply into the Power input jack at the rear of the decoder.
• Make sure the connector is properly inserted and locked to avoid intermittent power problems.
• Connect the power cord to the power supply and plug the cord into an AC power source.
• The Status LED will start blinking green, indicating that the decoder is booting up.
• Wait until the Status LED stays solid green, indicating that the decoder is ready for operation.
NOTE While the Conxall power connector on the Makito XH Decoder is identical to those on Makito X
Decoder appliances, the power supply (PSU) itself is different in order to support the increased tempera-
ture range.
For more detailed information, please refer to “Installing the Decoder” in the Makito X Decoder User’s Guide.
White - Channel 1 / Left Out
Red - Channel 2 / Right Out
Black - Talkback In (future use)

Makito XH Decoder Installation Guide
Modifying the Decoder’s IP Address
HVS-ID-IG-MAKXHD-21, Issue 01 Page 7 of 14
Modifying the Decoder’s IP Address
If you haven't changed the factory presets, and if not specified elsewhere in the shipment, the decoder’s IP
address is set by default to: 10.5.1.2. To be able to log in to the Makito XH Web interface, your computer has
to be in the same IP address range (subnet). You may have to temporarily change your computer’s IP address to
be in the same subnet as the decoder. Only then you will be able to access the decoder and change the decoder's
IP address, and then afterwards change your computer's IP address back.
TIP After you change the Makito XH’s IP address, we recommend that you document it somewhere, and
label the chassis.
1. If you have not already done so, power up the decoder.
2. The Makito XH Decoder comes pre-configured with the following settings:
* The IP address of your computer must be in the same subnet.
3. Open a Web browser, type the IP Address for the decoder into the URL address bar, and press Enter. An
Advisory and Consent banner may appear — review the terms and click OK to continue.
4. Log in to the Web Interface, using the following default administrative username and password:
* Be sure to change the default password.
NOTE While the Web interface is most commonly used to control the Makito XH Decoder, a Command
Line Interface (CLI) is accessible via Telnet or SSH. For more information, please refer to the Makito X
Decoder User’s Guide.
IP Address Subnet Mask Gateway
10.5.1.2* 255.255.0.0 10.1.50.1
Admin Username Password
admin manager*

Makito XH Decoder Installation Guide
Modifying the Decoder’s IP Address
HVS-ID-IG-MAKXHD-21, Issue 01 Page 8 of 14
5. Select the ADMINISTRATION icon from the toolbar, and then select NETWORK (under SETTINGS).
6. Type in the new IP address. If required, select or enter other new value(s) in the appropriate field(s).
7. To apply your changes, click Apply, and then click Reboot. (You must reboot the system for the changes to
take effect.)
NOTE Remember to change your computer network settings to be on the same network segment as the
Makito XH Decoder.
For more detailed information, please refer to “Managing Users and Security” in the Makito X Decoder User’s
Guide.

Makito XH Decoder Installation Guide
Setting Up a Test Stream
HVS-ID-IG-MAKXHD-21, Issue 01 Page 9 of 14
Setting Up a Test Stream
To verify that the Makito XH Decoder is operational, you will need to set up an encoded video stream for it to
receive and decode. To do this, make sure that your encoding device (or software) is compatible with the UDP
Transport Stream format and is on the same network segment as the Makito XH Decoder.
We recommend setting up the encoder to unicast a TS over UDP test stream to the IP address of the Makito XH
Decoder.
Decoding and Viewing the Test Stream
1. If you have not already done so, power up the Makito XH Decoder.
2. Open a Web browser, type the IP Address* for the Makito XH Decoder into the URL address bar, and press
Enter.
* The IP address of your computer must be in the same subnet (see “Modifying the Decoder’s IP Address” on
page 7).
3. Once you have successfully logged in, the Web interface opens to the Streams List View, displaying the
defined streams for the decoder. The following example shows the Streams List View after a stream has been
created, but not yet bound to output interfaces.
4. To add an incoming stream, click Add.
5. The Output Streams Detail View opens (as shown in the following example for a new stream).
Click link to open Detail View
Click to add a stream

Makito XH Decoder Installation Guide
Decoding and Viewing the Test Stream
HVS-ID-IG-MAKXHD-21, Issue 01 Page 10 of 14
6. Under Content, type a name for the stream in the Name field and select TS over UDP for the Protocol.
7. In the Source section, select Unicast and enter the appropriate Port number (from the encoder).
8. From the SDI1 and SDI2 DECODER pages, you can manage video decoding for the SDI1 and SDI2 ports. This
includes binding the video output(s) to the stream(s) you have created and configuring properties such as
the Output Resolution and Frame Rate.
NOTE The Makito XH Decoder supports two independent video decoders that feed the two SDI interfac-
es. The HDMI port can be configured to mirror the same content that is seen on either SDI1 or SDI2. The
decoder also can support the display of computer graphics content over the HDMI port.
9. Click SDI1 from the output interface bar.

Makito XH Decoder Installation Guide
Decoding and Viewing the Test Stream
HVS-ID-IG-MAKXHD-21, Issue 01 Page 11 of 14
The SDI1 Decoder page opens, displaying the current video decoding settings.
10. Under Input, select the Primary input stream from the drop-down list of the stream(s) you have created.

Makito XH Decoder Installation Guide
Decoding and Viewing the Test Stream
HVS-ID-IG-MAKXHD-21, Issue 01 Page 12 of 14
The Name, Protocol, Type, incoming Resolution, Frame Rate, and Audio Sampling Rate for the selected
stream now are displayed.
11. If required, adjust the video settings. For details, see “SDI Decoder Settings” in the Makito X Decoder User’s
Guide.

Makito XH Decoder Installation Guide
Decoding and Viewing the Test Stream
HVS-ID-IG-MAKXHD-21, Issue 01 Page 13 of 14
12. To apply your changes, click Apply. The changes will take effect immediately but will be lost after a reboot.
For information on saving configuration settings, please refer to the “Saving and Loading Presets” section of
the Makito X Decoder User’s Guide.
13. Click AUDIO from the output interface bar.
The Audio page opens, displaying the current analog audio decoding settings, as shown in the following ex-
ample.
NOTE On the dual channel decoder, two streams are received and can be displayed on either SDI video
port. Analog audio can be selected from embedded channels on either stream. Both Analog Audio and
Embedded Digital Audio are active.
14. Select or enter the new value(s) in the appropriate field(s). For details, see “Analog Audio Settings” in the
Makito X Decoder User’s Guide.
15. To apply your changes, click Apply.
You should now be able to view the output of the Makito XH Decoder on the monitor or TV connected to SDI1.
For more detailed information, please refer to “Managing the Decoder” in the Makito X Decoder User’s Guide.

Makito XH Decoder Installation Guide
For More Information
Contact Haivision Technical Support via our Support Portal on our website at: http://support.haivision.com
Or you may use the phone number or email address listed below:
You may download the firmware, Readme file, and PDF versions of the User’s Guide and Installation Guide
through our Knowledge Base at: http://support.haivision.com
Waste Electrical and Electronic Equipment (WEEE) Disposal
Haivision is compliant with the European Union (EU) WEEE Directive. For recovery and recycling
information, please visit our website at:
http://www.haivision.com/environment
North America:
International:
Technical Support email:
Product Information email:
Toll Free: 1.877.224.5445 (option 4)
Tel: 1-514-334-5445 (option 4)
Fax: 1-514-334-0088
Other manuals for Makito XH
1
Table of contents
Other Haivision Media Converter manuals

Haivision
Haivision Makito Air v2.3 User manual

Haivision
Haivision Makito HVS-ID-QS-MAKD-130 User manual

Haivision
Haivision Rack400 User manual

Haivision
Haivision Pro460 User manual

Haivision
Haivision Kraken User manual

Haivision
Haivision Kraken CR User manual

Haivision
Haivision Makito XH User manual

Haivision
Haivision Makito User manual

Haivision
Haivision Makito User manual

Haivision
Haivision S/B-292E-DVI User manual