9
DTC Displayed Possible Causes
ECU TIME OUT
or
NO LINK
No supply on ignition switched line.
Possible causes:
Truck fuse blown
EB+ GEN2 INFO CENTRE or cable fault.
Open circuit B -. ISO7638 not connected
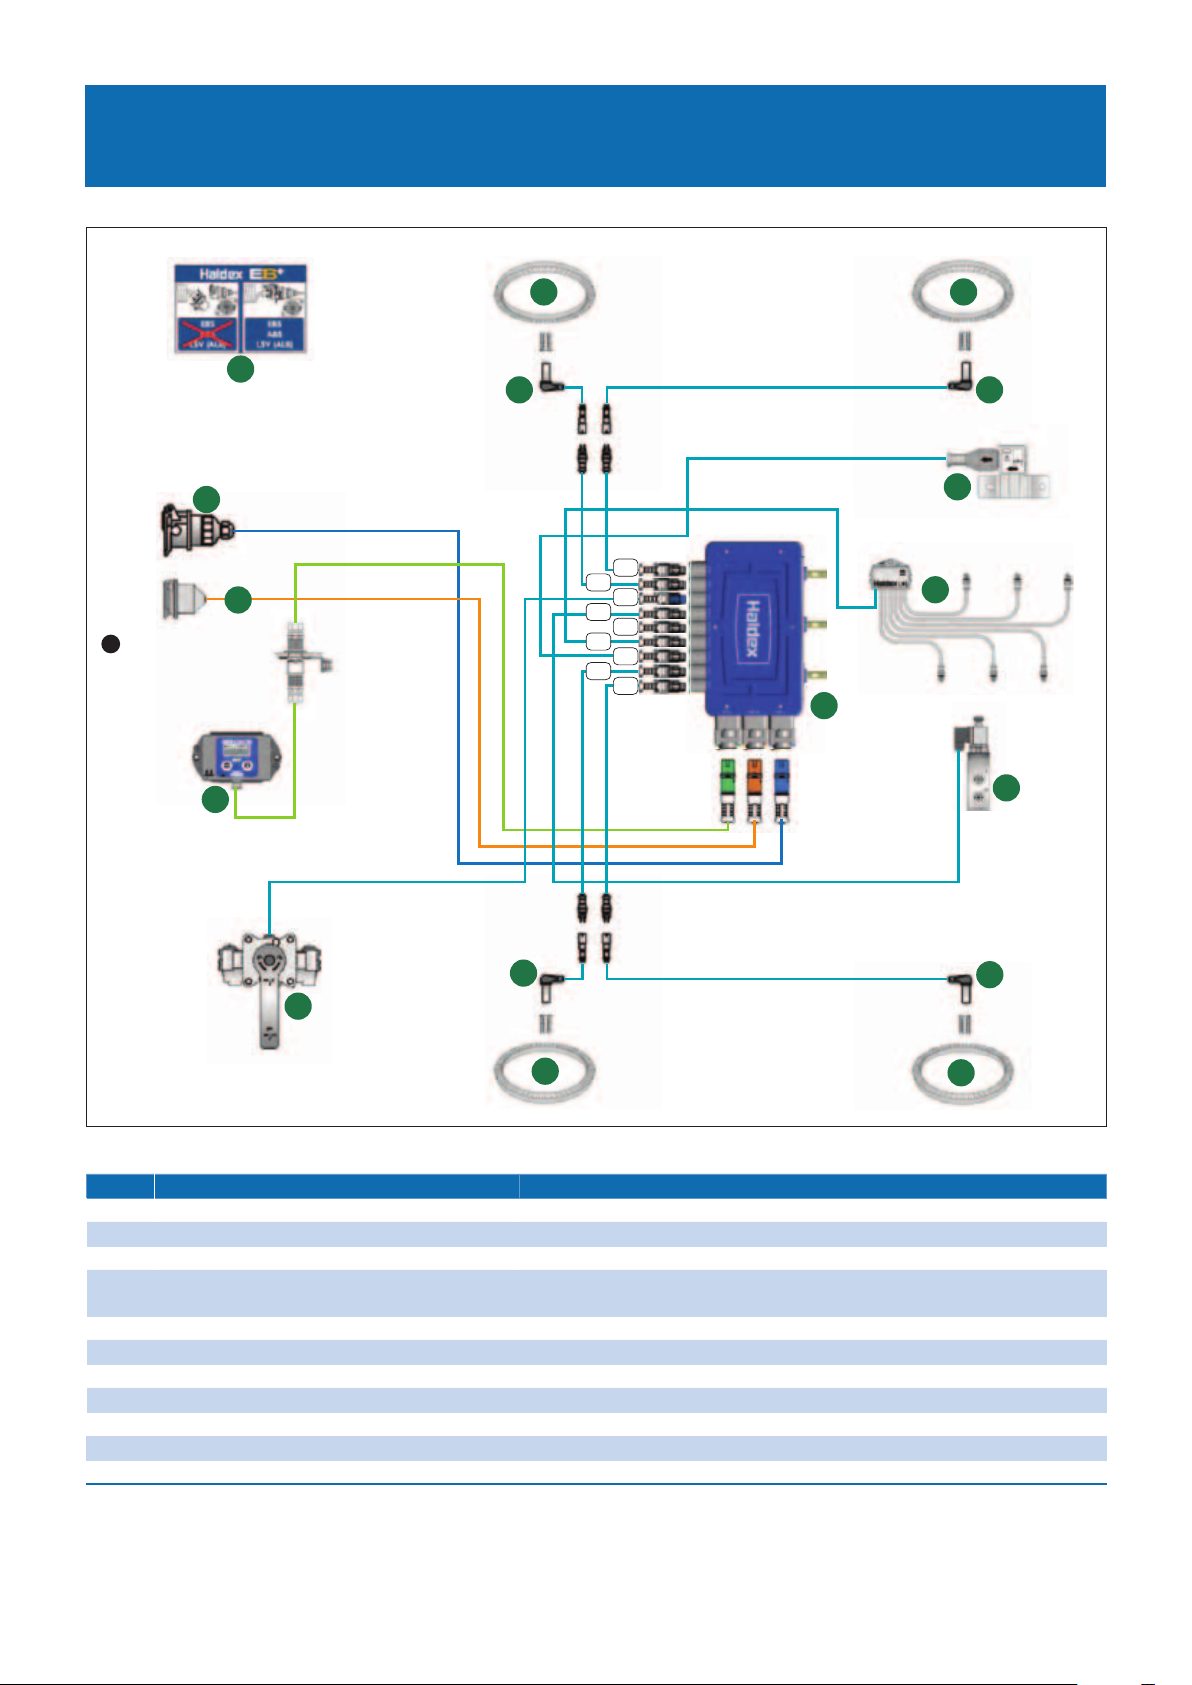
Sensor Group
S1A CONT 1A Sensor1/wiring open or short circuit
S1B CONT 1B Sensor/wiring open or short circuit
S2A CONT 2A Sensor/wiring open or short circuit
S2B CONT 2B Sensor/wiring open or short circuit
Intermittent Low Sensor Output Group
S1A SIGNAL 1A Sensor signal fault
S1B SIGNAL 1B Sensor signal fault
S2A SIGNAL 2A Sensor signal fault
S2B SIGNAL 2B Sensor signal fault
Possible causes:
Loose sensor, connection, bracket or
exciter. Damaged exciter.
Maladjusted sensor or worn sensor cable
insulation.
Low Sensor Output Group
S1A OUTPUT 1A Sensor system fault
S1B OUTPUT 1B Sensor system fault
S2A OUTPUT 2A Sensor system fault
S2B OUTPUT 2B Sensor system fault
Possible causes:
Sensor worn, maladjusted sensor, wiring
open or short circuit
Brake Apply Solenoid Group
BRK APPLY SC Brake apply solenoid short circuit
BRK APPLY OC Brake apply solenoid short circuit
BRK APPLY SC DRIVE Brake apply solenoid short circuit
permanently energised
BRK APPLY UNSPEC Brake apply solenoid short circuit
EPRV 21 Hold and Dump Solenoid Group
EPRV 21 HOLD SC Modulator 21 hold solenoid short circuit
EPRV 21 DUMP SC Modulator 21 dump solenoid short circuit
EPRV 21 HOLD OC Modulator 21 hold solenoid open circuit
EPRV 21 DUMP OC Modulator 21 dump solenoid open circuit
EPRV 21 HOLD SC
DRIVE
Modulator 21 hold solenoid short circuit
permanently energised
If a Diagnostic Trouble Code displayed is not listed here, check for intermittent sensor and wiring faults.
DTC Displayed Possible Causes
EPRV 21 DUMP SC
DRIVE
Modulator 21 dump solenoid short circuit
permanently energised
EPRV 21 HOLD
UNSPEC
Modulator 21 hold solenoid control
circuit fault
EPRV 21 DUMP
UNSPEC
Modulator 21 dump solenoid control
circuit fault
EPRV 22 Hold and Dump Solenoid Group
EPRV 22 HOLD SC Modulator 22 hold solenoid short circuit
EPRV 22 DUMP SC Modulator 22 dump solenoid short circuit
EPRV 22 HOLD OC Modulator 22 hold solenoid open circuit
EPRV 22 DUMP OC Modulator 22 dump solenoid open circuit
EPRV 22 HOLD SC
DRIVE
Modulator 22 hold solenoid short circuit
permanently energised
EPRV 22 DUMP SC
DRIVE
Modulator 22 dump solenoid short
circuit permanently energised
EPRV 22 HOLD
UNSPEC
Modulator 22 hold solenoid control
circuit fault
EPRV 22 DUMP
UNSPEC
Modulator 22 dump solenoid control
circuit fault
Demand Pressure Transducer Group
DEMAND SC Service line pressure transducer
short circuit
DEMAND OC Service line pressure transducer
open circuit
Delivery Pressure Transducer Group
EPRV 21 DEL SC Modulator 21 delivery pressure transducer
short circuit
EPRV 21 DEL OC Modulator 21 delivery pressure transducer
open circuit
EPRV 22 DEL SC Modulator 22 delivery pressure transducer
short circuit
EPRV 22 DEL OC Modulator 22 delivery pressure transducer
open circuit
One Wheel with Slow Recovery Group
EPRV 21 SLOW REC Slow recovery of one wheel of
modulator 21
EPRV 22 SLOW REC Slow recovery of one wheel of
modulator 22
Possible causes:
Slow brake release, foundation brake
mechanical faults, dry bearings, broken
spring, restricted piping
Check for kinks and blockages etc. Incorrect
piping, Wiring.
Modulator fault. Sensor wiring crossed
across an axle
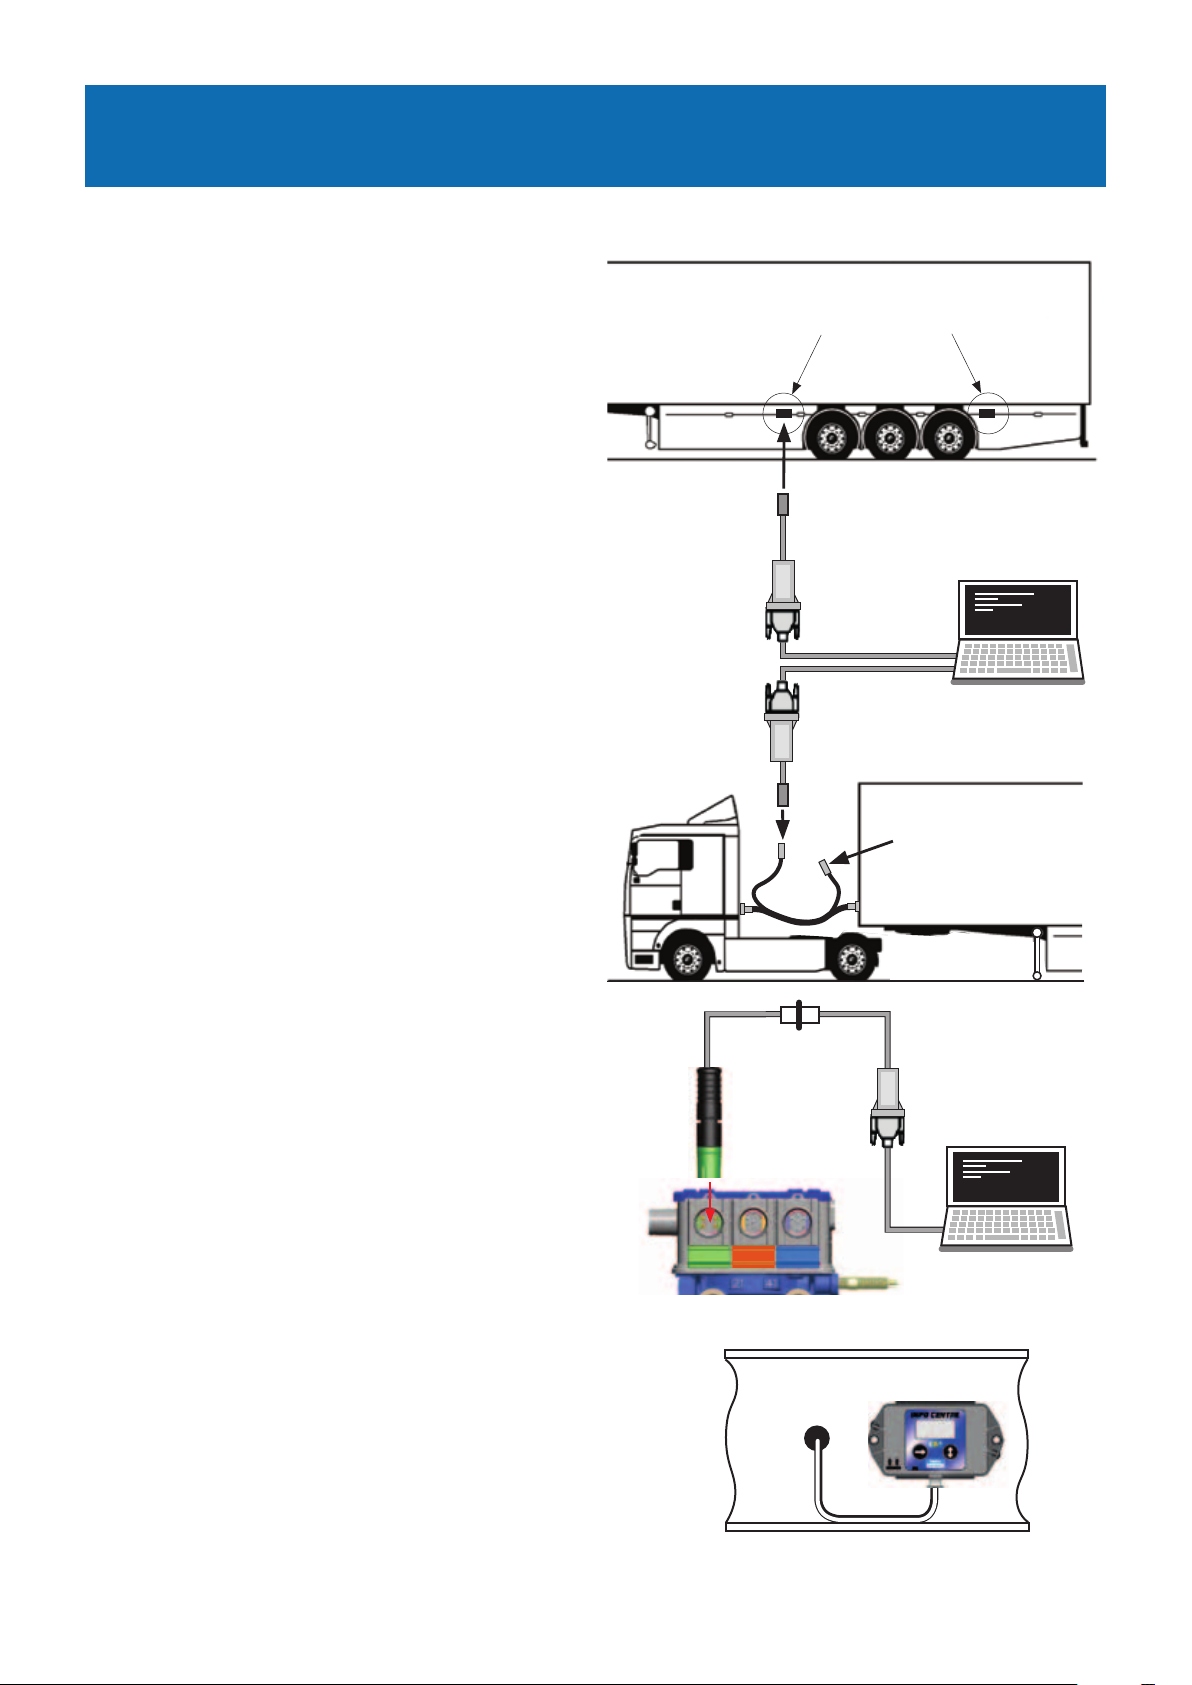
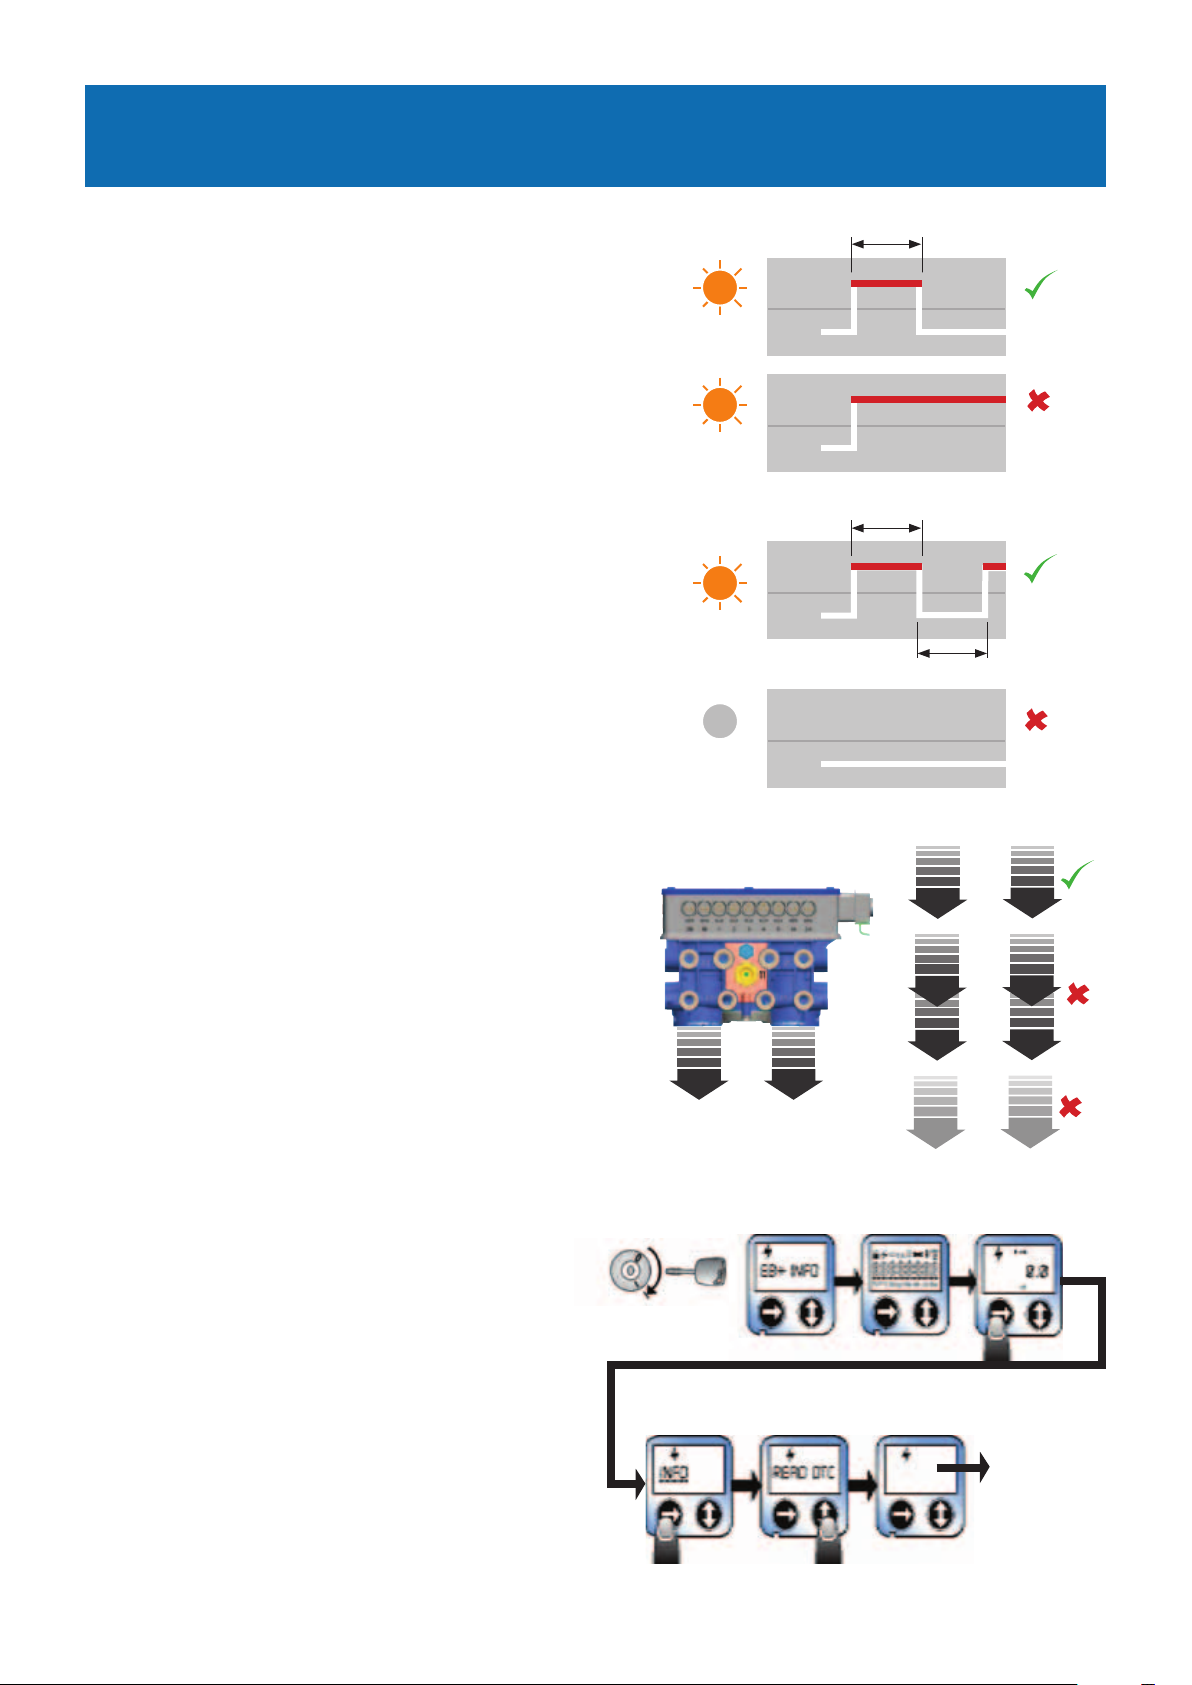
Diagnostic Trouble Codes (DTC)