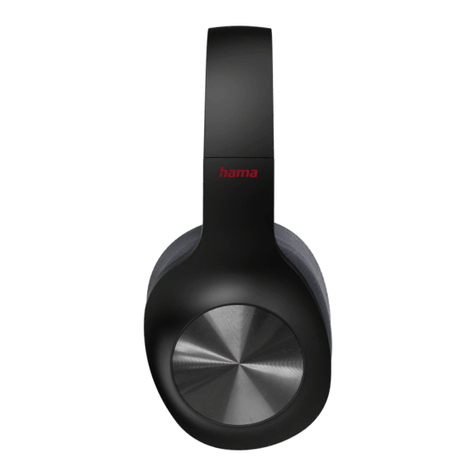
Hama Voice User manual

“Voice”
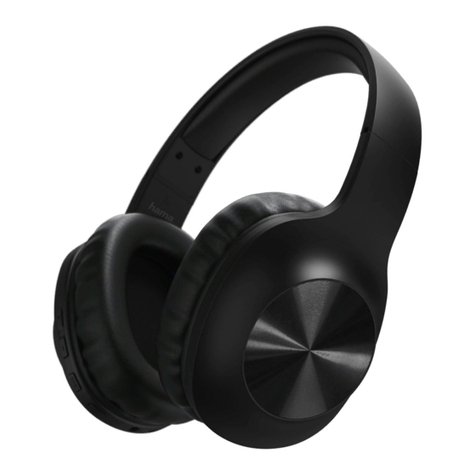
Bluetooth®Stereo Headphones
D
E
RUS
NL
P
GB
Operating Instructions
Bedienungsanleitung
Instrucciones de uso
Руководство по эксплуатации
Gebruiksaanwijzing
Manual de instruções
00
184054

2
5
6
7
8
3
4
1

2
GOperating instruction
Controls and Displays
1. Voice Assistant button
2. 3.5-mm AUX input
3. Micro-USB charging socket
4. Microphone
5. Multifunction button (MFB): Power /Play /Pause /Call
acceptance
6. LED function indicator
7. Volume -/Previous song
8. Volume +/Next song
Thank you for choosing aHama product.
Take your time and read the following instructions and information
completely.Please keep these instructions in asafe place for
futurereference. If you sell the device, please pass these operating
instructions on to the new owner.
1. Explanation of Warning Symbols and Notes
Warning
This symbol is used to indicate safety instructions or to draw your
attention to specichazards and risks.
Note
This symbol is used to indicate additional information or
important notes.
2. Package Contents
•1xBluetooth®stereo headphones
•1xMicro-USB charging cable
•1x3.5-mm stereo AUX cable with microphone
•These operating instructions
3. Safety Notes
•The product is intended for private, non-commercial use only.
•Use the product for its intended purpose only.
•Protect the product from dirt, moistureand overheating, and
only use it in adry environment.
•Donot use the product in the immediate vicinity of heaters or
other heat sources or in direct sunlight.
•Donot drop the product and do not expose it to any major shocks.
•Donot operate the product outside the power limits given in
the specications.
•Donot open the device or continue to operate it if it becomes
damaged.
•Since the battery is integrated and cannot be removed, you will
need to dispose of the product as awhole. Do this in compliance
with the legal requirements.
•Dispose of packaging material immediately according to locally
applicable regulations.
•Donot modify the product in any way.Doing so voids the
warranty.
•Donot attempt to service or repair the product yourself.Leave
any and all service work to qualied experts.
Warning –Battery
•Only use suitable charging devices or USB connections for
charging.
•Asarule, do not charge devices or USB connections that are
defective and do not try to repair them yourself.
•Donot overcharge the product or allow the battery to
completely discharge.
•Avoid storing, charging or using batteries in extreme
temperatures.
•When stored over along period of time, batteries should be
charged regularly (at least every three months).
Warning –High volumes
•High sound pressurelevel!
•Thereisarisk of hearing damage.
•Toprevent hearing loss, avoid listening at high volume levels
for long periods.
•Always keep the volume at areasonablelevel. Loud volumes,
even over short periods, can cause hearing loss.
•Using this product limits your perception of
ambient noise. Forthis reason, do not
operate any vehicles or machines while
using this product.
4. Getting Started
•The headphones areequipped with arechargeablebattery.
The battery must be fully charged beforeusing the device for
the rst time.
•Ensurethat the headphones areswitched off beforecharging.
•Begin charging by connecting the included USB charging cable
to the charging socket (3) as well as to the USB connection
of aPC/laptop.
•Alternatively,you can charge the headphones using asuitable
USB charger.Please refer to the operating instructions for the
USB charger used.
•The LED (6) is constantly lit redduring charging.
•Ittakes around 3hours until the battery is completely charged.
•Once the charging process is complete, the LED (6) is lit blue.
•Disconnect all cable and mains connections after use.
Note
•The Bluetooth®connection is not available during charging.
•Ifthe battery level is low,avoice says, ‘Low Battery’.
The message is repeated twice at 5-minute intervals
(approximately) beforethe headphones automatically switch
off.The LED indicator (6) begins to ash red. Connect the
headphones to asuitable USB port using the charging cable,
in order to recharge the battery.

3
5. Operation
Switching the headphones on/off
•Press and hold the MFB button (5) for about 4seconds until
you hear an acoustic signal and the LED (6) emits ashes of
alternating redand blue light.
•Toswitch off the headphones, press and hold the MFB button
(5) for about 4seconds until the LED (6) goes out.
Note
The functions described in this section areonly available for
Bluetooth®-capable terminal devices.
5.1. Bluetooth®pairing
Note –Pairing
•Make surethat your Bluetooth®-capable terminal device is on
and Bluetooth®is activated.
•Make surethat your Bluetooth®-capable terminal device is
visible for other Bluetooth®devices.
•For moreinformation, please refer to the operating
instructions of your terminal device.
•The headphones and the terminal device should be no further
than one metreapart. The shorter the distance, the better.
•Make surethat the headphones areswitched off.
•Switch on the headphones by pressing and holding the MFB
button (5) for about 4seconds until you hear an acoustic signal
and the LED (6) emits ashes of alternating redand blue light.
The headphones aresearching for aBluetooth®connection.
•Open the Bluetooth®settings on your terminal device and
wait until
Hama BTH VOICE
appears in the list of Bluetooth®
devices found.
•Select Hama BTH VOICE and wait until the headphones are
listed as connected in the Bluetooth®settings on your terminal
device.
•Ifthe connection was successful, you will hear another acoustic
signal and the LED (6) slowly ashes blue.
Note –Bluetooth®password
Some terminal devices requireapasswordinorder to connect to
another Bluetooth®device.
•Ifyour terminal device requests apasswordfor connection to
the headphones, enter 0000.
Note
•After asuccessful connection, the LED (6) slowly ashes blue.
•Ifthe connection could not be set up, rst switch off the
device and then repeat the steps for the Bluetooth®
connection listed under 5.1.
5.2. Automatic Bluetooth®connection (after successful
pairing)
Note
Once the headphones have connected to aterminal device, they
will storethe device and automatically connect to it again when
the device is within range and has Bluetooth®enabled. Renewed
pairing is not required for terminal devices that have previously
been connected to these headphones.
When the headphones areswitched on, they willautomatically
attempt to connect to the terminal device last connected. If
you want to connect the headphones to anew terminal device,
please follow the steps for the Bluetooth®connection listed
under 5.1.
As soon as the headphones areconnected to your terminal
device, music is transmitted via Bluetooth®using these
headphones. Forfurther information, please also refer to the
operating instructions of your terminal device.
•Switch on the headphones with the MFB button (5). The LED
(6) begins to emit ashes of alternating redand blue light, and
the headphones automatically connect to the terminal device
last used.
Note
•Ifthe connection was successful, the LED (6) slowly ashes
blue.
•Ifthe connection could not be set up, rst switch off the
headphones and then repeat the steps for the Bluetooth®
connection listed under 5.1.
•Itmay be necessary to change the settings on your
terminal device to enable it to automatically connect to the
headphones.
Note –Connection impaired
After the headset and terminal device have been paired, a
connection is established automatically.Ifthe Bluetooth®
connection is not established automatically,check the following:
•Check the Bluetooth
®
settings of your terminal device to see
whether
Hama BTH VOICE
is connected. If not, repeat the
steps listed under 5.1. Bluetooth
®
pairing.
•Check whether obstacles areimpairing the range. If so, move
the devices closer together.
•The performance can also be affected by aweak battery.
5.3. Audio playback
Note
•Note that the functions described under 5.3., 5.4. and 5.5.
areonly possible with an active Bluetooth®connection.
•Your terminal device must also support the individual
functions.

4
Note
•For moreinformation, please refer to the operating
instructions of your terminal device.
•Functions can still be controlled directly via the terminal device.
•Set the volume on your terminal device to alow level.
•Switch on the headphones with the MFB button (5).
•Start audio playback on the connected terminal device.
•Press and hold Volume + (8) to increase the volume.
•Press and hold Volume - (7) to reduce the volume.
•Brieypress the MFB button (5) to start or pause audio
playback.
•Brieypress Volume + (8) to skip to the next track.
•Brieypress Volume - (7) to skip back to the previous track.
Note
An acoustic signal is given when the minimum or maximum
volume is reached.
5.4. Hands-free function
•Press the MFB button (5) once to answer an incoming call.
•Press and hold the MFB button (5) for 2seconds or use your
telephone to reject an incoming call.
•During acall, press the MFB button (5) once to end the call.
•Press and hold Volume + (8) to increase the volume.
•Press and hold Volume - (7) to reduce the volume.
•Press the MFB button (5) twice to redial the number last dialled.
Note
•Not all terminal devices support allthe functions specied
above. Formoreinformation, please also refer to the
operating instructions of your terminal device.
•Some functions and acoustic signals aredependent on your
terminal device.
Note –Call quality
To increase the call quality,please make surethat you arenear
your mobile phone during the call.
5.5. Voice Assistant function
The Voice Assistant is an integrated, interactive function that
enables you to start communication with your Siri or Google
Assistant at the press of abutton. This function enables you to ask
questions and get various forms of help from your voice assistant,
even if you arenot holding your telephone in your hands.
Below you will nd some examples selected from the large number
of possibilities.
Note –Siri
Siri is only available on suitable terminal devices with iOS 5or
higher (from iPhone 4s onwards).
Note –Google Assistant
•The Google Assistant is only available on suitable terminal
devices with Android 5.0 or higher,Google Play Services,
>1.5 GB of free memory and aminimum screen resolution
of 720P.
•The Google Assistant app must be available on your
terminal device and set as the default voice assistant.
Press the Voice Assistant button (1) while the headphones are
connected via Bluetooth®to start communication with your Siri or
Google Assistant. As soon as you hear an acoustic signal, your voice
assistant is ready to help you.
•Example 1:
Press the Voice Assistant button (1) and then speak into your
headphones: ‘What’sthe weather like today?’ The voice assistant
will answer as follows, for example: ‘Mainly cloudy with some
showers’
•Example 2:
Press the Voice Assistant button (1) and then speak into your
headphones: ‘What time is it?’ The voice assistant will answer as
follows, for example: ‘It is 8pm’
•Other examples: Set an alarm for tomorrow at 7am.
Play music.
What’sinthe news?
5.6. Audio input socket
In addition to connecting these headphones via Bluetooth®, you
can connect them using the included AUX cable.
To do so, insert one end of the cable into the terminal device and
the other end into the Audio input socket (2) on the left side
of your headphones. The Bluetooth®connection is automatically
ended when you plug in the audio cable. The headphones now
function as wired headphones.
Note
To operate the headphones with the AUX cable, the headphones
do not have to be switched on. The Volume +/-, Play/Pause and
Next/Previous track functions arecontrolled solely using your
terminal device.
5.7. Disconnecting the headphones
•Switch off the headphones.
•Disconnect the headphones via the Bluetooth®settings on your
terminal device.
This manual suits for next models
1
Table of contents
Languages:
Other Hama Headphones manuals

Hama
Hama Spirit Go User manual

Hama
Hama Calypso User manual

Hama
Hama Calypso User manual

Hama
Hama Voice Neck User manual

Hama
Hama Freedom Lit User manual

Hama
Hama Spirit Focused 00184160 User manual

Hama
Hama Stereo RF User manual

Hama
Hama Spirit Athletics User manual

Hama
Hama Spirit Pocket User manual

Hama
Hama ME 487 User manual