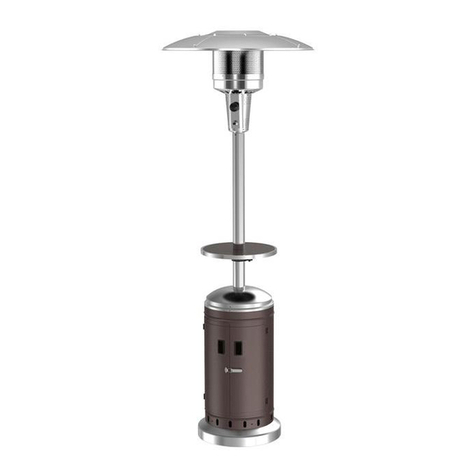
HAMPTON BAY 68164 User manual

THANK YOU
We appreciate the trust and confidence you have placed in Hampton Bay through the purchase of this patio heater. We strive to continually
create quality products designed to enhance your home. Visit us online to see our full line of products available for your home improvement
needs. Thank you for choosing Hampton Bay!
USE AND CARE GUIDE
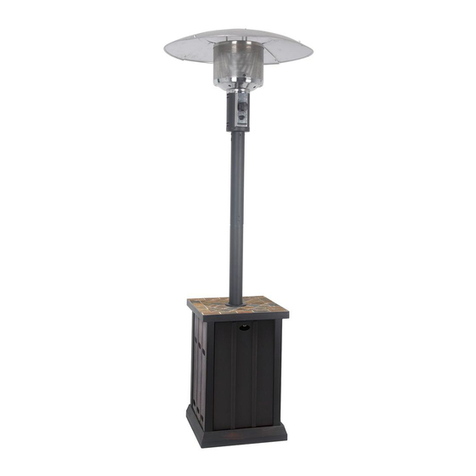
PATIO HEATER
Questions, problems, missing parts? Before returning to the store,
call Hampton Bay Customer Service
8 a.m. - 7 p.m., EST, Monday – Friday, 9 a.m. – 6 p.m., EST, Saturday
1-855-HD-HAMPTON
HAMPTONBAY.COM
Item #1001 362 427
Model #68164
USC

2
Table of Contents
Table of Contents ...................................2
Safety Information ..................................2
Warranty ..........................................4
Pre-Assembly ......................................5
Assembly. . . . . . . . . . . . . . . . . . . . . . . . . . . . . . . . . . . . . . . . . . 7
Connecting the Propane Tank .........................9
Performing a Leak Test..............................10
Operation. . . . . . . . . . . . . . . . . . . . . . . . . . . . . . . . . . . . . . . . . 11
Replacing the Gas Cylinder ..........................13
Storage ..........................................13
Care and Cleaning .................................14
Maintenance ......................................14
Troubleshooting ...................................14
Safety Information
READ AND SAVE THESE INSTRUCTIONS
Read this manual carefully before assembling, using, or servicing this
heater. Keep this manual for future reference.
IF YOU SMELL GAS
If you smell gas:
1. Shut off gas to the heater.
2. Extinguish any open ame.
3. If the odor continues, keep away from the heater and
immediately call your gas supplier or re department.
GENERAL SAFETY INFORMATION
This manual contains important information about the assembly,
operation, and maintenance of this patio heater. General safety
information is presented in these rst few pages and is also located
throughout the manual.
□Keep this manual for future reference and to educate new users
of this product. This manual should be read in conjunction with
the labeling on the product.
□Safety precautions are essential when any mechanical or
propane-fueled equipment is involved. These precautions
are necessary when using, storing, and servicing. Using this
equipment with the respect and caution demanded will reduce
the possibilities of personal injury or property damage.
□Equip your home with at least 1 smoke detector on each oor.
□Keep at least one dry-powder operative ABC-type re
extinguisher in the home at all times.
□Keep areas around heat sources free from papers and trash.
□Store paints, solvents, and ammable liquids away from all heat
and ignition sources.
□Develop a re-escape plan before a re occurs. Be sure every
person understands the plan and is able to carry out the plan in
case of emergency.
□If your clothing catches re, do not run. Drop down immediately
and roll to smother the ames.
The following symbols are used extensively throughout this manual.
Always pay attention to these precautions as they are essential when
using any mechanical or fueled equipment.
DANGER: Indicates an immediately hazardous situation
which, if not avoided, will result in death or serious injury.
WARNING: Indicates an imminently hazardous situation
which, if not avoided, could result in death or serious injury.
CAUTION: Indicates an imminently hazardous situation
which, if not avoided, may result in minor or moderate
personal injury, or property damage.
PERSONAL SAFETY
DANGER: Failure to comply with the precautions and
instructions provided with this heater can result in death,
serious bodily injury, and property loss or damage from
hazards of re, explosion, burn, asphyxiation, and/or carbon
monoxide poisoning. Only people who can understand and
follow the instructions should use or service this heater.
WARNING: For outdoor use only.
WARNING: Do not store or use gasoline or other
ammable vapor and liquids in the vicinity of this or any
other appliance. An LP-cylinder not connected for use shall
not be stored in the vicinity of this or any other appliance.
WARNING: Improper installation, adjustment, alteration,
service or maintenance can cause property damage, injury
or death. Read the installation, operating and maintenance
instructions thoroughly before installing or servicing this
equipment.
DANGER CARBON MONOXIDE HAZARD
This appliance can produce carbon monoxide which
has no odor.
Using it in an enclosed space can kill you.
Never use this appliance in an enclosed space such
as a camper, tent, car or home.

3 HAMPTONBAY.COM
Please contact 1-855-HD-HAMPTON for further assistance.
Safety Information (continued)
WARNING: California Proposition 65
Combustion by products produced when using this product
contain chemicals known to the state of California to cause
cancer, birth defects, and other reproductive harm.
DANGER: EXPLOSION – FIRE HAZARD
□Keep solid combustibles, such as building materials,
paper or cardboard, a safe distance away from the
heater as recommended by the instructions.
□Provide adequate clearances around air openings into
the combustion chamber.
□Never use the heater in spaces which do or may
contain volatile or airborne combustibles, or products
such as gasoline, solvents, paint thinner, dust particles
or unknown chemicals.
□During operation, this product can be a source of
ignition. Keep the heater area clear and free from
combustible materials, gasoline, paint thinner,
cleaning solvents, and other ammable vapors and
liquids. Do not use the heater in areas with high
dust content. Minimum heater clearances from
combustible materials: 3 ft. From the sides and 2 ft.
from the top.
DANGER: CARBON MONOXIDE HAZARD
□This heater is a combustion appliance. All combustion
appliances product carbon monoxide (CO) during
the combustion process. This product is designed to
product extremely minute, non-hazardous amounts
of CO if used and maintained in accordance with all
warnings and instructions. Do not block air ow into
or out of the heater.
□Carbon Monoxide poisoning produces u-like
symptoms, watery eyes, headaches, dizziness, fatigue,
and possibly death. You cannot see it and you cannot
smell it. It is an invisible killer. Of these symptoms are
present during operation of this product, get fresh air
immediately.For outdoor use only.
□Never use inside a house or other unventilated or
enclosed area.
□This heater consumes air (oxygen). Do not use in
unventilated or enclosed areas to avoid endangering
your life.
WARNING: BURN HAZARD
Never leave the heater unattended when hot or in use. Keep
out of the reach of children.
PROPANE GAS PRECAUTIONS
DANGER: EXPLOSION – FIRE HAZARD
□Never store propane near high heat, open ames, pilot
lights, direct sunlight, other ignition sources, or where
temperatures exceed 120°F (48°C).
□Propane vapors are heavier than air and can
accumulate in low places. If you smell gas, leave the
area immediately.
□Never install or remove propane cylinder while the
heater is lit near ame, pilot lights, other ignition
sources, or while the heater is hot to the touch.
□This heater is red hot during use and can ignite
ammables too close to the burner. Keep ammables
at least 2 ft. from sides and 3 ft. from top. Keep
gasoline and other ammable liquids and vapors well
away from the heater.
□The propane cylinder must always be stored outdoors
in a well-ventilated space. Never store the propane
cylinder in an enclosed area (house, garage, etc). If
the heater is to be stored indoors, disconnect the
propane cylinder for outdoor storage.
WARNING: This product is fueled by propane gas. Propane
gas is invisible, odorless, and ammable. An odorant is
normally added to help detect leaks and can be described
as a “rotten egg” smell. The odorant can fade over time so
leaking gas is not always detectable by smell alone.
Propane gas is heavier than air and leaking propane will
sink to the lowest level possible. It can ignite by ignition
sources including matches, lighters, sparks, or open ames
of any kind many feet away from the original leak. Use only
propane gas set up for vapor withdrawal.
Propane gas should be stored or used in compliance with
local ordinances and codes or with ANSI/NFPA 58. Turn off
propane when not in use.
FIRST AID FOR BURNS
EYES
Seek medical attention immediately. Do not put ointments or liquids
in eyes.
ELSEWHERE
□Consult a doctor if the burn has not healed in 24 hours or the
burn is larger than the size of a palm.
□If serious, send promptly for an ambulance or doctor.
□If possible, run the affected area under cold water, (not ice or
ice water) for 10-15 minutes if the skin is intact. Cut and gently
lift away any clothing covering the burned area, without pulling
clothing over the burns. Leave in place any clothing that is stuck
to the burns. Do not put any creams or greases on the burned
area.

4
Safety Information (continued)
□If the hands or wrists have been burned, remove jewelry if
possible without causing further injury. This prevents the
necessity of having to cut off jewelry since swelling usually
occurs as the result of a burn.
□Do not pop any blisters. Cover the burn with a light gauze
dressing.
□If blisters pop, apply a light antibiotic ointment and dress the
wound area with gauze as previously described.
Warranty
Lorem ipsum dolor sit amet, consectetur adipisicing elit, sed do eiusmod tempor incididunt ut labore et dolore magna aliqua. Ut enim ad
minim veniam, quis nostrud exercitation ullamco laboris. Excepteur sint occaecat cupidatat non proident, sunt in culpa qui ofcia deserunt
mollit anim id est laborum.
Contact the Customer Service Team at 1-855-HD-HAMPTON or visit www.HAMPTONBAY.com.

5 HAMPTONBAY.COM
Please contact 1-855-HD-HAMPTON for further assistance.
Pre-Assembly
PLANNING ASSEMBLY
Carefully lay all parts out on a soft surface and compare all parts to the Package Contents list. If any part appears missing or damaged, do
not use this product and call customer service immediately.
TOOLS REQUIRED
Wrench Phillips
screwdriver
HARDWARE INCLUDED
=
AA
GG HH II JJ KK LL
EE
BB CC DD FF
Part Description Quantity Part Description Quantity
AA M6 x10 bolt 8 HH M8 washer 6
BB M6 nut 14 II Anchoring arm 3
CC M8 bolt 3 JJ Anchoring nut 3
DD M6 x 22 bolt 6 KK Cap nut 9
EE Wrench 1 LL Small screw 9
FF Reector stud 3
GG Wing nut 3
MM Webbing 1
MM

6
Pre-Assembly (continued)
PACKAGE CONTENTS
A
B
C
D
E
F
G
H
I
Part Description Quantity
A Reector 1
B Head assembly 1
C Post 1
D Tank housing 1
E Post support 1
F Support legs 3
G Regulator 1
H Base 1
I Wheel assembly 1

7 HAMPTONBAY.COM
Please contact 1-855-HD-HAMPTON for further assistance.
Assembly
1 Attaching the wheel assembly to the
base
If your model did not come with a wheel assembly, proceed to
step 2.
□Align the holes in the wheel assembly (I) with the holes in
the base (H).
□Attach the wheel assembly to the base using the bolts (AA)
and nuts (BB).
H
AA
BB
I
2 (Optional) Attaching the ground
xture to the base
If your model does not come with the anchoring arms and nuts or
you do not wish to attach these items, proceed to step 3.
□Mount the anchoring arms (II) to the holes on the base
housing (H) using six bolts (AA) and nuts (BB).
H
BB
AA
EEE EEE
II
JJ
I
3 Attaching the support legs to the
base
□Attach the support legs (F) to the top of the base (H) using
three M8 bolts (CC).
H
F
CC
4 Attaching the post assembly
□Attach the post support (E) to the top of the support legs
using M6 x 22 bolts (DD) and M6 nuts (BB).
□Remove the pre-assembled screws from the post
support (E) and attach post (C) to the post support (E)
using those 4 screws.
E
DD C
E
BB
E
□Fix the product into the ground using 3 anchoring
nuts (JJ) after all assembly steps are completed.
EEE EEE

8
Assembly (continued)
5 Placing the tank housing
□Place the tank housing (D) on top of the assembly.
D
6 Attaching the reector studs to the
head assembly
□Insert three reector studs (FF) into the top of the head
assembly (B). Tighten the studs securely.
FF
B
7 Attaching the head assembly
□Remove the 4 pre-assembled screws from the head
assembly (B) and attach the post (C) with these 4 screws. B
C

9 HAMPTONBAY.COM
Please contact 1-855-HD-HAMPTON for further assistance.
Assembly (continued)
8 Assembling the reector
WARNING: Remove the protective cover before assembly.
NOTE: Leave all screws and nuts loose until the entire
reector is put together in order to ensure proper alignment
of all sections.
□Slide two pieces of the reector (A) together. Insert one
small screw (LL). Repeat until all pieces of the reector are
connected.
□Place cap nuts (KK) on the screws (LL).
□Place the reector center plate into the middle of the
reector panels and repeat this procedure.
A
KK
LL
9 Attaching the reector assembly
□Slide three large at washers (HH) over the threaded end of
the studs (FF).
□Place the reector assembly (A) over the studs (FF) and at
washers (HH).
□Place three more at washers (HH) over the studs (FF) and
secure the reector in place using three wing nuts (GG).
GG
HH
FF
HH A
Connecting the Propane Tank
REQUIREMENTS
□This heater requires propane gas and a propane cylinder (not included). Use a standard 20 lb. propane cylinder only.
□Use this heater only with a propane vapor withdrawal supply system. For more information on this requirement, see Chapter 5 of the
Standard for Storage and Handling of Liqueed Petroleum Gas, ANSI/NFPA 58. Your local library or re department should have this
book.
□The minimum permissible gas supply pressure of 10 W.C. is required for the purpose of input adjustment.
□The minimum hourly rate of 17,000 BTUs is the required input rating for a heater for automatic operation at ratings less than full
input rating.
□The pressure regulator and hose assembly supplied with the appliance must be used.
□The installation must conform with local codes, or in the absence of local codes, with National Fuel Gas Code, ANSI Z223.1.
□A dented, rusted, or damaged propane cylinder may be hazardous and should be checked by your cylinder supplier. Never use a
propane cylinder with a damaged valve connection.
□The propane cylinder must be constructed and marked in accordance with the specications for LP gas cylinders of the U.S.
Department of Transportation (DOT).
□Never connect an unregulated propane cylinder to the heater.

10
Connecting the Propane Tank (continued)
CONNECTING THE TANK
1. Attach a regulator to the cylinder.
2. Install the cylinder to the heater assembly using the
webbing (MM).
Performing a Leak Test
WARNING: Perform all leak tests outdoors. Extinguish all open ames. NEVER perform this test while smoking. DO not use the heater until
all connections have been tested and conrmed not to be leaking.
1. Make a 2-3 oz. solution consisting of one part dishwashing
detergent and three parts water.
2. Apply several drops of this solution where the hose attaches
to the regulator.
3. Apply several drops of this solution to where the regulator
connects to the cylinder.
4. Make sure all heater and light valves are OFF.
5. Turn the cylinder valve ON.
IF BUBBLES APPEAR AT ANY CONNECTIONS, THERE IS A LEAK. DO
THE FOLLOWING:
1. Turn the cylinder valve OFF.
2. If a leak is at the hose/regulator connection, tighten the connection and perform another leak test.
3. If the leak is at the regulator/cylinder valve connection, disconnect, reconnect, and perform another leak test. If you continue to see
bubbles after several attempts, the cylinder valve is defective and should be returned to the cylinder’s place of purchase.
If there are no bubbles, the connections are secure. You can turn the cylinder valve OFF. Whenever gas connections are loosened or
removed, you must perform a leak test.
MM

11 HAMPTONBAY.COM
Please contact 1-855-HD-HAMPTON for further assistance.
Operation
DANGER: For outdoor use only. Never use inside a house, or other unventilated or enclosed area. This heater consumes air (oxygen). Do
not use in an unventilated or enclosed area as this will endanger your life.
DANGER: EXPLOSION – FIRE HAZARD
□Never store propane near high heat, open ames, pilot lights, direct sunlight, other ignition sources, or where
temperatures exceed 120°F (48°C).
□Propane vapors are heavier than air and can accumulate in low places. If you smell gas, leave the area immediately.
□Never install or remove propane cylinder while the heater is lit near ame, pilot lights, other ignition sources, or while the
heater is hot to the touch.
□This heater is red hot during use and can ignite ammables too close to the burner. Keep ammables at least 2 ft. from
sides and 3 ft. from top. Keep gasoline and other ammable liquids and vapors well away from the heater.
□The propane cylinder must always be stored outdoors in a well-ventilated space. Never store the propane cylinder in
an enclosed area (house, garage, etc). if the heater is to be stored indoors, disconnect the propane cylinder for outdoor
storage.
WARNING: The whole gas system, hose, regulator, pilot or burner should be inspected for leaks before use.
WARNING: Check the hose assembly for signs of extreme abrasion, cuts or wear. Suspected areas should be leak tested. If the hose leaks,
inspect the visible portion of the hose before each use of the appliance and inspect the entire hose assembly at least annually. If disassembly
is required, properly check the connections for leaks upon re-assembly. The hose assembly must be replaced prior to the appliance being
put into operation if there is evidence of excessive abrasion or wear, or if the hose is damaged. The replacement hose assembly shall be that
specied by the manufacturer.
WARNING: Avoid twisting the exible tubes and hoses.
WARNING: Make sure the ventilation opening of the cylinder enclosure, control compartment, burner and circulation air passageways of the
heater are free and clear of debris. If debris, spider or insect nests are found, clean the holes with heavy-duty pipe cleaner or compressed air.
WARNING: Always keep a dry chemical re extinguisher readily available.
WARNING: For safety, always allow a 5-minute complete shut off period before re-lighting a hot heater.
WARNING: Maximum Working (kPa) Pressure: 250PSIG.
WARNING: Do not move the heater, or cover it with a protective cover after it has been turned off until the temperature has cooled down.

12
Operation (continued)
BEFORE YOU TURN THE GAS SUPPLY ON
□Your heater was designed and approved for outdoor use only. Do not use it inside a building, garage, or any other enclosed area.
□Make sure the surrounding areas are free of combustible materials, gasoline, and other ammable vapors or liquid.
□Ensure that there is no obstruction to the air ventilation.
□Ensure all gas connections are tight and there are no leaks.
□Ensure the cylinder cover is clear of debris.
□Ensure any component removed during assembly or servicing is replaced and fastened prior to starting.
BEFORE YOU LIGHT THE HEATER
□Inspect the heater thoroughly before each use.
□Have a qualied service person inspect the heater on an annual basis.
□If relighting a hot heater, always wait at least 5 minutes.
□Inspect the hose assembly for evidence of excessive abrasions, cuts, or wear. Suspected areas should be leak tested. If the hose
leaks, it must be replaced prior to operation. Only use the replacement hose assembly specied by the manufacturer.
TURNING THE HEATER ON AND OFF
1. Turn on the valve on the gas supply cylinder.
2. Press and turn the variable control knob to the HI position.
3. Press down the variable control knob and hold for 20 seconds.
4. While holding down the variable control knob, press the
igniter button several times until the burner head ame
ignites. Release the variable control knob 10 seconds after the
ignition.
5. If a new tank has just been connected, allow at least one
minute or more for the air in the gas pipeline to purge out.
6. The ame can be watched and checked from the peephole
located on the base of the burner.
7. Turn the variable control knob to the LO position for 5 minutes
or more before turning the knob to desired temperature
setting. If a small ame is needed, turn the variable control
knob to the LO position.
8. If the burner ame goes out accidentally or it is blown out by
wind, turn off the heater and wait at least 5 minutes or more
to let the gas dissipate before lighting again to avoid possible
gas explosion. Repeat steps 2 through 4.
Variable control knob
Igniter
OFF
HI
LO
IGNITER
To turn the heater off:
1. Press and turn the control knob to the OFF position.
2. Turn off the valve on the gas cylinder and disconnect the cylinder.

13 HAMPTONBAY.COM
Please contact 1-855-HD-HAMPTON for further assistance.
Replacing the Gas Cylinder
WARNING: Changing of the cylinder must be undertaken in a ame-free atmosphere. Ensure that all taps on the consuming appliance are
in the closed position.
1. Close the valve of the gas cylinder.
2. Disconnect the regulator from the cylinder following the instructions that came with your regulator.
3. Replace the cylinder.
4. In the absence of any ame, remove the plug or seal cap from the cylinder valve.
5. Check for the presence and good state of the gasket before connecting the regulator.
6. Perform a leak test using soapy water solution.
LP GAS SUPPLY CYLINDER SAFETY
The LP-gas supply cylinder must be:
□Constructed and marked in accordance with the Specications for LP-gas cylinders of the U.S. Department of Transportation
(DOT); or the Standard for Cylinders, Spheres and Tubes for Transportation of Dangerous Goods and Commission, CSA B339, as
applicable.
□Provided with a listed overlling prevention device.
□Provided with a cylinder connection device compatible with the connection for the appliance.
Additional precautions:
□Do not store a spare LP-gas cylinder under or near this appliance.
□Never ll the cylinder beyond 80 percent full.
□Place the dust cap on the cylinder valve outlet whenever the cylinder is not in use. Only install the type of dust cap on the cylinder
valve that is provided with the cylinder valve. Other types of caps or plugs may result in leakage of propane.
□The cylinder used must include a collar to protect the cylinder valve.
HOSE AND REGULATOR USE AND REPLACEMENT
The pressure regulator and hose assembly supplied with the appliance must be used. Replacement pressure regulators and hose
assemblies must be those specied by the appliance manufacturer.
Storage
□Always close the valve of the gas cylinder after use or in case of a disturbance.
□Remove the pressure regulator and the hose attachment if the heater is not to be used for a period of time.
□The cylinder must be stored outdoors in a well-ventilated area out of the reach of children.
□A disconnected cylinder must have threaded valve plugs tightly installed and must not be stored in a garage or any other
enclosed area.
□Storage of the heater indoors is permissible only if the cylinder is disconnected and removed from the heater.
□Check the tightness of the gas valve and for damage. If you suspect you have a damaged gas valve, have it changed by your gas
dealer.
□Never store liquid gas cylinder in a sub-terrain, or at places without adequate air ventilation.

14
Care and Cleaning
WARNING: Do not perform maintenance after the heater has been turned off until the temperature has cooled down. Do not expose
the pilot, controllers and parts underneath the burner to water. Do not use the heater if any of these parts are exposed to water until the
appliance is inspected or repaired by a qualied service person.
□Wipe off powder coated surfaces with a soft, moist rag and soapy water. Do not clean the heater with cleaners that are combustible or
corrosive.
□Remove debris, spider and insect nests from the ventilation opening of the cylinder enclosure, control compartment, burner and
circulation air passageways of the heater with heavy-duty pipe cleaner or compressed air to keep appliance clean and safe for use.
Never clear ports or other openings with toothpicks or other articles that will break and block the ports.
□If carbon deposits develop, remove the reector and ame screen and clean them with soap water. Do not paint the ame screen,
control panel or reector.
□Cover the burner unit with the supplied protective cover when the heater is not in use. Wait until the heater is cool before covering.
□In a salt-air environment, such as near an ocean, corrosion occurs more quickly than normal. Check frequently for corroded areas and
repair them promptly.
Maintenance
□Keep the appliance area clear and free from combustible materials, gasoline and other ammable vapors and liquids.
□Do not obstruct the ow of combustion and ventilation air.
□Keep the ventilation opening(s) of the cylinder enclosure free and clear from debris.
□Visually check the burner ames.
□Clean the appliance, including special surfaces, with recommended cleaning agents, if necessary.
□Visually check portions of the hose assembly located within the connes of the heater post.
Troubleshooting
Problem Probable Cause Solution
The burner will not light. The burner injector is clogged. Clean the burner injector.
There is low gas supply pressure. Call your gas supplier.
The burner ame goes off immediately
after ignition.
There is low gas pressure. Call your gas supplier.
The ignition is delayed. The main burner carryover ports are clogged. Clean the main burner ports.
There is low gas pressure. Call your gas supplier.
The combustion on the burner is
inadequate.
There is not enough air. Check the air passageways and burners for dirt
and debris, and clean with compressed air.
The burner ame is low. The supply hose is bent or twisted. Straighten the hose and perform a leak test.
There is blockage in the burner injector. Clean or replace the burner injector.
The emitter glows uneven. There is blockage in the burner injector. Clean or replace the burner injector.
The base is not on a level surface. Place the heater on a level surface.
The gas pressure is low. Replace the cylinder with a new cylinder.
There is slight smoke and odor during
initial operation.
This is residue from the manufacturing
process.
This will stop after approximately 30 minutes of
operation.

15 HAMPTONBAY.COM
Please contact 1-855-HD-HAMPTON for further assistance.
Troubleshooting (continued)
There is thick black smoke. There is blockage in the burner. Turn off the heater and let it cool. Remove the
blockage and clean the inside and outside of the
burner.
The heater produces a whistling noise
when the burner is lit.
Air passageways are blocked. Check the minimum installation clearances and
air passageways for debris.
There is air in the gas line. Operate the burner until the air is completely
purged.
The heater produces a clicking noise
just after the burner is lit or turned off.
The metal is expanding and contracting. This is common with heaters. If noise is ex-
cessive, contact a qualied service person.
There is a gas odor even when the
control knob is in the OFF position.
There is a gas leak. Locate and correct the leak immediately.
The gas control is defective. Replace the gas control.
There is a gas odor during combustion. There is foreign matter in the gas or on the
burner ports.
Check the gas passageway and burner.
The heater is burning vapors from paint or
impurities in the air.
Stop storing and using odor-causing products
near the heater.
There is gas leaking from the regulator and
hose connection, the valve and pipe connec-
tions, and the pipes.
Locate and correct the leaks, or contact your
gas supplier.
There is carbon build-up. There is dirt or lm on the reector and
ame screen.
Clean the reector and ame screen.

Questions, problems, missing parts? Before returning to the store,
call Hampton Bay Customer Service
8 a.m.-7 p.m., EST, Monday-Friday, 9 a.m. - 6 p.m., EST, Saturday
1-855-HD-HAMPTON
HAMPTONBAY.COM
Retain this manual for future use.
Table of contents
Other HAMPTON BAY Patio Heater manuals

HAMPTON BAY
HAMPTON BAY PG139HDS User manual

HAMPTON BAY
HAMPTON BAY HDMIRAGECO PC User manual

HAMPTON BAY
HAMPTON BAY PG169T-B User manual

HAMPTON BAY
HAMPTON BAY PG171H-B User manual

HAMPTON BAY
HAMPTON BAY HDMIRAGECO PC User manual

HAMPTON BAY
HAMPTON BAY SRPH78 User manual

HAMPTON BAY
HAMPTON BAY HD10 User manual

HAMPTON BAY
HAMPTON BAY PH01-SS User manual
Popular Patio Heater manuals by other brands

Alice's Garden
Alice's Garden ARCTIC PCG230KD manual

Sunred
Sunred Parasol 2000 Series manual

UBERHAUS DESIGN
UBERHAUS DESIGN BSH-A-SSPC Operator's manual

EvenGlo
EvenGlo GA 301 H Installation, operation & maintenance manual

Ayce
Ayce HA-55 MARSEILLE Original instructions

Schaefer
Schaefer Zubri Z1-12 user manual