2
Cuidado y limpieza
Solución de problemas
Garantía
□Limpiar el panel solar con un paño húmedo. No usar ningún producto químico ni abrasivo.
Problema Solución
Se acorta el tiempo de funcionamiento de las
luces por la noche.
□La batería no está bien cargada. Ubicar la lámpara solar en un área donde pueda recibir todos los días
el máximo de luz solar plena y directa.
□Las baterías están llegando al nal de su vida útil. Reemplazar las baterías viejas con nuevas.
Las luces no encienden al anochecer. □El panel solar está instalado cerca de otras fuentes de luz. Cambiar la ubicación del panel solar o
desactivar las otras fuentes de luz.
El fabricante garantiza que este producto no presentará defectos debido a materiales o fabricación defectuosos, durante dos (2) años. Esta garantía es válida sólo
para el comprador original y sólo cubre productos en uso y funciones normales. Si se descubre algún defecto en este producto, la única obligación y solución
exclusiva del fabricante, a criterio del mismo, será reparar o reemplazar el producto, siempre y cuando el defecto no sea resultado de un mal uso, abuso, accidente,
modicaciones, alteraciones, negligencia o manejo indebido. Esta garantía no cubre ningún producto mal instalado, congurado o usado de algún modo no acorde
con las instrucciones adjuntas. Esta garantía no cubre fallas del producto como resultado de accidente, mal uso, abuso, negligencia, modicaciones o instalación
defectuosa, ni cualquier otra falla no relacionada con defectos de fabricación. Esta garantía no se aplica al acabado de ninguna parte del producto, como la supercie,
ni al deterioro por condiciones ambientales, que se considera desgaste normal. El fabricante no garantiza y rechaza especícamente cualquier garantía, explícita o
implícita, o de idoneidad del producto para determinado propósito, que no sea la garantía indicada aquí. El fabricante rechaza especícamente toda obligación y no
será responsable por ninguna pérdida o daño directo o indirecto, incluyendo todo costo de mano de obra y los gastos por reposición o reparación del producto.
Comunicarse con el equipo de servicio al cliente al 1-855-HD-HAMPTON o visitar www.hamptonbay.com.
Ensamblaje e instalación (continuación)
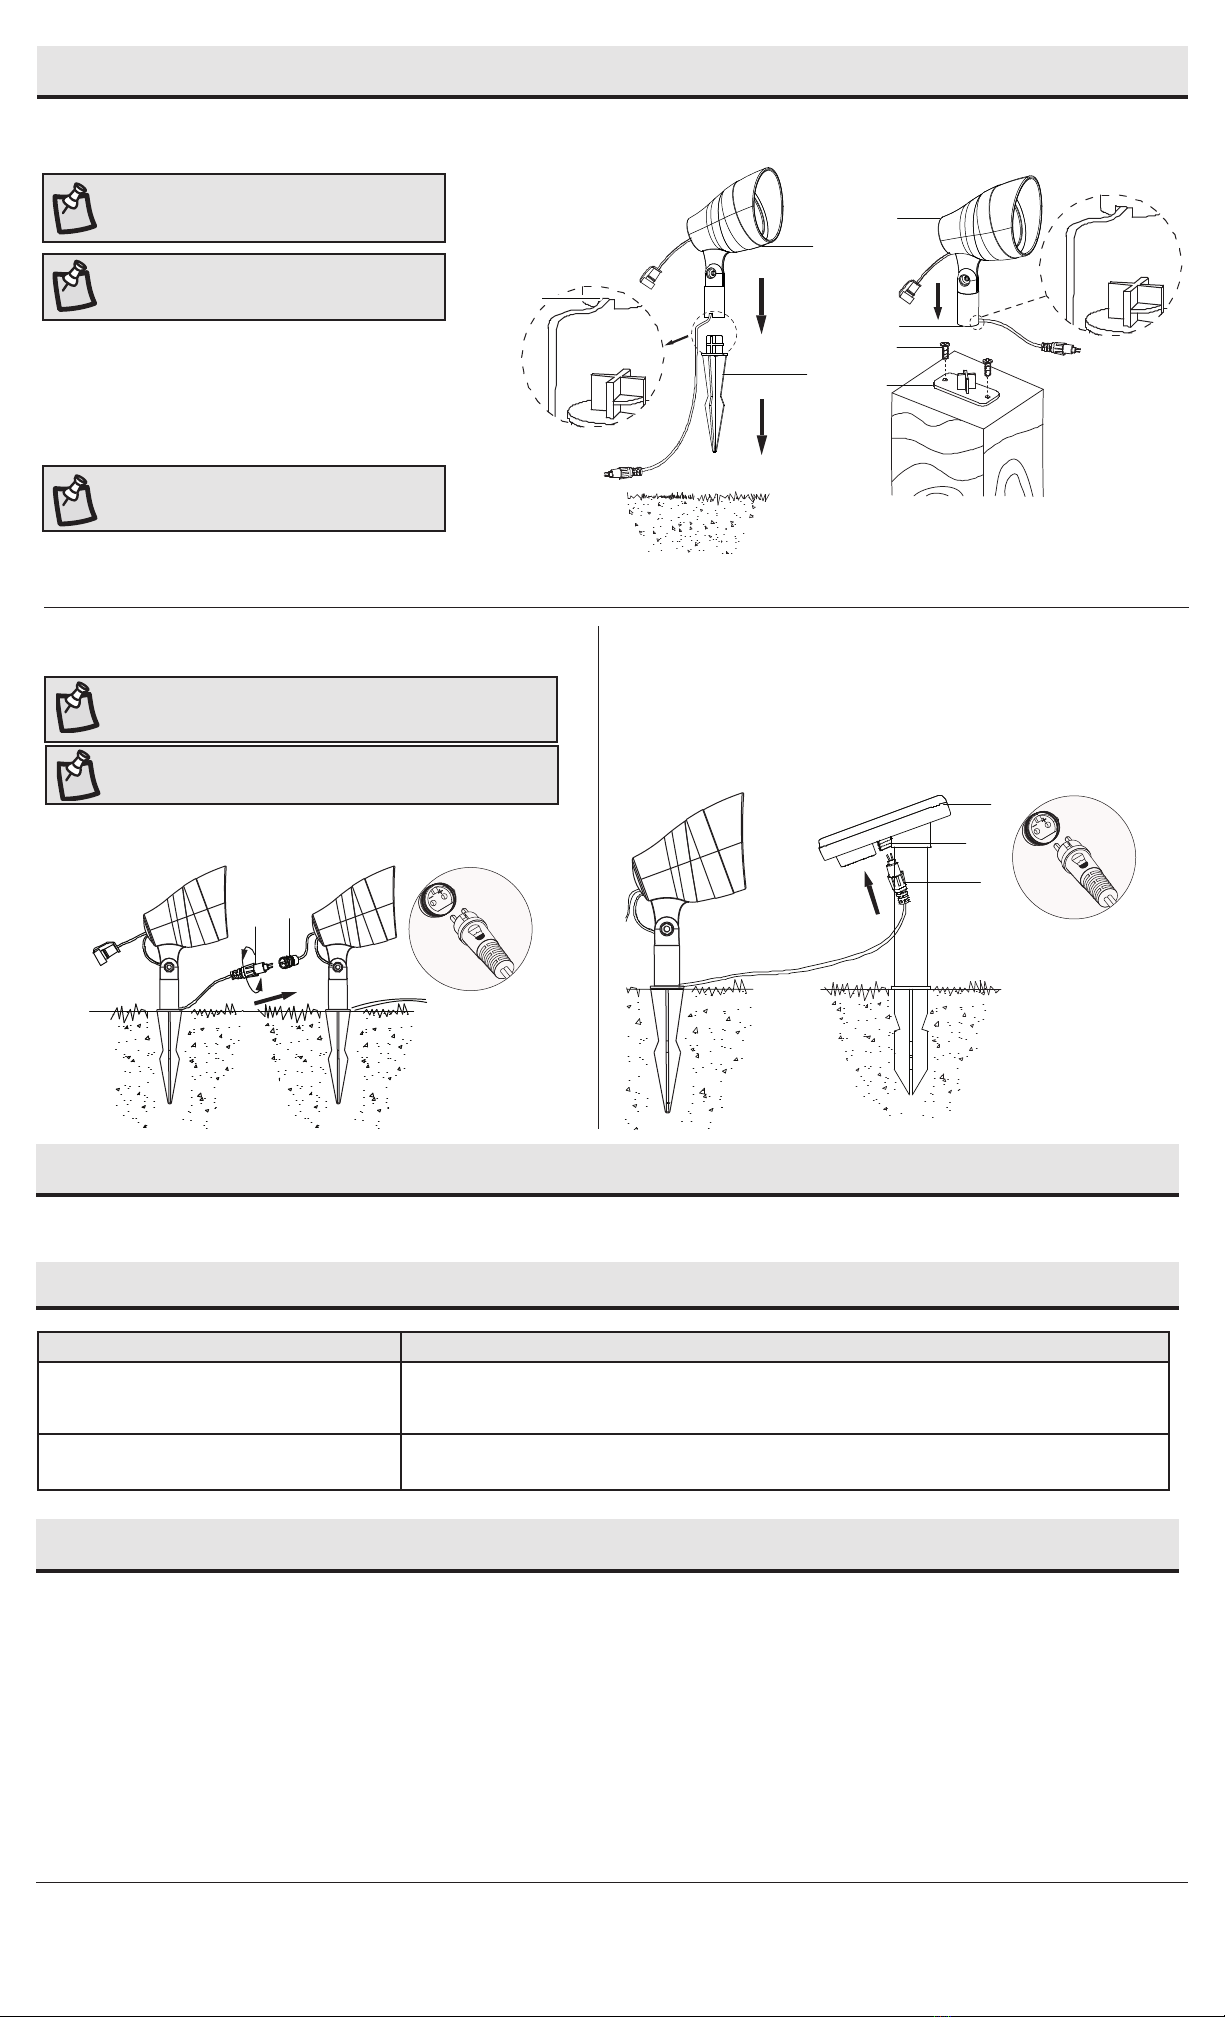
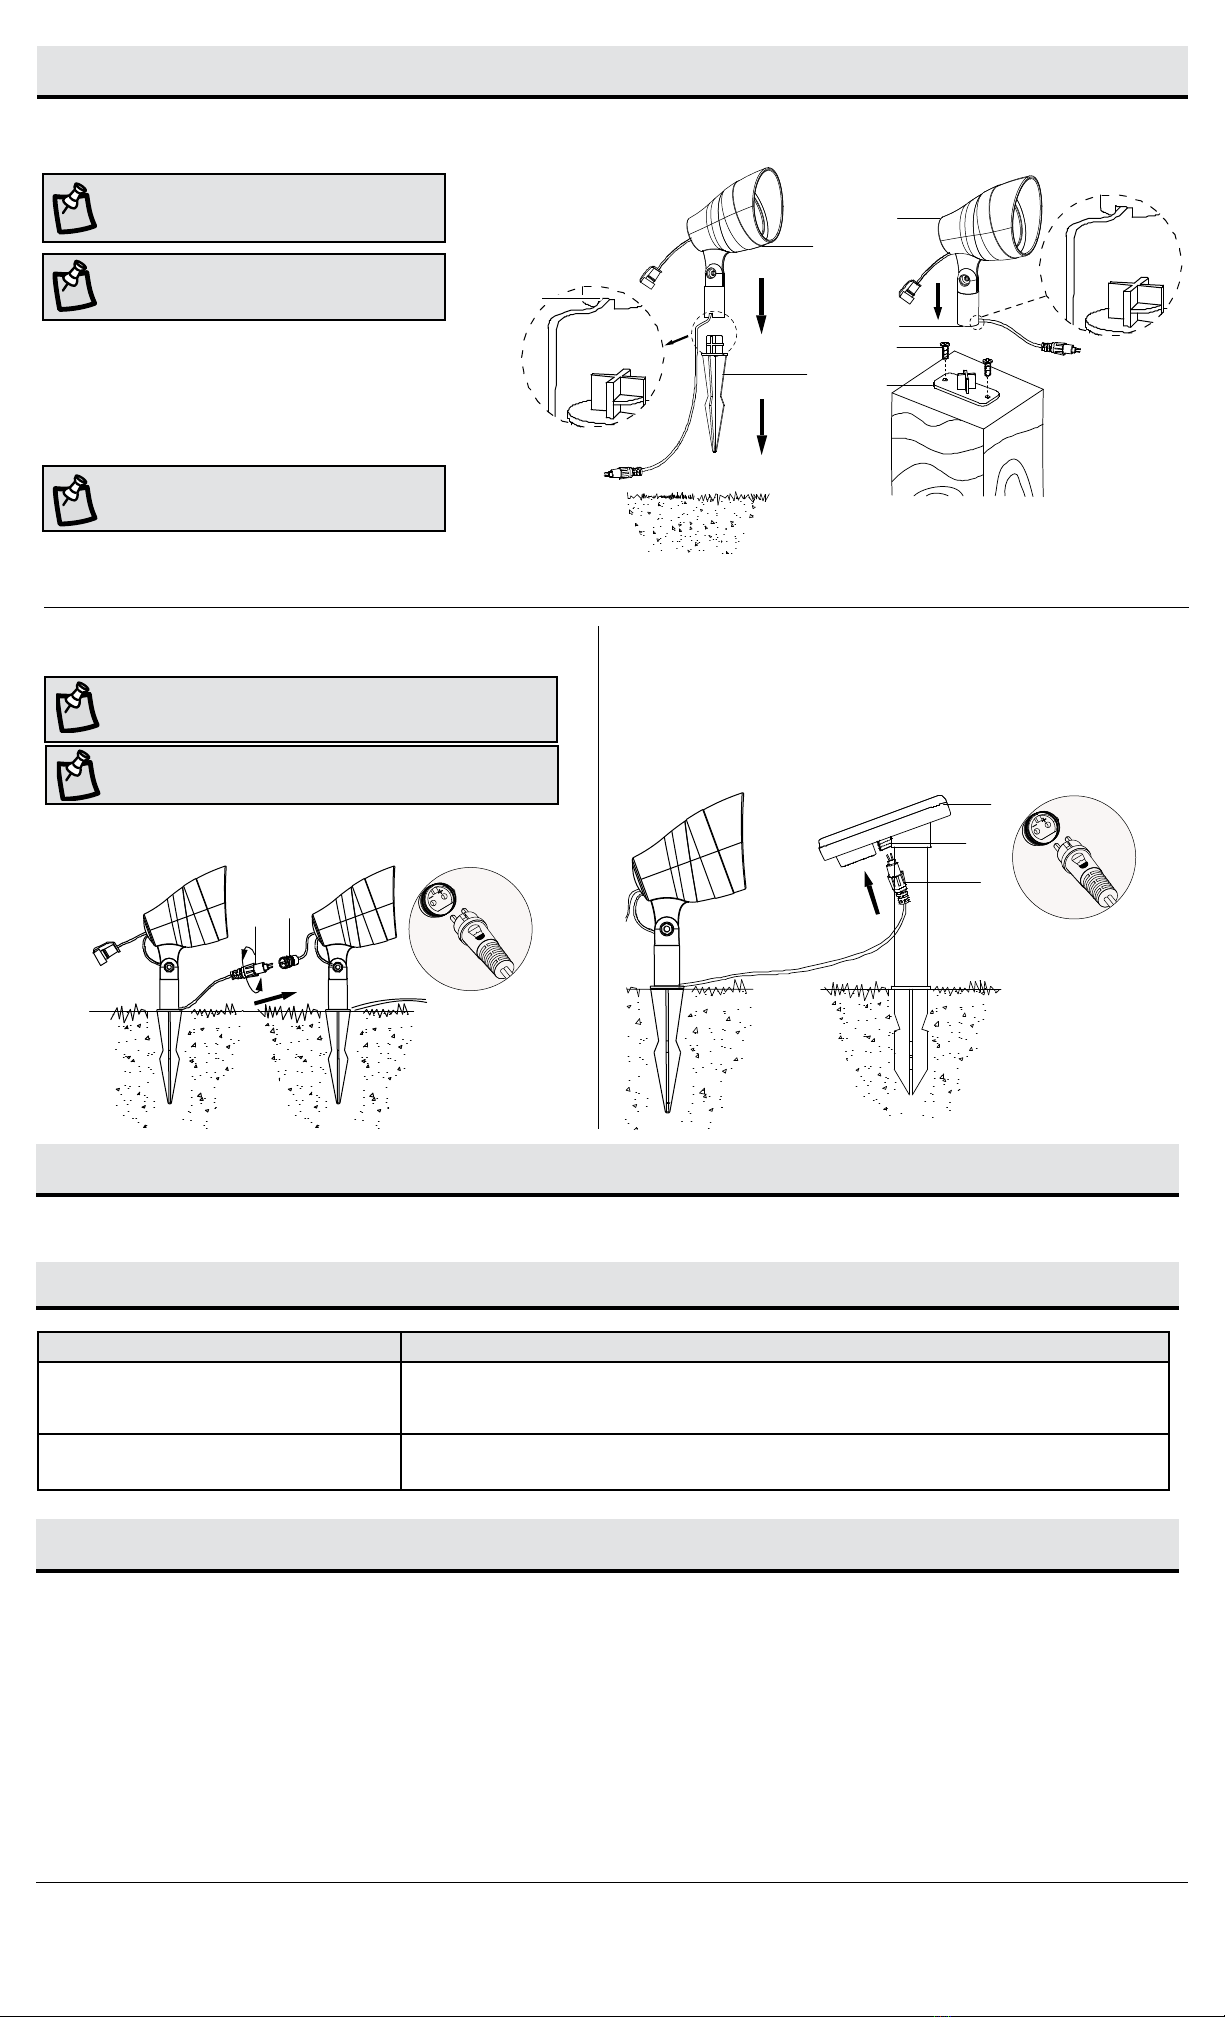
NOTA: Cada foco tiene un cable superior (1) y otro inferior (2).
Cómo conectar los focos Cómo conectar los focos al panel solar
□Conectar los focos en serie enroscando el cable inferior (2) hacia la
derecha en el cable inferior (1) de la siguiente lámpara.
□Conectar el último foco de la serie al panel solar (E) enroscando
el cable inferior (1) hacia la derecha en el enchufe de salida de
la parte inferior del panel solar (2) y asegurando la conexión de
positivo (+) con positivo (+) y negativo (-) con negativo (-).
4 5
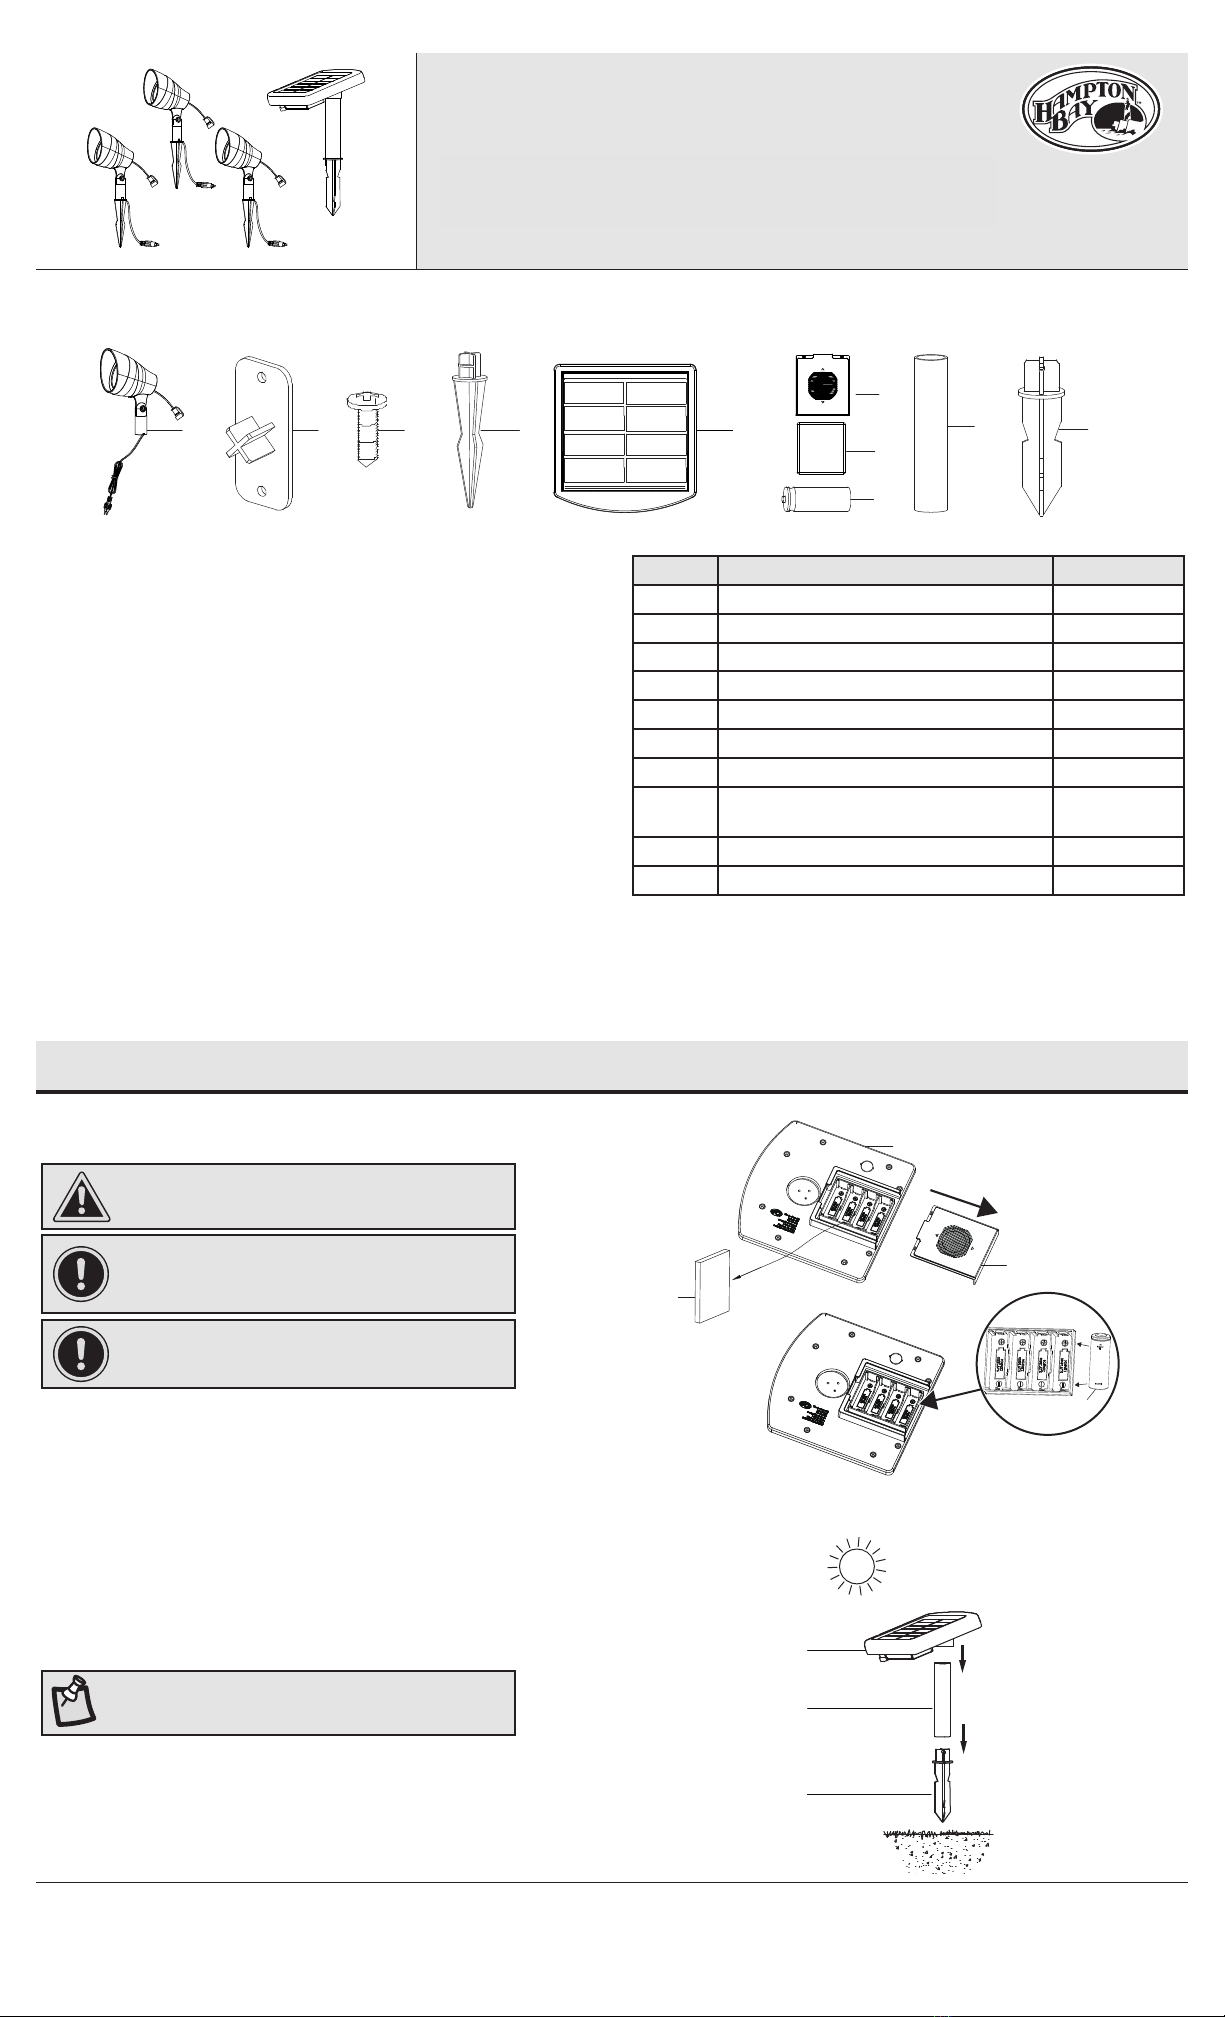
NOTA: No usar un martillo. Si el suelo está duro, usa
agua para ablandarlo o una cuchara de albañil para
aojar la tierra.
NOTA: Asegurar que el cable en la parte inferior del cabezal
del foco encaje bien en la muesca (AA) de la base del poste
del foco para evitar que se pellizque el cable.
Cómo instalar el foco en la tierra
(Opción 1)
□Fijar el cabezal del foco (A) rmemente a la estaca (D).
□Introducir rmemente en el suelo el conjunto del foco.
3a
NOTA: Asegurar que el cable en la parte inferior del cabezal
del foco encaje bien en la muesca (AA) de la base del poste
del foco para evitar que se pellizque el cable.
Cómo instalar en un poste
de madera (Opción 2)
□Montar el jador (B) en el poste usando los tornillos incluidos (C).
□Fijar el cabezal del foco (A) rmemente al jador (B).
3b
Opción 1 Opción 2
E
2
1
+
-
21+
-
A
AA
D
A
C
AA
B
NOTA: Garantizar que el enchufe y el portabombillas se conecten
correctamente, positivo (+) con positive (+) y negativo (-) con negativo (-).