HAMPTONBAY.COM
Llama al 1-855-HD-HAMPTON para asistencia adicional.
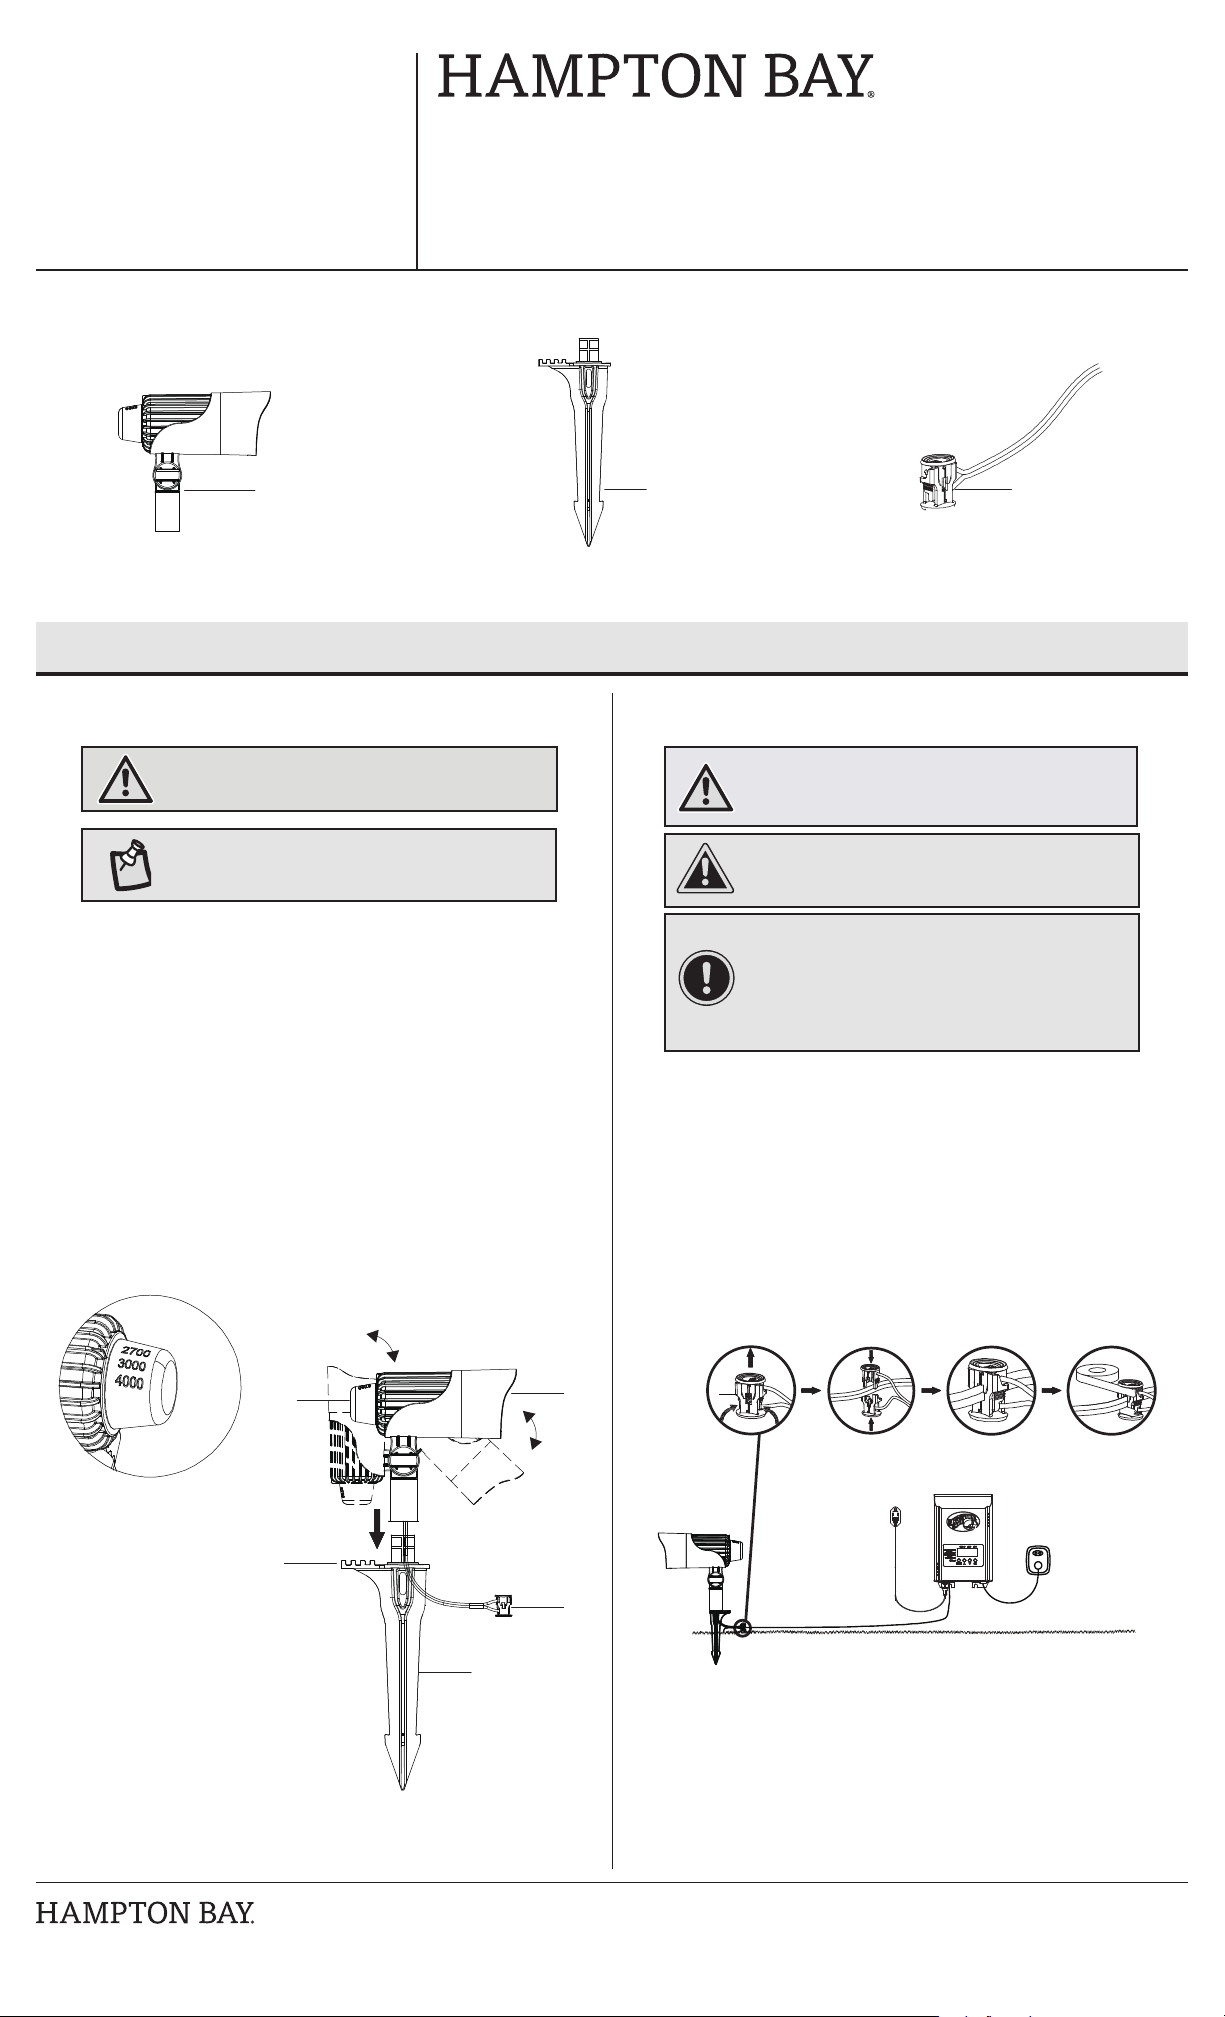
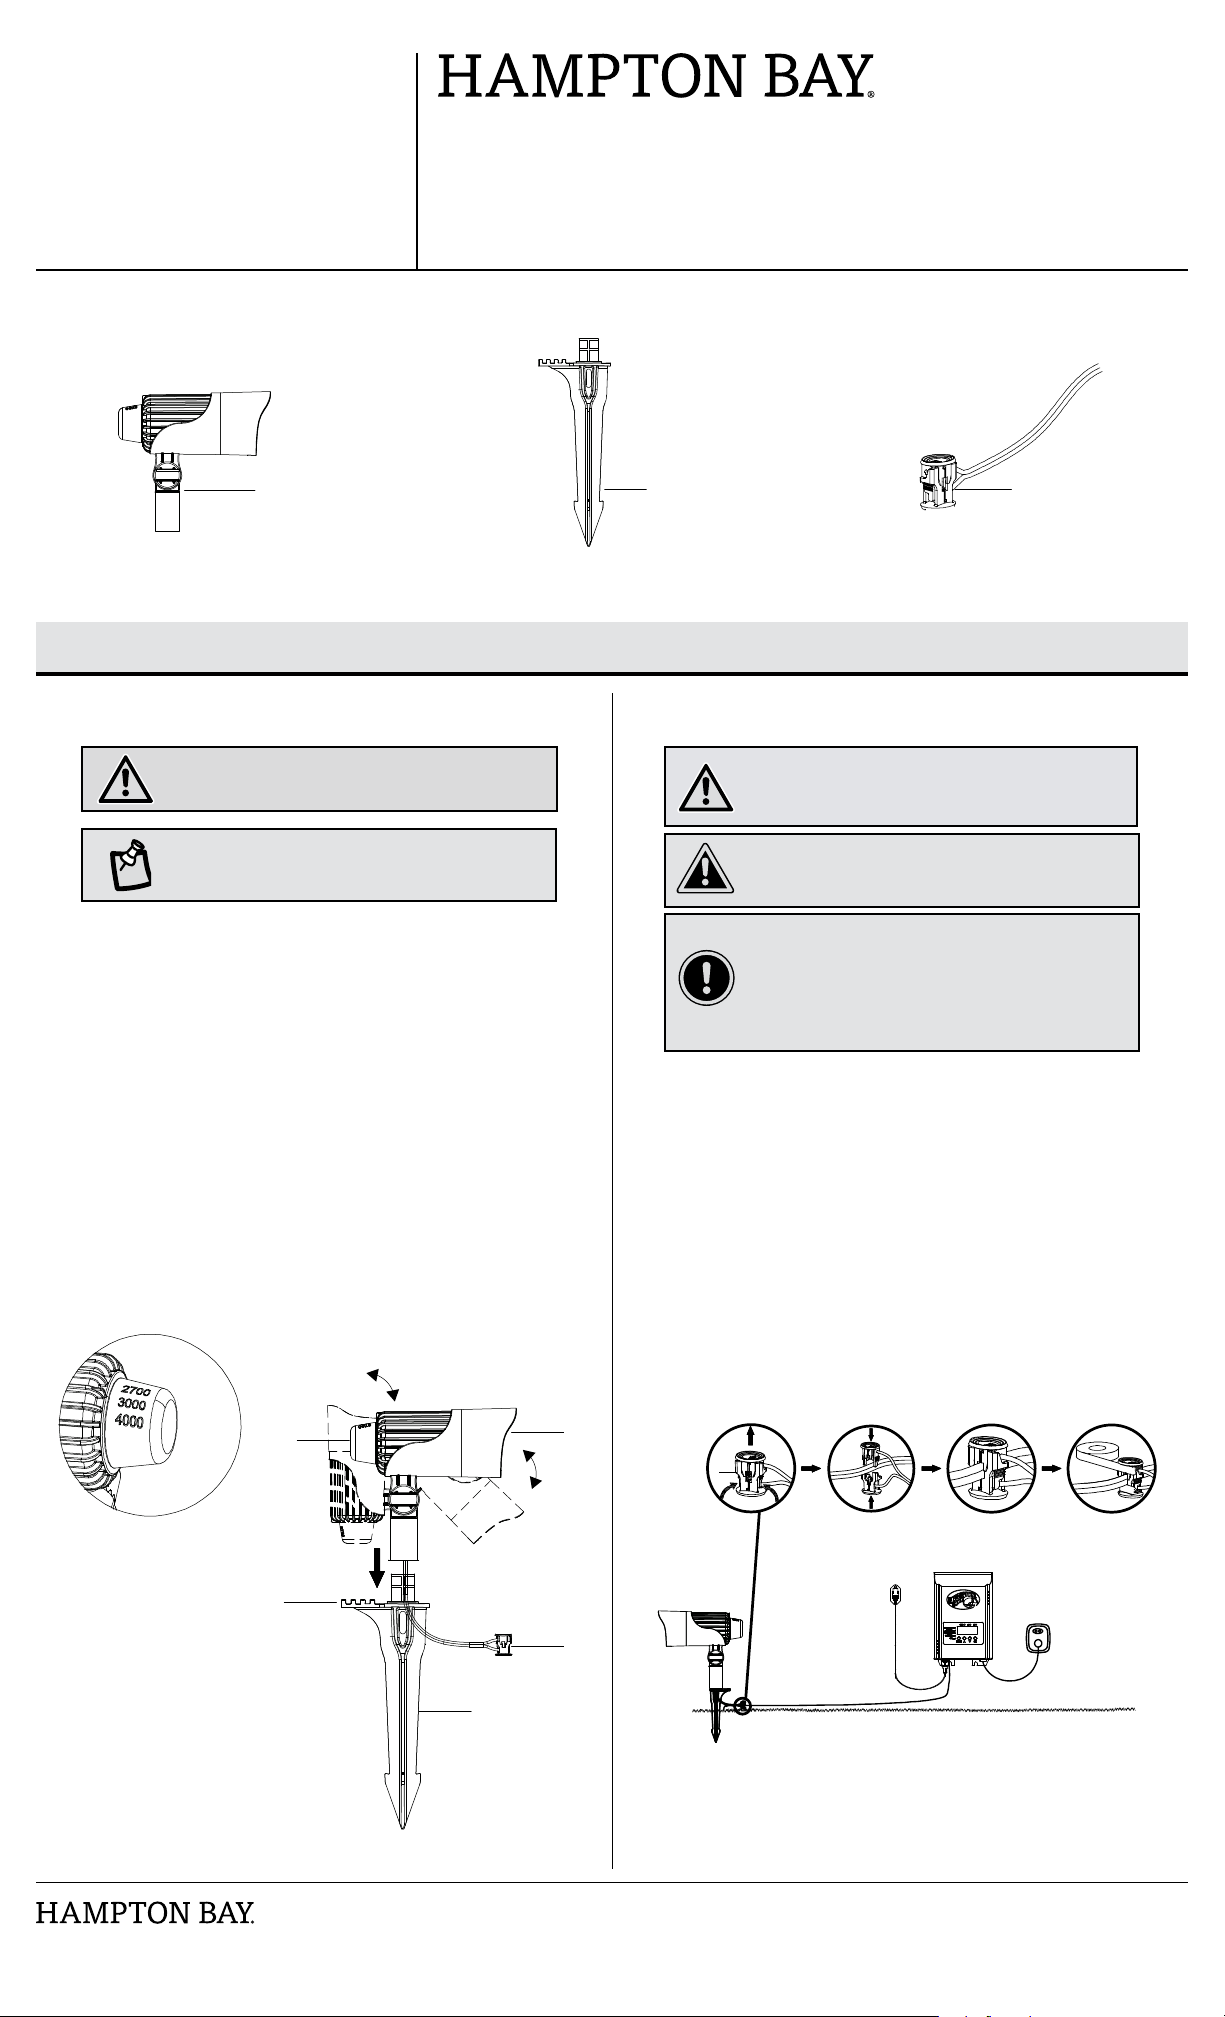
Selección del cable
ENCHUFE DE 12 V Longitud del cable
Vataje total de la lámpara De 0 a 15.2 metros De 15.5 a 30.5 metros De 30.8 a 45.7 metros
De 0 a 60 W Calibre 16 AWG Calibre 16 AWG Calibre 14 AWG
De 61 a 120 W Calibre 16 AWG Calibre 14 AWG Calibre 12 AWG
De 121 a 180 W Calibre 14 AWG Calibre 12 AWG NO SE RECOMIENDA
De 181 a 240 W Calibre 14 AWG Calibre 12 AWG NO SE RECOMIENDA
De 241 a 300 W Calibre 12 AWG NO SE RECOMIENDA NO SE RECOMIENDA
Transformador de 600 W = (2x300 W) Calibre 12 AWG NO SE RECOMIENDA NO SE RECOMIENDA
Transformador de 900 W = (2x300 W) Calibre 12 AWG NO SE RECOMIENDA NO SE RECOMIENDA
NOTA: La mayoría de las lámparas para jardín LED pueden funcionar con iluminación completa desde 9 V hasta 6 V. Es
posible instalar líneas más largas con lámparas LED que superen las especicaciones mostradas en las tablas anteriores.
Solución de problemas
Garantía
Problema Causa posible Solución
Las lámparas no
encienden.
□No hay corriente eléctrica.
□Hay un cable desconectado o roto.
□La conguración del transformador es
incorrecta.
□Revisa el tomacorriente y asegúrate de que no se ha fundido un
cortacircuitos o circuito con interruptor diferencial.
□Sigue los cables de la lámpara para garantizar una conexión continua hasta
el transformador.
□Revisa la conguración del transformador.
Las luces parpadean. □Está suelto un conector de cable que va a la
lámpara.
□Aprieta el conector de cable y asegúrate de que los contactos de metal
perforen el aislamiento en el cable de bajo voltaje del transformador.
Las luces parpadean (en
todas las lámparas).
□Hay una conexión suelta en el transformador. □Desconecta el transformador del tomacorriente y revisa los postes de
conexión positivo y negativo. Cada cable debe estar bien atornillado y sin
contacto con ningún otro.
QUÉ CUBRE LA GARANTÍA
El fabricante garantiza que esta lámpara estará libre de defectos materiales o de fabricación por un período de cinco (5) años a partir de la fecha de compra. Esta
garantía es válida solo para el comprador original y cubre solo productos en uso y servicio normales. Si este producto resultara defectuoso, la única obligación y
solución exclusiva del fabricante, será reparar o reemplazar el producto, a su entera discreción, siempre que el producto no haya sido dañado por uso indebido, abuso,
accidente, modicación, alteración, negligencia o manejo indebido.
QUÉ NO CUBRE LA GARANTÍA
Esta garantía no cubre ningún producto instalado, congurado o usado de cualquier manera que no cumpla con las instrucciones adjuntas al producto. Esta garantía no
cubre fallas del producto a consecuencia de un accidente, uso indebido, abuso, negligencia, modicación o instalación defectuosa, o cualquier otra falla no relacionada
con defectos materiales o de fabricación. Esta garantía no se aplica al acabado de ninguna parte del producto, como la supercie, ni al deterioro por condiciones
ambientales, ya que eso se considera un desgaste normal.
El fabricante no garantiza y rechaza en especial toda garantía, ya sea implícita o explícita, de la idoneidad del producto para un propósito particular que no esté
comprendido en esta garantía. El fabricante se exime especícamente de cualquier obligación y no es responsable por pérdidas o daños directos o indirectos,
incluyendo cualquier costo de mano de obra o gastos relacionados con el reemplazo o reparación de dicho producto.
Comunícate con el equipo de servicio al cliente al 1-855-HD-HAMPTON o visita www.HamptonBay.com
Mantenimiento y limpieza
□Antes de limpiar la lámpara, desconecta la electricidad apagando el cortacircuitos o quitando el fusible en la caja de fusibles.
□Para limpiar la lámpara, usa un paño seco o ligeramente humedecido.
□No uses limpiadores con productos químicos, solventes o abrasivos fuertes para no dañar la lámpara.