Hasler HJ500 User manual
Mailing Systems
And Solutions
HASLER
America’s better choice
®
An ISO 9001 Quality System
Certified company
Operating Guide
HJ500 Inkjet Printer

Model Number ____________________
Serial Number ____________________
Dealer Phone ____________________
Hasler®, Inc.
19 Forest Parkway
Shelton, CT 06484-6140
TEL 800/793-0180
203/926-1087
FAX 203/929-6084
E-Mail [email protected]
Web: http://www.haslerinc.com

CUSTOMER SURVEY FORM HJ500 Operating Guide
Revision: 06/2004 Form 51016
If you liked this manual ....... tell us! If you did not like this manual ....... tell us!
We at Hasler®, Inc. would like to hear your comments about this manual.
Fill out the following form and mail to: Jim Koonz or FAX to: Jim Koonz
P.O. Box 858 (203)-925-2441
19 Forest Parkway
Shelton, CT 06484-0904
Rate The Manual
Check A Box
What did you like:
What didn’t you like:
Are there any improvements or features that you would like to see added to the product?
Optional Information: Name THANKS
This way we can We
can send you a new Phone Number appreciate
manual when we your
update it Company response
Very
Good
Good Fair Poor Very
Poor


SAFETY PRECAUTIONS
THIS EQUIPMENT PRESENTS NO PROBLEM WHEN USED PROPERLY. HOWEVER,
CERTAIN SAFETY RULES SHOULD BE OBSERVED WHEN OPERATING THE HASLERJET 500
SYSTEM.
BEFORE USING THE PRINTER, YOU SHOULD READ THIS MANUAL CAREFULLY AND
FOLLOW THE RECOMMENDED PROCEDURES, SAFETY WARNINGS, AND INSTRUCTIONS:
??Keep hands, hair, and clothing clear of rollers and other moving parts.
??Avoid touching moving parts or materials while the machine is in use. Before clearing a jam, be sure machine
mechanisms come to a stop.
??Always turn off the machine before making adjustments, cleaning the machine, or performing any maintenance covered
in this manual.
??Use the power cord supplied with the machine and plug it into a properly grounded wall outlet located near the machine
and easily accessible. Failure to properly ground the machine can result in sever personal injury and/or fire.
??The power cord and wall plug is the primary means of disconnecting the machine for the power supply.
??DO NOT use an adapter plug on the line cord or wall outlet.
??DO NOT remove the ground pin from the line cord.
??DO NOT route the power cord over sharp edges or trapped between furniture.
??Avoid using wall outlets that are controlled by wall switches, or shared with other equipment.
??Make sure there is no strain on the power cord caused by jamming between the equipment, walls or furniture.
??DO NOT remove covers. Covers enclose hazardous parts that should only be accessed by a qualified service
representative. Report any damage of covers to your service representative.
??This machine requires periodic maintenance. Contact your authorized service representative for required service
schedules.
??To prevent overheating, do not cover the vent openings.
??Use this equipment only for its intended purpose.
In addition, follow any specific occupational safety and health standards for your workplace or area.
This manual is intended solely for the use and information of Hasler Inc., its designated agents, customers, and their
employees. The information in this guide was obtained from several different sources that are deemed reliable by all industry
standards. To the best of our knowledge, that information is accurate in all respects. However, neither Hasler Inc. nor any of
its agents or employees shall be responsible for any inaccuracies contained herein.
HASLERJET is a registered trademark of Hasler Inc..
Hewlett-Packard is a registered trademark of Hewlett-Packard Corporation.
Windows 95 and Windows 98 are registered trademarks of Microsoft Corporation.
IBM is a registered trademark of International Business Machines.
All other trademarks are the property of their respective holders.
All rights reserved. No part of this book may be reproduced or transmitted in any form or by any means, electronic or mechanical, including photocopying,
recording, or any information storage and retrieval system, without permission in writing from the Publisher.


i
Table of Contents
Section 1 –Getting Acquainted 1
The HaslerJet 500 1
The Control Panel 3
Section 2 –Installing the HaslerJet 500 5
Choose a Location 5
Connecting the HaslerJet 500 5
Installing the Inkjet Cartridges 6
Setting up the Feed 6
Installing the Software on the Computer 7
Section 3 –Quick Start 9
Create a Layout 9
Print the Job 10
Section 4 –Printer Operation 11
Running a Job 11
Printer Control Panel 12
Printer Control Panel Messages 14
Types of Media 14
Databases 15
Section 5 –Maintenance 17
The Inkjet Cartridge 17
Jams in the HaslerJet 500 Printer 19
Replacing the Sheet Separators 19
Replacing the Feed Rollers 20
Cleaning 21
Section 6 –Trouble Shooting Guide 23
Inkjet Cartridges 23
HaslerJet 500 Printer 24
Appendices 25
Specifications 25
Supplies and Optional Hardware 27
Index 29

ii
Notes

1
Section 1 –Getting Acquainted
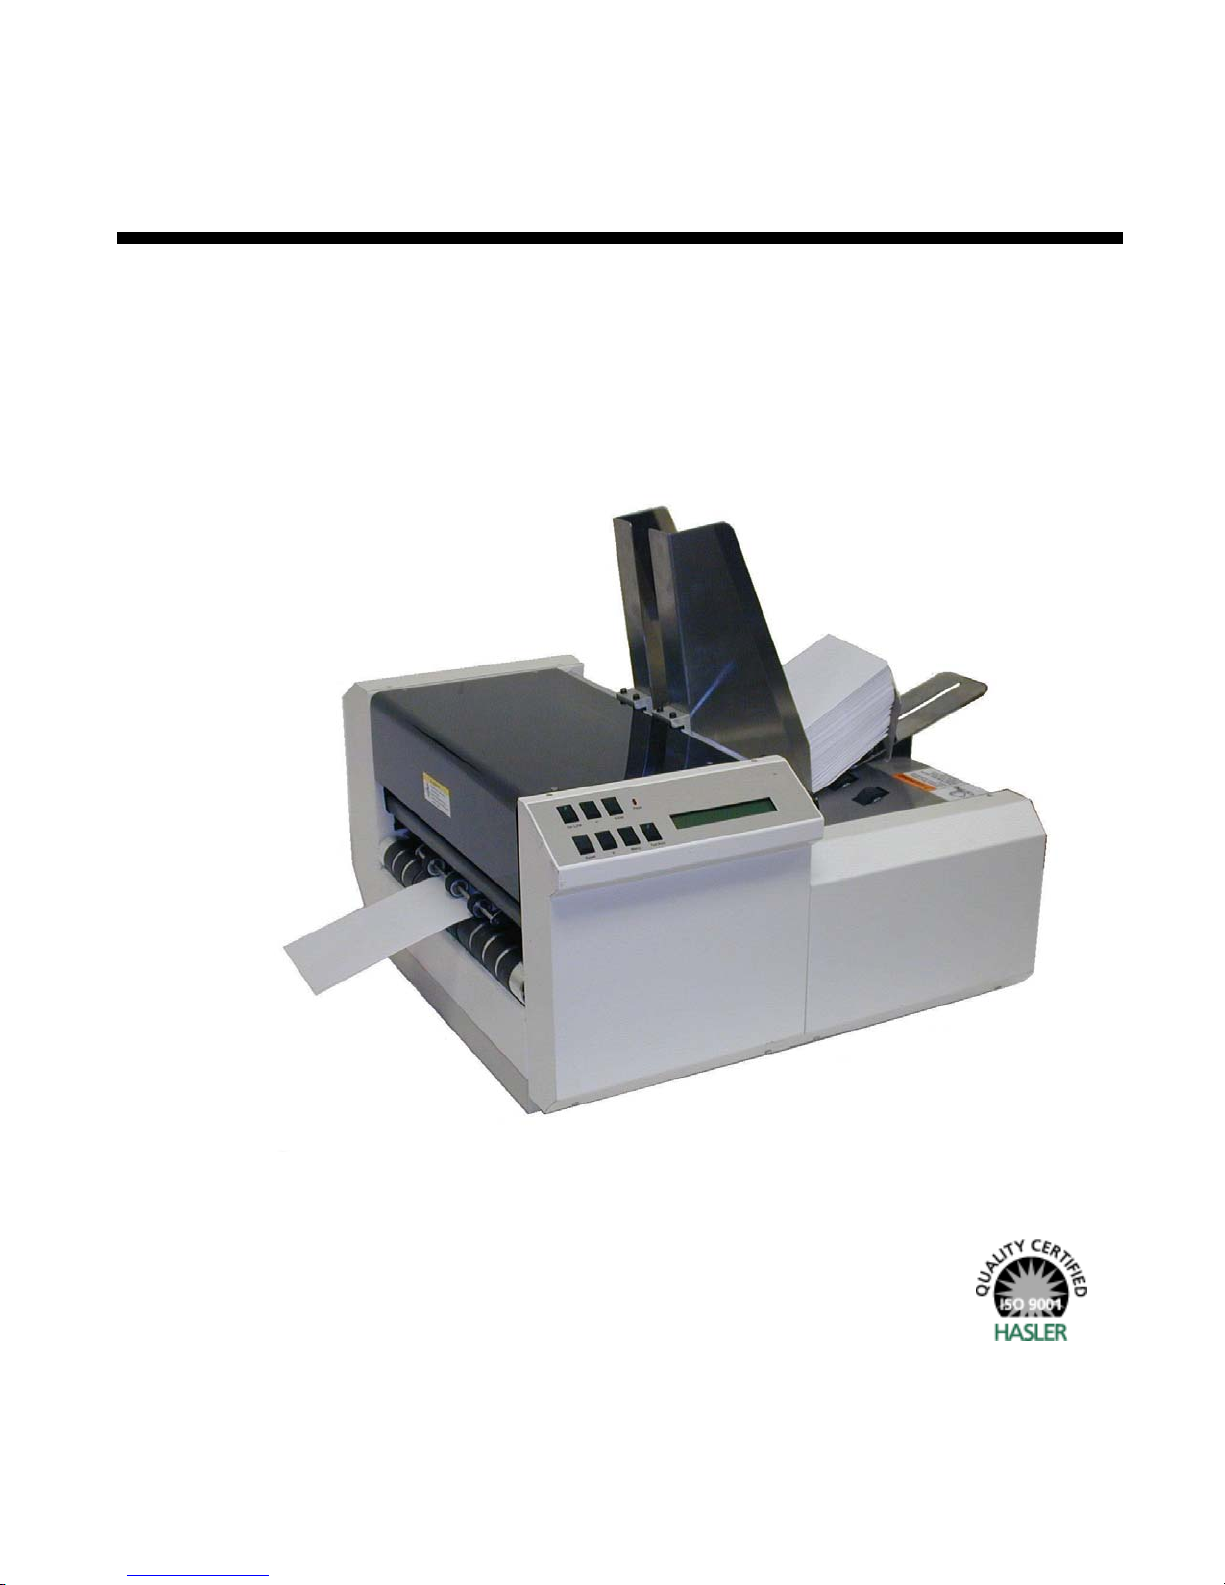
HASLERJET 500
The HaslerJet 500 is a high-speed printing and addressing systems that can print addresses,
bar codes, return addresses, bitmapped graphics, and special messages using TrueType
scaleable fonts simultaneously on up to 20,000 postcard (3.5 X 5.5 inch) mail pieces per hour.
1CONTROL PANEL –See page 3
2MEDIA THICKNESS KNOB –Controls the height of the printheads to obtain proper distance from the
media.
3SHEET SEPARATOR LOCKING LEVER –This lever locks and releases the sheet separators Item 3.
4SHEET SEPARATORS –There are four sheet separators that help separate the media as it is being fed.
(See Setting Up the Job page 6)
5SIDE GUIDES –The side guides are used to maintain side to side registration.
6REAR-GUIDE -The rear-guide is used to hold the media against the sheet-separators for proper feeding.
7POWER RECEPTACLE –The power receptacle contains the main power switch and the fuses.
8MOTOR CIRCUIT BREAKER –This circuit breaker protects the motor from overloads.

2
1PRINT HEAD COVER –Shown open for illustration purposes, but should be in the closed position for
running.
2PARALLEL PORT –The printer cable from your computer should be connected here.
3MEDIA TRANSPORT BELTS –The media is transported under the printheads on these belts.
4PRINTHEAD CARRIAGE –The HaslerJet 500 has fiver printheads. Head 1, 2, and 3 are banked
together on the rail. Head 4 and 5 are banked together and share the same rail and are positioned
opposite and independent of the other heads.
You can move the two printing banks from side to side to position the information properly on the media
with the following restrictions. Heads 1, 2, and 3, print a band 1-1/2 inch wide and may be positioned
anywhere within a range of 2-1/2 inches from the Control Panel side of the printer to 4 inches from the
opposite side of the printer. Head 4 and 5 can be positioned to within 1-5/16-inches of head 3 and to
within 2-1/2 inch of the non-operator side of the printer.
5MEDIA SENSOR –The media sensor is located just before the printheads and senses the media to start
the printing action.
Table of contents
Other Hasler Printer manuals


