Haussmann SHT18-4.0 User manual

1
20" ELECTRIC HEDGE TRIMMER
Operators' Manual p.2
TAILLE-HAIE ÉLECTRIQUE 20 PO
Guide de I'utilisateur p.13
MODEL/MODÈLE:SHT18–4.0
59595086
CUSTOMER SERVICE / SERVICE À LA CLIENTÈLE: 1-866-206-0888
Our Customer service staff is available to help you. For help with product assembly, to report damaged or missing parts, or for any other
information, please call our toll-free number: 1-866-206-0888.
Register your product
We invite you to register your product online to make future communications easier. To do so, simply visit our website
www.haussmanntools.com.
SAVE THIS MANUAL
You will need this manual for safety instructions, operating procedures, and warranty. Put it and the original sales invoice in a safe, dry place
for future reference.
Notre personnel du service à la clientèle est disponible pour vous aider. Pour obtenir de l’aide pour le montage de votre produit, pour signaler
des pièces endommagées ou manquantes, ou pour toute autre information, veuillez composer notre numéro sans frais: 1-866-206-0888.
Enregistrez votre produit
Nous vous invitons à enregistrer votre produit en ligne an de faciliter les communications; pour ce faire, veuillez visiter le
www.outilshaussmann.com
CONSERVEZ CE GUIDE
Vous aurez besoin de ce guide pour les règles de sécurité, le fonctionnement et la garantie. Conservez-le avec votre facture d'origine dans
un endroit sûr au sec pour référence future.

1
1
2
9
34
67
8
5
Fig. 1
Nomenclature des pièces
1.Poignée arrière
2.Barre d'acier
3.Gâchette avant
4.Poignée avant
5.Garde de protection
6.barre
7.Lame de coupe
8.Lame n protecteur
9.Gaine de lame
ENGLISH
Parts list
1.Rear handle
2.Rear switch trigger
3.Front switch trigger
4.Front handle
5.Safety guard
6.bar
7.Cutting blade
8.Blade end protector
9.Blade sheath

2
Safety symbols…………………………………………………………………
Safety instructions ………………………………………………………………
Application ………………………………………………………………………
Technical data ……………………………………………………………………
Assembly…………………………………………………………………………
Operation ………………………………………………………………………
Maintenance ……………………………………………………………………
Warranty…………………………………………………………………………
Parts List…………………………………………………………………………
Schematic Drawing………………………………………………………………
SAFETY SYMBOLS
Warning
Do not expose to rain or use in damp locations
Always wear safety goggles or safety glasses with
side shields and a full face shield when operating this
product
Always wear non-slip, heavy-duty protective gloves
when operating this product
Always keep bystanders at least 50ft.(15m)away
Safety class II
Always wear non-slip safety footwear when operating
this product
To reduce the risk of injury, user must read and
understand operator’s manual before using this
product
P2
P3
P6
P7
P7
P8
P9
P10
P11
P12
ENGLISH
TABLE OF CONTENTS
15
WARNING!Please read all of the safety and operating instructions
carefully before using this tool. Please pay particular attention to all
sections of this user manual that carry warning symbols and notices.

3
SAFETY INSTRUCTIONS
Save all warnings and instructions for future reference
To use this tool properly, you must observe all safety warnings, assembly,
operating and maintenance instructions in this manual. Always follow
regulations regarding use in the area the tool is being used. Do not allow
children, or a person physically incapable of operating the tool.Always
be aware, and take precautions against potential hazards during use
and maintenance of the tool. These include, but are not limited to, the
following:
Keep the work area clean and tidy. Cluttered areas and benches invite
accidents and injury.
Consider the environment which you are working. Do not use power
tools in damp or wet locations. Keep the work area well lit. Do not
expose power tools to rain and high humidity. Do not use power tools in
the presence of ammable liquids or gases.
Keep visitors away from the work area, All visitors and onlookers,
especially children and infirm people should be kept well away from
where you are working. Do not let others in the vicinity make contact
with the tool.
Store tools safely. When not in use, tools should be stored in a dry,
high place or locked up out of reach.
Do not force the tool for the job. The tool will do the job better and safer
working at the rate for which it was designed.
Use the correct tools for the job. Do not force small tools or attachments
to do the job best handled by a heavier duty tool. Never use a tool for a
purpose other than that for which it was intended.
Dress correctly. Do not wear loose clothing or jewelry. They can be
caught in moving parts. Rubber gloves and non-slip footwear are
recommended when working outdoors. If you have long hair, wear a
protective hair covering.
ENGLISH
WARNING!Read all safety warnings and all instructions. Failure to follow
all warnings and instructions may result in electric shock, re or serious
Injury.
WARNING!When using power tools, basic safety precautions should
always be taken to reduce the risk of fire, electric shock, and personal
injury. Always follow the safety instructions in this manual.
Contact with the blade.
Kickback.
Blade fracture.
Catapulting of blade pieces.
Damage to eyes if effective safety glasses of protective shields are not worn.
Damage to ears if effective ear protection is not worn.
1.
2.
3.
4.
5.
6.
7.

4
Electrical safety
A. For all double-insulated appliances
1) Replacement Parts
When servicing use only identical replacement parts.
2) Polarized Appliance Connections
To reduce the risk of electric shock, this appliance has a polarized
plug (one blade is wider than the other) and will require the use of a
polarized extension cord. The appliance plug will t into a polarized
extension cord only one way. If the plug does not fit fully into the
extension cord, reverse the plug. If the plug still does not t, obtain
a correct polarized extension cord. A polarized extension cord will
require the use of a polarized wall outlet. This plug will t into the
polarized wall outlet only one way. If the plug does not t fully into
the wall outlet, reverse the plug. If the plug still does not t, contact
a qualied electrician to install the proper wall outlet.
Use safety accessories. Safety glasses and ear muffs should always
be worn
Do not overreach. Keep your footing secure and balanced at all times.
Look after your tools. Keep tools clean and sharp for better and
safer performance. Follow the instructions regarding lubrication and
accessory changes. Keep tools handles dry, clean and free from oil and
grease.
Stay alert. Watch what you are doing. Use common sense. Do not
operate a power tool you are tired or under the influence of alcohol,
drugs or medication that cause drowsiness.
Check for damaged parts. Before using a tool, check that there are no
damaged parts. If a part is slightly damaged, carefully determine it will
operate properly and perform its intended function. Check for alignment
of moving parts, binding of moving parts, breakage of parts, proper
mounting and any other conditions that may affect the operation of the
tool. A guard or other part that is damaged should be properly repaired
or replaced by an authorized service facility, unless otherwise indicated
in this manual. Defective switches must be replaced by an authorized
service facility. Do not use a tool if the switch does not turn the tool ON
and OFF correctly.
Be careful of the cords or cables hidden in the shrubs.
Guard against electric shock. Prevent body contact with grounded
objects such as water pipes.
Always replace damaged parts with approved identical parts. Use an
authorized service facility to install replacement parts.
Do not let the tool run unattended. Always wait until the tool has come
to a complete stop before leaving it.
SAFETY INSTRUCTIONS
ENGLISH
8.
9.
10.
11.
12.
13.
14.
15.
16.
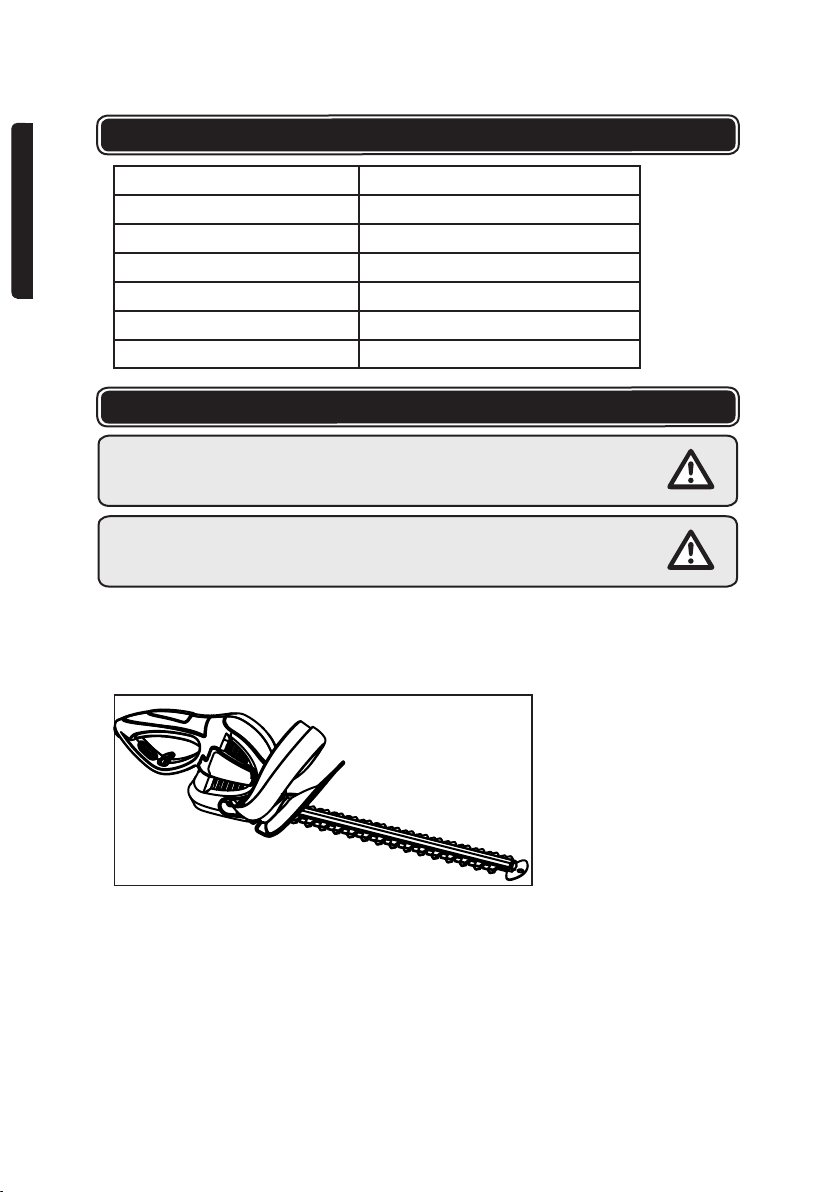
WARNING: Unplug tool from power source before attempting to attach
the guard. Never operate the tool without guard rmly in place. The guard
must always be on the tool to protect the user.

5
Do not change the equipment plug, extension cord receptacle, or
extension cord plug in any way.
Select an extension cord
Ampere rating(on tool rating label)
Wire size(A.W.G=American Wire Gauge)
Cord length
0-2.0 2.1-3.4 3.5-5.0 5.1-7.0 7.1-12.0 12.1-16.0
25’ 16 16 16 16 14 14
50’ 16 16 16 14 14 12
100’ 16 16 14 12 10 --
SAFETY INSTRUCTIONS
ENGLISH
B.For all appliances
Avoid Dangerous Environment – Don’t use appliances in damp or
wet locations.
Don’t Use In Rain.
Keep Children Away – All visitors should be kept at a distance
from work area.
Dress Properly – Do not wear loose clothing or jewelry. They can
be caught in moving parts. Use of rubber gloves and substantial
footwear is recommended when working outdoors. Wear
protective hair covering to contain long hair.
Use Safety Glasses – Always use face or dust mask if operation
is dusty.
Use Right Appliance – Do not use appliance for any job except
that for which it is intended.
Ground Fault Circuit Interrupter (GFCI) protection should be
provided on the circuit(s) or outlet(s) to be used for the gardening
appliance. Receptacles are available having built-in GFCI
protection and may be used for this measure of safety.
Extension Cord – Make sure your extension cord is in good
condition. When using an extension cord, be sure to use one
heavy enough to carry the current your product will draw. An
undersized extension cord will cause a drop in line voltage
resulting in loss of power and overheating. If in doubt, use the
next heavier gauge. The smaller the gauge number, the heavier
the cord.
To reduce the risk of disconnection of appliance cord from the
extension cord during operating:
i. Make a knot as shown in Figure A &B;
ii. Use one of the plug-receptacle retaining straps or connectors
described in this manual.
1.
2.
3.
4.
5.
6.
7.
8.
9.
WARNING!To reduce the risk of electric shock, use only with an extension
cord intended for outdoor use, such as an extension cord of cord type SW-
A, SOW-A, STW-A, STOW-A, SJW-A, SJOW-A, SJTW-A. or SJTOW-A.

6
ENGLISH
Additional safety rules for hedge trimmers
Parts list
Intended use
Check the box contents
SAFETY INSTRUCTIONS
APPLICATION
Do not use the trimmer in the rain.
Keep hands and ngers well away from the blade.
Ware work gloves, eye protection, solid shoes and trousers when using
the hedge trimmer.
Always grasp both handles when operating the unit.
This trimmer has been designed to cut soft, new growth and should
not be used on branches, hard wood or other forms of cutting.
If you are interrupted when operating the trimmer, complete the
process and turn tool OFF before looking up.
Never allow untrained users or children to use the trimmer.
Were goggles and ear muffs
The HAUSSMANN trimmer is intended to cut and shape normal hedges..
Any other use is not permitted.
Carefully remove the trimmer from its packaging and check the following
parts are present:
--Hedge Trimmer
-- Safety guard
If any parts missing or damaged, please contact Customer Service at
1-866-206-0888.
Read all safety warnings and instructions.Failure to follow the warnings
and instructions may result in electric shock, re and/or serious injury.
1. Rear handle
2. Rear switch trigger
3. Front switch trigger
4. Front handle
5. Safety guard
6. bar
7. Cutting blade
8. Blade end protector
9. Blade sheath

7
TECHNICAL DATA
ASSEMBLY
Product code 59595086
Model number SHT18 – 4.0
Power supply 120V, 60Hz
Electric current 4AMP
Blade length 20” (50 CM)
Max cutting diameter 5/8” (16 MM)
Mechanical brake YES
WARNING!The xed blade teeth have extended points with rounded ends
to reduce the chance of injury in case of accidental contact.
WARNING!Do not operate this trimmer until it is assembled and installed
according to the instructions. A tool incorrectly assembled can cause
serious injury.
Before tting the safety guard, rst remove the blade cover. Fit the safety
guard onto the body of the trimmer and secure it in place using two screws
provided.
Fitting the safety guard (Fig. 2)
ENGLISH
Fig. 2

8
To turn the tool on: Press the front switch trigger and the rear switch
trigger with both hands at the same time as shown in Fig 3
Note: The blade brake makes the blades stop immediately. Also, small
ashes in the area of the upper ventilation slots is normal and will not not
harm you or the machine.
Assume a secure position, using two hands to hold the trimmer and
switch the tool on.
Trim both sides of the hedge, starting at the bottom. This prevents
cuttings falling into the area yet to be cut.
Pass the blade lightly through the surface of the hedge. Do not attempt
to cut too deep in a single pass..
Trim the top of the hedge.
For older hedges that require cutting back substantially, use pruning
shears to cut the thicker branches and then finish the job with the
hedge trimmer.
To turn the tool off: Release any of the switch trigger
Starting and stopping (Fig. 3)
Cutting(Fig.4)
OPERATION
WARNING: The xed blade bar is longer than the moving blade to guard
against kickback should you inadvertently make contact with a wall or
fence.
WARNING: Do not use the tool without safety guard! Before start your
hedge trimmer, please remove the blade sheath to switch the trimmer ON
and OFF.
WARNING: Always keep the extension cord behind trimmer and away
from the trimming operation. Never drape it over a hedge being trimmed.
If you cut or damage the cord, unplug it at the electrical outlet immediately,
before inspecting or repairing cord.
1.
2.
3.
4.
5.
ENGLISH
Fig.3

9
OPERATION
MAINTENANCE
WARNING!Do not let the blade come into contact with fencing wire or any
other object that could damage it.
WARNING!Always ensure that the tool is switched off and the plug
is removed from the power source before making any adjustments or
performing maintenance procedures.
WARNING!Switch tool off and unplug from power source before carrying
out any maintenance on the tool.
Fig.4 Fig.5
Shaping(Fig.5)
Lubrication
Trim the hedge to make it wider at bottom than the top. This improves
penetration of light and promotes healthy growth.
Taper the hedge approximately 4 inches (100 mm) for every 40
inches (1 meter) in height. A bush can be round or a column shape.
After each use, clean the blades and lightly lubricate with general purpose
oil or spray lubricant.
Check your tool regularly before starting the work.
Damaged cutting blades have to be repaired or exchanged by a
authorized service facility before working with the tool.
After each cutting operation, clean the cutting blade with a soft
brush and cloth with lubricating uid oil and spray a thin layer of uid
protective oil on the completes blade.
Always keep the ventilation slots in motor housing clean.
Never clean or spray the tool with water. Clean the motor housing only
with a moist cloth and never apply detergents or solvents! These could
ruin the plastic parts of the tool. Finally, dry the motor housing carefully.
Store the tool with the blade sheath.
Only original accessories and spare parts can be repaired or replaced.
1.
1.
2.
3.
4.
5.
6.
7.
2.
ENGLISH

10
Thank you for investing in a HAUSSMANN power tool. These products
have been made to demanding, high-quality standards and are
guaranteed for domestic use against manufacturing faults for a period of
36 months from the date of purchase.
This guarantee does not affect your statutory rights. In case of any
malfunction of your tool (failure, missing part, etc.), please contact one
of our service technicians at our toll free service line at 1-866-206-0888
from 8 AM to 6 PM, Monday to Friday, Eastern time. RONA reserves the
right to repair or replace the defective tool, at its discretion.
The product is guaranteed for 36 months if used for normal trade
purposes. Any guarantee is invalid if the product has been overloaded
or subject to neglect, improper use or an attempted repair other than by
an authorized agent. Heavy-duty, daily professional or hire usage are
not guaranteed. Due to continuous product improvement, we reserve
Register your product
We invite you to register your product online to make future
communications easier. To do so, simply visit our website
www.haussmanntools.com.
WARRANTY
ENGLISH

11
PARTS LIST
Please refer to the schematic drawing on the next page
ENGLISH
NO. DESCRIPTION NO. DESCRIPTION
Blade sheath Steel wire
Screw M5X27 Safety guard
Spring washer Screw ST4X16
Washer Block
Lower blade Protection head
Upper blade Screw ST4X12
Bush Nut M5
Inside plate Upper cover
Bolt Nut M4
Steel bar Ball bearing 607
Light cover piece Brush holder assembly
Right housing Screw ST3X10
ScrewST4x20 Brush holder
Cable plug Brush holder pin
Cable sheath Rotor
Cable xing plate Deep groove ball bearing 608
ScrewST4x16 Stator
Terminal Screw ST4X25
Electric inductor Down cover
Capacitor Screw ST4X60
Switch Flat washer
Mandril cap Spring washer
Spring
Cross recessed pan head tapping screw ST5x20
Main switch trigger Nut M5
Mandril ring Center bracket
Mandril Washer
Wanr Bearing HK0808
Washer for blade Brake block
Flexible shaft spring Rubber cover
Flat washer Gear
Circlip Tension spring
Left housing Upper eccentric plate
Left cover piece Lower eccentric plate
Bracket Position pin
Front switch trigger Circlip
Spring Nut
Front handle Position pin
1
3
4
5
6
7
8
9
10
11
12
13
14
15
16
17
18
19
20
21
22
23
24
25
26
27
28
29
30
31
32
33
34
35
36
37
2
38
40
41
42
43
44
45
46
47
48
49
50
51
52
53
54
55
56
57
58
59
60
61
62
63
64
65
66
67
68
69
70
71
72
73
74
39

12
SCHEMATIC DRAWING / SCHÉMA
FRANÇAIS
ENGLISH

13
FRANÇAIS
LISTE DES PIÈCES
Veuillez consulter le schéma à la page précédente.
NO. DESCRIPTION NO. DESCRIPTION
Fourreau de la lame Câble en acier
Vis M5X27 Cache de sécurité
Joint Vis ST4X16
Ressort Bloc
Lame inférieure Embout de protection
Lame supérieure Vis ST4X12
Fusain Boulon M5
Plaque interne Cache supérieur
Boulon Écrou M4
Barre en acier Suspension à bille 607
Plaque décorative interne Support pour brosse
Boîtier droit Vis ST3X10
Vis ST4x20 Support de broche
Prise pour câble Fiche de xation pour broche
Fourreau de câble Rotor
Plaque de xation pour câble Suspension mobile à bille 608
Vis ST4x16 Stator
Borne Vis ST4X25
Inducteur électrique Cache inférieur
Alimentateur Vis ST4X60
Interrupteur Joint plat
Embout de mandrin Ressort
Ressort Vis à tête croisée ST5x20
Gâchette de l’interrupteur principal Écrou M5
Bague de mandrin Pince centrale
Mandarin Joint
Écrou Suspension HK0808
Joint de lame Bloc de frein
Ressort souple Cache en caoutchouc
Joint plat Transmission
Serre-joint Bague de tension
Boîtier gauche Plateau excentrique supérieur
Plaque décorative gauche Plateau excentrique supérieur
Pince Fiche de positionnement
Gâchette de interrupteur frontal Serre-joint
Bague Écrou
Poignée frontale Fiche de positionnement
1
3
4
5
6
7
8
9
10
11
12
13
14
15
16
17
18
19
20
21
22
23
24
25
26
27
28
29
30
31
32
33
34
35
36
37
2
38
40
41
42
43
44
45
46
47
48
49
50
51
52
53
54
55
56
57
58
59
60
61
62
63
64
65
66
67
68
69
70
71
72
73
74
39

14
FRANÇAIS
Schéma .........................................................................................................................
Liste des pièces ............................................................................................................
Symboles de sécurité ..................................................................................................
Consignes de sécurité .................................................................................................
Application......................................................................................................................
Données techniques.....................................................................................................
Assemblage...................................................................................................................
Fonctionnement.............................................................................................................
Entretien..........................................................................................................................
Garantie..........................................................................................................................
SYMBOLES DE SÉCURITÉ
Avertissement
Ne pas exposer à la pluie ou utiliser dans des endroits
humides
Porter toujours des lunettes de sécurité ou un masque
de sécurité avec écrans latéraux et un masque facial
intégral lors de l'utilisation du present produit.
Toujours porter des gants antidérapants, résistants
lors de l’utilisation de ce produit.
Toujours garder les spectateurs à une distance d'au
moins 50 pi. (15 m)
Classe de sécurité II
Toujours porter des chaussures antidérapantes de
sécurité lors de l’utilisation de ce produit.
Pour réduire le risque de blessure, l'utilisateur doit lire
et veiller à bien comprendre le manuel avant d'utiliser
le présent produit
P12
P14
P14
P15
P19
P19
P20
P20
P22
P23
LISTE DES PIÈCES
AVERTISSEMENT! Veuillez lire toutes les instructions de sécurité et
de fonctionnement avant d'utiliser le présent outil. Veuillez porter une
attention particulière à toutes les sections qui comportent des symboles
ou des avertissements.
15

15
CONSIGNES DE SÉCURITÉ
Conserver les avertissements et instructions pour référence future
Pour utiliser cet outil adéquatement, vous devez observer les règles de
sécurité, d’assemblage, d’opération et d’entretien qui sont dans ce manuel.
Toujours suivre les règles concernant l’aire d’utilisation de l’outil. Ne pas
laisser un enfant ou une personne physiquement inapte utiliser cet outil.
Toujours rester loin, et prendre garde aux dangers potentiels durant l’usage
et l’entretien de l’outil. Ces dangers potentiels comprennent, sans s'y
limiter:
Garder l’espace de travail propre et dégagé. Les espaces de travail
encombrés sont propices aux accidents et blessures.
Portez attention à l’environnement dans lequel vous travaillez. N’utilisez
pas cet outil sous la pluie ou dans un endroit trempé. Gardez l’espace
de travail bien éclairé. Ne pas exposer l’outil à la pluie ou aux endroits
humides. N’utilisez pas un outil électrique à proximité de liquides
inammables ou de gaz.
Gardez les visiteurs loin de l’aire de travail. Tous les visiteurs et
curieux, spécialement les enfants et personnes handicapées doivent
être tenus loin du lieu de travail. Ne laissez pas les gens à proximité de
l'aire de travail entrer en contact avec l’outil.
Rangez les outils de façon sécuritaire. Quand ils ne sont pas en usage,
les outils doivent être entreposés dans un endroit sec, placés hauts et
hors de portée.
Ne pas forcer l’usage de l’outil. L’outil offrira un meilleur rendement et sera
plus sécuritaire s’il est utilisé pour la tâche pour laquelle il a été conçu.
Utiliser le bon outil pour le travail. Ne pas utiliser un petit outil ou ses
pièces pour faire un travail qui nécessiterait un outil plus robuste. Ne
jamais utiliser l’outil pour faire un travail qui ne lui convient pas.
AVERTISSEMENT!Lire tous les avertissements de sécurité et instructions.
Omettre de suivre les consignes et instructions pourrait provoquer un choc
électrique, un feu ou des blessures graves.
AVERTISSEMENT!Quand on utilise un outil électrique, des précautions
de base doivent toujours être respectées pour éviter les risques de feu, de
choc électrique ou de blessures corporelles. Toujours suivre les règles de
sécurité de ce manuel.
Contact avec la lame.
Retour.
Bris de lame.
Éclat de lame.
Dommage aux yeux si on omet de porter des verres de sécurité ou un
écran protecteur.
Dommage aux oreilles si on ne porte pas de protection adéquate.
1.
2.
3.
4.
5.
6.
FRANÇAIS

16
Habillez-vous correctement. Ne portez pas de vêtements amples ou
de bijoux. Ils pourraient être attrapés par les parties mobiles. Il est
recommandé de porter des gants de caoutchouc et des chaussures
antidérapantes lorsque vous travaillez à l’extérieur. Si vous avez les
cheveux longs, portez une protection pour les couvrir.
Utilisez des articles de sécurité. Portez toujours des lunettes de
sécurité et des cache-oreilles.
Ne dépassez pas votre portée. Soyez en position stable et en équilibre
à tous moments.
Entretenez vos outils avec soin. Gardez vos outils propres et aiguisés
pour une performance meilleure et sécuritaire. Suivez les instructions
concernant la lubrication et le remplacement des accessoires. Gardez
les outils secs, propres et sans huile ou graisse.
Soyez vigilant. Regardez bien ce que vous faites. Utilisez votre bon
sens. N’opérez pas un outil électrique lorsque vous êtes fatigué ou
sous l’influence d’alcool, de drogues ou de médicaments causant la
somnolence.
Vériez si des pièces sont endommagées. Avant d’utiliser un outil, on
doit s’assurer qu’il n’y a pas de pièces endommagées. Si une pièce
est légèrement endommagée, déterminez soigneusement s’il va
fonctionner de façon adéquate pour ce pour quoi il est conçu. Vériez
l’alignement des pièces mobiles, si elles sont solidement attachées,
si elles sont brisées, le montage approprié et autres conditions
qui peuvent affecter la performance de l’outil. Une garde ou autre
partie endommagée doit être réparée ou remplacée par un service
d’installation autorisé, à moins qu’il en soit indiqué autrement dans ce
guide. Les prises défectueuses doivent être remplacées par un service
d’installation autorisé. N’utilisez pas l’outil si l’interrupteur marche/arrêt
ne fonctionne pas correctement.
Soyez vigilant avec les ls ou câbles cachés dans les buissons ou les haies.
Prenez garde aux chocs électriques. Évitez les contacts avec les objets
mis en terre comme les conduites d’eau.
Toujours remplacer les pièces endommagées par des pièces similaires
approuvées. Demander à un service de remplacement autorisé
d’installer une pièce.
Ne laissez pas l’outil en marche sans surveillance. Toujours attendre
jusqu’à ce que l’outil soit complètement arrêté avant de le déposer.
CONSIGNES DE SÉCURITÉ
7.
8.
9.
10.
11.
12.
13.
14.
15.
16.
AVERTISSEMENT: Débranchez toujours le cordon de la source
d'alimentation électrique avant d'installer le garde protecteur. N'utilisez
jamais l'outil sans le garde fermement installé en place. Le garde doit
toujours être installé pour protéger l'usager.
FRANÇAIS

17
Sécurité électrique
A. Pour tous les appareils à double isolation
B. Pour tous les appareils
1)Pièces de rechange
Lors du remplacement, utilisez toujours des pièces de rechange
identiques.
2)Connexions polarisées
Pour réduire le risque de choc électrique, cet appareil possède
une fiche polarisée (une lame est plus large que l'autre) et exige
l'utilisation d'une rallonge polarisée. Il n’y qu’une façon d'insérer
la fiche de l'appareil dans la rallonge polarisée. Si la fiche ne
s'insère pas complètement dans la rallonge, retourner la che. Si la
fiche ne rentre toujours pas, il faut prendre une rallonge polarisée
adaptée. Une rallonge polarisée requiert l'utilisation d'une prise
murale polarisée. Il n’y qu’une façon d'insérer cette fiche dans la
prise murale polarisée. Si la fiche n'entre pas complètement dans
la prise murale, retourner la fiche. Si la fiche ne rentre toujours
pas, communiquer avec un électricien qualifié pour installer une
prise murale appropriée. Ne pas modier la che d'équipement, le
réceptacle de rallonge, ou la prise de rallonge.
Évitez les environnements dangereux - N'utilisez pas les appareils
dans les endroits humides ou mouillés.
N'utilisez pas les outils sous la pluie.
Gardez tous les gens, incluant enfants, animaux de compagnie et
spectateurs,hors de la zone de danger de 50 pi (15 m). Arrêtez le
travail immédiatement si vous êtes approché.
Habillez-vous correctement - Ne portez pas de vêtements amples ou
de bijoux. Ils peuvent se coincer dans les pièces en mouvement. Des
gants en caoutchouc et chaussures fermées sont recommandés lors
de travaux extérieurs. Portez un let protecteur pour les cheveux longs.
Portez des lunettes de protection - Utilisez toujours le masque à
poussière si le travail à effectuer produit de la poussière.
Utilisez le bon appareil - N'utilisez pas cet appareil pour tout autre
travail que pour lequel il est destiné.
Un disjoncteur de protection de mise à la terre (GFCI) devrait être
installé sur le circuit ou la sortie utilisé pour l'appareil de jardinage. Il
existe des prises avec disjoncteur intégré, qui peuvent être utilisées
pour cette mesure de sécurité.
Cordons de rallonge - Assurez-vous que votre rallonge est en bon état.
Lorsque vous utilisez une rallonge, veillez à utiliser un calibre sufsant
CONSIGNES DE SÉCURITÉ
1.
2.
3.
4.
5.
6.
7.
8.
AVERTISSEMENT!Pour réduire le risque de choc électrique, utilisez
uniquement avec une rallonge électrique destinée à être utilisée à
l'extérieur,comme une rallonge de type SW-A, SOW-A, STW-A, STOW-A,
SJW-A,SJOW-A, SJTW-A. ou SJTOW-A.
FRANÇAIS

18
pour supporter le courant. Un cordon de calibre inférieur entraînera une
chute de tension, entraînant une perte de puissance et une surchauffe.
En cas de doute, utilisez le calibre suivant. Plus le numéro de calibre
est petit, plus la rallonge est puissante.
CONSIGNES DE SÉCURITÉ
Sélectionnez une rallonge
puissance - ampères (sur la plaque frontale de l’outil)
Taille du Câble (A.W.G.)
Longueur du corde
0-2.0 2.1-3.4 3.5-5.0 5.1-7.0 7.1-12.0 12.1-16.0
25 pi 16 16 16 16 14 14
50 pi 16 16 16 14 14 12
100 pi 16 16 14 12 10 --
Pour réduire le risque de déconnexion de la rallonge en cours de
fonctionnement:
i) Faites une boucle tel qu'illustré à la Fig.A&B;
i i) Utilisez l'une des sangles de retenue de cordon ou connecteurs
décrits dans ce manuel.
9.
Règles de sécurité additionnelles pour tailles-haies.
Ne pas utiliser le taille-haie sous la pluie.
Garder les mains et les doigts loin de la lame.
Porter des gants de travail, des lunettes de protection, des chaussures
solides et un pantalon lors de l’utilisation du taille-haie.
Toujours tenir les deux poignées quand vous utilisez l’appareil.
Ce taille-haie a été conçu pour les coupes simples et nouvelles
pousses et ne doit pas être utilisé pour couper les grosses branches,
branches, le bois franc ou autres types de coupes.
SI vous êtes interrompu durant votre travail avec le taille-haie,
complétez le travail en cours et mettez l’outil en position ARRÊT avant
de lever les yeux.
Ne jamais laisser une personne sans expérience ou un enfant utiliser le
taille-haie.
Utilisez des lunettes de protection et une protection auditive.
FRANÇAIS
Rallonge
Nouez le cordon Branchez la che et la prise
Cordon de
l'appareil

19
APPLICATION
DONNÉES TECHNIQUES
Lire toutes les règles et instructions de sécurité.Ne pas suivre
l’ensemble des règles et instructions peut entraîner une électrocution, un
incendie ou des blessures graves.
Le taille-haie HAUSSMANN est conçu pour couper et tailler des haies
normales. Aucune autre utilisation n’est autorisée.
Sortez soigneusement l'outil de son emballage et vériez que les pièces
présentes sont présentes :
-- Taille-haie
-- Garde de protection
Si toute pièce est endommagée ou manquante, veuillez communiquer
avec le Service à la clientèle au 1-866-206-0888.
La numérotation des caractéristiques du produit renvoie à l'illustration de
l'outil sur la page des représentations graphiques de la page 1 (Fig. 1 ).
Utilisation prevue
Vérication du contenu de l’emballage
Liste des pièces
1. Poignée arrière
2. Barre d'acier
3. Gâchette avant
4. Poignée avant
5. Garde de protection
6. barre
7. Lame de coupe
8. Lame n protecteur
9. Gaine de lame
Code de produit 59595086
Numéro de modèle SHT18-4.0
Puissance 120V, 60Hz
Courant nominal 4 A
Longueur de lame 20 po (50 CM)
Diamètre max.de coupe 5/8 po (16 MM)
Frein mécanique OUI
FRANÇAIS
This manual suits for next models
1
Table of contents
Languages:
Other Haussmann Trimmer manuals

Haussmann
Haussmann N1F-GT-300/4.0-B User manual

Haussmann
Haussmann N1F-GT-300 User manual

Haussmann
Haussmann 02325006 User manual

Haussmann
Haussmann 8401020 User manual

Haussmann
Haussmann GHT610NU User manual

Haussmann
Haussmann 8401022 User manual

Haussmann
Haussmann AGT18-1.3 User manual

Haussmann
Haussmann GGT520U.1 User manual

Haussmann
Haussmann H2TOOLKIT-18 User manual

Haussmann
Haussmann 68125135 User manual