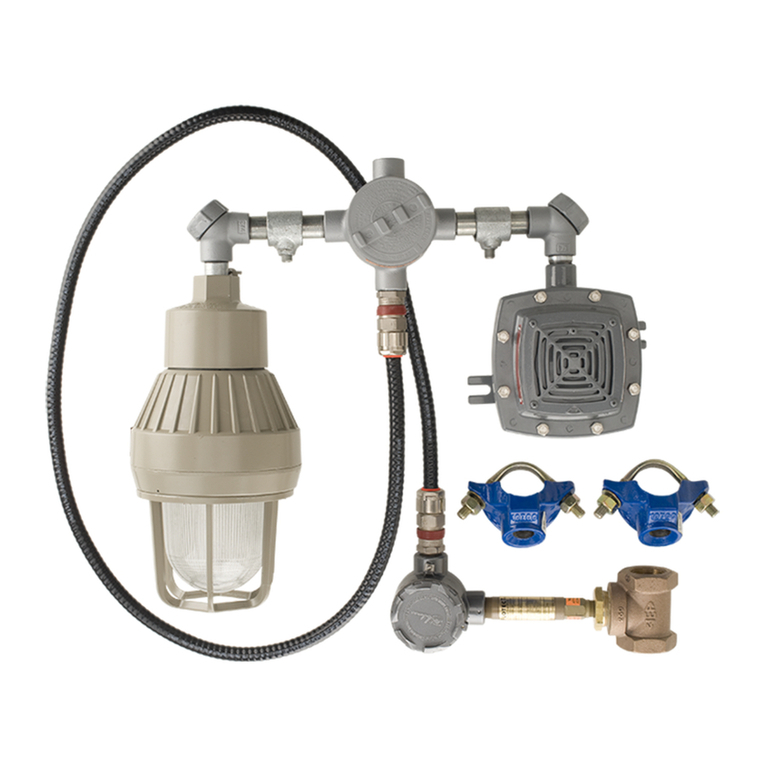
Haws 9001 Alarm Series Owner's manual

10/17 9001 Alarm Series Page 1 of 6
No. 2080202(31)
1455 Kleppe Lane Sparks, NV 89431-6467 (775) 359-4712 Fax (775) 359-7424
E-mail: haws@hawsco.com website: www.hawsco.com
Model 9001, 9001.5 Alarm
INSTALLATION, OPERATION
&
MAINTENANCE INSTRUCTIONS
LIMITED WARRANTY
HAWS warrants that this specific product is guaranteed against defective material or poor
workmanship for a period of one year from date of shipment. HAWS liability under this
warranty shall be discharged by furnishing without charge F.O.B. HAWS Factory any goods,
or part thereof, which shall appear to the Company upon inspection to be of defective
material or not of first class workmanship, provided that claim is made in writing to Haws
within a reasonable period after receipt of the product. Where claims for defects are made,
the defective part or parts shall be delivered to the Company, prepaid, for inspection. HAWS
will not be liable for the cost of repairs, alterations or replacements, or for any expense
connected therewith made by the owner or his agents, except upon written authority from
HAWS, Sparks, Nevada. HAWS will not be liable for any damages caused by defective
materials or poor workmanship, except for replacements, as provided above. Buyer agrees
that Haws has made no other warranties either expressed or implied in addition to those
above stated, except that of title with respect to any of the products or equipment sold
hereunder and that HAWS shall not be liable for general, special, or consequential damages
claimed to arise under the contract of sale.
The emergency equipment manufactured by HAWS is warranted to function if installation
and maintenance instructions provided are adhered to. The units also must be used for the
purpose for which they were intended. This product is intended to supplement first-aid
treatment. Due to widely varying conditions, Haws cannot guarantee that the use of this
emergency equipment will prevent serious injury or the aggravation of existing or prior
injuries.
NO OTHER WARRANTIES EXPRESSED OR IMPLIED ARE AUTHORIZED, PROVIDED OR
GIVEN BY HAWS.
NOTE TO INSTALLER: Please leave this information with the Maintenance Department.
SHOULD YOU EXPERIENCE DIFFICULTY WITH THE INSTALLATION OF THIS
MODEL PLEASE CALL:
TECHNICAL SUPPORT: 1-800-766-5612
FOR CUSTOMER SERVICE: 1-888-640-4297

10/17 9001 Alarm Series Page 2 of 6
RECOMMENDED TOOLS: Pipe joint sealant, screwdriver, pipe wrench, 14 AWG wire,
1/2"conduit and basic electricians’ tools for power connection.
LOCATION OF UNIT: The Model 9001 Alarm Series may be mounted directly to the upper
standpipe of a safety shower or wall mounted next to a shower or eyewash. The alarm should
be clearly visible from several directions.
ELECTRICAL SUPPLY:
Model 9001 & 9001.5 120 VAC 50/60 HZ.
14 watts average power consumption. WARNING: Power shall be supplied by a dedicated
circuit through a 10 AMP maximum breaker or fuse and should not supply power to any other
devices. NOT FOR USE IN CLASSIFIED AREAS.
WATER SUPPLY:
Model 9001 2.4 gpm minimum required to activate flow switch.
Model 9001.5 1.5 gpm minimum required to activate flow switch.
Mount flow switch in supply line with flow in horizontal direction and switch stem extending
vertically from tee. Mount switch with at least 6” of straight pipe on both sides to minimize
turbulence in switch.
TROUBLESHOOTING
PROBLEM
REPAIR CHECKLIST
1. Alarm horn and light do not
operate.
1. a. Check incoming circuit for power and power
from flow switch.
b. Check that the direction of water flow
corresponds to the arrow on the flow switch
body.
c. Check that the switch located on the junction
box is in the “on” position.
d.
Check for continuity through the switch.
e.
Check all electrical connections.
f.
Check that water flow is sufficient.
g. Faulty flow switch. Replace entire switch
assembly.
2. Horn sounds but light does not
flash.
2. a. Check wiring connections.
b.
Replace flashing light.
3. Light flashes but horn does not
sound.
3. a. Check wiring connections.
b. Make sure the alarm silencing switch is in
the “on” position.
4.
Alarm stays on.
4.
a.
Check wiring connections.
b. Disconnect flow switch wires and test for
continuity.

10/17 9001 Alarm Series Page 3 of 6
INSTALLATION PROCEDURE
STEP 1: Choose a location for mounting the flow switch in the water supply line. The inlet and
outlet ports of the flow switch must be a minimum of 6 inches from any tees or
elbows in the water supply line. See attached installation drawing.
STEP 2: Mount the flow switch assembly in the water supply line. The switch body must be in
the vertical position with the water pipe horizontal. The water flow must be in the
direction marked by the arrow on the flow switch body. Use pipe sealing compound
on all water pipe connections.
STEP 3: Choose a location for mounting the alarm assembly. The alarm housing should be
positioned along a vertical axis at least 7 feet above ground for best visibility. The
alarm may be mounted directly to a water pipe using the supplied bracket, washers
and nuts. The alarm can also be bolted to a flat surface such as a wall using
appropriate fasteners (not supplied).
STEP 4: Using the wire crimp terminals (supplied), connect the alarm to the power supply per
attached installation drawing. The purple wire is connected to the second normally
closed contact and the pink wire to the second common contact of the flow switch
and may be used for remote alarm activation. The signal from the purple wire will be
zero voltage when water is flowing and supply voltage when no water is flowing. If a
remote alarm is not used, the purple wire must be insulated at its free end. Leaving
the two crimp terminals (supplied) connected will be sufficient insulation.
NOTICE: ALL POWER CONNECTIONS MUST BE MADE ACCORDING TO NEC CODE
USING TYPE 4 COMPLIANT EQUIPMENT.
OPERATION AND TEST INSTRUCTIONS
Test weekly. Instruct all employees in the use of emergency showers and eyewashes.
STEP 1: Apply power to the alarm branch circuit. The alarm should remain OFF.
STEP 2: Open the shower or eyewash flow valve. The alarm should sound and the light
should flash shortly after water flows.
STEP 3: Shut off the flow valve. The alarm should turn OFF.
For more information on Haws products, see our website: www.hawsco.com
© 2017 Haws®Corporation – All Rights Reserved
HAWS® and other trademarks usedin these materials are the exclusive property of Haws Corporation.

1 FLOW SWITCH
2 120V LIGHT
3 SELECTOR SWITCH
PARTS BREAKDOWN
1
FLOW SWITCH4
49001
9001.5
LEGEND PLATE5
0003225300
0005726705.3
0005726850
0004465585.2
SP154DPDT
APPROVED
DRAWN
PART NUMBER
DRAWING NO.
SCALE: SHEET OF
REV
DRAWING TYPE: SIZE: A
BYECN NO.
PAGE
DATE
DATE
ECN:
REVISED PER
CHKD
Haws Corporation - All Rights Reserved
HAWS and other trademarks used in these materials are the exclusive property of Haws Corporation.
CR
MODEL(S)
1455 KLEPPE LANE
SPARKS, NEVADA 89431
(775) 359-4712 FAX (755) 359-7424
E-MAIL: HAWS@HAWSCO.COM
WEBSITE: WWW.HAWSCO.COM
ITEM DESCRIPTION
THIS DOCUMENT IS TRUE AND CORRECT AT TIME OF PUBLICATION. CONTINUED PRODUCT IMPROVEMENTS
MAKE SPECIFICATIONS AND MEASUREMENTS SUBJECT TO CHANGE WITHOUT NOTICE.
WHEN ORDERING PARTS PLEASE SPECIFY MODEL NUMBER.
PART NO.
CLF
3/17/93
A31
0002080202
9001/9001.5 ALARM
1:2.5
11
FV
11/22/17
GC
4 of 6
PARTS BREAKDOWN
5232
2017
2
35
6
0210000283PIEZO ALARM6

FLOW SWITCH MUST BE MOUNTED IN HORIZONTAL POSITION
FLEX CONDUIT
1/2" UNIONS
(BY OTHERS
RECOMMENDED)
6"MIN.
152mm
STRAIGHT
FOR MODEL 9001.5
OR 1/2" IPS
STRAIGHT
6"MIN.
152mm
DIRECTION
NOTE FLOW
ARROW
SHOWER
OR
1-1/4" UNIONS
FOR MODEL 9001.5
DO NOT DISASSEMBLE OR ROTATE
THIS ASSEMBLY AT ANY JOINT
AS DAMAGE WILL OCCUR
CAUTION:
1-1/4 IPS
WATER SUPPLY
1. THE SIGNAL FROM THE PURPLE WIRE WILL BE SUPPLY VOLTAGE WHEN NO
WATER IS FLOWING AND ZERO VOLTAGE WHEN THE FLOW SWITCH AND
LOCAL ALARM ARE ACTIVATED. IF A REMOTE ALARM IS NOT USED,
THE PURPLE WIRE MUST BE INSULATED AT ITS FREE END. LEAVING THE
TWO CRIMP TERMINALS (SUPPLIED) CONNECTED WILL DO THIS.
2. INSTALLER MUST USE A THREAD SEALANT, SUCH AS APPLETON
TLC3, RECOMMENDED FOR USE ON ELECTRICAL COMPONENTS ON
ALL ELECTRICAL NPT CONNECTIONS.
NOTES:
POWER SOURCE
POWER SOURCE
WIRING DIAGRAM
NC
FLOW SWITCH
(DPDT)
LOAD
(CUSTOMER)
(BLK)
(PURPLE)
GROUND
(RED)
(PINK)
(GRN)
HOT
NO
COM
NC NO
COM
(WHITE)
NEUTRAL
FL LT
(WHT)
(BLK)
(BLK)
(RED)
HORN
CUSTOMER 120 VAC
(CUSTOMER)
SEE SHEET 2
FOR CLAMP ASSEMBLY DETAIL
(REF)
(RED)
SWITCH
(13")
APPROVED:
DRAWN:
PART NUMBER
SCALE: SHEET OF
REVISION
DRAWING TYPE: SIZE: A
BY:ECN NO.
PAGE
DATE:
DATE:
ECN:
REVISED PER
CHK'D.:
Haws Corporation - All Rights Reserved. HAWS and other trademarks used in these materials are the exclusive property of Haws Corporation.
CR
MODEL(S)
1455 KLEPPE LANE
SPARKS, NEVADA 89431
(775) 359-4712 FAX (775) 359-7424
E-MAIL: [email protected]
WEBSITE: WWW.HAWSCO.COM
THIS DOCUMENT IS TRUE AND CORRECT AT TIME OF PUBLICATION. CONTINUED PRODUCT IMPROVEMENTS
MAKE SPECIFICATIONS AND MEASUREMENTS SUBJECT TO CHANGE WITHOUT NOTICE.
CH
01/09/01
31
0002080202.D
9001/9001.5 ALARM
1:1
12
FV
11/22/17
GC
5 of 6
INSTALLATION
5232
2017
JP
(3-5/8")

1 SNAP CLAMP TO BE INSTALLED FIRST FOR VERTICAL SUPPORT.
2 SCREWS INSTALLED FROM FRONT, WITH BOX DOOR OFF.
3 NUTS TO BE INSTALLED TO A TORQUE OF 12 IN-LBS MAX.
NOTES:
2X PIPE CLAMP
4X WASHER
SNAP CLAMP
4X HEX NUT
4X 8-32 SCREW
4X WASHER
BOX DOOR 2
2
3
1
CLAMP ASSEMBLY DETAIL
LID TO BE INSTALLED
TO 3 IN/LBS TORQUE
MAX PIPE SIZE
Ø1 5/8"
APPROVED:
DRAWN:
PART NUMBER
SCALE: SHEET OF
REVISION
DRAWING TYPE: SIZE: A
BY:ECN NO.
PAGE
DATE:
DATE:
ECN:
REVISED PER
CHK'D.:
Haws Corporation - All Rights Reserved. HAWS and other trademarks used in these materials are the exclusive property of Haws Corporation.
CR
MODEL(S)
1455 KLEPPE LANE
SPARKS, NEVADA 89431
(775) 359-4712 FAX (775) 359-7424
E-MAIL: [email protected]
WEBSITE: WWW.HAWSCO.COM
THIS DOCUMENT IS TRUE AND CORRECT AT TIME OF PUBLICATION. CONTINUED PRODUCT IMPROVEMENTS
MAKE SPECIFICATIONS AND MEASUREMENTS SUBJECT TO CHANGE WITHOUT NOTICE.
CH
01/09/01
31
0002080202.D
9001/9001.5 ALARM
1:1
22
FV
11/22/17
.
GC
6 of 6
INSTALLATION
5232
2017
JP
This manual suits for next models
1
Table of contents
Other Haws Security System manuals
Popular Security System manuals by other brands

DSC
DSC New Classic PC585 user manual

Alderon Industries
Alderon Industries Oil Alert VA02 Operation, maintenance and installation manual

Eldes
Eldes ESIM364 user manual

Safety Vision
Safety Vision PatrolRecorder 4C installation guide

Danguard
Danguard HS-200 user manual

Black Widow Security
Black Widow Security BW RAS 130 installation manual