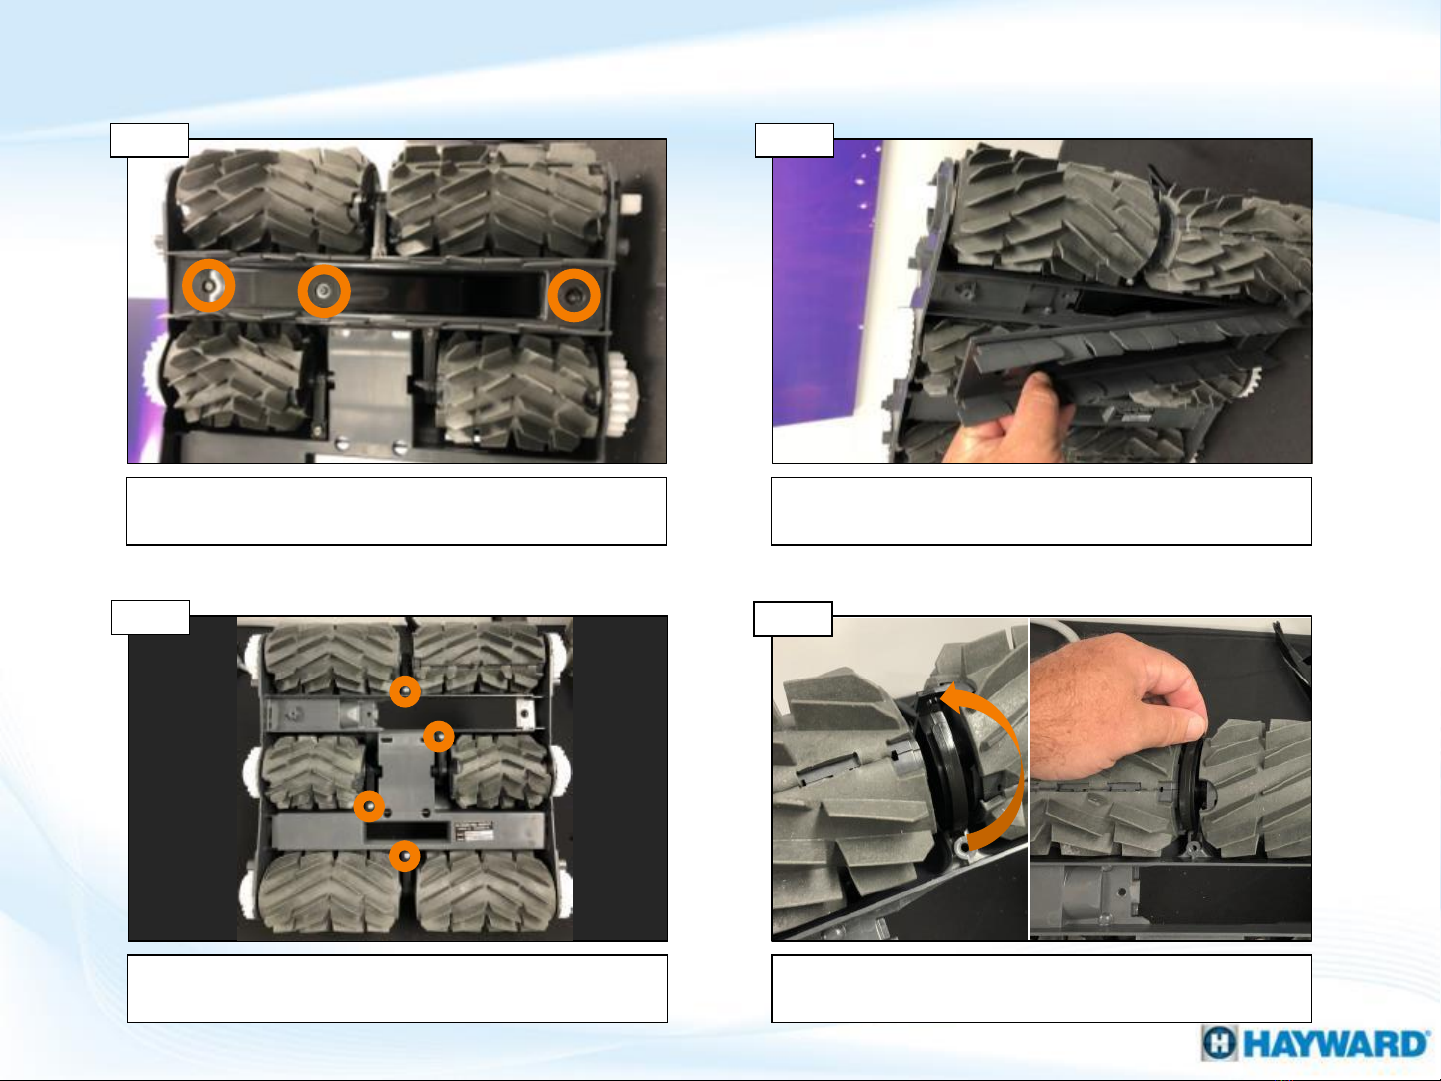
How To: Clean Debris from the Canister
8
Some water is kept inside the canister to enable the self cleaning and flushing function
for a true touch-free debris disposal. If desired most of the water can be removed by
tilting the canister toward the inlet check valve. Doing so may result in having to rinse
the canister after flushing the debris.
Grab the handle on the canister and lift upright to a 90
degree position.
Remove canister from cleaner
Lift the canister out of the cleaner by holding the
handle and lifting straight up.
Turn Power off and Lift handle
Step 1 Step 2
NOTE: Operating the cleaner with a full filter or debris canister will result in reduced performance,
limited wall climbing capability and limited debris pick up. Empty and clean the filter or canister,
when needed, to maintain optimal performance. Heavier debris such as sand, pebbles, and rocks
may require more frequent cleaning, since they have a greater effect on the weight and buoyancy
of the cleaner.