Hayward SharkVAC Configuration guide

SharkVAC
GENERAL INFORMATION.
Congratulations on your purchase of a SharkVAC microprocessor controlled, fully
automatic pool cleaner. The SharkVAC represents the highest standard in design,
performance, and quality. This manual contains important information regarding
the operation and maintenance of your SharkVAC.
Please read and follow all instructions carefully before putting your SharkVAC
into use.
Deterioration, discoloration or brittleness of any pool finish can be caused
over time separately by, or in combination with, age, incorrect pool water
chemistry, improper installation, and other factors. Customer hereby disclaims
any and all claims, and releases Manufacturer from any and all claims for
damages to any pool plaster or vinyl liner in Customer’s pool by reason of the
use and/or operation of the Cleaner. Under no circumstances shall the
Manufacturer be liable for any loss or damage, whether direct, consequential or
incidental, arising out of the use or inability to use the cleaner in Customer’s
pool.
FEATURES.
•The SharkVAC independently scrubs, vacuums, and filters your pool.
•No installation, no attachments. Just drop it in and turn it on. It is
completely automatic.
•Filter cleaning is much easier with the top-access filter cartridge
element
•Adaptive Seek Control Logic (ASCL¨) Microprocessor control optimizes
cleaning routine for each individual pool size and shape.
•Electronic Self-Diagnostics and Overload Protection.
•Simple Direct Drive design w/non-corrosive bearings for high reliability.


GENERAL OPERATING INSTRUCTIONS.
Insert Warning Bullets HERE – see attached
Take a moment to get familiar with the SharkVAC using the figure on page.
Throughout this manual reference to this figure is made when referring to
different components of the SharkVAC.
Remove the SharkVAC by placing the carton on its side and removing it from the
box as shown. If the Caddy Cart is included, the SharkVAC and the Power Supply
will be pre-mounted to the cart. See page ___ for SharkVAC Caddy Cart.
1. Select the nearest GFCI (Ground Fault Circuit Interrupter) protected 110-120
volt AC outlet.
2. Place the power supply so that the SharkVAC power supply is at a minimum
distance of 11.5 feet from the pool edge. The length of the standard SharkVAC
cable is 50 feet.
3. Connect the floating cable to the power supply. Use only the original
SharkVAC Power Supply manufactured by Hayward Pool Products.
4. Place the SharkVAC in the pool. It will slowly sink to the bottom of the pool
as the air inside is released.
5. Connect the power supply to the GFCI protected outlet and switch it on. The
SharkVAC will perform a self-diagnostics routine for several minutes before
starting the cleaning cycle.
Caution: DO NOT switch power supply ON when the SharkVAC is out of water. This
may result in damage to the pump & drive motor seals, which will VOID the
warranty.
6. The SharkVAC will automatically shut off after a cleaning cycle of 2 hours.
If your pool is cleaned in less time than 2 hrs, you may shut the SharkVAC off
manually by switching the power supply to the off position.

Should a second cleaning cycle be required, switch OFF the power supply for 10
seconds and restart. (BOLDED)
7. After the pool has been cleaned, switch OFF the power supply before removing
the SharkVAC from the pool.
8. Remove the SharkVAC from the water at the shallow end of the pool by pulling
the cable until the SharkVAC reaches the surface. Then lift it out of the water
using the handle, NOT the cable.
Caution: When pulling the cable, reel it in hand-over-hand - do NOT reel it
around your arm.
DO NOT ENTER THE SWIMMING POOL WHEN THE SharkVAC IS OPERATING.(BOLDED)
Optimum operating water temperature range for the SharkVAC is 50F - 100F.
Remove the SharkVAC from the pool after each use. Keeping the SharkVAC
permanently in the pool may result in additional service requirements.


Caddy Cart Instructions – See Diagram
1. Caddy Cart will come partially assembled in the carton less the handle &
tube.
2. Insert the screw into the tube at the base of the caddy cart & secure with
bolt
3. Insert the handle into the top of the tube & insert the screw securing it
with the bolt

Maintenance.
Clean the filter cartridge after each use:
•Open the SharkVAC by pressing the lid button & lifting up the dome cover
•Remove the filter bucket assembly by lifting it up out of the SharkVAC with
both hands from each side.
•Flip the bucket assembly over to remove the debris & then rinse with a garden
hose to remove small particles. Filter cartridges do not need to be removed
to clean

To Remove filter cartridges:
•Unsnap and lift up both filter door latches
•Pull out the filter cartridges. Using a garden hose with a spray nozzle,
pressure wash the filter elements to remove debris. Hold the filter elements
as shown to allow the debris to fall out
•Wash the entire filter bucket assembly (Previously Shown)
•Place the filter cartridges back into the filter bucket assembly.

•Snap the filter door latches into place.
•Return the filter bucket assembly into the SharkVAC using the diagram shown
to determine the front & back.
•Close the SharkVAC dome and press the lid button to snap dome into place.
•Filter cleaning solution can be used to remove D.E., excessive dirt and/or
sand.

Remember: The cleaner your filter is, the more efficient your cleaner will
perform.
Periodic Cleaning of Moving Parts.
WARNING: Disconnect the power supply from electrical outlet before cleaning
moving parts.
Inspect the venturi to ensure that no debris or hair has clogged the impeller.
•The impeller can be cleaned by spraying it with a garden hose
•Remove any debris that has accumulated between the tracks and wheels
Storage
When out of the water, store the SharkVAC in a dry, shady location at
temperatures between 40F - 115F
Cable Care
With continued use, the cable may become coiled (like a telephone cord). To
correct this, periodically stretching the cord out in the sun should remove any
cord twists.
IMPORTANT: The cable should be checked periodically for any external damage.
Important Tips.
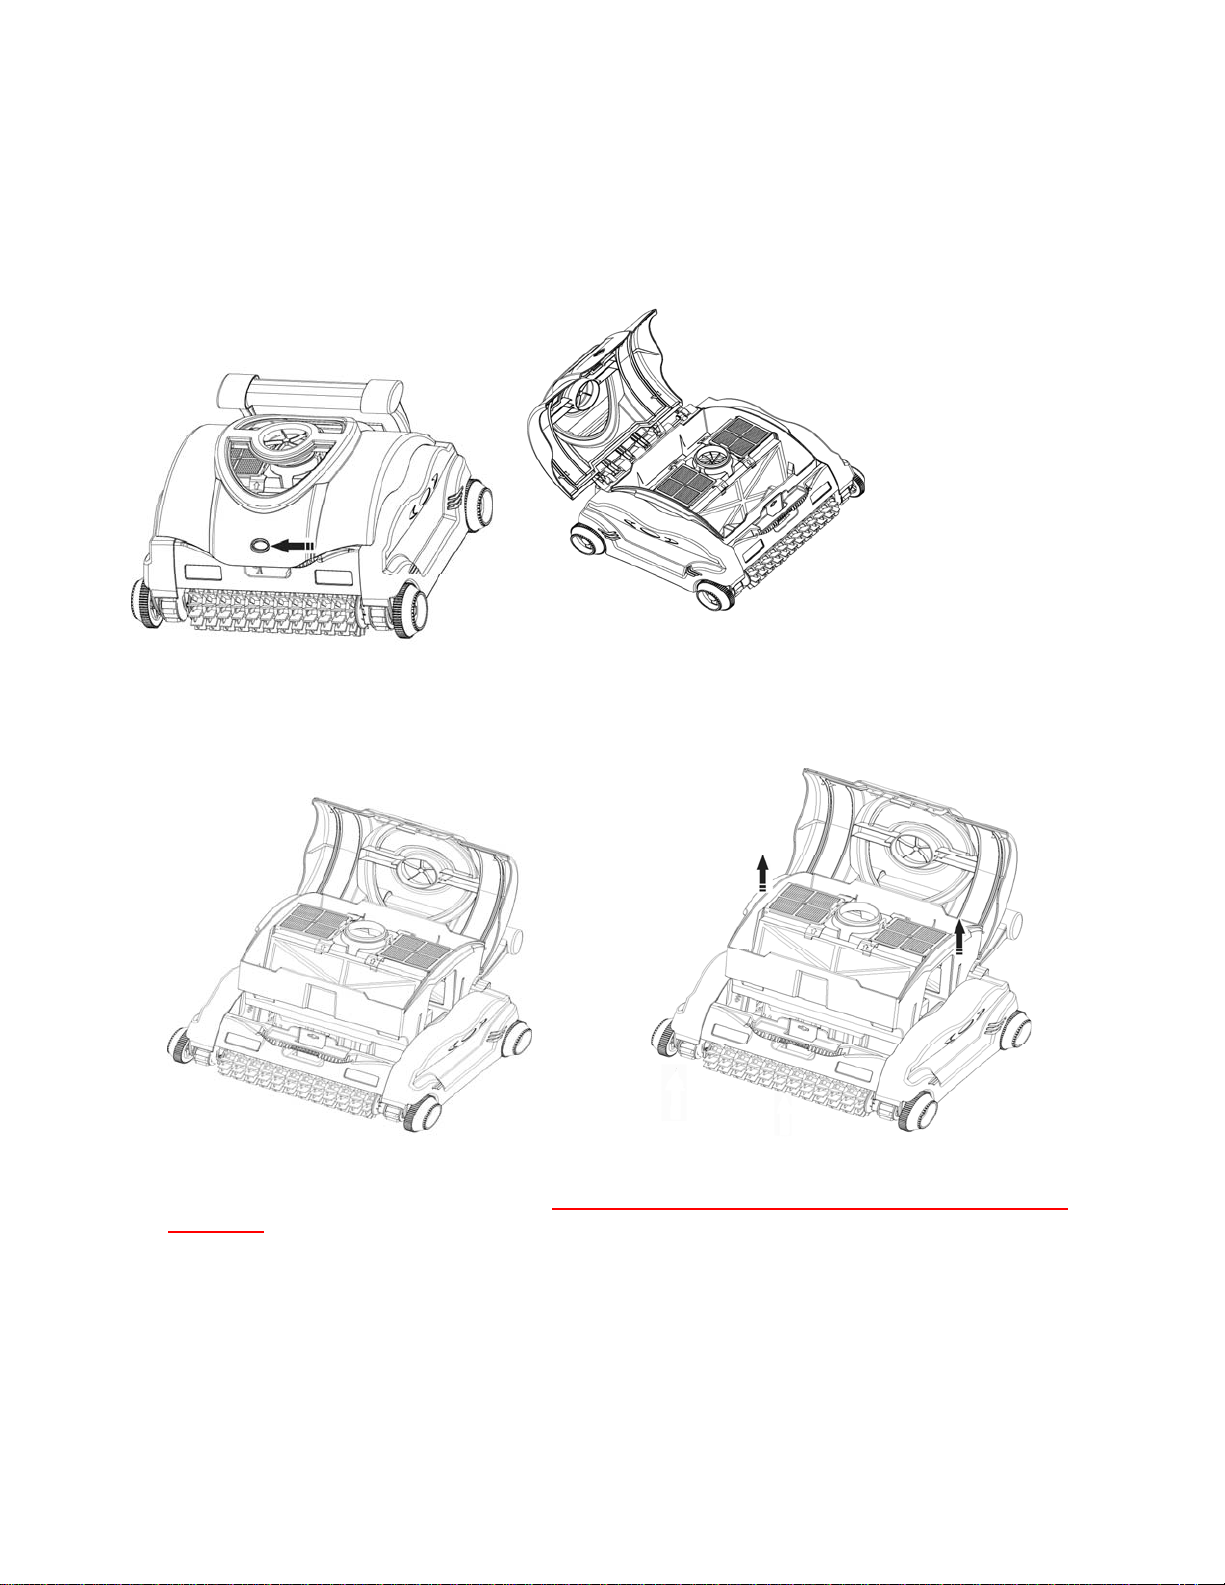
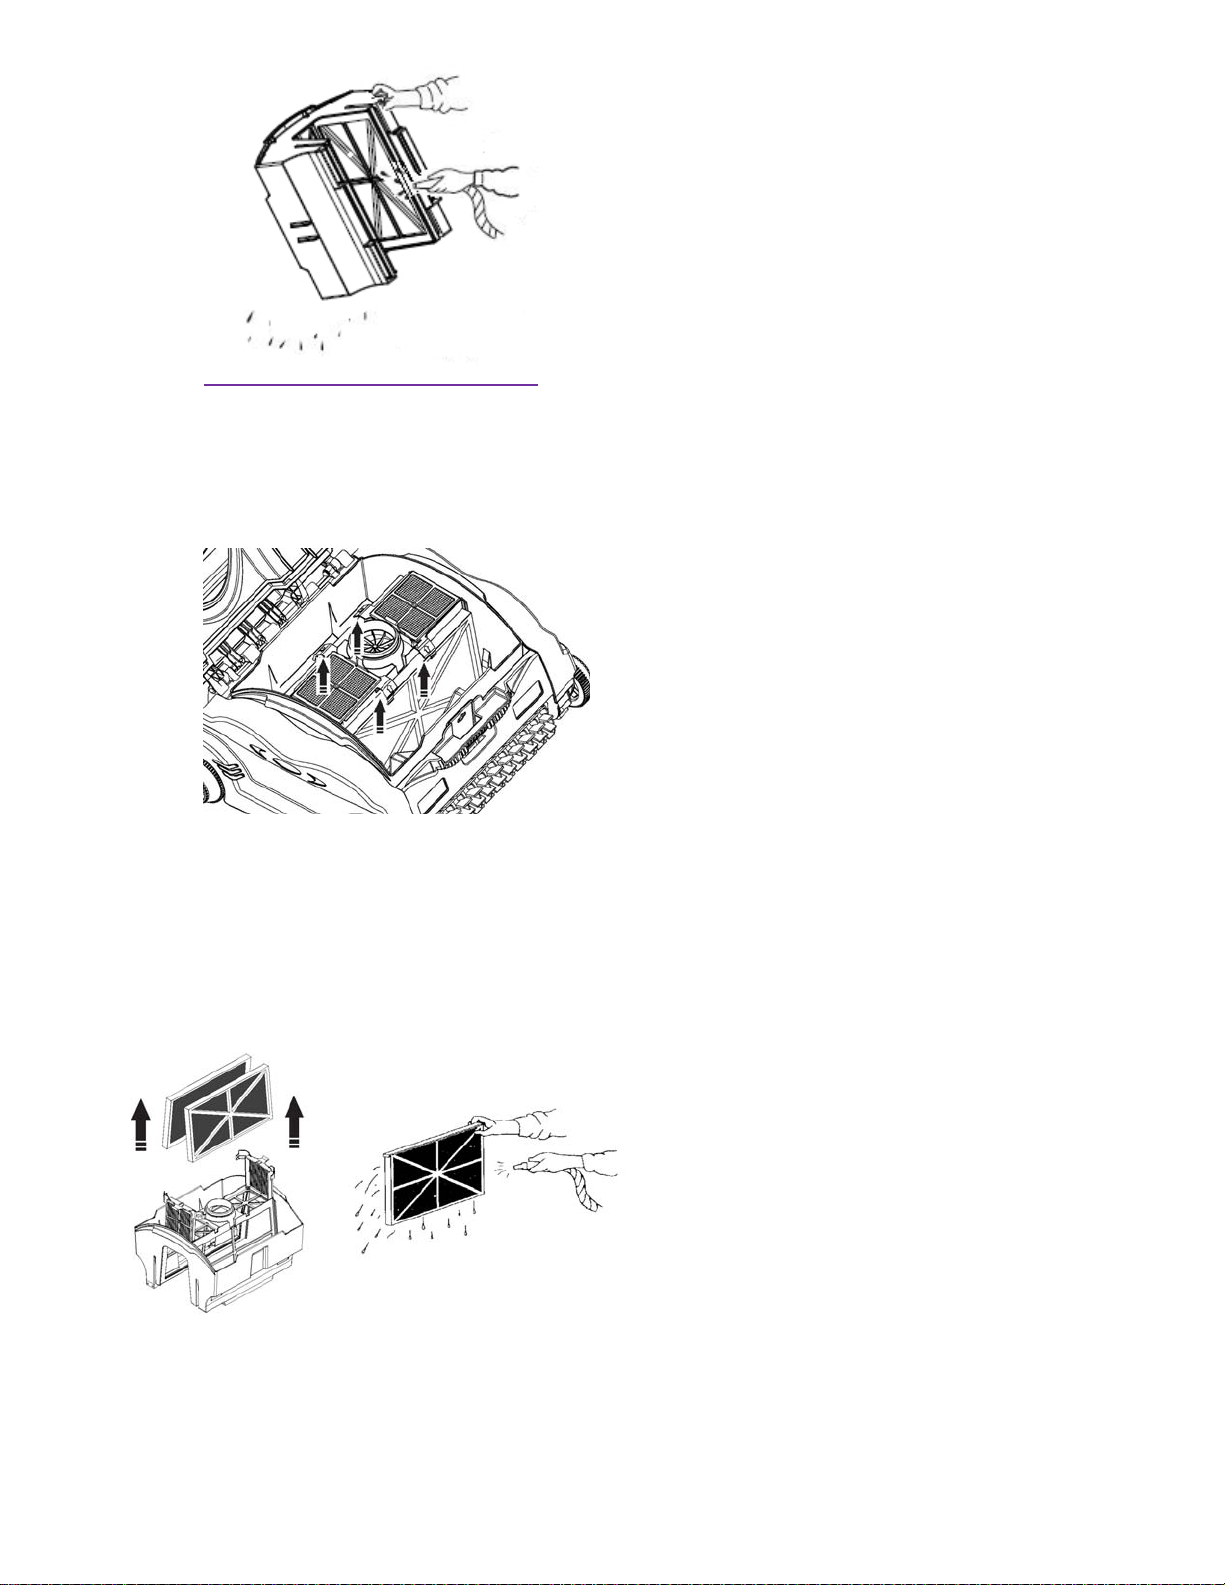
•Cleaning the filter cartridge after every use maximizes the unit’s
performance.
•Replace worn brushes
•If granular chemicals are used in the pool on a daily basis, an automatic or
floating dispenser is recommended, as it retains the calcium sediment
sometimes contained in granular chlorine.
•It is recommended not to operate the SharkVAC until all chemical powder is
dissolved because it can clog the filter.
•In a pool with usually high calcium content, more frequent cleaning of the
filter is recommended.
•Save the SharkVAC original carton for extended storage or shipping
requirements should your SharkVAC require dealer service
•The sealed Motor Unit and the Power Supply contain no user-serviceable parts.
Opening them will automatically VOID your warranty.
•Remove items such as thermometer, toys and the like from the pool before
using the unit. Such items can jam the unit and cause damage to the unit
and/or your pool.
TROUBLESHOOTING.
If SharkVAC fails to pick up fine or heavy debris:
•Clean the filter. It may be clogged. A filter cleaning solution can be used
to remove D.E., excessive dirt and/or sand
If SharkVAC starts working momentarily but then stops working:
•Check and clean if necessaryImpeller may be clogged or jammed with debris.
following the instructions in the maintenance section.
•Brush roller or drive tracks are stuck. Check for debris and clean if
necessary.

Specifications
Suction Rate 75 gal/min
Current Consumption 0.78 amps
Weight (w/o cable) 21.5 lbs
Cable Length, Type 50 ft
Materials High Impact ABS - Metal Parts of
Non-Ferrous Stainless Steel
Motor Unit
PUMP DRIVE PCB
Speed (rpm) 2,700 55 -
Voltage 24V DC 22V DC 5V DC
Current (amp) 2.62 0.63 -
Waterproof Sealing Double Redundant Radial Shaft Seals & 0-Rings.
Housing Sealed, Watertight, High Impact Polypropelene
Overload Protection Electronic Overload Monitoring w/auto-shutoff.
Filter
Type Removable, Re-Usable, Pleated Element Cartridge
Media Pleated Cellulose/Polyester Blend
Porosity 100 micron
Area 1,150 sq. inches
Cleaning Routine Control
Type Adaptive Seek Control Logic (ASCL¨) Microprocessor
Cleaning Cycle 2 hrs
Drive System
Direct Drive w/Polyurethane Drive Track & Acetal/Stainless Steel Bearing System
Power Supply.
Input Primary Voltage 110-120 volt AC (220-240 volts for 240 volt model)
Output Secondary Voltage 24V DC
Rated Output Current 4 amps
Weight 8.3 lbs
These specifications may vary in different swimming pools and electrical supply
outlets.
Shipping
SharkVAC
Carton Dimensions Height 19 in. (48.3 cm) 21 in. (53.3 cm)
Width 19 in. (48.3 cm) 19 in. (48.3 cm)
Length 19 in. (48.3 cm) 21 in. (53.3 cm)
Shipping Weight 21.5 lbs (19.1 kg)
Although the SharkVAC has been tested to work in a wide range of swimming pools,
AquaVac Systems cannot guarantee proper operation in all swimming pools.
Other manuals for SharkVAC
2
Table of contents
Other Hayward Swimming Pool Cleaner manuals
Popular Swimming Pool Cleaner manuals by other brands

Procopi
Procopi Aquareva SL-119-MR Instructions for installation and recommendation

BWT
BWT ICE1240 operating instructions

MARIMEX
MARIMEX Steril Pool instruction manual

Paramount Fitness
Paramount Fitness MDX installation manual

iRobot
iRobot Mirra 530 owner's manual

SmartPool
SmartPool SCRUBBER 60 PLUS NC74S Operation manual