6 / 148
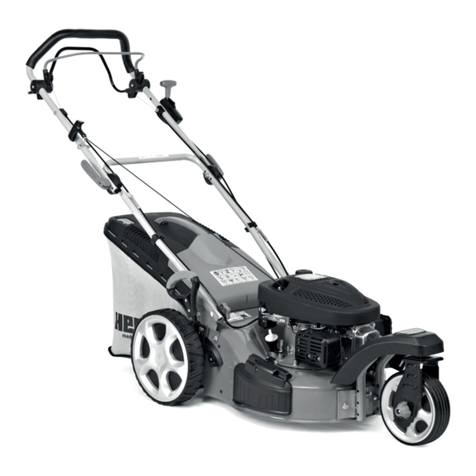
Mounting the handle: CAUTION! Product damage!
Pay attention to the routing of the Bowden cables.
The Bowden cables may neither be routed in too
small a radius not may they be crushed. Loosen
the self-locking nut (A) with the circlip and the washer
from the round-head screw with square neck (B). Push
the handle (C) onto the round-head screw with square
neck. Screw the self-locking nut with the circlip and
the washer onto the round-head screw with square neck
and tighten it. Note: Make sure that the vibration damper
(D) between the handlebars support (E) and the handle
(C) is installed.
Handlebars support: Unscrew the screws (A) with
the circlip and the washer on both sides of the product.
Place the handlebars support (B) onto the product and
screw down to the product again with the screws.
Podpěra rukojetí: Vyšroubujte na obou stranách šrouby
(A) s pojistnou podložkou a podložkou. Umístěte podpěru
rukojetí na tělo sekačky a pomocí šroubů, pojistných
podložek a podložek ji připevněte.
Podpera rukovätí: Odskrutkujte skrutky (A) po oboch
stranách spolu s poistkou a podložkou. Umiestnite
podperu rukovätí na telo kosačky a pripevnite ju pomocou
skrutiek, poistných podložiek a podložiek.
Mounting the steering
CAUTION
Product damage!
Pay attention to the routing of the Bowden cables.
The Bowden cables may neither be routed in too small a radius not may they be
crushed.
– Loosen the self-locking nut (20) with the circlip
and the washer from the round-head screw with
square neck (21).
– Push the steering (3) onto the round-head screw
with square neck (21).
– Screw the self-locking nut (20) with the circlip
and the washer onto the round-head screw with
square neck (21) and tighten it.
Note:
Make sure that the vibration damper (22) between the arm housing (4) and the
steering (3) is installed.
Mounting the Bowden cable guide
CAUTION
Product damage!
Pay attention to the routing of the Bowden cables.
The Bowden cables may neither be routed in too small a radius not may they be
crushed.
– Loosen the self-locking nut (28) with the circlip
and the washer from the screw (29).
– Push the screw (29) with the washer through
the hole in the bracket (30) and the arm housing
(4).
– Screw the self-locking nut (28) with the circlip
and the washer onto the screw (29) and tighten it.
4
a
c
d
e
b
Assembly
Mounting the wheels
WARNING
Risk of injury!
Make sure that the linch pin closes fully.
CAUTION
Product damage!
Pay attention to the running direction of the wheel.
The profile of the wheels must point forward in travel direction.
CAUTION
Product damage!
Always make sure that the tyres have the correct air pressure.
– Push the protectve cap (17) onto the drve
shaft (16).
– Push the wheel (7) with the valve facng
outwards onto the drive shaft (16). If
necessary, first remove the linch pin (18) from
the drive shaft (16).
– Push the linch pin (18) through the hoes in
the rim of the wheel (7) and the drive shaft
(16).
– Close the linch pin (18).
– Repeat the procedure on the other side.
Mounting the arm housing
– Unscrew the screws (19) with the circlip
and the washer on both sides of the product.
– Place the arm housing (4) onto the
product and screw down to the product again
with the screws (19).
3
a
b
b
Wspornik rękojeści: Odkręć śruby (A) z podkładką zabezpieczającą i podkładką po obu stronach. Umieść wspornik
rękojeści na korpusie kosiarki i zamocuj go za pomocą śrub, podkładek zabezpieczających i podkładek.
Fogantyú támaszték: Csavarozza ki minkét oldalon a biztosító alátéttel és alátéttel ellátott csavarokat (A). Helyezze el
a fogantyú támasztékot a kaszáló testére és csavarok, biztosító alátétek és alátétek segítségével rögzítse azt.
Montáž rukojetí: POZOR! Nebezpečí poškození výrobku! Při montáži věnujte pozornost dráze bowdenů.
Bowdeny nesmějí být vedeny příliš malým poloměrem a nesmějí být nikde skřípnuté. Z vratových šroubů
(B) uvolněte samosvorné matice (A) s pojistnou podložkou a podložkou. Nasaďte rukojeti na vratové šrouby a pomocí
samosvorných matic, pojistných podložek a podložek ji připevněte. Dotáhněte matice. Poznámka: Ujistěte se, že mezi
podpěrou rukojetí (E) a rukojetí (C) je nainstalován tlumič vibrací (D).
Montáž rukojetí: POZOR! Nebezpečenstvo poškodenia výrobku! Pri montáži venujte zvýšenú pozornosť
dráhe bowdenov. Bowdeny nesmú byť vedené príliš malým polomerom a nesmú nikde zlomené, prípadne
priškripnuté. Zo skrutiek (B) uvolnite matice (A), poistné podložky a podložky. Nasaďte rukoväte a upevnite ich pomocou
skrutiek, matíc, poistných podložiek a podložiek. Pritiahnite matice. Poznámka: uistite sa, že medzi podperou rukoväte
(E) a rukoväťou (C) je nainštalovaný tlmič vibrácií (D).
Montaż rękojeści: UWAGA! Niebezpieczeństwo uszkodzenia produktu! Podczas montażu zwróć uwagę
na bowden. Bowdeny nie mogą być prowadzone zbyt małym promieniem i nie mogą być nigdzie
przygniecione. Poluzuj nakrętki samozabezpieczające (A) z podkładką zabezpieczającą i podkładką od śrub drzwi (B).
Zamontuj rękojeści na śruby drzwi i zamocuj je za pomocą nakrętek samozabezpieczających, podkładek zabezpieczających
i podkładek. Dokręć nakrętki. Notatka: Upewnij się, że tłumik drgań (D) jest zainstalowany między wspornikiem rękojeści
(E) a rękojeścią (C).


