manuals.online logo
Brands
  1. Home
  2. •
  3. Brands
  4. •
  5. hepco & becker
  6. •
  7. Motorcycle Accessories
  8. •
  9. hepco & becker 5079509 00 01 User manual

hepco & becker 5079509 00 01 User manual

2x Zylinderschraube ISK M12x1,25x110
2x Aludistanz Ø25 xØ12,5x15
2x VA Distanz Ø38xØ13x5
2x allen screw M12x1,25x110
2x Alu spacer Ø25 xØ12,5x15
2x VA spacer Ø38xØ13x5
1
260918
ProtectionPad
HONDA CB 1000 R
ab Baujahr 2018 / from date of manufacture 2018
Artikel Nr.: / Item-no.:
5079509 00 01 schwarz/black
1x 700010188 Schraubensatz:
1x 507.004 ProtectionPad Set
mit roten Logoblenden
1x Padkopf links
1x Padkopf rechts
1x Polymerelement links
1x Polymerelement rechts
1x Logo-Blende links rot
1x Logo-Blende rechts rot
2x Hülse ø13 mm
1x 700010188 Screw kit:
1x 507.004 ProtectionPad Set
with Red covers
1x Pad left
1x Pad right
1x Polymer element left
1x Polymer element right
1x Cover left red
1x Cover right red
INHALT
CONTENTS
Die Originalschrauben der vorderen Motoraufhängung links/rechts entfernen, diese entfallen.
Remove the original screws of the front engine mount left/right, screws are obsolete. 2
Of course, the assembly requires a certain technical experience. If you are not sure how to execute a determined action,
you should ask your local distributor to do it. First, tighten all screws only loosely. After mounting all parts, the screws
should be tightened to the torque specified. This guarantees, that the product is mounted without tension. Observe
the tightening torques of the manufacturer! Control all screw connections after the assembling for tightness!
Die Voraussetzung für die Montage ist natürlich eine gewisse technische Erfahrung. Wenn Sie sich nicht sicher sind,
wie man eine bestimmte Arbeit ausführt, sollten Sie diese Ihrer Fachwerkstatt überlassen. Ziehen sie alle zugänglichen
Schrauben zuerst nur locker an. Nachdem alles montiert ist, werden die Schrauben dann auf das entsprechende
Anzugsmoment festgezogen. Dadurch wird sichergestellt, dass das Produkt spannungsfrei angebaut ist. Anzugsmomente
beachten! Nach der Montage alle Verschraubungen auf festen Sitz kontrollieren!
Beachten Sie die in Ihrem Land geltenden Zulassungsbestimmungen.
Für den Bereich der BRD gilt: Ein Eintrag in die Fahrzeugpapiere ist nicht erforderlich.
Der Protection Pad - Kopf muss vor der
Befestigung am Halter
zusammengebaut werden.
Zuerst die Hülse einsetzen.
Anschließend das Polymerelement
einschieben.
Bitte Reihenfolge beachten!
The Protection Pad kit must be
assembled before attaching the holder.
First insert the spacer.
Then push in the polymer element.
Please note the sequence !
ProtectionPad
HONDA CB 1000 R
ab Baujahr 2018 / from date of manufacture 2018
Artikel Nr.: / Item-no.:
5079509 00 01 schwarz/black
1
WICHTIG
IMPORTANT
VORBEREITUNG
PREPARING
Mount one side after the other.
Otherwise, there is the risk that the engine block change position.
Immer nur eine Seite nach der anderen montieren.
Ansonsten besteht die Gefahr, dass sich der Motor absenkt.
ACHTUNG
CAUTION
Ratsche/Ratchet
Verlängerung/extension
Set
BENÖTIGTE WERKZEUGE
TOOLS REQUIRED
VORBEREITUNG
PREPARING
3
Als weiteres Zubehör lieferbar:/ Also available:
Hepco & Becker GmbH
An der Steinmauer 6
D-66955 Pirmasens
Germany
Tel.: +49 (0)6331 - 1453 - 100
Fax: +49 (0)6331 - 1453 - 120
eMail: [email protected]
www.hepco-becker.de
Weiteres Zubehör auf unsere Homepage. More accessories: see our homepage.
ACHTUNG
CAUTION
Nach der Montage alle Verschraubungen auf festen Sitz kontrollieren ! Abgebaute Teile
wieder montieren. Bitte beachten Sie unsere beigefügten Serviceinformationen.
Control all screw connections after the assembling for tightness! Reassemble the
dismanteled parts. Please notice our enclosed service information.
Nach abgeschlossener Montage die
Logo-Blende ins Pad einsetzen.
After finishing the mounting, insert the
cover into the Pad.
2x
2
3
2x
ProtectionPad
HONDA CB 1000 R
ab Baujahr 2018 / from date of manufacture 2018
Artikel Nr.: / Item-no.:
5079509 00 01 schwarz/black
2x
MONTAGEANLEITUNG
MOUNTING INSTRUCTIONS
Montage der ProtectionPads links/rechts:
Die vormontierten Pads an den nun freien
Bohrungen montieren. Hierfür die
Zylinderschrauben M12x1,25x110
verwenden. Zwischen Protectionpad und
Rahmen die VA Distanzen ø38xø13x5mm
sowie die Aludistanzen in abgebildeter
Reihenfolge fügen.
Fastening of the ProtectionPads left/right:
Mount the pre-assembled pads to the now
free borings. Use allen screws
M12x1,25x110. Add the VA spacers
ø38xø13x5mm between the Pad and frame
and the alu spacers as shown in the
drawing.
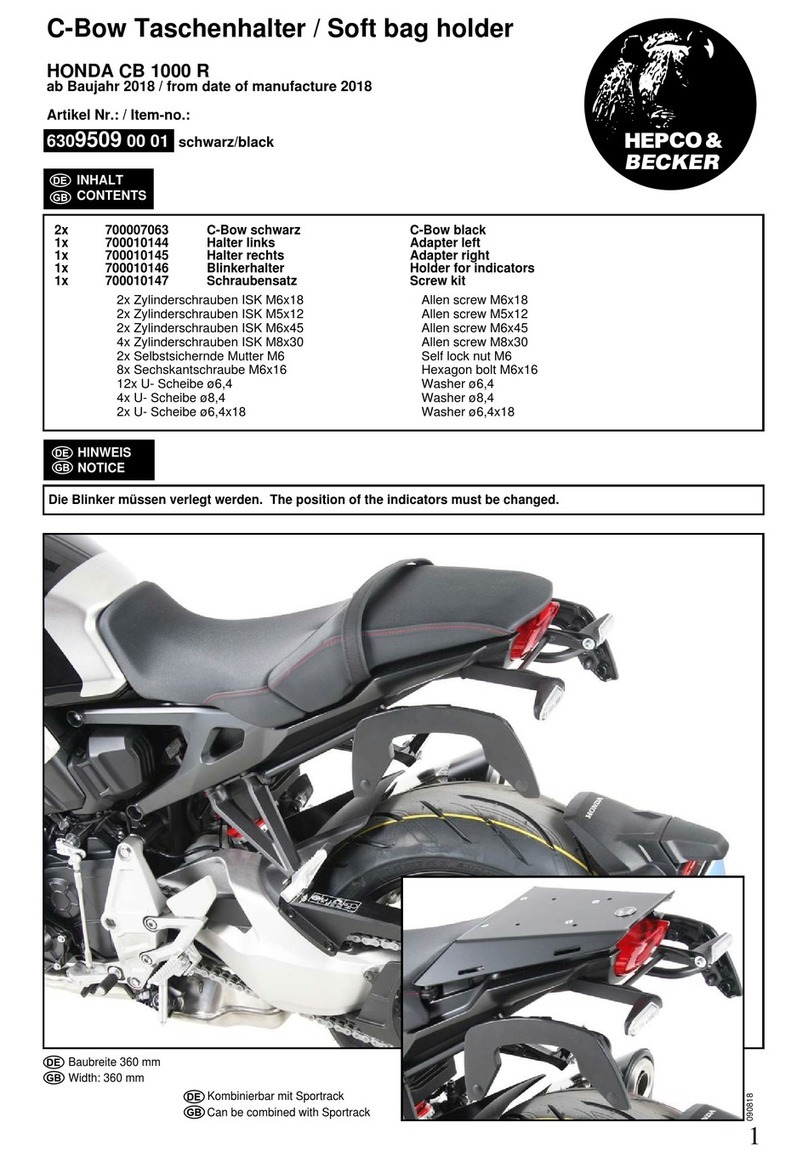
6309509 00 01 C-Bow Taschenhalter / C-Bow Softbag holder
6709509 00 01 Sportrack
5069509 00 09 Tankring
Allgemeine Hinweise:
Der Kunststoffeinsatz wirkt wie eine Kufe und dient dadurch als Führung und
Geschwindigkeitsreduzierung für das rutschende Motorrad.
Protection Pads schützen nicht vor Kratzern, verhindern aber oft schwere Schäden an Rahmen und
Motorgehäuse. Da Schäden an Rahmen oder Motorgehäuse trotz, oder wegen der Verwendung von Protection
Pads nicht völlig auszuschließen sind, erfolgt die Montage auf eigene Verantwortung und unter Ausschluss
jeglicher Gewährleistung.
Wichtig:
Wenn Sie kein ausgebildeter Mechaniker sind, wenden Sie sich bitte an eine Fachwerkstatt.
Es gelten folgende Anzugsmomente, falls nicht in der Zeichnung anders angegeben: M5 = 5Nm; M6 = 10Nm;
M8 = 20Nm; M10x1,25 = 35Nm. Für alle Verschraubungen mit Rahmen oder Motor gelten die
Anzugsdrehmomente des Fahrzeugherstellers. Die Montage muss seitenweise erfolgen, keinesfalls die
Motorhalterung auf beiden Seiten gleichzeitig lösen.
General advice:
The plastic insert guides your motorcycle and reduces sliding speed in case of an accident.
Protection Pads will not prevent scratches but can mostly avoid damages to frame and engine.
Anyhow it is possible, that damage may occur by or in spite of using Protection Pads, therefore
be aware that Protection Pad mounting is on your own responsibility and without any warranty.
Important:
If you are not a trained motorcycle mechanic stop now. Ask a local motorcycle shop to do the work for you.
If not otherwise mentioned, the following tightening torqueses are recommended: M5 = 5Nm/3.7lbf ft; M6
= 10Nm/7.4lbf ft; M8 = 20Nm/14.8lbf ft; M10x1.25 = 35Nm/25.8lbf ft. Refer to the vehicle manufacturer’s
instructions for all connections to frame or engine. Fitting needs to be done one side after the other, never
loosen the engine support on both sides at the same time.
4

Other hepco & becker Motorcycle Accessories manuals
hepco & becker 8107605 00 12 User manual

hepco & becker

hepco & becker 8107605 00 12 User manual

hepco & becker 6307534 00 01 User manual

hepco & becker

hepco & becker 6307534 00 01 User manual

hepco & becker 5034537 00 05 Assembly instructions

hepco & becker

hepco & becker 5034537 00 05 Assembly instructions

hepco & becker Easyrack User manual

hepco & becker

hepco & becker Easyrack User manual

hepco & becker 6302538 00 01 User manual

hepco & becker

hepco & becker 6302538 00 01 User manual

hepco & becker 6304530 00 01 User manual

hepco & becker

hepco & becker 6304530 00 01 User manual

hepco & becker 6607602 00 01 User manual

hepco & becker

hepco & becker 6607602 00 01 User manual

hepco & becker 6619515 01 05 User manual

hepco & becker

hepco & becker 6619515 01 05 User manual

hepco & becker SPORTRACK 670915 00 01 User manual

hepco & becker

hepco & becker SPORTRACK 670915 00 01 User manual

hepco & becker 710081 User manual

hepco & becker

hepco & becker 710081 User manual

hepco & becker 7105590 User manual

hepco & becker

hepco & becker 7105590 User manual

hepco & becker 501984 00 01 User manual

hepco & becker

hepco & becker 501984 00 01 User manual

hepco & becker Xplorer 45 User manual

hepco & becker

hepco & becker Xplorer 45 User manual

hepco & becker LOCK-IT 506012-5 User manual

hepco & becker

hepco & becker LOCK-IT 506012-5 User manual

hepco & becker 5019502 00 02 User manual

hepco & becker

hepco & becker 5019502 00 02 User manual

hepco & becker 7007581 00 01 User manual

hepco & becker

hepco & becker 7007581 00 01 User manual

hepco & becker 710113 00 01 User manual

hepco & becker

hepco & becker 710113 00 01 User manual

hepco & becker 653550 00 01 User manual

hepco & becker

hepco & becker 653550 00 01 User manual

hepco & becker Easyrack User manual

hepco & becker

hepco & becker Easyrack User manual

hepco & becker 6309509 00 01 User manual
hepco & becker

hepco & becker 6309509 00 01 User manual

hepco & becker 6507513 00 01 User manual

hepco & becker

hepco & becker 6507513 00 01 User manual

hepco & becker 6304564 00 01 User manual

hepco & becker

hepco & becker 6304564 00 01 User manual

hepco & becker 7416514 00 01 User manual

hepco & becker

hepco & becker 7416514 00 01 User manual

hepco & becker 6507513 01 01 User manual

hepco & becker

hepco & becker 6507513 01 01 User manual

Popular Motorcycle Accessories manuals by other brands

Suzuki 99130-48K00-CRB installation instructions

Suzuki

Suzuki 99130-48K00-CRB installation instructions

LAZER Victor KinetiCore user manual

LAZER

LAZER Victor KinetiCore user manual

Crivit 292227 Instructions for use

Crivit

Crivit 292227 Instructions for use

AMI Powersports Akari AX.11 Frequently asked questions

AMI Powersports

AMI Powersports Akari AX.11 Frequently asked questions

Titanium TI-TCWH7 user manual

Titanium

Titanium TI-TCWH7 user manual

KTM 60112929050 Information

KTM

KTM 60112929050 Information

Memphis Shades 2320-0042 Mounting instructions

Memphis Shades

Memphis Shades 2320-0042 Mounting instructions

Aim EVO4 user guide

Aim

Aim EVO4 user guide

Suzuki 99143-00A0 000 Series installation instructions

Suzuki

Suzuki 99143-00A0 000 Series installation instructions

Memphis Shades 2320-0020 Mounting instructions

Memphis Shades

Memphis Shades 2320-0020 Mounting instructions

Shad SH40 user manual

Shad

Shad SH40 user manual

Petzl ELIA-2 TECHNICAL NOTICE

Petzl

Petzl ELIA-2 TECHNICAL NOTICE

Tucano TERMOSCUD R209X instruction manual

Tucano

Tucano TERMOSCUD R209X instruction manual

TESSERACT CFMoto Zforce 1000 installation manual

TESSERACT

TESSERACT CFMoto Zforce 1000 installation manual

Schweißkraft VarioProtect XXL-W-2 TC Operating	 instruction

Schweißkraft

Schweißkraft VarioProtect XXL-W-2 TC Operating instruction

Nolan N-Com X Series manual

Nolan

Nolan N-Com X Series manual

Kennedy cellset installation guide

Kennedy

Kennedy cellset installation guide

SUOMY 3LOGY User instructions

SUOMY

SUOMY 3LOGY User instructions

manuals.online logo
manuals.online logoBrands
  • About & Mission
  • Contact us
  • Privacy Policy
  • Terms and Conditions

Copyright 2025 Manuals.Online. All Rights Reserved.