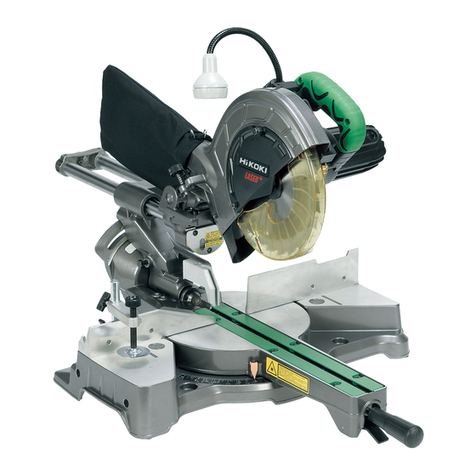
HIKOKI C 3610DRA User manual

C 3610DRA
Handling instructions
使用說明書
취급 설명서
Hướng dẫn sửdụng
คูมือการใชงาน
Petunjuk pemakaian
en
zh
ko
vi
th
id
ar
en
zh
ko
vi
th
id
ar
00BookC3610DRAAsia.indb100BookC3610DRAAsia.indb1 2019/04/029:43:262019/04/029:43:26

2
1
1
z
q
!
a
5
t
%
g
3
c
e
#
d
7
u
&
j
9
o
(
l
2
x
w
@
s
6
y
^
h
4
v
r
$
f
8
i
*
k
0
p
)
;
2
%
r
00BookC3610DRAAsia.indb200BookC3610DRAAsia.indb2 2019/04/029:43:312019/04/029:43:31

3
2
b
n
c3c
m
1
2
43
l
5
4 – ø9 mm
290 mm
263 mm 295 mm
&
, .
/
¡
6
%
™
£
7
a
¢
q
w
§
c
h
!
b
∞
00BookC3610DRAAsia.indb300BookC3610DRAAsia.indb3 2019/04/029:43:342019/04/029:43:34

4
8
¶
•
9
ª
¶
•
10
º
*
e
w
11
z
j
⁄
¤
z
j
‹
¤
a
b
12
b
a
c
s
r
sr
s
r
›
›
›
00BookC3610DRAAsia.indb400BookC3610DRAAsia.indb4 2019/04/029:43:402019/04/029:43:40

5
13
u
y
fi
14
#
$fi
15 816
q
(
e
w
17
*
18
s
‡
·
fl°
fl
‡
00BookC3610DRAAsia.indb500BookC3610DRAAsia.indb5 2019/04/029:43:442019/04/029:43:44

6
19
‚
Œ
´
„
‰
flfl„
´
‰
abc
20
ˇ Á
ˇ
Á
21
2
¨
î
o
p
22
@
y$ °
Ø
∏
Å
/
00BookC3610DRAAsia.indb600BookC3610DRAAsia.indb6 2019/04/029:43:492019/04/029:43:49

7
23
ⓐⓑ
Ï
ⓐⓑ
ⓐⓑ
s
Î
ÍÍ
24
°
3
1
2
3
˝
ÔÓ
25
q
26 27
Ò
Ú
¸
˛
)
Ç
*◊
e
w
ı
28
ⓐ
ⓑ
Ñ
00BookC3610DRAAsia.indb700BookC3610DRAAsia.indb7 2019/04/029:43:512019/04/029:43:51

8
29
ⓑ
j
¤
z
‹
)
Â
30
¯
@
@
¯
˘
y
$
¿
¯
¯
˘
a
b
31
1
102
101
a
g
103
104
105
104
103
s
ab
cd
00BookC3610DRAAsia.indb800BookC3610DRAAsia.indb8 2019/04/029:43:542019/04/029:43:54

9
32 33
106
107
108
1
;
00BookC3610DRAAsia.indb900BookC3610DRAAsia.indb9 2019/04/029:43:592019/04/029:43:59

10
34
ab
35
1
2
36
1
2
00BookC3610DRAAsia.indb1000BookC3610DRAAsia.indb10 2019/04/029:44:002019/04/029:44:00

11
English
1Lower guard xCarriage handle Î(Front view)
2Trigger switch cBattery ÏAdjusting line
3Switch handle vMotor ass’y ˝Pull forward
4Laser marker bCharge indicator lamp ÓPress down
5Motor head nGuide rail ÔPush backward
6Gear case mLatch 33.9° Set pin (A)
7Dust bag ,Work bench ÒStop block (A)
8Slide securing knob .8 mm nut ÚStop plate (A)
9Slide carriage /25 mm thick work bench ¸Stop plate (B)
0Holder (A) ¡8 mm bolt ˛Stop block (B)
!Indicator (For bevel scale) ™Hole ÇMiter scale
@Vise assembly £5 mm screw ◊Turn the turntable
#Sub fence (B) ¢Combination square ıTighten
$Fence (B) ∞Bevel pointer screw ˜Cut grooves with saw blade
%Support rod ass’y §Adjustment bolts ÂBottom line of the groove
^Left extention wing ¶Locknut ¯Wood plate
&Base •Bolt ˘Aluminum sash
*Indicator (For miter scale) ªHex screw ¿Clamp
(Miter detent override button ºScrew
101
Cover plate
)Turntable ⁄Stop rod
102
Cover plate screw
qBevel lock handle ¤Stop block
103
Washer (B)
wMiter lock handle ‹Stop seat
104
8 mm bolt
ePositive stop lock button ›4 mm machine screw
105
Washer (A)
rTable insert fiLock knob
106
Remaining battery indicator switch
tRight extention wing flLaser line
107
Remaining battery indicator lamp
yFence (A) ‡Cutting line
108
Air gun
uSub fence (A) °Workpiece
iRotation direction ·TOP VIEW
oLaser marker switch ‚Laser vertical adjustment knob
pLED light switch ŒLaser horizontal adjustment knob
aSpindle lock „Pattern line
sSaw blade ´Clockwise
dMounting hold ‰Counterclockwise
fBlade wrench strage ˇLine
gBlade wrench ÁWarning sign
hSet pin (A) ¨Lock-offbutton
jAnchor plate îHole
kHinge ØKnob
lLocking pin ∏Vise plate
;Dust port ÅVise lock knob
zStop knob ÍMarking (pre-marked)
00BookC3610DRAAsia.indb1100BookC3610DRAAsia.indb11 2019/04/029:44:002019/04/029:44:00

12
中國語
1下部安全罩 x台架手柄 Î(前視圖)
2扳機開關 c電池 Ï調整線
3切換手柄 v馬達組件 ˝向前拉
4雷射標記器 b充電指示燈 Ó向下按
5馬達頭 n導軌 Ô向後推
6齒輪箱 m閂扣 33.9°定位銷(A)
7集塵袋 ,工作台 Ò止動塊(A)
8滑動式固定旋鈕 .8mm 螺母 Ú止動板(A)
9滑動台架 /25mm 厚工作台 ¸止動板(B)
0支架(A) ¡8mm 螺栓 ˛止動塊(B)
!指針(斜角尺用) ™孔Ç斜接尺
@虎鉗組件 £5mm 螺絲 ◊轉動回轉台
#副擋板(B) ¢組合角尺 ı擰緊
$擋板(B) ∞斜角指針螺絲 ˜用鋸片切割凹槽
%支撐桿組件 §調節螺栓 Â凹槽底線
^左延伸翼 ¶鎖定螺母 ¯木板
&底座 •螺栓 ˘鋁窗框
*指針 ( 斜接尺用 ) ª六角螺絲 ¿夾具
(斜接止動超馳按鈕 º螺絲
101
蓋板
)回轉台 ⁄止動桿
102
蓋板螺絲
q斜角鎖定手柄 ¤止動塊
103
墊圈(B)
w斜接鎖定手柄 ‹止動座
104
8mm 螺栓
e正面擋塊鎖定按鈕 ›4mm 機器螺絲
105
墊圈(A)
r導板 fi鎖定旋鈕
106
電池剩餘量指示燈開關
t右延伸翼 fl雷射線
107
電池剩餘量指示燈
y擋板(A) ‡鋸割線
108
空氣槍
u副擋板(A) °工件
i旋轉方向 ·俯視圖
o雷射標記器開關 ‚雷射垂直調節旋鈕
pLED 燈開關 Œ雷射水平調節旋鈕
a主軸鎖 „圖案線
s鋸片 ´順時針
d安裝固定件 ‰逆時針
f刀片扳手保管處 ˇ線條
g刀片扳手 Á警告標誌
h定位銷 (A) ¨鎖定按鈕
j錨板 î孔
k鉸鏈 Ø旋鈕
l鎖定銷 ∏虎鉗板
;集塵端口 Å虎鉗鎖定旋鈕
z停止旋鈕 Í標誌(預先標記)
00BookC3610DRAAsia.indb1200BookC3610DRAAsia.indb12 2019/04/029:44:012019/04/029:44:01

13
한국어
1하부 가드 x캐리지 핸들 Î(정면도)
2트리거 스위치 c배터리 Ï선 조정
3스위치 핸들 v모터 어셈블리 ˝앞으로 당기기
4레이저 마커 b충전 표시 램프 Ó아래로 누르기
5모터 헤드 n가이드 레일 Ô뒤로 밀기
6기어 케이스 m래치 33.9° 고정 핀 (A)
7분진 주머니 ,작업대 Ò스톱 블록 (A)
8슬라이드 고정 노브 .8mm 너트 Ú스톱 플레이트 (A)
9슬라이드 캐리지 /25mm 두께 작업대 ¸스톱 플레이트 (B)
0홀더 (A) ¡8mm 볼트 ˛스톱 블록 (B)
!표시(경사 눈금) ™구멍 Ç연귀 눈금
@바이스 어셈블리 £5mm 나사 ◊턴테이블 회전
#보조 펜스 (B) ¢콤비네이션 직각자 ı조임
$펜스 (B) ∞경사 포인터 나사 ˜톱날로 홈 내기
%지지 로드 어셈블리 §조절 볼트 Â하단 홈 라인
^왼쪽 연장 윙 ¶잠금 너트 ¯목재판
&베이스 •볼트 ˘알루미늄 섀시
*표시(연귀 눈금) ª육각 나사 ¿클램프
(연귀 멈춤쇠 오버라이드 버튼 º나사
101
커버 플레이트
)턴테이블 ⁄스톱 로드
102
커버 플레이트 나사
q경사 잠금 핸들 ¤스톱 블록
103
와셔 (B)
w연귀 잠금 핸들 ‹스톱 시트
104
8mm 볼트
e포지티브 스톱 잠금 버튼 ›4mm 기계 나사
105
와셔 (A)
r테이블 인서트 fi잠금 노브
106
배터리 잔량 표시 스위치
t오른쪽 연장 윙 fl레이저 선
107
배터리 잔량 표시 램프
y펜스 (A) ‡절단선
108
에어 건
u보조 펜스 (A) °작업물
i회전 방향 ·상면도
o레이저 마커 스위치 ‚레이저 수직 조절 노브
pLED 조명 스위치 Œ레이저 수평 조절 노브
a스핀들 잠금 장치 „패턴 선
s톱날 ´시계 방향
d마운팅 홀드 ‰시계 반대 방향
f블레이드 렌치 스트레이지 ˇ선
g블레이드 렌치 Á경고 표시
h고정 핀 (A) ¨잠금 해제 버튼
j앵커판 î구멍
k힌지 Ø손잡이
l잠금 핀 ∏바이스 플레이트
;분진 포트 Å바이스 잠금 노브
z정지 노브 Í표시(사전 표시됨)
00BookC3610DRAAsia.indb1300BookC3610DRAAsia.indb13 2019/04/029:44:012019/04/029:44:01

14
Tiếng Việt
1Tấm chắn dướixTay cầmÎ(Nhìn từphía trước)
2Công tắc khởi động cPin ÏVạch điều chỉnh
3Tay cầm gắn công tắcvChi tiết động cơ˝Kéo vềphía trước
4Máy đánh dấu laze bĐèn chỉthịsạcÓNhấn xuống
5Đầu động cơnThanh ray dẫnÔĐẩy vềphía sau
6Hộp sốmThen cài Chốt định vị(A) 33,9°
7Túi chứa bụi,Bàn làm việcÒKhối dừng (A)
8Tay nắm an toàn dạng trượt.Đai ốc 8 mm ÚTấm dừng (A)
9Bàn trượt/Bàn làm việc dày 25 mm ¸Tấm dừng (B)
0Giá đỡ (A) ¡Bu lông 8 mm ˛Khối dừng (B)
!Thước đo (Để cân góc xiên) ™LỗÇBàn kẹp gờ
@Bàn kẹp£Đinh vít 5 mm ◊Xoay bàn xoay
#Lá chắn phụ(B) ¢Thước đo kết hợpıSiết chặt
$Lá chắn (B) ∞Vít vạch chuẩn góc xiên ˜Cắt rãnh bằng lưỡi cưa
%Thanh hỗtrợ§Bu lông điều chỉnh ÂĐường đáy của rãnh
^Cánh mởrộng bên trái ¶Đai ốc hãm ¯Tấm gỗ
&Chân bệ•Bu lông ˘Khung nhôm
*Thước đo (Để cân góc) ªVít lục giác ¿Kẹp
(Nút khống chếhãm vát ºVít
101
Nắp che
)Bàn xoay ⁄Thanh dừng
102
Vít nắp che
qTay cầm khóa góc xiên ¤Khối dừng
103
Vòng đệm (B)
wTay cầm khóa góc vát ‹Đế dừng
104
Bu lông 8 mm
eNút khóa dừng chiều thuận›Vít máy 4 mm
105
Vòng đệm (A)
rĐệm lót bàn fiNúm khóa
106
Công tắc đèn báo lượng pin còn lại
tCánh mởrộng bên phảiflVạch laze
107
Đèn báo lượng pin còn lại
yLá chắn (A) ‡Đường cắt
108
Súng hơi
uLá chắn phụ(A) °Vật liệu gia công
iHướng quay ·NHÌN TỪTRÊN
oCông tắc máy đánh dấu laze ‚Núm điều chỉnh dọc cho laze
pCông tắc đèn LED ŒNúm điều chỉnh ngang cho laze
aKhóa hãm trục„Vạch mẫu
sLưỡi cưa´Theo chiều kim đồng hồ
dKhoang lắp đặt‰Ngược chiều kim đồng hồ
fCất giữchìa vặn lưỡi cưaˇĐường vạch
gChìa vặn lưỡi cưaÁDấu hiệu cảnh báo
hChốt định vị(A) ¨Nút nhảkhóa
jBản neo îLỗ
kBản lềØNúm vặn
lChốt an toàn ∏Tấm dụng cụkẹp
;Cổng xảbụiÅNúm khóa kẹp
zNúm dừng ÍĐánh dấu (Vạch sẵn)
00BookC3610DRAAsia.indb1400BookC3610DRAAsia.indb14 2019/04/029:44:012019/04/029:44:01

15
ไทย
1แผนกั้นดานลาง xมือจับตัวควบคุม Î(มุมมองดานหนา)
2สวิตชสั่งงาน cแบตเตอรี่ Ïแนวปรับแตง
3มือจับสวิตช vชุดมอเตอร ˝ดึงไปขางหนา
4เครื่องยิงเลเซอร bชารจไฟแสดงสถานะ Óกดลง
5หัวมอเตอร nรางแนว Ôผลักไปขางหลัง
6เรือนเฟอง mตัวล็อค ชุดสลัก 33.9°(A)
7ถุงเก็บฝุน ,แทนตัด Òบล็อกตัวกั้นระยะ (A)
8แปนปองกันการเลื่อน .น็อต 8 มม.Úแผนรองตัวกั้นระยะ (A)
9ตัวควบคุมการเลื่อน /แทนตัดหนา 25 มม.¸แผนรองตัวกั้นระยะ (B)
0ฐานติดตั้ง (A) ¡สลักเกลียว 8 มม.˛บล็อกตัวกั้นระยะ (B)
!สัญลักษณ (สําหรับเครื่องวัดมุมตัดเขา)™รู Çเครื่องวัดองศา
@ชุดแทนจับ £สกรู 5 มม.◊หมุนแทนหมุน
#แนวฉากยอย (B) ¢ฉากผสม ıขันใหแนน
$ฉาก (B) ∞สกรูเข็มชี้มุมตัดเขา ˜ตัดแนวรองดวยใบเลื่อย
%ชุดกานพยุง §สลักเกลียวปรับความลึก Âแนวรองเสนลาง
^ปกยื่นซาย ¶น็อตล็อค ¯แผนรองไม
&ฐาน •สลักเกลียว ˘แผนอะลูมิเนียม
*สัญลักษณ (สําหรับเครื่องวัดองศา)ªสกรูแบบหัวหลุมหกเหลี่ยม ¿ปากจับ
(ปุมยกเลิกจํากัดการตัดองศา ºสกรู
101
แผนรองตัวยึด
)แทนหมุน ⁄กานตัวกั้นระยะ
102
สกรูแผนรองตัวยึด
qมือจับล็อคมุมตัดเขา ¤บล็อกตัวกั้นระยะ
103
แหวนสกรู (B)
wมือจับล็อคองศา ‹แทนตัวกั้นระยะ
104
สลักเกลียว 8 มม.
eปุมล็อคตัวกั้นระยะแบบโพสิทีฟ ›สกรูเครื่องจักร 4 มม.
105
แหวนสกรู (A)
rแผนเสียบคํ้า fiแปนหมุนล็อค
106
สวิตชแสดงสถานะแบตเตอรี่ที่เหลือ
tปกยื่นขวา flแนวเลเซอร
107
ไฟแสดงสถานะแบตเตอรี่ที่เหลือ
yฉาก (A) ‡แนวการตัด
108
ปนเปาลม
uแนวฉากยอย (A) °ชิ้นงาน
iทิศทางการหมุน ·มุมมองจากดานบน
oสวิตชเครื่องยิงเลเซอร ‚แปนหมุนปรับแนวดิ่งเลเซอร
pสวิตชไฟ LED Œแปนหมุนปรับแนวนอนเลเซอร
aล็อคแกนหมุน „แนวรูปแบบ
sใบเลื่อย ´ตามเข็มนาฬกา
dฐานรองตัวยึด ‰ทวนเข็มนาฬกา
fที่เก็บประแจแหวนใบเลื่อย ˇแนว
gประแจแหวนใบเลื่อย Áสัญลักษณเตือน
hชุดสลัก (A) ¨ปุมออกจากระบบ
jแผนยึด îรู
kบานพับ Øแปนควบคุม
lสลักล็อค ∏แผนรองแทนจับ
;ชองฝุน Åแปนหมุนล็อคแทนจับ
zแปนหมุนตัวกั้นระยะ Íการทําเครื่องหมาย (กอนทําเครื่องหมาย)
00BookC3610DRAAsia.indb1500BookC3610DRAAsia.indb15 2019/04/029:44:012019/04/029:44:01

16
Bahasa Indonesia
1Penahan bawah xHandel kereta Î(Tampilan depan)
2Sakelar pemicu cBaterai ÏGaris penyesuai
3Handel sakelar vRakitan motor ˝Tarik ke depan
4Penanda laser bLampu indikator pengisian daya ÓTekan ke bawah
5Kepala motor nRail pemandu ÔTekan ke belakang
6Wadah gir mKancing 33.9° Pin pengatur (A)
7Kantong debu ,Bangku kerja ÒBalok stop (A)
8Knob pengaman seser .Mur 8 mm ÚPelat stop (A)
9Kereta geser /Bangku kerja tebal 25 mm ¸Pelat stop (B)
0Penyangga (A) ¡Baut 8 mm ˛Balok stop (B)
!Indikator (Untuk skala konis) ™Lubang ÇSkala miter
@Ragum £Sekrup 5 mm ◊Putar meja putar
#Sub pagar (B) ¢Penggaris siku kombinasi ıKencangkan
$Pagar (B) ∞Sekrup penunjuk konis ˜Potong alur dengan bilah gergaji
%Rakitan batang penyangga §Bait penyesuai ÂGaris bawah alur
^Sayap ekstensi kiri ¶Mur pengunci ¯Pelat kayu
&Alas •Baut ˘Sash aluminium
*Indikator (Untuk skala miter) ªSekrup heksagonal ¿Klem
(Tombol timpa tahan miter ºSekrup
101
Pelat penutup
)Meja putar ⁄Batang stop
102
Sekrup pelat penutup
qHandel pengunci konis ¤Balok stop
103
Cincin (B)
wHandel pengunci miter ‹Kursi stop
104
Baut 8 mm
eTombol kunci henti positif ›Sekrup mesin 4 mm
105
Cincin (A)
rSisipan meja fiKnob pengunci
106
Sakelar indikator sisa baterai
tSayap ekstensi kanan flGaris laser
107
Lampu indikator sisa baterai
yPagar (A) ‡Garis potong
108
Penembak udara
uSub pagar (A) °Benda kerja
iArah putaran ·TAMPILAN ATAS
oSakelar penanda laser ‚Knob penyesuai vertikal laser
pSakelar lampu LED ŒKnob penyesuai horizontal laser
aPengunci poros „Garis pola
sBilah gergaji ´Searah jarum jam
dLubang pemasangan ‰Berlawanan arah jarum jam
fPenyimpanan obeng bilah ˇGaris
gObeng bilah ÁTanda peringatan
hPin pengatur (A) ¨Tombol pengunci
jPelat jangkar îLubang
kEngsel ØKnob
lPin pengunci ∏Pelat ragum
;Port debu ÅKnob pengunci ragum
zKnob stop ÍPenanda (pra-tandai)
00BookC3610DRAAsia.indb1600BookC3610DRAAsia.indb16 2019/04/029:44:012019/04/029:44:01

17
ﺔﻳﺑﺭﻌﻟﺍ
1
ﻲﻠﻔﺳﻟﺍ ءﺎﻗﻭﻟﺍ
c
ﺔﻳﺭﺎﻁﺑﻟﺍ
˝
ﻡﺎﻣﻸﻟ ﺏﺣﺳﺍ
2
ﻝﻐﺷﻣﻟﺍ ﺡﺎﺗﻔﻣ
v
ﺭﻭﺗﻭﻣﻟﺍ ﺔﻋﻭﻣﺟﻣ
Ó
ﻡﺎﻣﻸﻟ ﻁﻐﺿﺍ
3
ﻝﻳﺩﺑﺗﻟﺍ ﺽﺑﻘﻣ
b
ﻥﺣﺷﻟﺍ ﺭﺷﺅﻣ ﺡﺎﺑﺻﻣ
Ô
ﻑﻠﺧﻠﻟ ﻊﻓﺩﺍ
4
ﺭﺯﻳﻟ ﺭﺷﺅﻣ
n
ﻕﺎﺳﻣﻟﺍ ﻝﻳﻟﺩ
(A) ﻁﺑﺿﻟﺍ ﺭﺎﻣﺳﻣ 33.9°
5
ﻙﺭﺣﻣﻟﺍ ﺱﺃﺭ
m
ﺝﻻﺯﻣ
Ò
(A) ﻑﻗﻭﺗﻟﺍ ﺯﺟﺎﺣ
6
ﻥﻧﺳﻣﻟﺍ ﺱﺭﺗﻟﺍ ءﺎﻁﻏ
,
ﻝﻣﻌﻟﺍ ﺔﻟﻭﺎﻁ
Ú
(A) ﻑﻗﻭﺗﻟﺍ ﺔﺣﻭﻟ
7
ﺭﺎﺑﻐﻟﺍ ﺱﻳﻛ
.
ﻡﻣ 8ﺔﻟﻭﻣﺎﺻ
¸
(B) ﻑﻗﻭﺗﻟﺍ ﺔﺣﻭﻟ
8
ﻲﺑﻧﺎﺟ ﺔﻳﺎﻗﻭ ﺽﺑﻘﻣ
/
ﻡﻣ 25 ﺔﻛﻳﻣﺳ ﻝﻣﻋ ﺔﻟﻭﺎﻁ
˛
(B) ﻑﻗﻭﺗﻟﺍ ﺯﺟﺎﺣ
9
ﻲﺑﻧﺎﺟ ﻝﻣﺎﺣ
¡
ﻡﻣ 8ﺭﺎﻣﺳﻣ
Ç
ﻲﺟﺎﺗﻟﺍ ﺱﺎﻳﻘﻣﻟﺍ
0
(A) ﺽﺑﻘﻣ
™
ﺔﺣﺗﻔﻟﺍ
◊
ﺭﺍﻭﺩﻟﺍ ﺹﺭﻘﻟﺍ ﺓﺭﺍﺩﺇ
!
(ﻲﻁﻭﺭﺧﻣﻟﺍ ﺱﺎﻳﻘﻣﻠﻟ) ﺭﺷﺅﻣﻟﺍ
£
ﻡﻣ 5ﺭﺎﻣﺳﻣ
ı
ﻡﺎﻛﺣﺈﺑ ﺕﻳﺑﺛﺗ
@
ﺔﻣﺯﻠﻣﻟﺍ ﺏﻳﻛﺭﺗ
¢
ﻊﻳﻣﺟﺗﻠﻟ ﺔﻣﺋﺎﻗ ﺔﻳﻭﺍﺯ
˜
ﺭﺷﻧﻟﺍ ﺓﺭﻔﺷﺑ ﺕﺍءﻭﺗﻧﻟﺍ ﻊﻁﻗ
#
(B) ﻲﻋﺭﻔﻟﺍ ﺭﻭﺳﻟﺍ
∞
ﻲﻁﻭﺭﺧﻣ ﻲﺑﻟﻭﻟ ﺏﺎﻘﺛﻣ
Â
ءﻭﺗﻧﻠﻟ ﻲﻠﻔﺳﻟﺍ ﻁﺧﻟﺍ
$
(B) ﺭﻭﺳﻟﺍ
§
ﻁﺑﺿﻟﺍ ﺭﻳﻣﺎﺳﻣ
¯
ﺔﻳﺑﺷﺧ ﺔﺣﻭﻟ
%
ﻡﻋﺩﻟﺍ ﺩﻭﻣﻋ ﺔﻋﻭﻣﺟﻣ
¶
ﻝﻔﻘﻟﺍ ﺔﻟﻭﻣﺎﺻ
˘
ﻡﻭﻳﻧﻣﻭﻟﺃ ﺭﺎﻁﺇ
^
ﺭﺳﻳﻷﺍ ﺩﻳﺩﻣﺗﻟﺍ ﺡﺎﻧﺟ
•
ﺭﺎﻣﺳﻣﻟﺍ
¿
ﺕﺑﺛﻣﻟﺍ
&
ﺓﺩﻋﺎﻗ
ª
ﺱﺃﺭﻟﺍ ﻲﺳﺩﺍﺩﺳ ﻲﻏﺭﺑ
101
ﺔﺣﻭﻠﻟﺍ ءﺎﻁﻏ
*
(ﻲﺟﺎﺗﻟﺍ ﺱﺎﻳﻘﻣﻠﻟ) ﺭﺷﺅﻣﻟﺍ
º
ﻲﻏﺭﺑ
102
ﺔﺣﻭﻠﻟﺍ ءﺎﻁﻏ ﺭﺎﻣﺳﻣ
(
ﻱﺭﺗﻣﻟﺍ ﺯﺟﺎﺣﻟﺍ ﺯﻭﺎﺟﺗ ﺭﺯ
⁄
ﻑﻗﻭﺗﻟﺍ ﻉﺍﺭﺫ
103
(B) ﺔﻳﻧﺩﻌﻣ ﺔﻘﻠﺣ
)
ﺭﺍﻭﺩﻟﺍ ﺹﺭﻘﻟﺍ
¤
ﻑﻗﻭﺗﻟﺍ ﺯﺟﺎﺣ
104
ﻡﻣ 8ﺭﺎﻣﺳﻣ
q
ﻲﻁﻭﺭﺧﻣﻟﺍ ﻝﻔﻘﻟﺍ ﺽﺑﻘﻣ
‹
ﻑﻗﻭﺗﻟﺍ ﺓﺩﻋﺎﻗ
105
(A) ﺔﻳﻧﺩﻌﻣ ﺔﻘﻠﺣ
w
ﻲﺟﺎﺗﻟﺍ ﻝﻔﻘﻟﺍ ﺽﺑﻘﻣ
›
ﻡﻣ 4ﺯﺎﻬﺟﻟﺍ ﺭﺎﻣﺳﻣ
106
ﻲﻘﺑﺗﻣﻟﺍ ﺔﻳﺭﺎﻁﺑﻟﺍ ﻥﺣﺷ ﺭﺷﺅﻣ ﺡﺎﺗﻔﻣ
e
ﻲﺑﺎﺟﻳﻹﺍ ﻑﺎﻘﻳﻹﺍ ﻝﻔﻗ ﺭﺯ
fi
ﻝﻔﻘﻟﺍ ﺽﺑﻘﻣ
107
ﺔﻳﺭﺎﻁﺑﻟﺎﺑ ﺔﻳﻘﺑﺗﻣﻟﺍ ﺔﻗﺎﻁﻟﺍ ﺭﺷﺅﻣ ﺡﺎﺑﺻﻣ
r
ﺔﻟﻭﺎﻁﻟﺍ ﻝﺎﺧﺩﺇ
fl
ﺭﺯﻳﻠﻟﺍ ﻁﺧ
108
ﻲﺋﺍﻭﻫ ﻊﻓﺩﻣ
t
ﻥﻣﻳﻷﺍ ﺩﻳﺩﻣﺗﻟﺍ ﺡﺎﻧﺟ
‡
ﻊﻁﻘﻟﺍ ﻁﺧ
y
(A) ﺭﻭﺳﻟﺍ
°
ﻝﻣﻋ ﺔﻌﻁﻗ
u
(A) ﻲﻋﺭﻔﻟﺍ ﺭﻭﺳﻟﺍ
·
ﻱﻭﻠﻋ ﺭﻅﻧﻣ
i
ﻥﺍﺭﻭﺩﻟﺍ ﻩﺎﺟﺗﺍ
‚
ﺭﺯﻳﻠﻟ ﻲﺳﺃﺭﻟﺍ ﻁﺑﺿﻟﺍ ﺽﺑﻘﻣ
o
ﺭﺯﻳﻠﻟﺍ ﺭﺷﺅﻣ ﺡﺎﺗﻔﻣ
Œ
ﺭﺯﻳﻠﻟ ﻲﻘﻓﻷﺍ ﻁﺑﺿﻟﺍ ﺽﺑﻘﻣ
p
LED ﺡﺎﺑﺻﻣ ﺡﺎﺗﻔﻣ
„
ﻁﻣﻧﻟﺍ ﻁﺧ
a
ﻥﺍﺭﻭﺩﻟﺍ ﺩﻭﻣﻋ ﻝﻔﻗ
´
ﺔﻋﺎﺳﻟﺍ ﺏﺭﺎﻘﻋ ﻩﺎﺟﺗﺎﺑ
s
ﺭﺷﻧﻟﺍ ﺓﺭﻔﺷ
‰
ﺔﻋﺎﺳﻟﺍ ﺏﺭﺎﻘﻋ ﻩﺎﺟﺗﺍ ﺱﻛﻋ
d
ﺕﻳﺑﺛﺗﻟﺍ ﻝﻣﺎﺣ
ˇ
ﻁﺧ
f
ﺓﺭﻔﺷﻟﺍ ﻁﺑﺭ ﺡﺎﺗﻔﻣ ﻥﻳﺯﺧﺗ
Á
ﺭﻳﺫﺣﺗﻟﺍ ﺓﺭﺎﺷﺇ
g
ﺓﺭﻔﺷﻟﺍ ﻁﺑﺭ ﺡﺎﺗﻔﻣ
¨
ﻕﻼﻏﻹﺍ ﺭﺯ
h
(A) ﻁﺑﺿﻟﺍ ﺭﺎﻣﺳﻣ
î
ﺔﺣﺗﻔﻟﺍ
j
ﺕﻳﺑﺛﺗﻟﺍ ﺔﺣﻳﺭﺷ
Ø
ﺽﺑﻘﻣﻟﺍ
k
ﺔﻠﺻﻔﻣ
∏
ﺔﻣﺯﻠﻣﻟﺍ ﺔﺣﻳﺭﺷ
l
ﻝﺎﻔﻗﻹﺍ ﻥﺳ
Å
ﻝﻔﻘﻟﺍ ﺽﺑﻘﻣ ﺔﺣﻳﺭﺷ
;
ﺭﺎﺑﻐﻟﺍ ﺫﻔﻧﻣ
Í
(ﺎًﻘﺑﺳﻣ ﻩﺩﻳﺩﺣﺗ ﻡﺗ) ﺩﻳﺩﺣﺗﻟﺍ
z
ﻑﻗﻭﺗﻟﺍ ﺽﺑﻘﻣ
Î
(ﻲﻣﺎﻣﺃ ﺭﻅﻧﻣ)
x
ﻝﻣﺣﻟﺍ ﺽﺑﻘﻣ
Ï
ﻁﺑﺿﻟﺍ ﻁﺧ
00BookC3610DRAAsia.indb1700BookC3610DRAAsia.indb17 2019/04/029:44:022019/04/029:44:02

English
18
GENERAL POWER TOOL SAFETY
WARNINGS
WARNING
Read all safety warnings, instructions, illustrations and
specifications provided with this power tool.
Failure to follow all instructions listed below may result in
electric shock, fire and/or serious injury.
Save all warnings and instructions for future reference.
The term “power tool” in the warnings refers to your mains-
operated (corded) power tool or battery-operated (cordless)
power tool.
1) Work area safety
a) Keep work area clean and well lit.
Cluttered or dark areas invite accidents.
b) Do not operate power tools in explosive
atmospheres, such as in the presence of
flammable liquids, gases or dust.
Power tools create sparks which may ignite the dust
or fumes.
c) Keep children and bystanders away while
operating a power tool.
Distractions can cause you to lose control.
2) Electrical safety
a) Power tool plugs must match the outlet.
Never modify the plug in any way.
Do not use any adapter plugs with earthed
(grounded) power tools.
Unmodified plugs and matching outlets will reduce
risk of electric shock.
b) Avoid body contact with earthed or grounded
surfaces, such as pipes, radiators, ranges and
refrigerators.
There is an increased risk of electric shock if your
body is earthed or grounded.
c) Do not expose power tools to rain or wet
conditions.
Water entering a power tool will increase the risk of
electric shock.
d) Do not abuse the cord. Never use the cord for
carrying, pulling or unplugging the power tool.
Keep cord away from heat, oil, sharp edges or
moving parts.
Damaged or entangled cords increase the risk of
electric shock.
e) When operating a power tool outdoors, use an
extension cord suitable for outdoor use.
Use of a cord suitable for outdoor use reduces the
risk of electric shock.
f) If operating a power tool in a damp location
is unavoidable, use a residual current device
(RCD) protected supply.
Use of an RCD reduces the risk of electric shock.
3) Personal safety
a) Stay alert, watch what you are doing and use
common sense when operating a power tool.
Do not use a power tool while you are tired
or under the influence of drugs, alcohol or
medication.
A moment of inattention while operating power tools
may result in serious personal injury.
b) Use personal protective equipment. Always
wear eye protection.
Protective equipment such as a dust mask, non-skid
safety shoes, hard hat or hearing protection used for
appropriate conditions will reduce personal injuries.
c) Prevent unintentional starting. Ensure the
switch is in the off-position before connecting
to power source and/or battery pack, picking up
or carrying the tool.
Carrying power tools with your finger on the switch
or energising power tools that have the switch on
invites accidents.
d) Remove any adjusting key or wrench before
turning the power tool on.
A wrench or a key left attached to a rotating part of
the power tool may result in personal injury.
e) Do not overreach. Keep proper footing and
balance at all times.
This enables better control of the power tool in
unexpected situations.
f) Dress properly. Do not wear loose clothing or
jewellery. Keep your hair and clothing away
from moving parts.
Loose clothes, jewellery or long hair can be caught in
moving parts.
g) If devices are provided for the connection of
dust extraction and collection facilities, ensure
these are connected and properly used.
Use of dust collection can reduce dust-related
hazards.
h) Do not let familiarity gained from frequent use
of tools allow you to become complacent and
ignore tool safety principles.
A careless action can cause severe injury within a
fraction of a second.
4) Power tool use and care
a) Do not force the power tool. Use the correct
power tool for your application.
The correct power tool will do the job better and safer
at the rate for which it was designed.
b) Do not use the power tool if the switch does not
turn it on and off.
Any power tool that cannot be controlled with the
switch is dangerous and must be repaired.
c) Disconnect the plug from the power source and/
or remove the battery pack, if detachable, from
the power tool before making any adjustments,
changing accessories, or storing power tools.
Such preventive safety measures reduce the risk of
starting the power tool accidentally.
d) Store idle power tools out of the reach of
children and do not allow persons unfamiliar
with the power tool or these instructions to
operate the power tool.
Power tools are dangerous in the hands of untrained
users.
e) Maintain power tools and accessories. Check
for misalignment or binding of moving parts,
breakage of parts and any other condition that
may affect the power tool’s operation.
If damaged, have the power tool repaired before
use.
Many accidents are caused by poorly maintained
power tools.
f) Keep cutting tools sharp and clean.
Properly maintained cutting tools with sharp cutting
edges are less likely to bind and are easier to control.
g) Use the power tool, accessories and tool bits
etc. in accordance with these instructions,
taking into account the working conditions and
the work to be performed.
Use of the power tool for operations different from
those intended could result in a hazardous situation.
h) Keep handles and grasping surfaces dry, clean
and free from oil and grease.
00BookC3610DRAAsia.indb1800BookC3610DRAAsia.indb18 2019/04/029:44:022019/04/029:44:02

English
19
Slippery handles and grasping surfaces do not
allow for safe handling and control of the tool in
unexpected situations.
5) Battery tool use and care
a) Recharge only with the charger specified by the
manufacturer.
A charger that is suitable for one type of battery pack
may create a risk of fire when used with another
battery pack.
b) Use power tools only with specifically
designated battery packs.
Use of any other battery packs may create a risk of
injury and fire.
c) When battery pack is not in use, keep it away
from other metal objects, like paper clips, coins,
keys, nails, screws or other small metal objects,
that can make a connection from one terminal to
another.
Shorting the battery terminals together may cause
burns or a fire.
d) Under abusive conditions, liquid may be ejected
from the battery; avoid contact. If contact
accidentally occurs, flush with water. If liquid
contacts eyes, additionally seek medical help.
Liquid ejected from the battery may cause irritation or
burns.
e) Do not use a battery pack or tool that is damaged
or modified.
Damaged or modified batteries may exhibit
unpredictable behaviour resulting in fire, explosion
or risk of injury.
f) Do not expose a battery pack or tool to fire or
excessive temperature.
Exposure to fire or temperature above 130 °C may
cause explosion.
g) Follow all charging instructions and do not
charge the battery pack or tool outside the
temperature range specified in the instructions.
Charging improperly or at temperatures outside
the specified range may damage the battery and
increase the risk of fire.
6) Service
a) Have your power tool serviced by a qualified
repair person using only identical replacement
parts.
This will ensure that the safety of the power tool is
maintained.
b) Never service damaged battery packs.
Service of battery packs should only be performed
by the manufacturer or authorized service providers.
PRECAUTION
Keep children and infirm persons away.
When not in use, tools should be stored out of reach of
children and infirm persons.
SAFETY INSTRUCTIONS FOR MITER
SAW
a) Miter saws are intended to cut wood or wood-like
products, they cannot be used with abrasive cut-
offwheels for cutting ferrous material such as bars,
rods, studs, etc.
Abrasive dust causes moving parts such as the lower
guard to jam. Sparks from abrasive cutting will burn the
lower guard, the kerf insert and other plastic parts.
b) Use clamps to support the workpiece whenever
possible. If supporting the workpiece by hand, you
must always keep your hand at least 100 mm from
either side of the saw blade. Do not use this saw to
cut pieces that are too small to be securely clamped
or held by hand.
If your hand is placed too close to the saw blade, there is
an increased risk of injury from blade contact.
c) The workpiece must be stationary and clamped or
held against both the fence and the table. Do not
feed the workpiece into the blade or cut "freehand"
in any way.
Unrestrained or moving workpieces could be thrown at
high speeds, causing injury.
d) Push the saw through the workpiece. Do not pull
the saw through the workpiece. To make a cut, raise
the saw head and pull it out over the workpiece
without cutting, start the motor, press the saw head
down and push the saw through the workpiece.
Cutting on the pull stroke is likely to cause the saw blade
to climb on top of the workpiece and violently throw the
blade assembly towards the operator.
e) Never cross your hand over the intended line of
cutting either in front or behind the saw blade.
Supporting the workpiece “cross handed” i.e. holding
the workpiece to the right of the saw blade with your left
hand or vice versa is very dangerous.
f) Do not reach behind the fence with either hand
closer than 100 mm from either side of the saw
blade, to remove wood scraps, or for any other
reason while the blade is spinning.
The proximity of the spinning saw blade to your hand
may not be obvious and you may be seriously injured.
g) Inspect your workpiece before cutting. If the
workpiece is bowed or warped, clamp it with the
outside bowed face toward the fence. Always make
certain that there is no gap between the workpiece,
fence and table along the line of the cut.
Bent or warped workpieces can twist or shift and may
cause binding on tile spinning saw blade while cutting.
There should be no nails or foreign objects in the
workpiece.
h) Do not use the saw until the table is clear of all
tools, wood scraps, etc., except for the workpiece.
Small debris or loose pieces of wood or other objects
that contact the revolving blade can be thrown with high
speed.
i) Cut only one workpiece at a time.
Stacked multiple workpieces cannot be adequately
clamped or braced and may bind on the blade or shift
during cutting.
j) Ensure the miter saw is mounted or placed on a
level, firm work surface before use.
A level and firm work surface reduces the risk of the miter
saw becoming unstable.
k) Plan your work. Every time you change the bevel or
miter angle setting, make sure the adjustable fence
is set correctly to support the workpiece and will
not interfere with the blade or the guarding system.
Without turning the tool “ON” and with no workpiece
on the table, move the saw blade through a complete
simulated cut to assure there will be no interference or
danger of cutting the fence.
I) Provide adequate support such as table extensions,
saw horses, etc. for a workpiece that is wider or
longer than the table top.
Workpieces longer or wider than the miter saw table
can tip if not securely supported. If the cut-offpiece or
workpiece tips, it can lift the lower guard or be thrown by
the spinning blade.
m) Do not use another person as a substitute for a
table extension or as additional support.
Unstable support for the workpiece can cause the
blade to bind or the workpiece to shift during the cutting
operation pulling you and the helper into the spinning
blade.
00BookC3610DRAAsia.indb1900BookC3610DRAAsia.indb19 2019/04/029:44:022019/04/029:44:02

English
20
n) The cut-offpiece must not be jammed or pressed
by any means against the spinning saw blade.
If confined, i.e. using length stops, the cut-offpiece could
get wedged against the blade and thrown violently.
o) Always use a clamp or a fixture designed to properly
support round material such as rods or tubing.
Rods have a tendency to roll while being cut, causing the
blade to "bite" and pull the work with your hand into the
blade.
p) Let the blade reach full speed before contacting the
workpiece.
This will reduce the risk of the workpiece being thrown.
q) If the workpiece or blade becomes jammed, turn the
miter saw off. Wait for all moving parts to stop and
disconnect the plug from the power source and/
or remove the battery pack. Then work to free the
jammed material.
Continued sawing with a jammed workpiece could cause
lass of control or damage to the miter saw.
r) After finishing the cut, release the switch, hold
the saw head down and wait for the blade to stop
before removing the cut-offpiece.
Reaching with your hand near the coasting blade is
dangerous.
s) Hold the handle firmly when making an incomplete
cut or when releasing the switch before the saw
head is completely in the down position.
The braking action of the saw may cause the saw head
to be suddenly pulled downward, causing a risk of injury.
PRECAUTIONS ON USING SLIDE
COMPOUND MITER SAW
1. Keep the floor area around the machine level. Well
maintained and free of loose materials e.g. chips and
cut-offs.
2. Provide adequate general or localized lighting.
3. Do not use power tools for applications other than those
specified in the handling instructions.
4. Repairing must be done only by authorized service
facility. Manufacturer is not responsible for any damages
and injuries due to the repair by the unauthorized
persons as well as the mishandling of the tool.
5. To ensure the designed operational integrity of power
tools, do not remove installed covers or screws.
6. Do not touch movable parts or accessories unless the
power source has been disconnected.
7. Use your tool at lower input than specified on the
nameplate; otherwise, the finish may be spoiled and
working efficiency reduced due to motor overload.
8. Do not wipe plastic parts with solvent. Solvents such as
gasoline, thinner, benzine, carbon tetrachloride, alcohol,
may damage and crack plastic parts. Do not wipe them
with such solvent. Clean plastic parts with a soft cloth
lightly dampened with soapy water.
9. Use only original HiKOKI replacement parts.
10. The exploded assembly drawing on this handling
instructions should be used only for authorized service
facility.
11. Never cut ferrous metals or masonry.
12. Adequate general or localized lighting is provided.
Stock and finished workpieces are located close to the
operators normal working position.
13. Wear suitable personal protective equipment when
necessary, this could include:
Hearing protection to reduce the risk of induced hearing
loss.
Eye protection to reduce the risk of injuring an eye.
Respiratory protection to reduce the risk of inhalation of
harmful dust.
Gloves for handling saw blades (saw blades shall be
carried in a holder wherever practicable) and rough
material.
14. The operator is adequately trained in the use, adjustment
and operation of the machine.
15. Refrain from removing any cut-offs or other parts of the
workpiece from the cutting area whilst the machine is
running and the saw head is not in the rest position.
16. Never use the slide compound miter saw with its lower
guard locked in the open position.
17. Ensure that the lower guard moves smoothly.
18. Do not use the saw without guards in position, in good
working order and properly maintained.
19. Use correctly sharpened saw blades. Observe the
maximum speed marked on the saw blade.
20. Do not use saw blades which are damaged or deformed.
21. Do not use saw blades manufactured from high speed
steel.
22. Use only saw blades recommended by HiKOKI.
Use of saw blade comply with EN847-1.
23. The saw blades should be from 235 mm to 255 mm
external diameter ranges.
24. Select the correct saw blade for the material to be cut.
25. Never operate the slide compound miter saw with the
saw blade turned upward or to the side.
26. Ensure that the workpiece is free of foreign matter such
as nails.
27. Replace the table insert when worn.
28. Do not use the saw to cut other than aluminium, wood or
similar materials.
29. Do not use the saw to cut other materials than those
recommended by the manufacturer.
30. Blade replacement procedure, including the method for
repositioning and a warning that this must be carried out
correctly.
31. Connect the slide compound miter saw to a dust
collecting device when sawing wood.
32. Take care when slotting.
33. When transporting or carrying the tool, do not grasp the
holder. Grasp the handle instead of the holder.
34. Start cutting only after motor revolution reaches
maximum speed.
35. Promptly cut OFF the switch when abnormality observed.
36. Shut offpower and wait for saw blade to stop before
servicing or adjusting tool.
37. During a miter or bevel cut the blade should not be lifted
until it has stopped rotation completely.
38. During slide cutting operation, the saw must be pushed
and slided away from the operator.
39. Take all the possibility of residual risks in cutting
operation into your consideration, such as the laser
radiation to your eyes, the inadvertent access to moving
parts on slide mechanical parts on machine and so on.
40. Ensure before each cut that the machine is stable.
Use only saw blades whose maximum permitted speed
is higher than the no-load speed of the power tool.
Do not replace the laser with a different type.
41. Do not stand in a line with the saw blade In front of the
machine. Always stand aside of the saw blade. This
protects your body against possible kickback. Keep
hands, fingers and arms away from the rotating saw
blade.
Do not cross your arms when operating the tool arm.
42. If the saw blade should become jammed, switch the
machine offand hold the workpiece until the saw blade
comes to a complete stop. To prevent kickback, the
workpiece may not be moved until after the machine has
come to a complete stop.
Correct the cause for the jamming of the saw blade
before restarting the machine.
00BookC3610DRAAsia.indb2000BookC3610DRAAsia.indb20 2019/04/029:44:022019/04/029:44:02
Table of contents
Languages:
Other HIKOKI Saw manuals

HIKOKI
HIKOKI C 7MFA User manual

HIKOKI
HIKOKI C 10RJ User manual

HIKOKI
HIKOKI C 5MEY User manual

HIKOKI
HIKOKI CB12-ST2 User manual

HIKOKI
HIKOKI C 10FCH2 User manual

HIKOKI
HIKOKI C 18DBAL User manual

HIKOKI
HIKOKI CR 13VEY User manual

HIKOKI
HIKOKI CR 13VC User manual

HIKOKI
HIKOKI C 7SB3 User manual

HIKOKI
HIKOKI C8FSHE User manual
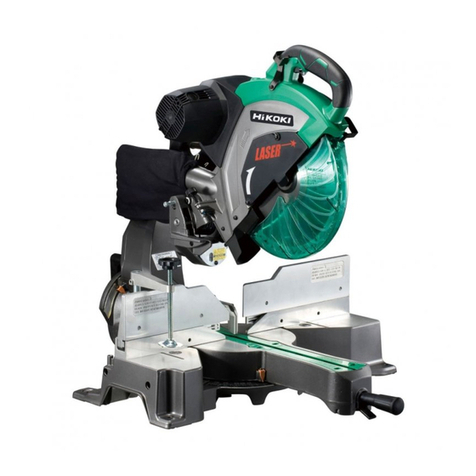
HIKOKI
HIKOKI CD 3605DA User manual

HIKOKI
HIKOKI C 7UY User manual

HIKOKI
HIKOKI C 9U3 User manual

HIKOKI
HIKOKI C 3610DRJX User manual

HIKOKI
HIKOKI C3607DRA User manual

HIKOKI
HIKOKI C 9SA3 User manual

HIKOKI
HIKOKI C 12RSH2 User manual
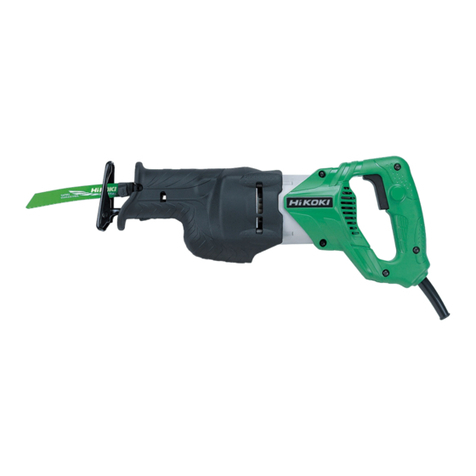
HIKOKI
HIKOKI C8FSHE User manual

HIKOKI
HIKOKI C 3606DPA User manual

HIKOKI
HIKOKI C 6MEY2 User manual