HJM 625 Manual

TERMOVENTILADOR CERÁMICO
TERMOVENTILADOR CERÂMICO
OSCILLATING CERAMIC HEATER
Instrucciones de uso • Instruções de uso • Using instructions
Mod. 625
ESB-37295664
Fábrica: Gutenberg, 91-93
Oficinas: Esposos Curie, 44
Polígono Industrial Los Villares
37184 VILLARES DE LA REINA(Salamanca)
Teléfonos: + 34 923 22 22 77 – + 34 923 22 22 82
Fax + 34 923 22 33 97
http://www.hjm.es - e-mail: [email protected]

–2–

–3–
ESPAÑOL
Características técnicas
Modelo: 625
Voltaje: 230 V~
Potencia: 2.000 W
Frecuencia: 50 Hz
Notas importantes
Lea estas instrucciones atentamente. Consérvelas para futuras consultas:
- El funcionamiento incorrecto y el uso impropio pueden dañar el aparato y causar
lesiones al usuario.
- El aparato sólo puede utilizarse para el propósito para el que se diseñó. No se asu-
mirá ninguna responsabilidad por cualquier posible daño causado por un uso inco-
rrecto o manejo impropio.
- Antes de conectar el aparato, compruebe que la tensión de la red doméstica y la indi-
cada en la etiqueta de características coinciden.
- No sumerja el aparato o la clavija en agua o cualquier otro líquido. Si el aparato entra
en contacto con el agua accidentalmente, desenchufe el aparato inmediatamente y
haga que sea revisado por una persona cualificada antes de usarlo de nuevo. La no
observancia de esta norma podría causar un choque eléctrico fatal.
- No use el aparato en lugares húmedos o cerca de una bañera, ducha o piscina.
- No rocíe con aerosoles o espráis el interior del aparato.
- Nunca intente abrir el aparato.
- No introduzca ningún objeto en su interior.
- No use el aparato con las manos o pies húmedos.
- No toque la clavija con las manos húmedas.
- Comprueba el cable y la clavija regularmente por si existiera un posible daño. Si el
cable o la clavija están dañados, no utilice el aparato. Llévelo a nuestro servicio téc-
nico para su examen y reparación si es necesaria.
-Durante el funcionamiento debe mantener el aparato alejado de materiales combus-
tibles tales como cortinas, moquetas, sillones, etc. Frontalmente debe dejar al menos
una distancia de 2 metros y por detrás no debe haber nada a menos de 0.5 metros
de distancia del aparato.
- No coloque el aparato bajo una toma de corriente.
- Nunca cubra el aparato durante su funcionamiento.
- No use el aparato si se deja caer o se daña por cualquier otro motivo.
- Nunca intente reparar el aparato. Esto podría causar un choque eléctrico.
- Extraiga la clavija del enchufe tirando de la propia clavija y nunca del cable.
-Asegúrese de que no hay peligro de que el cable pueda enredarse accidentalmente o
pueda causar un tropiezo durante su uso.
- Se desaconseja el uso de adaptadores, tomas múltiples y/o prolongaciones. Si se utilizan
deben estar en consonancia con la potencia del aparato y deben estar homologados de
acuerdo con las normas vigentes. De otra forma, podría provocarse un sobrecalentamiento.
- Nunca deje desatendido el aparato mientras está en uso.
- Los niños no pueden reconocer el peligro inherente al uso incorrecto de aparatos
eléctricos. Por consiguiente mantenga el aparato fuera del alcance de los niños.
E
S
P
A
Ñ
O
L

–4–
- Siempre desenchufe el aparato de la red cuando éste no está en uso y siempre antes
de limpiarlo.
- Nunca use el cable para transportar el aparato.
Conozca su aparato
Funcionamiento
E
S
P
A
Ñ
O
L
A. SALIDA DE AIRE
B. BASE CON SISTEMA ANTIVUELCO
C. CUERPO
D. REJILLA METÁLICA
E. PANEL DE CONTROL
F. ASA
G. REJILLA DE ENTRADA DE AIRE
H. CABLE
I. INTERRUPTOR
PARTE DELANTERA PARTE TRASERA
PANTALLA LCD
INDICADOR DE TIEMPO
PILOTO
BOTÓN DE OSCILACIÓN
MANDO DEL TERMOSTATO
INDICADOR DE MODO
INDICADOR DE TEMPERATURA
RECEPTOR MANDO A DISTANCIA
TEMPORIZADOR
BOTÓN DE MODO/
ENCENDIDO/APAGADO

–5–
E
S
P
A
Ñ
O
L
1. Saque el aparato de la caja y de la bolsa.
2. Sitúe el aparato sobre una superficie lisa y estable.
3. Conecte la clavija a la toma de corriente. Durante su funcionamiento, la clavija y/o
el cable pueden calentarse, siendo algo normal.
4. Cuando conecte el aparato a la red y accione el interruptor situado en la parte tra-
sera, oirá una señal acústica y el piloto se iluminará, permaneciendo iluminado
hasta que se accione de nuevo el interruptor o se desconecte el aparato de la toma
de corriente.
5. Presionando el botón de ENCENDIDO/APAGADO/MODO, el aparato comenzará a
funcionar en el modo MÍNIMO (LOW) a 1000W y el ventilador se accionará, apare-
ciendo en la pantalla el símbolo . También aparecerá la letra “L” (LOW) y se irán
iluminando seis pequeñas barras una a una.
6. Si presiona otra vez el botón de ENCENDIDO/APAGADO/MODO, el aparato fun-
cionará en modo MÁXIMO (HIGH) a 2000W .También aparecerá la letra “H” (HIGH)
y se irán iluminando doce pequeñas barras una a una.
7. Si presiona una vez más el botón ENCENDIDO/APAGADO/MODO, el aparato fun-
cionará en modo AUTOMÁTICO a 2000W. En la pantalla aparecerá un valor de tem-
peratura (VER FUNCIONAMIENTO DEL TERMOSTATO). Al mismo tiempo, en la
pantalla aparecerá la letra “A” (AUTOMÁTICO).
8. Presionando una vez más el botón ENCENDIDO/APAGADO/MODO, el aparato
funcionará en modo ventilador a 25W. En la pantalla se iluminará la letra “F” (modo
ventilador) y no habrá salida de calor.
9. Si vuelve a presionar el botón ENCENDIDO/APAGADO/MODO, el aparato volverá
al modo MÍNIMO.
10. Presionando el botón OSC., el aparato comenzará a oscilar. Presionándolo de
nuevo, el aparato dejará de hacerlo.
11. Para apagar el aparato, mantenga presionado el botón ENCENDIDO/APAGA-
DO/MODO durante unos tres segundos. A continuación presione el interruptor en
la parte trasera y desconecte la clavija de la toma de corriente.
Función temporizador
Presione el botón TIMER. El piloto se iluminará y en la pantalla aparecerá por defec-
to 1hr.Presiónelo de nuevo y aparecerá el valor 2hr. Con cada pulsación se incremen-
tará el valor en 1hr hasta un máximo de 8hr. Al final del ciclo, el aparato comenzará a
funcionar en modo continuo.
Una vez activado el temporizador, éste comenzará una cuenta atrás de una en una
hora y en la pantalla aparecerá el tiempo restante para que el aparato se apague auto-
máticamente.
Funcionamiento del termostato
1. Presione el botón ENCENDIDO/APAGADO/MODO hasta que en la pantalla
aparezca el modo AUTOMÁTICO (“A”).
2. Para ajustar la temperatura deseada, gire la rueda del mando hacia arriba para
incrementarla y hacia abajo para disminuirla.
3. Cuando la temperatura supere en dos grados la establecida, el aparato dejará
de calentar y unos quince segundos después dejará de expulsar aire.
–6–
4. Cuando la temperatura caiga dos grados por debajo del valor establecido, el
aparato comenzará a funcionar nuevamente.
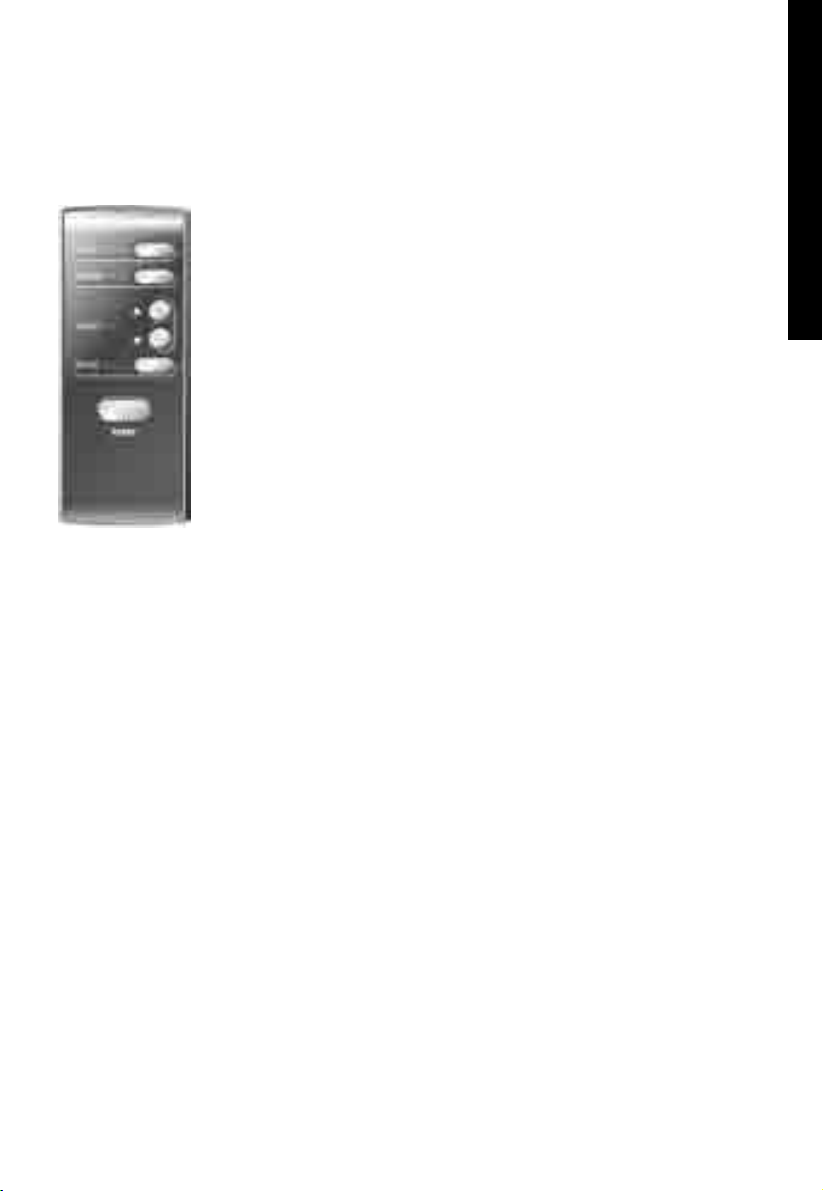
Mando a distancia
1. Conecte el aparato a una toma de corriente y pulse el interrup-
tor situado en la parte trasera.
2. Presione el botón de encendido (ON/OFF) . El aparato se
encenderá.
3. Los botones
OSC.,TIEMPO y MODO realizan las mismas fun-
ciones que las descritas para los mandos del aparato en el
punto FUNCIONAMIENTO.
4. Los botones de TEMP + , - realizan las mismas funciones que
el mando del termostato situado en el aparato.
5. El mando funciona con dos pilas AAA no suministradas y situa-
das en la parte trasera del mando.
6. No mezcle pilas nuevas y usadas o pilas con características
distintas.
Notas de seguridad
Este aparato incluye una alarma que suena cuando el aparato alcanza una tempera-
tura anormalmente alta. Si la alarma suena, apague el aparato e inspecciónelo en busca
de la causa del sobrecalentamiento.
No haga funcionar el aparato cuando suena la alarma
Para evitar peligro en caso de sobrecalentamiento, este aparato está dotado de un
protector térmico.
Cuando el sobrecalentamiento ocurre, el aparato se apaga automáticamente.
Para hacerlo funcionar nuevamente, hay que resetear el aparato. Para ello, desco-
néctelo de la toma de corriente y espere 10 minutos hasta que se enfríe totalmente.
Después de diez minutos, conéctelo a la toma de corriente y hágalo funcionar nor-
malmente.
Cuidado y mantenimiento
No hay partes en el interior del aparato que requieran un mantenimiento o atención
especial. No intente abrir el aparato ya que podría dañarlo, invalidando así la garantía.
Si tiene un problema con el aparato o si el cable está dañado, llévelo al servicio téc-
nico más cercano.
Antes de limpiar el aparato, asegúrese de que está desconectado de la toma de
corriente y que está totalmente frío.
Nunca limpie el aparato con agua o cualquier otro líquido.
La parte externa puede ser limpiada utilizando un paño ligeramente humedecido.
E
S
P
A
Ñ
O
L
–7–
Para eliminar partículas de polvo de la rejilla y de las entradas de aire, puede utilizar
un aspirador regularmente.
Si no va a utilizar el aparato durante una larga temporada, límpielo y guárdelo en un
lugar seco.
Nunca utilice gasolina, disolventes o alcohol para limpiar el aparato.
Eliminación de equipamiento eléctrico y electrónico usado
Este símbolo en el producto, sus accesorios o embalaje indica que el producto no
debe tratarse como un residuo doméstico. Deshágase de este equipamiento en su
punto de recogida más cercano para el reciclaje de residuos eléctricos y electrónicos.
En la Unión Europea y otros países europeos existen diferentes sistemas de recogida
de productos eléctricos y electrónicos usados.
Al asegurar la correcta eliminación de este producto ayudará a evitar riesgos poten-
ciales para el medio ambiente y la salud de las personas que podrían tener lugar si el
producto no se eliminara de forma adecuada. El reciclaje de materiales ayu-
dará a conservar los recursos naturales. Por consiguiente, no elimine equipa-
miento eléctrico y electrónico usado junto con residuos domésticos. Para
información más detallada acerca del reciclaje de este producto, póngase en
contacto con su oficina municipal, el servicio de eliminación de residuos
domésticos o el establecimiento donde adquirió el producto.
E
S
P
A
Ñ
O
L

–8–
PORTUGÛÉS
Características técnicas
Modelo: 625
Tensão: 230 V~
Potência: 2.000 W
Frequência: 50 Hz
Notas importantes
Leia atentamente estas instruções. Conserve-as para futuras consultas.
- O funcionamento incorreto e o uso impróprio podem danificar o aparelho e causar
lesões ao utilizador.
- O aparelho só pode utilizar-se para o propósito que foi concebido. Não se assumirá
nenhuma responsabilidade por qualquer possível dano causado por um uso incorre-
to ou manuseamento impróprio.
- Antes de ligar o aparelho, comprove que a tensão da rede doméstica e a indicada na
etiqueta de características coincidem.
- Não submerja o aparelho ou a ficha em água ou qualquer outro líquido. Se o aparel-
ho acidentalmente entrar em contato com a água desligue o aparelho imediatamente
e procure que seja revisto por uma pessoa qualificada antes de o voltar a usar. A não
observância desta norma pode causar um choque eléctrico fatal.
- Não use o aparelho em lugares húmidos ou perto de uma banheira, chuveiro ou pis-
cina.
- Não pulverize com aerosóis ou sprays o interior do aparelho.
- Nunca tente abrir o aparelho.
- Não introduza nenhum objeto no interior.
- Não use o aparelho com as mãos ou pés húmidos.
- Não toque a ficha com as mãos húmidas.
- Verifique regularmente o estado do cabo e da ficha . Se o cabo ou a ficha estiverem
danificados, não utilize o aparelho. Leve-o ao nosso serviço técnico para ser exami-
nado e reparado se necessário.
-Durante o funcionamento deve manter o aparelho afastado de materiais combustíveis
tais como cortinas, carpetes, cadeirões, etc. Frontalmente deve deixar no minimo
uma distância de 2 metros e por detrás não deve ter nada a menos de 0.5 metros de
distância do aparelho.
- Não coloque o aparelho sob uma tomada de corrente.
- Nunca cubra o aparelho durante o seu funcionamento.
- Não use o aparelho se, por qualquer motivo, se aperceber que se poderá danificar.
- Nunca tente consertar o aparelho. Isto poderia causar um choque elétrico.
- Extraia a ficha da tomada puxando pela ficha e nunca pelo cabo.
-Assegure-se de que não há perigo de que o cabo possa enredar-se acidentalmente
ou possa causar um tropeço durante o seu uso.
- Desaconselha-se o uso de adaptadores, tomadas múltiplas e/ou prolongamentos. Se
se utilizam devem estar em consonância com a potência do aparelho e devem estar
homologados de acordo com as normas vigentes. De outra forma, poderia provocar-
se um sobreaquecimento.
- Nunca abandone o aparelho enquanto está em uso.
- As crianças não reconhecem o perigo inerente ao uso incorreto de aparelhos eléctri-
cos. Por tanto mantenha o aparelho fora do alcance das crianças.
P
O
R
T
U
G
Û
É
S

–9–
P
O
R
T
U
G
Û
É
S
- Desligue sempre o aparelho da rede quando este não está em uso e sempre antes de
o limpar.
- Nunca use o cabo para transportar o aparelho.
Conheça o seu aparelho
Funcionamento
A. SAÍDA DE AR
B. BASE COM SISTEMA ANTIQUEDA
C. CORPO
D. GRELHA METÁLICA
E. PAINEL DE CONTROLO
F. ASA
G. GRELHA DE ENTRADA DO AR
H. CABO
I. INTERRUPTOR
LADO DA FRENTE LADO DE TRÁS
MOSTRADOR LCD
INDICADOR DE TEMPO
PILOTO
BOTÃO DE OSCILAÇÃO
COMANDO DO TERMÓSTATO
INDICADOR DE MODO
INDICADOR DE TEMPERATURA
RECEPTOR TELECOMANDO
TEMPORIZADOR
LIGAR/DESLIGAR/MODO

–10–
1. Retire o aparelho da caixa e do invólucro.
Coloque o aparelho sobre uma superfície plana e estável.
2. Ligue a ficha a uma tomada de corrente É normal que durante o funcionamento se
verifique algum aquecimento da ficha e/ou do cabo.
3. Quando ligar o aparelho à tomada e accionar o interruptor situado na parte trasei-
ra, irá ouvir um sinal acústico e a luz-piloto acender-se-á, permanecendo assim até
que se pressione novamente o interruptor ou até que se desligue o aparelho da
tomada de corrente.
4. Carregando no botão de LIGAR/DESLIGAR/MODO, o aparelho começará a funcio-
nar no modo MÍNIMO (LOW) a 1.000W, accionando-se o ventilador e aparecendo
no mostrador o símbolo . Também aparecerá a letra “L” (LOW) e iluminar-se-ão
seis pequenas barras, uma de cada vez.
5. Se carregar outra vez no botão LIGAR/DESLIGAR/MODO, o aparelho funcionará
em modo MÁXIMO (HIGH) a 2.000W. Também aparecerá a letra “H” (HIGH) e ilumi-
nar-se-ão doze pequenas barras, uma de cada vez.
6. Se carregar mais uma vez no botão LIGAR/DESLIGAR/MODO, o aparelho funcio-
nará em modo AUTOMÁTICO a 2.000W. No mostrador aparecerá um valor de tem-
peratura (VER FUNCIONAMENTO DO TERMÓSTATO. Ao mesmo tempo aparecerá
no mostrador a letra “A” (AUTOMÁTICO).
7. Se carregar mais uma vez no botão LIGAR/DESLIGAR/MODO, o aparelho funcio-
nará em modo ventilador a 25W. No mostrador aparecerá a letra “F” (modo ventila-
dor), não havendo saída de calor.
8. Se voltar a carregar no botão LIGAR/DESLIGAR/MODO, o aparelho regressará ao
modo MÍNIMO.
9. Carregando no botão OSC, o aparelho começará a oscilar. Carregando novamente,
o aparelho deixará de oscilar.
10. Para desligar o aparelho, mantenha pressionado o botão LIGAR/DESLI-
GAR/MODO durante uns 3 segundos. Em seguida, carregue no interruptor do lado
de trás e desligue a ficha da tomada de corrente.
Função temporizador
Carregue no botão TIMER. A luz-piloto acender-se-á e no mostrador aparecerá 1hr
como pré-definição. Carregando-o de novo, aparecerá o valor 2hr.Por cada vez que se
carrega, o valor aumentará 1 hora, até um máximo de 8hr. No fim do ciclo, o aparelho
começará a funcionar em modo contínuo.
Uma vez activado, o temporizador entrará em contagem regressiva, de hora em
hora, aparecendo no mostrador o tempo que falta para que o aparelho se desligue auto-
maticamente.
Funcionamento do termóstato
1. Carregue no botão LIGAR/DESLIGAR/MODO até que no mostrador apareça o
modo AUTO.
2. Para estabelecer a temperatura desejada, gire a roda do comando para cima a fim
de aumentar e para baixo a fim de diminuir.
3. Quando a temperatura ultrapassar em dois graus o valor estabelecido, o aparelho
deixará de aquecer e de expelir ar passados uns 15 segundos.
4. Quando a temperatura cair dois graus abaixo do valor estabelecido, o aparelho
começará a funcionar novamente.
P
O
R
T
U
G
Û
É
S
–11–
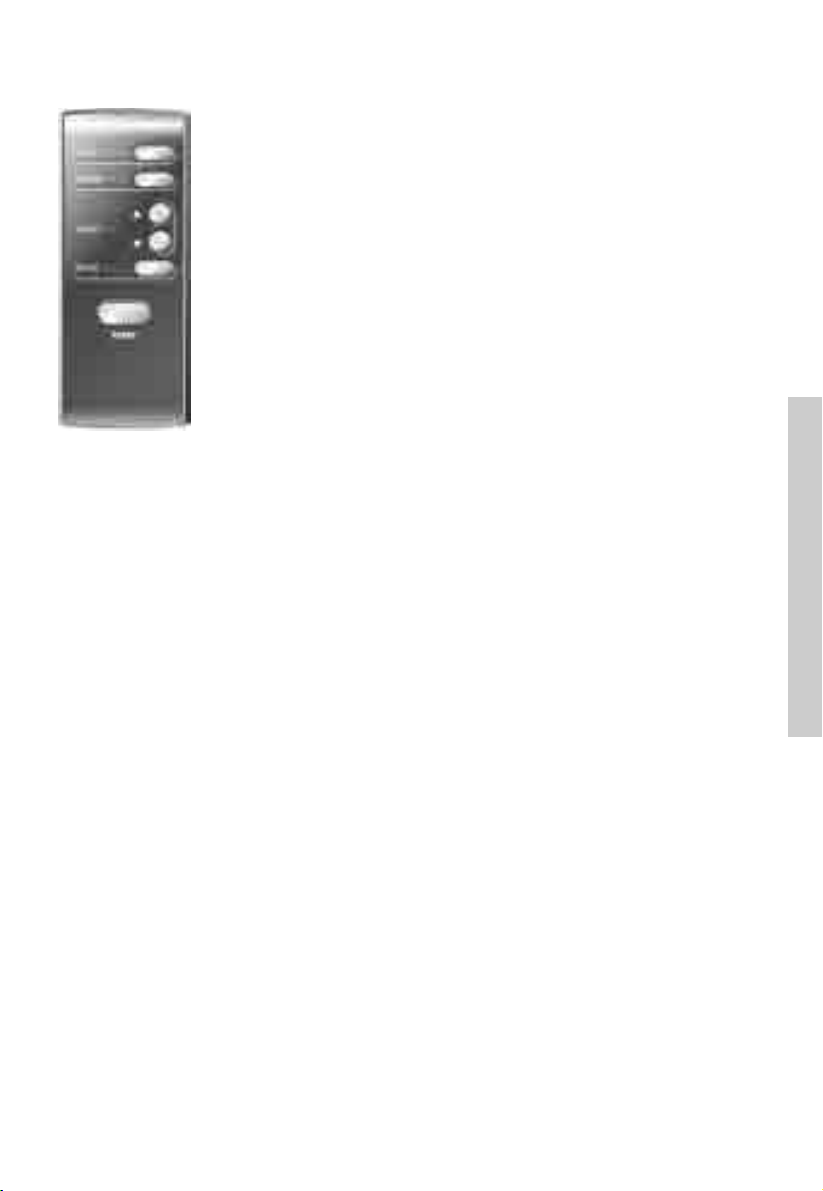
Telecomando
1. Ligue o aparelho a uma tomada de corrente e carregue no inte-
rruptor situado na parte de trás.
2. Carregue no botão ON/OFF. O aparelho ligar-se-á.
3. Os botões
OSC, TIEMPO e MODO realizam as mesmas funçõ-
es que as descritas para os comandos do aparelho no ponto
FUNCIONAMENTO.
4. Os botões de TEMP +, - realizam as mesmas funções que
comando do termóstato situado no aparelho.
5. O comando funciona com duas pilhas AAA não fornecidas e
situadas na parte de trás do comando.
6. Não misture pilhas novas e usadas ou pilhas com característi-
cas diferentes.
Notas sobre segurança
Este aparelho inclui um alarme que soa quando ele atinge uma temperatura anormal-
mente elevada. Se o alarme soar, desligue o aparelho e inspeccione-o para tentar
encontrar a causa do sobreaquecimento.
Não ponha o aparelho a funcionar quando soar o alarme.
Para evitar perigo em caso de sobreaquecimento, este aparelho está dotado de um
protector térmico.
Quando o sobreaquecimento ocorre, o aparelho apaga-se automaticamente.
Para pô-lo novamente a funcionar, é necessário reiniciar o aparelho. Para esse efeito,
desligue-o da tomada de corrente e espere 10 minutos até que ele arrefeça totalmente.
Decorridos dez minutos, ligue-o à tomada de corrente e ponha-o a funcionar normal-
mente.
Cuidados e manutenção
No hay partes en el interior del aparato que requieran un mantenimiento o atención
especial. No intente abrir el aparato ya que podría dañarlo, invalidando así la garantía.
Si tiene un problema con el aparato o si el cable está dañado, llévelo al servicio téc-
nico más cercano.
Antes de limpiar el aparato, asegúrese de que está desconectado de la toma de
corriente y que está totalmente frío.
Nunca limpie el aparato con agua o cualquier otro líquido.
La parte externa puede ser limpiada utilizando un paño ligeramente humedecido.
Para eliminar partículas de polvo de la rejilla y de las entradas de aire, puede utilizar
un aspirador regularmente.
Si no va a utilizar el aparato durante una larga temporada, límpielo y guárdelo en un
lugar seco.
Nunca utilice gasolina, disolventes o alcohol para limpiar el aparato.
P
O
R
T
U
G
Û
É
S
–12–
Destruição e eliminação de equipamentos eléctricos e
electrónicos em fim de vida
A existencia deste simbolo no produto, acessórios ou embalagem significa que o
produto não deve ser tratado como um residuo doméstico. Ao desfazer-se do aparelho
deve coloca-lo no ponto de recolha mais próximo e próprio para a recolha de residuos
eléctricos e electrónicos. N aUnião Europeia e outros países europeus existem diferen-
tes sistemas de recolha de produtos eléctricos e electrónicos usados (fim de vida). Ao
assegurar a correcta eliminação destes produtos está a ajudar a proteger o meio
ambiente e como consequencia a nossa saúde. A reciclagem ajuda a con-
servação dos recursos naturais. Assim sendo não elimine equipamento eléc-
trico e electrónico usado em conjunto com residuos domésticos. Para infor-
mação mais detalhada sobre a reciclagem deste produto contacte o estabe-
lecimento onde comprou o produto, o Instituto dos residuos ou a Camara
Municipal .
P
O
R
T
U
G
Û
É
S

–13–
ENGLISH
Product Appearance
General Safety Information
When using electrical appliances, basic precautions should always be followed to
reduce the risk of fire, electric shock and injury to person, including the following:
1. Read all instructions before using heater.
2. Use this heater only as described in this manual. Any other use not recommended
by the manufacturer may cause fire, electrical shock, or injury to persons.
3. Make certain that the power source conforms to the electrical requirements of the
heater.
4. Extreme caution is necessary when any heater is used by or near children or inva-
lids and whenever the heater is left operating unattended.
5. Where possible, avoid the use of extension cords because the extension cord may
overheat and cause a risk of fire.
6. Do not operate any heater with a damaged cord or plug or after the heater malfunc-
tions, has been dropped or damaged in any manner. Return heater to authorized
service facility for examination, electrical or mechanical adjustment or repair.
7. Unplug power cord before servicing or moving the heater. Always unplug heater
when not in use.
WARNING: DO NOT DEPEND ON THE ON/OFF SWITCH THE SOLE MEANS OF
DISCONNECTING POWER WHEN SERVICING OR MOVING THE HEATER.
ALWAYS UNPLUG THE POWER CORD.
8. Do not insert or allow fingers or foreign objects to enter any ventilation or exhaust
opening as it may cause an electric shock or fire or damage the heater. Do not block
or tamper with the heater in and manner while it is in operation.
E
N
G
L
I
S
H
A. WARM OUTLET OPENING
B. BASE WITH TIP-OVER SWITCH
C. BODY
D. METAL MESH
E. CONTROL PANEL
F. HANDLE
G. AIR INLET OPENING
H. PLUG
I. POWER SWITCH
FRONT REAR

–14–
9. To prevent a possible fire, do not block air intakes or exhaust in any manner. Do not
place heater on soft surfaces, like a bed, where openings may become blocked.
10. Always place the heater on a stable, flat, level surface when operating, to avoid the
chance of the heater overturning. Locate the power cord so the heater or other
objects are not resting on it, Do not run power cord under carpeting. Do not cover
power cord with throw rugs, runners, or the like. Arrange power cord away from
room traffic and where it will not be tripped over.
11. This heater is hot when in use. To avoid burns, do not let bare skin touch hot surfa-
ces. Always use handle when moving this heater. Keep combustible materials, such
as furniture, pillows, bedding, papers, clothes and curtains at least 0.5m.
12. A heater has hot and arcing or sparking parts inside. It must NOT be used in poten-
tially dangerous locations such as flammable, explosive, chemical-laden or wet
atmosphere. This heater is intended for use in general use only.
13. This heater is not intended for use in wet or damp locations. Never locate a heater
where it may fall into a bathtub or other water container.
14. Do not use heater outdoors.
WARNING: REDUCE THE RISK OF FIRE OR ELECTRIC SHOCK – DO NOT USE
THIS HEATER WITH ANY SOLID STATE SPEED CONTROL DEVICES.
READ AND SAVE THESE INSTRUCTIONS
Operation
Control Panel:
E
N
G
L
I
S
H

–15–
1. Carefully remove the heater from the bag and the gift box.
2. The heater must be placed on a flat level surface.
3. Plug the cord set into a electrical outlet. Be sure plug fits tightly in outlet. A loose fit
will cause overheating and damage the plug. Plug and cord set may feel warm
during normal usage.
4. When heater is plugged in and turn on the power switch on the rear of the unit, there
will be a “beep” and a red power light to indicate that there is power to the unit. The
red light will remain lit until the power switch is closed or the heater is unplugged
from the outlet.
5. Press the
POWER&MODE BUTTON will start the heater.
6. Upon turning the heater on, the unit will be in the LOW heat mode(1000 watts), the
FAN start to run, the ” ” in the LCD will be highlighted . At the same time the “L”
in the LCD will be highlighted. The decoration light will be lit from 1 on the left to 6
one by one, then cycle.
7. When
POWER&MODE button is pressed at this point, the heater will be set into
“HIGH “heat mode(2000 watts), and the “H” in the LCD will be highlighted. The
decoration light will be lit from 1 on the left to 12 one by one, then cycle.
8. Pressing the POWER&MODE button once more will set the heater into AUTO mode
(2000 watts). Notice that the display now displays a SET TEMP indicator (see
THERMOSTAT INSTRUCTION) . At the same time the “A” in the LCD will be high-
lighted.
9. Press the
POWER&MODE button again and the heater will be in the FAN mode(25
watts). The “F” in the LCD will be highlighted. FAN mode is for fan-only operation,
without any heat output.
10. Pressing the
POWER&MODE button again and the heater will go back to LOW heat
mode. Continuing to press the POWER&MODE button will cycle the unit through
LOW, HIGH, AUTO, FAN mode.
11. Press
OSC. button, the heater will oscillate left and right. Press it again and the osci-
llation will stop.
12. To disconnect heater, press POWER&MODE button for above 3 seconds, and turn
off the power switch, then remove plug from outlet.
Timer Function. Press the Timer button once and the light comes on indicating 1
hour of time. Press it again and the light indicates 2 hours. Press it a third time and
it indicates 3 hours. The total time that can be indicated at one time is 8 hours.
Continuing to press the Timer button will cycle through the settings until all timer
lights are off. When the time indicator lights are off, the heater will run continuously.
Once the timer has been set, the timer will count down the hours in 1 hour incre-
ments, and the LCD will display the remaining operating time, until the heater will
turn itself off.
Thermostat instruction
1. Pressing the POWER&MODE button until the display shows AUTO mode.
2. To adjust set temperature, Rotate the Thermostat knob up to increase the desired
temperature and down to decrease the desired temperature.
3. When the air temperature raises 2 degrees above the set temperature, the heater
will stop heating at once and stop blowing after 15 seconds.
4. When the air temperature drops 2 degrees below the set temperature, the unit will
come back on.
E
N
G
L
I
S
H

–16–
Remote control
1) Plug the heater into outlet and open the power switch on the
base.
2) Press the ON/OFF button will start the heater.
3) The OSC., TIEMPO and MODO buttons function in the exact
same manner as listed in the OPERATION instructions above.
4) The TEMP.buttons (+,-) are for the thermostat function in the
exact same as the Thermostat knob.
5) The remote control is powered by two AAA batteries. There is a
cover on the back of the remote control that can be removed
for replacement of the batteries as required.
6) Do not mix old and new batteries, or batteries of different spe-
cifications.
7) The battery must be removed from the appliance before it is
scrapped; it is to be disposed of safety.
Safety features
1. This heater includes an audible alarm to warn that parts of the heater are getting
excessively hot. If the alarm sounds, immediately turn the heater off and inspect for
any objects on or adjacent to the heater that may cause high temperature.
DO NOT OPERATE THE HEATER WITH THE ALARM SOUNDING.
2. A thermal overload protector is built in to prevent overheating.
3. When an overheat temperature is reached, the heater will be automatically shut off.
It can only resume operation when the user resets the unit. (See RESET INSTRUC-
TION below)
Reset instruction
1. Unplug the heater and wait 10 minutes for the unit to cool down.
2. After the 10 minutes, plug the unit in again and operate normally.
Trouble shooting tips
If your heater shuts off unexpectedly or fails to operate, one of the above-mentioned
safety features may have activated to prevent overheating.
1. Be sure the power cord is plugged into a working electrical outlet.
2. Check your thermostat setting. The heater may be off because it has reached the
desired temperature setting.
Maintenance
WARNING: ALWAYS UNPLUG THE CORD BEFORE CLEANING, MOVING OR
SERVICING.
DO NOT IMMERSE HEATER IN WATER!
E
N
G
L
I
S
H

–17–
CLEANING: Clean the heater grills with the vacuum brush attachment on your vacuum
cleaner. This will remove dirt from the inside of the heater. DO NOT ATTEMPT TO TAKE
HEATER APART. Clean the body of heater with a soft cloth moistened with a solution
of mild detergent and water. Then dry it with another cloth.
This appliance is not intended for use by persons (including children) with reduced
physical, sensory or mental capabilities, or lack of experience and knowledge, unless
they have been given supervision or instruction concerning use of the appliance by a
person responsible for their safety.
CAUTION: Do not use gasoline, thinner, harsh cleaners, etc., as they will damage
the heater. NEVER USE ALCOHOL OR SOLVENTS. (NEVER USE ALCOHOL OR
SOLVENTS.)
STORAGE: Store the heater with these instructions in the original carton in a cool, dry
place.
Recycling of electrical and electronic equipment
The symbol on the product or in its packing indicates that this product may not be
treated as household waste. Instead it shall be handed over to the applicable collection
point for the recycling of electrical and electronic equipment. By ensuring this
product is disposed of correctly, you will help prevent potential negative con-
sequences for the environment and human health, which could otherwise be
caused by inappropriate waste handling of this product. For more detailed
information about recycling of this product , please contact your local city
office, your household waste disposal service or the shop where you purcha-
sed the product. These instructions are only valid in the EU member states.
E
N
G
L
I
S
H
–18–
•ALBACETE
FERRETERÍA TENDERO
Baños, 42
Teléfono 967 52 10 40
•ALICANTE
Alcoy
PATRICIA SOLER GADEA
Cid, n.º 12
Teléfono 965 33 14 12
Elche
MICROSERVICIO
Luis Lorente, 16
Teléfono 965 46 77 10
Elda
REACESORIOS PUCHE
Donoso Cortés, 19
Teléfono 965 38 18 99
•ASTURIAS
Avilés
LUIS GARCÍA
J. María Pedregal, 14
Teléfono 985 56 97 92
Gijón
LUIS GARCÍA
Cienfuegos, 39
Teléfono 985 36 97 68
Oviedo
LUIS GARCÍA
Aguila, 5
Teléfono 985 22 35 25
•BADAJOZ
REELECTRO
Quevedo Quintana, 7
Teléfono 924 23 70 12
Mérida
SALETE S.A.T.
Prol. Cuartel Guardia Civil, 3
Teléfono 924 31 56 62
•BARCELONA
COVILAS, S. A.
Llull, 163-165
Teléfono 93 485 27 27
KLEIN GERÄTE
Ramón y Cajal, 98
Teléfono 93 284 19 96
Igualada
SERVIELDE, S. L.
C/. Rambla San Ferrán, 56
Teléfono 93 803 26 37
Les Franqueses del Vallés
REP. ELEC. SALVADO, S. L.
C/. San Josep, 51-53
Teléfono 93 849 40 73
Manresa
JORDI MANERO CARNÉ
C/. Bruc, 55
Teléfono 93 872 85 42
Sabadell
SERVEI TECNIC FERRER, S.C.P.
C/. Lepant, 38
Teléfono 93 710 51 38
•BURGOS
MUTOBRE, S. L.
Avda. Cid, 93 - bajo
Teléfono 947 24 10 40
•CÁCERES
CECOCASA
Argentina, 7
Teléfono 927 24 44 84
Plasencia
TALLERES SÁNCHEZ
Sor Valentina Mirón, 29
Teléfono 927 41 19 69
Moraleja
ELECTRODOMÉSTICOS FERREIRA
Avda. Virgen de la Vega, 28
Teléfono 927 51 54 62
Navalmoral de la Mata
REPARACIONES LA CIBELES
Mercado, 13
Teléfono 927 53 17 17
•CÁDIZ
Algeciras
VÍCTOR MANUEL MOYA ACUÑA
San Antonio, 7
Teléfono 956 66 18 81
Chipiona
TECNI-REPUESTOS REYES, S.L.
Avda. de Rota, n.º 72
Teléfono 956 37 04 53
El Puerto de Santa María
REPUESTOS IMA
Calle Ruiseñor, 32 - Edificio Andalucía
Teléfono 956 85 33 51
Sanlúcar de Barrameda
ELETRO REY
Santo Domingo, 128
Teléfono 956 36 68 66
•CASTELLÓN DE LA PLANA
FERMÍN RENAU CARSI
C/. Unión, 41
Teléfono 964 21 73 05
•CIUDAD REAL
TALLERES MANZANO
Esperanza, 11
Teléfono 926 22 23 66
•CÓRDOBA
REPARACIONES CAÑERO
Escritor Jiménez Lora, 47
Teléfono 957 25 90 46
•CORUÑA
DIFER GALICIA
San Rosendo, 9
Teléfono 981 23 65 64
El Ferrol
GREMAR S.A.T., S. L.
Españoleto, 21-23
Teléfono 981 32 32 56
Santiago de Compostela
SERVICIOS TÉCNICOS CANCELA
Bonaval, 29
Teléfono 981 56 40 16
•GIRONA
VAMER
Santa Eugenia, 206
Teléfono 972 23 27 20
•GRANADA
JUAN ÚNICA
Doctor Jaime García Royo, s/n.
Teléfono 958 27 87 16
Baza
FRANCISCO VICO LÓPEZ
Avda. José de Mora, 22
Teléfono 958 70 06 87
Motril
JOSÉ LUIS MARTÍN BLANQUEZ
Ventura, 4
Teléfono 958 60 24 08
•GUADALAJARA
ANTONIO ANDRÉS SERRANO
Toledo, 40 C
Teléfono 949 25 30 89
•GUIPÚZCOA
San Sebastián
GARLAZ
Iglesia, 4
Teléfono 943 45 67 64
RECAMBIOS NAVARRO
Santa Bárbara, 2
Teléfono 943 35 30 49
SANTIAGO ESTALAYO ARIJA
Paseo Magdalena Jáuregui-Berri, 4 L. 3
Teléfono 943 47 50 13
SERVICIOS TÉCNICOS OFICIALES

–19–
Eibar
EIBAR S.A.T. TELE COLOR
Ifar-kale, 8
Teléfono 943 20 67 17
•HUELVA
BLANCO MEJIAS, S.L.
Plaza Berrocal, local 2
Teléfono 959 15 61 61
INICIATIVA GARFEN, S.L.
Rascón, 11
Teléfono 959 25 80 00
M. GARCÍA RAMÍREZ
Béjar, 27
Teléfono 959 25 80 00
TELE-HIFI, S.L.
C/. Isla Saltes, 6
Teléfono 959 23 72 44
Ayamonte
ISIDRO FERNÁNDEZ REYES
C/. Lusitania, 27
Teléfono 959 32 06 35
•JAÉN
EDUARDO DELGADO HUETE
Ruiz Romero, 8
Teléfono 953 23 66 05
Úbeda
VIMCA
Avda. de Linares, 8
Teléfono 953 75 34 07
•LA RIOJA
Logroño
JULCRISA
Calvo Sotelo, 57
Teléfono 941 23 36 99
•LEÓN
PROSAT
Jaime Balmes, 8, bajos
Teléfono 987 22 37 30
Ponferrada
ELECTRÓNICA POLO
Lago de la Baña, 4
Teléfono 987 41 19 22
•LUGO
TECNILUGO, S.L.U.
Chantada, 7-9, bajo dcha.
Teléfono 982 26 37 23
•MADRID
DISTRIBUCIONES MARÍN
Suecia, 67
Teléfono 91 306 62 33
•MÁLAGA
AINCO-GAS
Polifemo, 11 - Polígono Pacífico
Teléfono 95 224 03 00
F. M ALDONADO
C/. Martínez Maldonado, 11
Teléfono 95 227 29 37
Estepona
ELECTRICIDAD MURSA
C/. Valencia, 18
Teléfono 95 280 74 83
•MURCIA
SERVICIOS SEBA, C. B.
Isaac Albéniz, 4
Teléfono 968 29 85 93
Cartagena
MEGASÓN, Servicios Técnicos
C/. Carlos III, 30
Teléfono 968 52 75 19
•OURENSE
ELECTRO COUTO
Melchor de Velasco, 17
Teléfono 988 23 51 15
•PALENCIA
MIFE
General Goded, 27-A
Teléfono 979 74 20 27
•PONTEVEDRA
GASELEC
Paseo de Colón, 3
Teléfono 986 85 55 28
Vigo
GASELEC
Barcelona, 56
Teléfono 986 42 32 09
•SALAMANCA
ILUMINACIÓN GONZÁLEZ
Ctra. Ledesma, 90
Teléfono 923 22 31 26
RAMÓN RODRÍGUEZ
Lazarillo de Tormes, 10
Teléfono 923 23 84 91
•SANTANDER
RANJE ELECTRODOMÉSTICOS
C/. Transmiera, 8 - bajo
Teléfono 942 27 19 48
•SEVILLA
EUROSAT, S. L.
C/. Avilés, s/n.
Teléfono 954 45 83 91
Dos Hermanas
BRICOLAJE DEL SUR
C/. Cristo de la Veracruz, 2
Teléfono 954 72 73 11
BRICOLAJE DEL SUR
Pl. del Emigrante, 6
Teléfono 954 72 18 66
Morón de la Frontera
QUINTERO
C/. Santiago, 21
Teléfono 954 85 13 87
•TARRAGONA
SERTELS
Capuchinos, 22
Teléfono 977 22 18 51
•TOLEDO
ELECTRODO
Avda. América, 1
Teléfono 925 21 69 69
Talavera de la Reina
ELECTRODO
C/. Santa Teresa de Jesús, 5
Teléfono 925 82 48 34
•VALENCIA
S.A.T. GUESCA, S. L.
Mosén Jacinto Verdaguer, 14
Teléfono 96 384 53 64
Alfaraz del Patriarca
PABLO GARCÍA VILLEN
Avda. Primero de Mayo, 15
Teléfono 96 130 95 46
Quart de Poblet
QUARTSAT, C. B.
Antic Regne de Valencia, 46
Teléfono 96 153 25 20
Xátiva
TORRES E HIJOS, S. L.
C/. Juan XXIII, 2
Teléfono 96 228 24 04
•VALLADOLID
ELECTROSERVIS, C. B.
Santa Lucía, 16
Teléfono 983 39 63 75
•VITORIA
ROMESA
C/. Olaguibel, 48
Teléfono 945 12 82 00
•VIZCAYA
Bilbao
R.E. ABAD
Gregorio de la Revilla, 34 lonja
Teléfono 94 421 52 71
•ZAMORA
ANGEL S.A.T.
San Vicente, 9
Teléfono 980 53 37 83
•ZARAGOZA
UNAJESAT, S.L.L.
Avda. del Tenor Fleta, 136 BJ
Teléfono 976 37 30 99
JUAN ESPINOSA IGLESIAS
Carmen, 19
Teléfono 976 22 77 11
ASISTENCIA TÉCNICA PORTUGAL
DEX-TEC LDA
Telefone: 226062706

–20–
ESB-37295664
Fábrica: Gutenberg, 91-93
Oficinas: Esposos Curie, 44
Polígono Industrial Los Villares
37184 VILLARES DE LA REINA(Salamanca)
Teléfonos: + 34 923 22 22 77 – + 34 923 22 22 82
Fax + 34 923 22 33 97
http://www.hjm.es - e-mail: [email protected]
Table of contents
Languages:
Other HJM Heater manuals


Popular Heater manuals by other brands

Technotherm
Technotherm CPH 1000 E Installation and technical manual

Winterwarm
Winterwarm DX-EH installation manual

Mark Climate
Mark Climate EASYAIR W100 EC Technical manual

Cedar Ridge
Cedar Ridge MD3TPU OWNER'S OPERATION AND INSTALLATION MANUAL

Heat Electric
Heat Electric Conservatory Radiator 3100 Installation and operating instructions

Dyson
Dyson AM09 Operation manual


7U1H Owner's/operator's manual")

Hunter
Hunter 73028-WH owner's manual

Standler Form
Standler Form Anna little operating instructions

Stelrad
Stelrad ELECTRIC Series quick start guide

Swann
Swann Smith's Space Saver SS2E Installation, commissioning and user manual

Sonnenkonig
Sonnenkonig OFR 7 LCD user manual

Aktobis
Aktobis WDH-BGP03 quick start guide