Hocom GRC Series User manual

User Manual
GRC Series
DIGITAL COUNTING SCALE

1
GRC-Counting Series
User Manual
Cautions
Upon receiving the scale, please take at least 8
hours to recharge the battery (refer to page 10)
before you start to operate this scale.
Please recharge the battery after a long period of
storage (more than one month). It takes 8~10
hours to fully recharge the battery.
Please assemble the platter before powering on the
scale.
Do not keep the weight placed on the platter for a
long period.
Keep the scale away from the environment with
high temperature, high humidity, heavy press,
and heavy bump.
Always make sure the scale is located in a flat
and plane surface.

2
GRC-Counting Series
User Manual
Dimensions
Tabletop:
Indicator:
140mm
150mm
300mm
160mm

3
GRC-Counting Series
User Manual
Symbols on LCD
Zero Indication ():
cursor appears on the bottom edge of WEIGHT
LCD (above of ZERO printed on the display-overlay),
and indicates the scale is at zero-point.
NET Weight Indication ():
cursor appears on the bottom edge of WEIGHT
LCD (above of TARE printed on the display-overlay),
and indicates the tare weight has been deducted.
Accumulation Indication ():
cursor appears on the bottom edge of QUANTITY
LCD (above of M+ printed on the display-overlay),
and indicates the memory bank has stored
accumulative data of total weight and total quantity.
Insufficient Sampling-Quantity Indication ():
cursor appears on the bottom edge of UNIT
WEIGHT LCD (above of S.Q printed on the
display-overlay), and indicates the sampling-quantity
(setup via SAMPLE key) is less than 10 pieces. The
more sampling-quantity on the platter, the scale
could calculate more precise unit weight.

4
GRC-Counting Series
User Manual
Insufficient Unit Weight Indication ():
cursor appears on the bottom edge of UNIT
WEIGHT LCD (above of S.W printed on the
display-overlay), and indicates the averaging unit
weight is too light.
The internal resolution of this scale is 30000. While
the averaging unit weight of measured subjects is
lighter than “max capacity / 30000”, cursor will
flash on UNIT WEIGHT LCD. For example:
With 30kg max capacity; and the internal resolution
is 30000. 30kg / 30000 = 1g. If the averaging unit
weight of measured subjects is lighter than 1g,
cursor will flash on UNIT WEIGHT LCD (above of
S.W printed on the display-overlay).
Operation Instructions
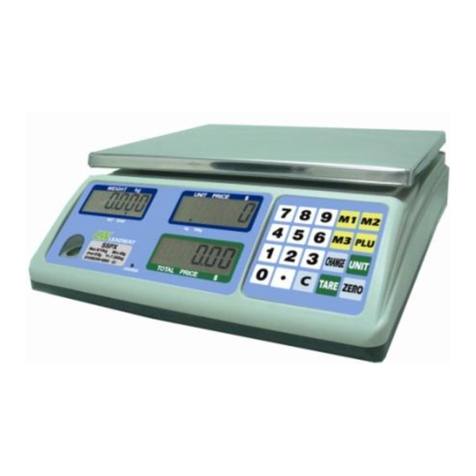
Status of the Battery :
When WEIGHT LCD indicates and the scale
sounds beep beep beep every thirty-minute, it
means the battery is running in low-voltage status.
LCD will indicate continuously for reminding the
user to recharge the battery. If the battery is still
running in low-voltage status without being recharged,
WEIGHT LCD will indicate -OFF- and the scale will
sound beep repeatedly. Please power of the scale
and recharge the battery (refer to page 10) as soon
as possible.
-
-

5
GRC-Counting Series
User Manual
0
~
9
:
Pressing these keys to key in the unit weight or
sampling-quantity.
:
(1) Pressing this key to set the decimal point for the
weight.
(2) Press and hold [] key till the scale sounds beep to
enable or disable optional Backlight.
CE
:
Pressing this key to delete the setting of weight
value.
ZERO
:
Pressing this key to zero the weight. WEIGHT LCD
will show cursor on the above of ZERO (printed on
the display-overlay).
TARE
:
Pressing this key to deduct the tare weight. Put the
package or container on the platter and then press
[TARE] key. cursors will flash on WEIGHT LCD
(above of TARE and ZERO).
M+
:
Pressing this key could save the measured weight

6
GRC-Counting Series
User Manual
and quantity values into the memory bank (up to 99
data accumulation). Please notice the M+ function
must be operated under the same unit weight.
MR
:
Pressing this key to recall the data one by one that is
saved in the memory bank. After the last item of
saved data is recalled, pressing [MR] key again will
show the total accumulative values of total weight
(on WEIGHT LCD) and total quantity (on QNANTITY
LCD).
MC
:
Pressing this key to delete all accumulated data in
the memory bank (the scale will sound beep beep and
WEIGHT LCD will flash CLR when [MC] key has been
operated.
SAMPLE
:
Pressing this key to confirm the sampling quantity.
Example:
Put 500pcs of screws on the platter; then key in 500;
then press [SAMPLE] key once, the scale will
calculate the averaging unit weight of 500 screws
and show the value on UNIT WEIGHT LCD.
While putting another more pieces (less than 500pcs)
of screws on the platter, the scale will re-calculate
the averaging unit weight (UNIT WEIGHT LCD will

7
GRC-Counting Series
User Manual
clear the original value and then show the updated
value). Please do NOT remove any thing from the
platter till the updated value of averaging unit weight
has been displayed.
WS
:
Pressing this key is to set the value of unit weight.
We suggest the unit weight should be heavier than
the division (or sensitivity) of the scale. For
GRC-30kg x 5g, the unit weight should not be lighter
than 5g.
Example:
With the known unit weight at 10g, please key in 10;
then press [WS] once; then 10g will be indicated on
UNIT WEIGHT LCD.
MEMO A & MEMO E
:
Five preset memory keys for saving the values of unit
weight.
Example: saving 5g into MEMO A.
Key in 5and then press and hold [MEMO A] key till
the scale sounds beep >> Finish setting. Press
[MEMO A] key could recall 5g showed on UNIT
WEIGHT LCD. To modify the setting figure of MEMO
A, please just follow the above steps again.
ALARM
:
1. Quantity Alarm:
<1> Press [ALARM] key to select -PCS- (showed
on UNIT WEIGHT LCD.
<2> Key in 100 (showed on WEIGHT LCD; then

8
GRC-Counting Series
User Manual
press [ALARM] key again to confirm the
setting.
!!
Notice:The setting values under -Hi- mode
and -Lo- mode must be 0.
When the total quantity of measured subjects is
≧
100, the scale will sound beep continuously.
2. Hi/Lo Weight Limit:
Example: setup Hi/Lo weight range at 10kg ±500g.
<1> Press [ALARM] key to select -Lo- (showed
on UNIT WEIGHT LCD); then key in 9.500
(showed on WEIGHT LCD; then press
[ALARM] key again to confirm the setting.
<2> Press [ALARM] key to select -HI- (showed on
UNIT WEIGHT LCD); then key in 10.500
(showed on WEIGHT LCD; then press [ALARM]
key again to confirm the setting.
!!
Notice:The setting value under PCS mode must
be 0.
The scale will sound beep continuously while:
9.500
≦
the total-weight value
≦
10.500
3. Over-Weight Alarm:
Example: setup 10kg as the over-weight limit.
Press [ALARM] key to select -Lo- (showed on UNIT
WEIGHT LCD); then key in 10.000 (showed on
WEIGHT LCD; then press [ALARM] key again to
confirm the setting.

9
GRC-Counting Series
User Manual
!!
Notice:The setting values under PCS mode and
-HI- mode must be 0.
The scale will sound beep continuously when the
measured weight is
≧
10.000kg.
RS232 Interface <optional device>
Wiring Configuration:
Baud Rate: 9600
Parity: None
Stop Bit: 1
Data Bit: 8
5
4
3
2
1
9
8
7
6
PC
5
4
3
2
1
9
8
7
6
SCALE
DATA OUT
GND

10
GRC-Counting Series
User Manual
Recharge the Battery
Power off the scale and connect the power cord to
an AC outlet. CHARGE LED will indicate the ongoing
status of the battery. It takes about 8~10 hours to
fully recharge the battery.
CHARGE LED:
Color of LED
Status of the battery
RED
Initial connection
ORANGE
Charging
GREEN
Fully-charged
Power Requirements
AC : 110V~230V, 50/60 Hz
DC : 6V DC / 25mA rechargeable battery;
P=0.2W(max)

11
GRC-Counting Series
User Manual
5
1
8
2
3
4
6
7
List of Components:
No.
Item
<1>
Indicator
<2>
Regulator
<3>
Stainless Steel Tube
<4>
Tube Base
<5>
Stainless Steel Platter
<6>
Main Structure
<7>
Cable of Load Cell
<8>
Connector
Installation Diagram of Bench Scale
Installation Procedure:
A. Screw <4> Tube Base and <6> Main Structure together (with 2
screws of Tube Base).
B. Insert <3> Stainless Steel Tube into <4> Tube Base (with 2 screws
of Stainless Steel Tube).
C. Screw <2>Regulator and <3> Stainless Steel Tube together (with 1
screw and 1 clip of Regulator).
D. Please refer to the Diagram; pull <7> Cable of Load Cell, from the
bottom to the top, through <3> Stainless Steel Tube; and then screw
the Clip on the bottom of <4> Tube Base (with 1 screw of Clip).
E. Connect <1> Indicator with <2> Regulator. Notice the direction.
Please refer to the arrow on the diagram for proper direction.
F. Put <5> Platter on <6> Main Structure.
G. Insert <8>Connector into the socket of <1>Indicator. Installation OK.

16
GRC-Counting Series
User Manual
We do more than you expect
Table of contents
Other Hocom Scale manuals

Hocom
Hocom GRP Series User manual

Hocom
Hocom JDC Series User manual

Hocom
Hocom EQW Series User manual

Hocom
Hocom SDW Series User manual

Hocom
Hocom SSW Series User manual

Hocom
Hocom SSPX User manual

Hocom
Hocom BCS Series User manual

Hocom
Hocom GRW Series User manual

Hocom
Hocom EQC Series User manual

Hocom
Hocom AEPL-M Series User manual