manuals.online logo
Brands
  1. Home
  2. •
  3. Brands
  4. •
  5. Home Styles
  6. •
  7. Indoor Furnishing
  8. •
  9. Home Styles Arts & Crafts 88 5180 04 Quick start guide

Home Styles Arts & Crafts 88 5180 04 Quick start guide

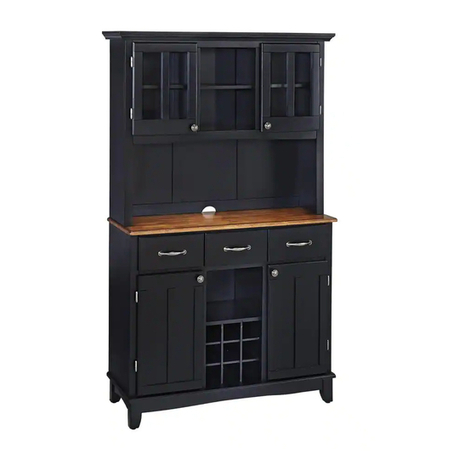
Hutch Unit Part List
88 5180 04
Arts & Crafts
Computer Hutch
IMPORTANT NOTE
Carefully remove all the parts from the carton and put
them individually on a soft cloth to prevent scratches
or other damages occuring to the wood parts.
We have taken great care in the design of this
product and request that you carefully and strictly
follow our assembly instructions to ensure a
completed product as it was designed. Casual Attire For Today's Home
Hardware List
Hex Wrench
1 pc.
Head Cap Bolt
6 pcs. (+1 extra)
Cam Lock
6 pcs.(+1 extra)
Cam Lock Screw
6 pcs.(+1 extra)
Machine Screw
4 pcs.
A.
Top
1 pc.
Adjustable Pin
12 pcs. (+2 extra)
H.
Back Piece
1 pc.
Tools required for assembly : Phillips screwdriver
L.
Back Panel
2 pcs.
B.
Side Panel
1pc.
D.
Middle Panel
1 pc.
F.
Front Rail
1 pc.
G.
Back Stretcher
1 pc.
N.
Shelf
2 pcs.
O.
Shelf
1 pc.
P.
Door
1 pc.
Q.
Door
1 pc.
C.
Side Panel
1pc.
E.
Middle Panel
1 pc.
M.
Back Panel
2 pcs.
I.
Back Piece
1 pc.
K.
Back Piece
2 pcs.
J.
Shelf
1 pc.
Steel Plate
Connector
2 pcs.
Door
Pull Handle
2 pcs.
Wood Screw
8 pcs. (+1 extra)
Small Cam Lock
8 pcs.(+1 extra)
Small
Cam Lock Screw
8 pcs.(+1 extra)
Small
Hex Wrench
1 pc.
IMPORTANT
Do not tighten up all the screws until each part is properly assembled.
You should keep Hex Wrench in the safe place as you may need to tighten up the Head Cap Bolts in the future.
STEP 1
Assembly Instructions 2/3
Put Cam Lock Screws into the pre-drilled holes of Top (A) Side Panel (B),(C) Front Rail (I)
and tighten.
Attach Back Stretcher (H) to Side Panel (B) using Cam Lock.
Attach Back Piece (K) to Back Stretcher (H) and slide Back Panel (L) into place.
Attach Back Piece (I) to the unit and slide Back Panel (M) into place.
Attach Back Piece (K) to the unit and slide Back Panel (L) into Place.
Attach Back Stretcher (G) to the unit using Cam Locks.
STEP 2
BC
A
B
G
H
K
K
I
Cam Lock
Cam Lock
L
L
M
M
Cam Lock Screw
F
Assembly Instructions 3/3
J
STEP 3
the unit using Cam Locks.
Attach Middle Panel (D) and (E)
to shelf (J) with Head Cap Bolts.
Attach Front Rail (F) to the unit using Cam Lock.
Attach Side Panel (C) to the unit with Cam Locks.
Attach Shelf (J) to
D
E
F
C
Cam Lock
Head Cap Bolt
STEP 3
(Figure 2)
(Figure 1)
(Figure 4)
(Figure 3)
A
N
N
O
P
Q
Cam Lock
Machine Screw
Pull Handle
Adjustable Pin
Turn the unit to
its upright position.
Place Top (A) onto the unit using Cam Locks.
Insert Adjustable Pins into side panels and middle panels at the desired level
and Slide Shelf (N) and (O) into place.
Assemble Pull Handles to Door (P) and (Q)
with Machine Screws. (see Figure 1)
Attach Door (P) and (Q) to the side panels
by sliding the door lift hinges into
the side panel lift hinges. (see Figure 2)
Place the Hutch unit onto the Buffet unit.
(see Figure 3)
Attach Steel Plate Connectors on the back of the units by inserting Wood Screws and tighten.
(see Figure 4)
HARDWARE LIST
Attention !
For safety reasons, please follow these additional instructions to
prevent the unit from tipping over.
Bracket
at the wall
Bracket
at the top
of the unit
Wood
Screw
Wall Screw
Plastic Belt
Top of unit
(figure X)
Wood Screw (short)
2 pcs.(+1 extra)
Wall Screw (long)
2 pcs.(+1 extra)
Anchor
2 pcs.(+1 extra)
Bracket
4 pcs.(+1 extra)
Plastic Belt
2 pcs.(+1 extra)
Assembly Instructions
Place the unit at desired
location in room.
Drill two ¼” holes in wall at the appropriate
location.
Insert the Anchors into the wall holes and
attach the Brackets using Wall Screws.
Attach the Brackets at the pre-drilled holes
on the top of the unit using Wood Screws.
Use the Plastic Belt to secure the
Brackets on the unit to the Brackets on
the wall (See figure X).
Put the tie end of the belt into the loop end
of the belt and pull until tight.
Drill two ¼” holes in wall

Other Home Styles Indoor Furnishing manuals
Home Styles 88 5180 181 User manual

Home Styles

Home Styles 88 5180 181 User manual

Home Styles 5180-16 User manual

Home Styles

Home Styles 5180-16 User manual

Home Styles 4511-95 User manual

Home Styles

Home Styles 4511-95 User manual

Home Styles 20 05020 0941 User manual

Home Styles

Home Styles 20 05020 0941 User manual

Home Styles 5411-88 User manual

Home Styles

Home Styles 5411-88 User manual

Home Styles 88 5100 006 User manual

Home Styles

Home Styles 88 5100 006 User manual

Home Styles 20 05427 0692 User manual

Home Styles

Home Styles 20 05427 0692 User manual

Home Styles 88521695 C User manual

Home Styles

Home Styles 88521695 C User manual

Home Styles 20 05053 0098 User manual

Home Styles

Home Styles 20 05053 0098 User manual

Home Styles 88 5670 332 User manual

Home Styles

Home Styles 88 5670 332 User manual

Home Styles 20 05525 0682 User manual

Home Styles

Home Styles 20 05525 0682 User manual

Home Styles Laguna 88 5600 80 User manual

Home Styles

Home Styles Laguna 88 5600 80 User manual

Home Styles 88 5053 101 User manual

Home Styles

Home Styles 88 5053 101 User manual

Home Styles Orleans 88 5060 941 User manual

Home Styles

Home Styles Orleans 88 5060 941 User manual

Home Styles Glen Rock 88560736 User manual

Home Styles

Home Styles Glen Rock 88560736 User manual

Home Styles 88 5053 16 User manual

Home Styles

Home Styles 88 5053 16 User manual

Home Styles 5650-49 User manual

Home Styles

Home Styles 5650-49 User manual

Home Styles Barnside 88 5516 01 User manual

Home Styles

Home Styles Barnside 88 5516 01 User manual

Home Styles The Aspen 88 5520 51 User manual

Home Styles

Home Styles The Aspen 88 5520 51 User manual

Home Styles 5050-13 User manual

Home Styles

Home Styles 5050-13 User manual

Home Styles 20 05177 080C User manual

Home Styles

Home Styles 20 05177 080C User manual

Home Styles 88503595 C User manual

Home Styles

Home Styles 88503595 C User manual

Home Styles Hall Tree 88564849 C User manual

Home Styles

Home Styles Hall Tree 88564849 C User manual

Home Styles 20 06700 0055 User manual

Home Styles

Home Styles 20 06700 0055 User manual

Popular Indoor Furnishing manuals by other brands

Next EVIE DOUBLE ROBE Assembly instructions

Next

Next EVIE DOUBLE ROBE Assembly instructions

Rauch M2227 Assembly instructions

Rauch

Rauch M2227 Assembly instructions

IAC INDUSTRIES LT Series Assembly instructions

IAC INDUSTRIES

IAC INDUSTRIES LT Series Assembly instructions

Acme Furniture Zakwani OF00005-1 Assembly instructions

Acme Furniture

Acme Furniture Zakwani OF00005-1 Assembly instructions

bpc living 945486 quick start guide

bpc living

bpc living 945486 quick start guide

Safavieh Outdoor PAT6757 manual

Safavieh Outdoor

Safavieh Outdoor PAT6757 manual

VEVOR YF-003 user manual

VEVOR

VEVOR YF-003 user manual

Alice's Home LOFT ILFCHEST5D manual

Alice's Home

Alice's Home LOFT ILFCHEST5D manual

RATTAN WF199168 Assembly instruction

RATTAN

RATTAN WF199168 Assembly instruction

Studymate NEWTON HUTCH DESK Assembly instructions

Studymate

Studymate NEWTON HUTCH DESK Assembly instructions

WASHTOWER WSCH207-60 Assembling Instruction

WASHTOWER

WASHTOWER WSCH207-60 Assembling Instruction

Systembuild Evolution 7808884COM Instruction booklet

Systembuild Evolution

Systembuild Evolution 7808884COM Instruction booklet

comfortel Matisse 7583 owner's manual

comfortel

comfortel Matisse 7583 owner's manual

BOBOCHIC LENA MSB 80 manual

BOBOCHIC

BOBOCHIC LENA MSB 80 manual

Amart Furniture BOULEVARD 1600 Assembly instruction

Amart Furniture

Amart Furniture BOULEVARD 1600 Assembly instruction

AmpliVox Ambassador Lectern SN3035 Specifications

AmpliVox

AmpliVox Ambassador Lectern SN3035 Specifications

Next DARCY 949806 Assembly instructions

Next

Next DARCY 949806 Assembly instructions

Vivo DESK-E3CVB instruction manual

Vivo

Vivo DESK-E3CVB instruction manual

manuals.online logo
manuals.online logoBrands
  • About & Mission
  • Contact us
  • Privacy Policy
  • Terms and Conditions

Copyright 2025 Manuals.Online. All Rights Reserved.