Honeywell Home Lyric LCP500-L Product information sheet

1
User Reference Guide
Ref: LCP500-L/LCP5 0 0 -LC
800-18078H
11/15 Rev. H
Ready To Arm - Chime
Notices
Automation
Settings
Video
Smart Scenes
66F
Mostly Sunny
5-Day F ore cast
December 31, 2014
Security
12:00PM

2
IMPORTANT!
PROPER INTRUSION PROTECTION
For proper intrusion coverage, sensors should be located at every possible point of entry to a home or commercial
premises. This would include any skylights that may be present, and the upper windows in a multi-level building.
In addition, we recommend that radio backup be used in a security system so that alarm signals can still be sent to the
Central Monitoring Station in the event that the internet connection is interrupted or not working correctly (alarm signals are
normally sent over the Wi-Fi® and Internet network).
EARLY WARNING FIRE DETECTION
Early warning fire detection is important in a home. Smoke and heat detectors have played a key role in reducing fire
deaths in the United States. With regard to the number and placement of smoke/heat detectors, we subscribe to the
recommendations contained in the National Fire Protection Association's National Fire Alarm Code (NFPA 72). These
recommendations can be found on
page
71
of this manual.
System Compatibility Notice
This Honeywell Home security system is designed for use with devices manufactured or approved by Resideo
Technologies, Inc., through its subsidiary Ademco Inc. (“Resideo”). Your security system is not designed for use with any
device that may be attached to your security system's touchpad or other communicating bus if Resideo has not approved
such device for use with your security system. Use of any such unauthorized device may cause damage or compromise the
performance of your security system and affect the validity of your Resideo limited warranty. When you purchase devices
that have been manufactured or approved by Resideo you acquire the assurance that these devices have been thoroughly
tested to ensure optimum performance when used with your security system.
Lyric™ Lock
Your system supports advanced features designed to keep it functioning optimally. These capabilities include: the ability to
interact with Resideo and your dealer’s network for the setup and programming of its features, support for remote software
updates and the ability (when enabled by your monitoring dealer) to enhance your security by preventing an unauthorized
takeover of the system by another monitoring company. In the event that your dealer has enabled the feature to prevent an
unauthorized takeover and you wish to authorize a new company to take over your system, you may request that Resideo
remotely disable this feature. Resideo will require documentation that you have attempted to contact your existing security
dealer and that they have failed to respond, or failed to agree to your request.

3
TABLE OF CONTENTS
OVERVIEW ....................................................................................................................................................................5
About This Guide .......................................................................................................................................................5
Basic Functions..........................................................................................................................................................6
About the Control Panel .............................................................................................................................................7
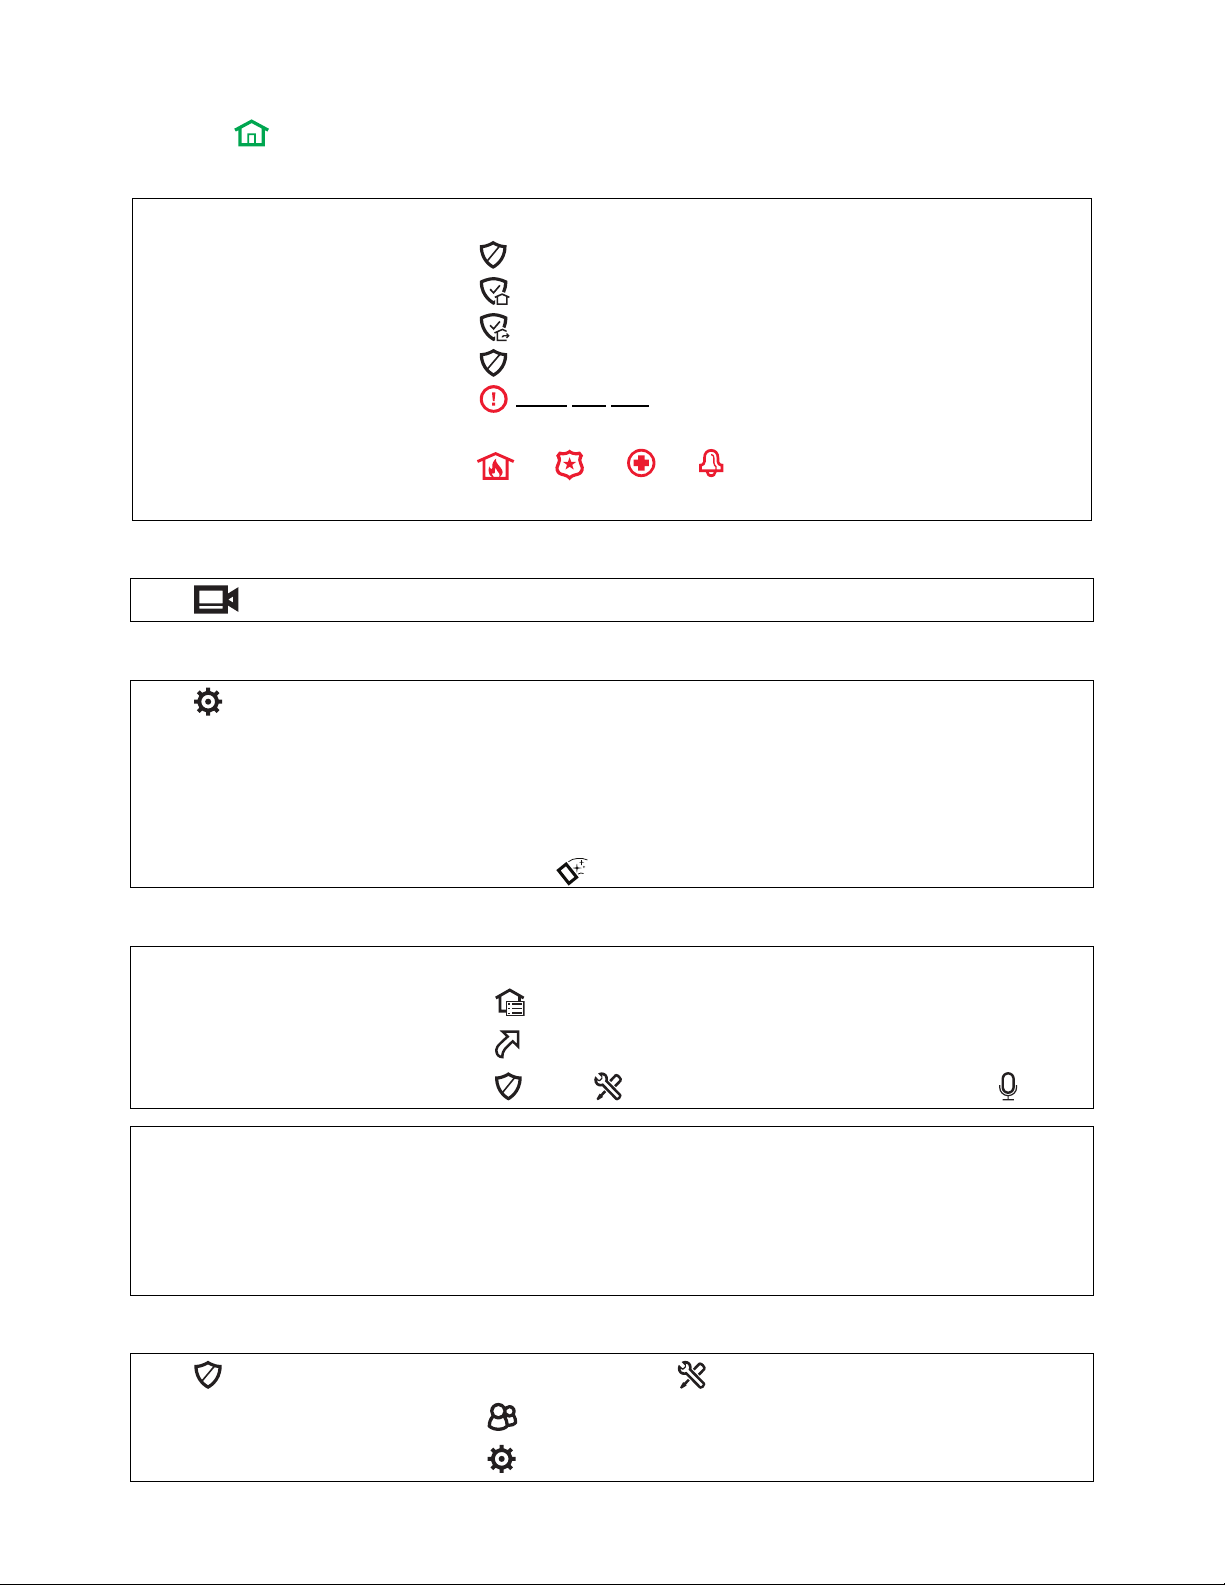
Home Button Status Indications .................................................................................................................................7
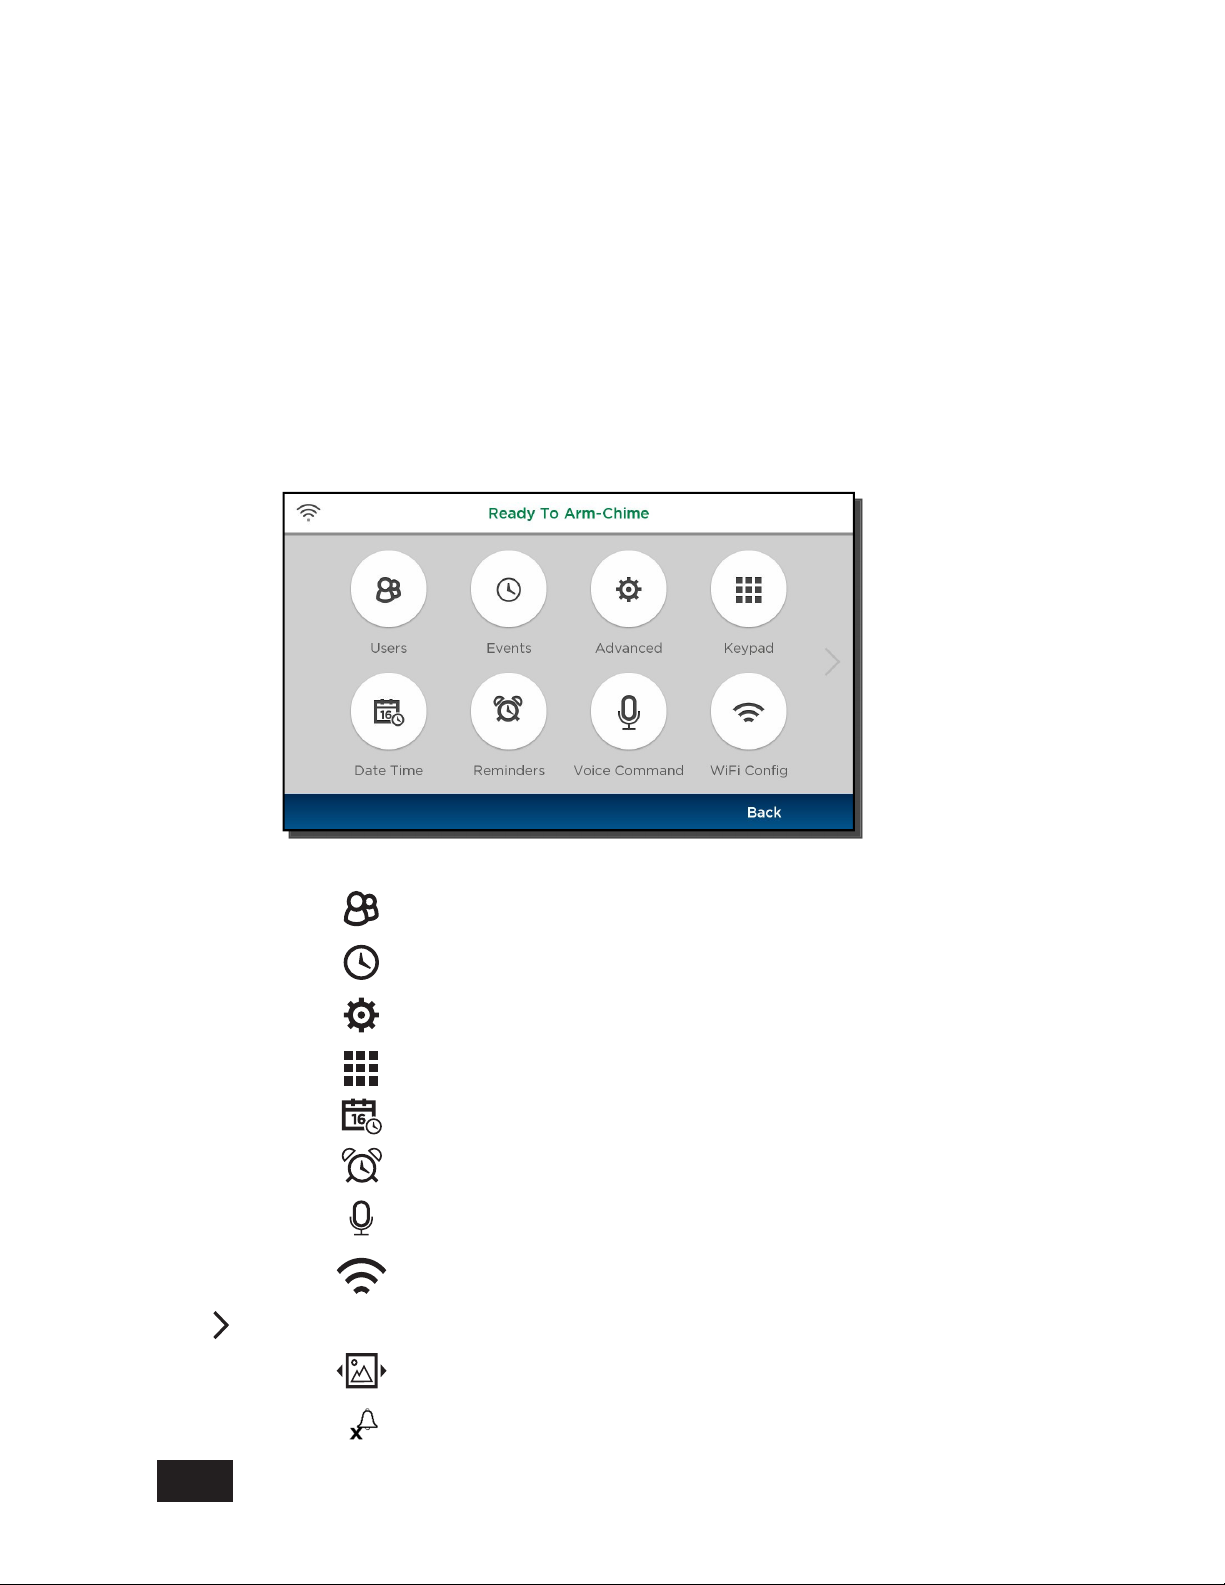
The Tools Menu .........................................................................................................................................................8
SECURITY ...................................................................................................................................................................11
Security Features .....................................................................................................................................................11
False Alarm Prevention............................................................................................................................................12
Arming the System...................................................................................................................................................13
Disarming the System ..............................................................................................................................................15
Bypassing Protection Zones.....................................................................................................................................15
Entry and Exit Delays...............................................................................................................................................16
Panic Alarms ............................................................................................................................................................17
Chimes/Voice Annunciations....................................................................................................................................18
Audio Alarm Verification (Two-Way Voice)...............................................................................................................19
Built-In Camera ........................................................................................................................................................19
AUTOMATION: AN INTRODUCTION ..........................................................................................................................21
AUTOMATION: SMART SCENES ...............................................................................................................................23
Smart Scenes and User Access...............................................................................................................................23
Creating a Smart Scene ...........................................................................................................................................24
Hold/Run/Show ........................................................................................................................................................27
AUTOMATION: VOICE COMMAND ............................................................................................................................29
Setup........................................................................................................................................................................29
Voice Command Assignment ...................................................................................................................................30
Using Voice Command.............................................................................................................................................30
Counter (Sensitivity Settings) ...................................................................................................................................31
AUTOMATION: Z-WAVE DEVICES.............................................................................................................................33
Operating Z-Wave Devices Manually.......................................................................................................................34
Adding Z-Wave Devices (Include)............................................................................................................................34
Deleting Z-Wave Devices (Exclude).........................................................................................................................35
Editing Z-Wave Device Names ................................................................................................................................35
Advanced Tools .......................................................................................................................................................35
Failed Devices (Failed Nodes) .................................................................................................................................36
Garage Doors...........................................................................................................................................................37
Important Notes About Z-Wave Devices ..................................................................................................................38
Notes on Thermostats..............................................................................................................................................39
Z-Wave Compatibility ...............................................................................................................................................40
VIDEO ..........................................................................................................................................................................41
Viewing and Naming Cameras.................................................................................................................................41
Adding a Camera .....................................................................................................................................................41
Video Recovery........................................................................................................................................................42
USERS AND SECURITY CODES................................................................................................................................43
User Codes ..............................................................................................................................................................43
Duress Code ............................................................................................................................................................43
Adding Users and Assigning Codes.........................................................................................................................44
Changing Security Codes or the Duress Code.........................................................................................................44
Deleting a User ........................................................................................................................................................44
User Settings............................................................................................................................................................45
SYSTEM SETTINGS....................................................................................................................................................47
Brightness/Volume/Cleaning ....................................................................................................................................47
Wi-Fi Configuration...................................................................................................................................................47
Software Updates.....................................................................................................................................................48
Slide Show ...............................................................................................................................................................49

4
Date / Time...............................................................................................................................................................49
Events ......................................................................................................................................................................50
Keypad .....................................................................................................................................................................50
TESTING YOUR SYSTEM...........................................................................................................................................51
Testing Sensors (Walk Test) ....................................................................................................................................51
Testing Communications..........................................................................................................................................52
Reboot......................................................................................................................................................................52
MAINTENANCE ...........................................................................................................................................................53
Care and Cleaning ...................................................................................................................................................53
Battery Replacement................................................................................................................................................53
Communication Module Replacement......................................................................................................................55
SYSTEM DISPLAY AND BUTTONS............................................................................................................................57
WIRELESS KEYS ........................................................................................................................................................59
Key Assignments......................................................................................................................................................59
SiXFOB Wireless Key Status Indications .................................................................................................................59
EVENT LOG CODES ...................................................................................................................................................61
APPENDIX: VIDEO DOORBELL..................................................................................................................................65
Change the Video Doorbell Descriptions and Chime Sound, or Delete a Video Doorbell ........................................65
Install a Video Doorbell ............................................................................................................................................65
GLOSSARY .................................................................................................................................................................67
FIRE/CO ALARM SYSTEM..........................................................................................................................................69
In Case of Fire..........................................................................................................................................................69
In Case of Carbon Monoxide Alarm .........................................................................................................................69
Silencing a Fire/Carbon Monoxide Alarm.................................................................................................................69
NATIONAL FIRE PROTECTION ASSOCIATION SMOKE DETECTOR RECOMMENDATIONS...............................71
Emergency Evacuation ............................................................................................................................................72
REGULATORY AGENCY STATEMENTS ...................................................................................................................73
OWNER'S INSURANCE PREMIUM CREDIT REQUEST............................................................................................75
YOUR SYSTEM INFORMATION .................................................................................................................................77
LIMITATIONS OF THIS ALARM SYSTEM...................................................................................................................82
TWO YEAR LIMITED WARRANTY..............................................................................................................................83

5
Overview
The Lyric™ Controller combines a security system and home automation with an easy to use interface. All
functions can be operated from the Controller and many Lyric features can be accessed from internet-connected
smart devices.
Security functions can be operated from optional wireless keys and wireless keypads.
Wireless and wired sensors provide burglary protection and smoke and combustion detectors provide early fire
and carbon monoxide (CO) warnings.
Lyric monitors sensors and system status to initiate alarms and generate alerts. The system can also send alarm
and status messages to a central monitoring station via the cellular phone network or the Internet. Lyric can also
provide two-way voice communication with the central station.
Arming options Use Away mode when no one will be home. Exterior doors and windows are
protected; interior areas can be monitored by motion detectors.
Use Stay mode to protect exterior doors and windows when the house will be
occupied.
Arming modes can be customized to exclude specific parts of the premises.
Selected door/window and movement sensors can be excluded temporarily.
Fire protection cannot be bypassed or suspended.
Panic buttons Activate police and fire alarms or emergency alerts from the Controller, wireless keys
or remote keypad. Panic modes can be customized by your installer.
Audio Alarm Verification
(Two-way Voice)
Talk directly to your central monitoring station from the Controller.
Video Monitor and control compatible Wi-Fi® cameras. View video from as many as four
cameras simultaneously.
User and Security Codes 4-digit codes allow Lyric to distinguish between users with different types of access to
system functions.
The Master User is typically a household member who can perform all normal system
functions. Guest and other users each have unique codes.
Voice Commands Use spoken trigger phrases to control Smart Scenes and video cameras.
Automation Automate lights, locks and other compatible devices. Some features can be operated
remotely via remote services such as Resideo Total Connect®.
Smart Scenes Easy-to-program combinations of security and automation features.
Message center Record and play back voice messages.
Weather Displayed on the touch screen.
Remote Keypad Operate security functions from the Lyric Keypad. (Optional)
Remote Services Remote monitoring and control functions from mobile devices or web browser.
Requires remote services plan.
Built-in Camera Lyric takes a snapshot of the person at the Controller when the system is disarmed.
Requires remote services.
About This Guide
Throughout the guide, you will see these tips for finding the menus and controls you need.
For example,
Home > Security > Tools > Users
Means: On the Home screen, select Security.
On the Security menu, select Tools.
On the Tools menu, select Users.
The illustrations in this manual may differ slightly from your system. Also, please note that the terms “panel”,
“security panel” and “Controller” are used interchangeably.

6
Basic Fu ctio s
Press the button below the touchscreen to return to the Home screen from other functions
Security
Press
Security features
on the Home screen
Arm in Stay mode
and enter a user code
Arm in Away mode
and enter a user code
Disarm system & silence alarms
and enter a user code. Repeat to silence alarms/alerts
Panic
Press and hold this button below the touchscreen.
Then press:
or
or
or on the touchscreen
Other Panic modes may appear on the screen if they are programmed in your system
Video
Press on the Home screen to view and configure Wi-Fi® cameras
Co trol Pa el Setti gs
Press on the Home screen
Screen brightness Use the Brightness slider
Voice announcements volume Select VOICE and use the slider
Chime volume (count-down beeps, other
sounds)
Select CHIME and use the slider
Clean touchscreen Touch to disable all controls for 15 seconds
Automatio Features
Press
Operate & manage Z-Wave® devices
on the Home screen
Create & manage Smart Scenes on the Home screen
Use & manage Voice Commands
then then enter Master User code, then
Using Voice Commands
Speak trigger phrase Lyric™ confirms it has heard a trigger phrase. Confirmation is optional. Three
phrases are available and can be
changed later.
Speak command phrase Lyric executes the operation associated with the command, confirms
operation. Five voice commands can be associated with Smart Scenes. The
command “Cameras” launches the Video function.
Commo Master User Fu ctio s
Press on the Home screen. On the Security menu, press and enter Master User code.
Add, delete or modify user codes
System tests and select Walk Test or Comm. Test

7
About the Co trol Pa el
The display may vary with your connected devices and services.
•Security system status appears at the top of the screen.
•Wi-Fi® status appears at top left.
•Time, date and local weather appear at left. Touch 5 Day Forecast for weather information.
The Home screen normally shows:
•Security: Arm and disarm the system with various options.
•Automation: Control lights, locks and other devices.
•Video: View and control Wi-Fi cameras.
•Smart Scenes: Customize and automate security and comfort features.
•Notices: View system updates and other information from your security company.
•Settings: Adjust screen brightness and audible indicator volume, hide controls for screen cleaning.
Press for Help videos and other features.
NOTE If the Controller loses AC power, playback of Help videos is disabled to minimize drain on the
backup battery. If power is lost while you are watching a Help video, playback may continue.
Below the touchscree :
Press to return to the Home screen.
Press for Fire, Police and other emergencies.
NOTE If the Controller loses AC power, the Home button begins to blink slowly after 15 minutes on
battery backup (red if the system is armed, green if not armed). In this situation, the Panic
button goes dark, but Panic functions remain available.
Home Butto Status I dicatio s
The Home button shines green or red to indicate system status:
Green, steady System is ready to be armed
Red, steady System is armed
Green, blinking System is disarmed, and not ready to be armed (fault or alarm exists)
Red, blinking An Alarm condition exists.
Red/Green, blinking
alternately
System is in Programming mode or Two-Way Voice communication is active.
See the
Panic
section for information on silent alarms and the Home button.
Armed Stay
Not ices
Automatio n
Setti ngs
Vi deo
Smart Scenes
July 31
Se curity
76°F
5-Day Forecast
Sunny
Built-in Came
r
a
WiFi status
Panic
USB Port
(underside)
Home
Touch Screen
Status
lyric-074-V0

8
Audible I dicators
Beeping sounds accompany entry/exit countdowns, pressed buttons and other functions.
Volume is adjustable for voice announcements, chimes and most sounds.
Alarms are signaled by the Controller’s built-in sounder. Alarm volume is not adjustable.
Software Update Notificatio s
Software updates for the Controller are published periodically. Most updates request user permission.
Select Accept, Yes or OK to install the update.
Certain critical updates are installed automatically. After updates of this type, information about the
update appears on-screen.
The Tools Me u
Home > Security > Tools
This menu offers access to most of Lyric’s important settings and maintenance functions.
NOTE: The Master User code is required to access Tools.
Features available from this screen include:
Users
Master User can add/remove other users and control users’ access to
features. See Users and Security Codes.
Events View and export system event logs. See Events.
Advanced
Access to software upgrades, tests and user maintenance functions.
Includes features found in Maintenance and System Settings.
Keypad Manage mobile devices running keypad apps. See Keypad.
Date/Time Set the system’s calendar and clock. See Date and Time.
Reminders Record and schedule voice memos. See Reminders.
Voice Command
Use simple phrases to control Smart Scenes or operate Wi-Fi® video
cameras. See Voice Command.
Wi-Fi Config
Configure Wi-Fi access points, set security and choose automatic or manual
video recovery. See Wi-Fi Configuration.
Press on the right side of the screen for more.
Slide Show
View selected photos on the Lyric™ display. See Slide Show.
SkyBell Setup
(Video Doorbell)
Manage Video Doorbell settings (change descriptions, chime sounds, or
delete from the system). See Video Doorbell Appendix.
Return to the Security menu.
Back

9
Notices
Home > Notices
The Notices icon alerts you to new information from your security company. Press for more information.
Messages
Home > Security > Message
Audio messages for all users can be recorded on the Controller.
NOTE Audio Messages on the Controller are deleted when the system’s firmware is updated.
To work with Messages:
1. On the Security menu, select Message. If there are none are saved, the list shows No items to
display.
2. Press Add New. Recording controls appear.
3. Use the Record, Stop,Play and Delete buttons to record and review your message.
4. Press to return to the message list.
In the message list, select a message before pressing Play.
The Delete All button requires confirmation. Press Yes when asked Are You Sure?
When messages are stored in the Controller, the Message icon is highlighted.
Remi ders
Home > Security > Tools > Reminders
Reminders can be scheduled to display a text note and optionally, play a brief audio message.
Reminders that are set to require acknowledgment remain on-screen and repeat their audio until
dismissed.
NOTES •The Master User code is required to access Tools.
•
••
•Reminders can only be created when the system is disarmed.
•Reminders that don’t require acknowledgment will appear on the screen, play any included
audio once and clear themselves automatically.
To create a Reminder:
1. On the Tools menu, select Reminders. If there are none are saved, the list shows No items to
display.
2. Press Add New and Name.
3. Use the on-screen keyboard to assign a name and remember to press Save.
4. Select Frequency and then Once, Daily, Weekly, Weekday or Monthly.
5. If selecting Once, set a Date and Start Time next.
•If Daily, set a Start Time.
•If Weekday, set a Start Time.
•If Weekly, set a Day of the Week and a Start Time.
•If selecting Monthly, set a Day of the Month and a Start Time.
6. To add an audio message, press Voice and select Yes. Use the Record, Stop, Play and Delete
buttons to record and review the message. When finished recording, press
.
7. To require that the Reminder is acknowledged, press Acknowledge and select Yes.
8. Press Save.
To dismiss a Reminder that requires acknowledgment, press OK.

10

11
Security
Home > Security
IMPORTANT
If the Controller is beeping rapidly when you enter the premises, an alarm has occurred and
an intruder may still be nearby.
LEAVE IMMEDIATELY and CONTACT THE POLICE from a safe location.
Security Features
NOTES •
••
•
For Lyric™ to report alarms over the internet, your Wi-Fi® network MUST have power at all
times.
•You must arm your security system in order for it to sound alarms.
Sensors and
Zones
Lyric’s sensors are assigned to numbered zones that correspond to areas of your home. For
example, the sensor on an entry/exit door might be assigned to Zone 03, a device in a bedroom
to Zone 06, and so on.
When alarms or trouble conditions occur, the touchscreen displays the zone number and a
description of the sensor involved.
Fire
Protection
Fire protection is always active when the system is operating normally. An alarm sounds if a
fire condition is detected. See Fire/CO Alarm System for important information about fire
protection, smoke detectors and planning emergency exit routes.
Carbon
Monoxide
Carbon monoxide (CO) detectors, if installed, are always active and sound an alarm if a carbon
monoxide condition is detected. See Fire/CO Alarm System for more information.
Burglary
Protection
Lyric provides STAY and AWAY burglary protection.
STAY mode protects windows and exterior doors, allowing you to move around inside your
home without setting off an alarm.
AWAY mode protects the entire premises, including interior motion detectors if present.
Both modes offer an entry delay period that allows you to reenter the home without setting off
an alarm. For long periods such as vacations, the entry delay can be turned off while arming the
system.
Lyric also allows you to Bypass selected sensors before arming the system.
The system also features Chime mode, which can alert you to the opening of protected doors
and windows while the system is not armed.
Security
Codes
At the time of installation, the installer asks the homeowner to choose a personal
4-digit security code, known as the “Master User code”.
Other users can be added, typically with less control over the system than the Master User. See
Users and Security Codes.
A user code is required when arming or disarming and for some other functions.
Alarms Alarms are signaled by the Controller’s internal sounder (and external sirens if connected). The screen
indicates the zone where the alarm has occurred. After 15 seconds, the sounder stops
temporarily and the system begins voice announcements of relevant zone information.
After the zones are announced, the panel’s sounder resumes sounding. Alarm sounds and
voice announcements alternate until the system is disarmed or until alarm bell timeout occurs. If
the system is connected to central monitoring, an alarm message is sent.
To silence the sounder, disarm the system. The zone(s) causing the alarm remain displayed,
indicating Memory Of Alarm. See Clearing a Panic Alarm for more about clearing memory of
alarm.
Audio Alarm
Verification
Allows your central monitoring station to listen to or talk with persons on the premises.
Keypad
Lockout
If 24 numeric keys (0-9) are entered within a period of 15 minutes and no valid command is executed,
Lyric will not process any further numeric key-presses for the following 15 minutes. Entering any
numerical keys during that period causes the panel to sound a single long beep. When the 15-minute
lockout period is over, a Restore message is sent to the Central Station and recorded in the Event Log.

12
False Alarm Preve tio
Many false alarms are caused by minor problems, such as a door left ajar when exiting the home. Lyric™
includes several features to help prevent false alarms. Note that some are optional or must be programmed
by the installer. Disabling these features may increase security, but might also increase the chance of false
alarms.
Your installer can help you decide how to use and customize these features. A brief explanation of false alarm
prevention features follows, along with advice on what to do if false alarms occur.
Exit/Entry Delays Programmed delay times allow you to leave after arming the system or disarm it after
entering without setting off an alarm. Exceeding a delay period causes an alarm.
After a false alarm, disarm the system and contact your monitoring company. They will
verify your security code or password, preventing unnecessary calls for emergency
response.
Alarm Reporting
Delay
Lyric is programmed to wait for a brief period between sounding a burglary alarm on the
premises and sending an alarm message to your monitoring company. This delay allows
you to disarm the system before an alarm message is sent in error.
Exit Alarms False alarms can be caused by leaving the house and forgetting to close the door. If this
happens, Lyric sounds an alarm and displays an Exit Error.
The alarm reporting delay gives you time to disarm the system before an alarm message is
sent.
Exit Time Restart
Exit Delay
Restart/Reset
If you leave the premises and enter again before the exit delay has expired, the exit delay
restarts, giving you more time to leave without causing an alarm.
With 10 seconds left to exit, the Controller begins beeping quickly, indicating that an alarm
will occur if you don’t exit or disarm the system immediately.
If this occurs, disarm the system and arm it again when you are ready to leave. You can
restart the Exit Delay by pressing Restart Timer.
Silent Exit Press Silent Exit to mute the beeping sound that accompanies exit countdowns in most
situations. Voice confirmation of arming status is not muted. Silent Exit increases the Exit
Delay time.
Quick Exit If the system has been armed and someone needs to leave the premises, you can press
this button, which restarts exit delay, allowing exit from the premises without the need to
disarm and re-arm.
Entry Delay If the system is armed, this is the period allowed between a door opening and the system
being disarmed with a user code. Failure to disarm the system during the Entry Delay
causes an alarm. Delay period set by your installer.
Exit Delay Period that begins upon arming the system, during which household members can exit
through entry/exit doors without triggering an alarm. Delay period set by your installer.

13
Armi g the System
The Home button beneath the screen lights green when the system is ready to be armed. If the button is
blinking green, the system is not ready to arm.
Before arming your system, all protected doors, windows, and other protection zones should be closed or
bypassed (see Bypassing Protection Zones).
To change the volume of countdown sounds and security status voice announcements, see System
Settings.
NOTE When a security code is required, a valid code must be entered within 10 seconds of pressing an
Arm button. If an invalid code is entered, or more than 10 seconds elapses, the Security menu
returns and the system is not armed.
Armi g states i clude
Arm Away
For times when no one is home; protects all perimeter and interior zones.
Arm Stay
For times when the house is occupied; protects only perimeter zones.
Arm Custom
Arms the system with pre-selected zones bypassed.
Bypass
This feature allows you to arm the system while intentionally leaving selected
zones unprotected.
Arm Night
For times when the house is occupied; protects perimeter zones and interior
motion sensors if used. Other interior zones are unprotected. Enabled by your
installer and only used with interior motion sensors.
Instant For times when no one is expected to use the Entry/Exit zone doors.
Entry Delay is eliminated. When the system is armed, an alarm occurs immediately if
an exterior door is opened.
When arming in Away, Stay, or Night (if enabled) modes, Instant mode can be set from
the Security screen (shown below). When using Arm Custom, use the Entry Delay button
on the Arm Custom menu to set Instant mode.
Quick Arm Press to arm the system in any mode without entering a user code,
if
programmed
.
NOTE:
A user code is always needed to
disarm
the system.
Auto Stay If you arm the system in the “AWAY” mode but no one exits, the alarm system
automatically changes to the “STAY” mode. This helps to prevent unwanted alarms when
someone remains on the premises. Disarm the system and Arm Away again when you
are ready to leave.
En
abled by your installer.
Ready To Arm - Chime
lyric-019-V3
ARM CUSTOMARM STAYARM AWAY ZONES
TOOLS
MESSAGE
SYSTEM
Ready To Arm
9:11 AM December 17, 2014Entry Delay: ON

14
Arm Away
Security > Arm Away
By default, this mode’s exit delay countdown is accompanied by a beeping sound.
1. Enter a user code or press Quick Arm. (If desired, click Silent Exit first.)
2. The system beeps twice and announces “Armed Away; exit now”. The exit delay countdown
begins.
Press Restart Timer if you need more time to leave.
3. Leave the premises and close the door before the countdown ends.
4. The system arms in Away mode. (Door and window sensors and interior motion sensors are
active.)
Arm Stay
Security > Arm Stay
By default, this mode’s exit delay countdown is silent.
1. Enter a user code or press Quick Arm.
2. The system beeps three times and announces, “Armed Stay; exit now”. The exit delay countdown
begins.
Press Restart Timer if you need more time to leave.
3. The system arms in Stay mode. Door and window sensors are active, but interior motion sensors
are not active.
Arm Custom
Security > Arm Custom
Use this option to pre-set zones for bypass when arming the system. You can also enable or disable the
entry delay.
1. Select Arm Custom to display a list of zones.
2. Select the zones you wish to bypass when arming the system.
3. Select Arm Custom on the bottom, right side of the zone list screen.
4. Press the Entry Delay button to set the Entry Delay On or Off: Entry Delay On (the button is blue),
Entry Delay Off (the button is white). For Instant Mode, set the Entry Delay Off. See Instant
Mode below for more details.)
5. Arm the system by entering a user code.
6. The exit delay countdown begins.
7. Leave the premises and close the door the same as you would when setting Away mode.
Bypassed zones are left unprotected.
NOTE that the next time Arm Custom is used, the same zones that were previously selected
are highlighted on the zone list screen. If desired, select different zones for custom arming.
I sta t Mode
Security >Entry Delay Off OR Security > Arm Custom > de-select Entry Delay
In Instant mode, an alarm occurs immediately when a protected Entry/Exit zone door is opened. There
is no entry delay time.
When arming in Away, Stay or Night (if enabled) modes, press Entry Delay On/Off at the bottom of the
Security screen to toggle the option Off for Instant mode.
When using Arm Custom, de-select the Entry Delay button located in the Arm Custom menu for Instant
mode.

15
Arm Night
Security > Arm Stay
The Arm Night feature must be enabled by your security professional.
1. Select Arm Stay to display the keypad.
2. Select Arm Night and then enter a user code.
3. The system beeps and announces, “Armed Night Stay; exit now”. The exit delay countdown
begins.
Press Restart Timer if you need more time to leave.
4. The system arms in Arm Night mode. Doors and windows and pre-selected zones are active.
Disarmi g the System
Security > Disarm
NOTE: Disarming the system also silences audible alarms and trouble alerts.
IMPORTANT SECURITY NOTICE
Your wireless key (key fob) is similar to your keys or access card. If lost or stolen, another
person can compromise your security system. Immediately notify your Dealer/Installer of a lost
or stolen wireless key. The Dealer/Installer will then remove the wireless key programming from
the security system.
To disarm your security system:
1. Select Disarm. A keypad appears.
2. Enter a user code. The system beeps and announces “Disarmed”, followed by alerts about system
readiness, if any. The announcement “Check system” indicates a faulted sensor or problems in the
Controller itself.
In most situations, if a valid user code is not entered within 30 seconds of pressing Disarm, the Home screen
reappears, and the system remains armed.
NOTES: •
••
•If a valid code is not entered by the time the entry delay ends, an alarm occurs.
•The Guest code and the Installer code can only disarm the system if that code was used to arm
the system. If the Quick Arm option has been used, neither the Guest Code nor Installer Code
can disarm the system.
Bypassi g Protectio Zo es
Bypass allows arming the system while intentionally leaving selected zones unprotected.
Bypassed zones will not trigger an alarm.
NOTES: •
••
•Fire and Carbon Monoxide (CO) and Panic zones cannot be bypassed.
•
••
•Bypassed zones are automatically unbypassed when the system is disarmed.
To Bypass zones:
1. Before arming the system, press Zones on the Security menu. A list of your system’s zones appears.
Faulted (open) zones are shown in red or orange.
Use the up and down arrows to scroll through the list of zones.
2. Select the zone(s) to be bypassed.
3. Press Bypass at the bottom of the screen. A keypad appears.
At the bottom of the screen, you can Bypass All Faulted, which selects all zones with faults or other
issues.
Press Select All to toggle through options for selecting zones.
4. Enter a user code. The zone list reappears, with the Bypass icon shown for the affected zones.

16
Bypassing Protection Zones (continued)
5. Arm the system as usual.
Press Clear Bypass to un-bypass any previously bypassed zones. Any zones with faults must be addressed
before arming the system.
E try a d Exit Delays
NOTE: Entry and exit delay times are programmed by your installer. There is room to jot them down in
Your System Information, near the end of this guide.
E try Delay
Entry delay allows time to disarm the system when entering the premises. If the system is not disarmed
before the entry delay period ends, an alarm occurs. If programmed, the Controller beeps during the entry
delay period as a reminder to disarm the system.
Two different entry delay periods can be programmed. The first is for the primary entrance, typically, the
front door. The second can be used for a secondary entrance, where more time might be needed to walk
to the Controller to disarm the system.
Exit Delay
Exit delay begins immediately after the system is armed, providing time to leave through the designated
exit door without causing an alarm. In most situations, the touchscreen displays a countdown of the
remaining time. The exit door must be closed before the end of the exit delay.
Typically, the system beeps slowly when counting down to Arm Away; during the last 10 seconds of the
delay period, the beeping speeds up. The exit beeps cannot be silenced unless Silent Exit is selected.
Restart Exit Delay
The Restart Timer button appears only if the option has been programmed by the installer.
Exit delay can be restarted once.
Exit Alarm
This option helps minimize false alarms sent to the monitoring company. Exit Alarm must be enabled by
your installer.
Exit delay begins whenever the system is armed.
•If an exterior door or protected interior zone is faulted during the exit delay (and remains faulted when
the exit delay ends), an exit alarm occurs and an entry delay countdown begins.
•If the system is disarmed before the entry delay ends, the alarm sound stops and the message Alarm
Cancelled and any faulted zones appear.
•No message is sent to the monitoring company. Any open zones must be secured before the exit
alarm condition can be cleared.
To clear the display, press Disarm and enter a security code.
•If the system is not disarmed before the entry delay ends, and an entry/exit door or interior zone is
still open, the alarm sound continues and an Exit Alarm message is sent to the alarm monitoring
company, along with a “Recent Close” message (if the Recent Close option is enabled).
•The message Alarm Exit Error appears. Faulted zones are also displayed. The alarm will continue to
sound until the system is disarmed or timeout occurs.
To stop the alarm, disarm the system. The message Alarm Cancelled will be displayed. “Alarm” and
faulted zones continue to be displayed.
To clear the display, press Disarm and re-enter the security code.
An exit alarm (“Alarm – Entry Exit”) also occurs if an entry/exit door or interior zone is faulted within two
minutes after the end of the exit delay.

17
Pa ic Alarms
Available Panic modes may vary, depending on the options programmed by your installer.
IMPORTANT
Please note the difference between the Panic button below the touchscreen and the
different Panic icons on the touchscreen.
Activati g a Pa ic Alarm
1. Press and hold the button on the Controller until Panic icons appear on the screen.
2. Press the appropriate Panic icon on the screen.
Depending on the Panic mode selected, an alarm tone sounds and the appropriate alarm icon appears on
the touchscreen.
Pressing Police typically sends a silent message to your monitoring company*. When you take your
finger away from the Police icon, the screen appears to return to a normal state, with the button on
the Controller blinking. However, the alarm message has been sent.
*
The details of this function’s behavior are determined by a setting in the system’s programming; we recommend that
you verify the setting with your installer.
Commo Pa ic Ico s
Fire Alerts the monitoring company that a fire condition exists. (Displays zone 995)
Police Alerts the monitoring company that a police emergency exists.
(Displays zone 999, default is silent)
Medical If programmed, alerts the monitoring company to other types of emergency.
(Displays zone 996)
Local Activates sirens and sounders on premises without alerting the monitoring company. (Displays zone
998)
Types of Pa ic Alarms
Silent emergency
(silent alarm)
Sends an alarm signal to the monitoring company, but triggers no audible alarms or
touchscreen display. Requires connection to a monitoring company.
Audible emergency
(audible alarm)
Sends an emergency message to the monitoring company, if connected. A loud, steady
tone sounds at the Controller and external sounders if connected, and an alarm
appears on the touchscreen.
Personal emergency
or Aux alarm
Sends an emergency message to the monitoring company if connected and sounds at
the Controller, but not at external sounders. An alarm icon appears.
Fire alarm Sends a fire alarm message to the monitoring company if connected. A unique tone
sounds at the Controller and external sounders are activated if connected. A Fire alarm
icon appears.
Local alarm If programmed, activates the sirens and sounders on the premises without sending a
message to the monitoring company.
Ca celli g a Pa ic Alarm
NOTE A Fire alarm triggered by the Controller’s Panic button cannot be cancelled from remote
services such as Total Connect®. For your safety, Fire and Carbon Monoxide alarms can only
be cleared/silenced from the Controller itself.
Depending on the type of panic alarm in effect, a keypad may appear immediately after the alarm is
initiated.
1. Enter a user code to cancel the alarm.
2. The audible alarms stop and Alarm Cancel appears.

18
Cancelling a Panic Alarm (continued)
If a silent alarm has been activated and the Home screen is displayed:
1. Select Security on the Home screen. Typically, a Disarm icon appears; a Security status
message such as “Not Ready To Arm” may be displayed.
2. Press Disarm. A keypad appears on the touchscreen.
3. Enter a user code.
4. The normal Security menu returns and the button on the Controller stops blinking.
Cleari g a Pa ic Alarm
After a panic alarm is cancelled, the Controller continues to display zone information associated with the
alarm (this feature is known as Memory of Alarm).
To cancel and silence the alarm, enter a user code.
To clear memory of alarm on the screen:
1. Press the Home button beneath the screen.
2. Re-enter the user code.
Memory of alarm can also be dismissed with these steps:
1. Cancel and silence the alarm with a user code as above.
2. Select Zones on the Security menu. The zone number associated with the type of alarm appears.
3. Press Clear Alarms at the bottom of the screen.
4. Enter a user code. The Zones screen displays “No items to display!”
5. Press to return to the Security menu or press the Home button.
Chimes/Voice A u ciatio s
IMPORTANT
The Chime feature is intended for convenience and is not intended for life safety purposes or
pool alarm and does not meet the requirements of UL 2017.
Volume/Mute
Home > Settings
NOTES •Chime and voice volume/muting can only be changed when the system is disarmed.
•
••
•
Voice annunciations are controlled by enabling or disabling Chimes.
•Voice annunciations should not be confused with Lyric’s Voice Command or Audio Alarm
Verification features.
Lyric™ can give audible notifications when a protected zone opens while the system is disarmed. With
Chimes enabled three beeps (or a selectable tone) sound at the Controller when a protected zone is
opened. If programmed, a voice announcement also sounds.
1. On the Home screen, select Settings.
2. Select Chime to enable chime sounds and voice annunciations. To mute all, de-select.
For chime sounds only, de-select Voice.
3. Adjust volume with the slider.
4. Press Save.
Setti g Chime Sou ds
Home > Security > Zones
NOTES: •Chime sounds can only be changed when the system is disarmed.
•Sounds can be changed only for door, window and motion sensors. Sounds associated with
smoke and CO detectors cannot be changed.
Different sounds can be assigned to the sensors in your system.
1. On the Zones menu, press Select All repeatedly to choose Select Chime. A list of sensors
appears.
2. Select a sensor. The Controller displays available sounds.
3. Press repeatedly to choose a sound. (Options include Disabled.)
4. Press to save your selection and return to the Security menu.

19
Audio Alarm Verificatio (Two-Way Voice)
This feature allows your central monitoring station to listen to or talk with persons on the premises when an
alarm has occurred.
NOTES •System announcements are disabled when this feature is active.
•Fire and CO alarms will prevent Audio Alarm Verification from operating.
•New Fire or CO alarms will terminate Audio Alarm Verification operation.
•Burglar alarms occurring during Audio Alarm Verification operation do not interrupt operation
and are reported immediately after operation concludes.
•Audio Alarm Verification modes are controlled by the central station.
Built-I Camera
Lyric’s built-in camera takes a snapshot of the person at the Controller when the system is manually
disarmed. Snapshots can be viewed via your Total Connect® account.
Built-in camera options may vary. Ask your security professional for more information.

20
This manual suits for next models
1
Table of contents
Other Honeywell Home Controllers manuals

Honeywell Home
Honeywell Home DB7110U User manual

Honeywell Home
Honeywell Home D6 PRO User manual

Honeywell Home
Honeywell Home HVC0001 User manual

Honeywell Home
Honeywell Home Evohome User manual

Honeywell Home
Honeywell Home Resideo HCC100 User manual

Honeywell Home
Honeywell Home HR92UK User manual

Honeywell Home
Honeywell Home R8182H User manual

Honeywell Home
Honeywell Home H46C-F User manual

Honeywell Home
Honeywell Home TheraPro HR90 Instruction Manual

Honeywell Home
Honeywell Home H4600A User manual