manuals.online logo
Brands
  1. Home
  2. •
  3. Brands
  4. •
  5. Honeywell
  6. •
  7. Controllers
  8. •
  9. Honeywell UDC2800 User manual

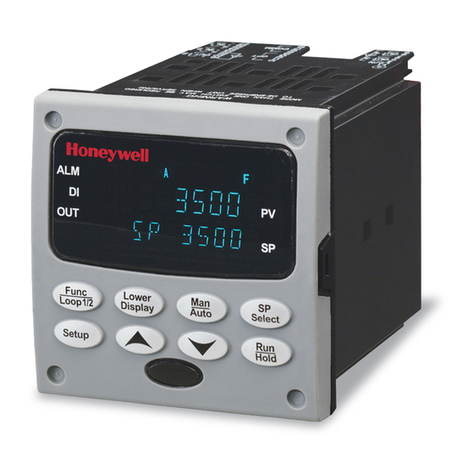
Honeywell UDC2800 User manual

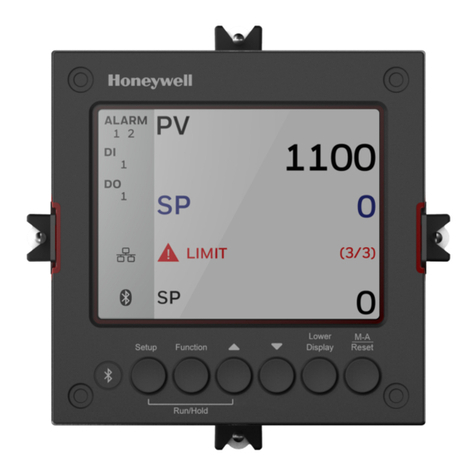
UDC2800 Universal Digital Limit Controller Quick Start Guide
When start up the controller for the first time, it is required to enter the initial password and a new password. The initial password is 1234.
Output #1 Current Output (4 to 20ma, 0 to 20ma)
Electro Mechanical Relay (5 Amp Form C)
Open Collector transistor output
Dual 2 Amp Relays (Both are Form A) (Heat/Cool Applications)
C _
E _
T _
R _
•
•
•
•
•
•
•
•
Output #2 and
Alarm #1 or Alarms
1 and 2
No Additional Outputs or Alarms
One Alarm Relay Only
E-M Relay (5 Amp Form C) Plus Alarm 1 (5 Amp Form C Relay)
Open Collector Plus Alarm 1 (5 Amp Form C Relay)
_ 0
_ B
_ E
_ T
•
•
•
•
•
•
•
•
Key Number III III IV VVI
_ _ _ _ _ _ _ _ _ _ _ _ _ _ _ _ _ _ _ _
Table I –Specify Control Output and/or Alarms
Table II –Communications and Software
Getting started
Overview
Model Number Interpretation
Dimensions and Mounting
This document is a quick start guide for the UDC2800 Limit controller. For detailed instructions, see UDC2800 Limit Controller Product
Manual.
To Download the Product Manual:
1. In a web browser, enter https://process.honeywell.com/us/en/support/product-documents-downloads, and log in.
If you are a new user, register at this website first.
2. In the Search box, enter UDC2800 Limit Control Product Manual (#51-52-25-165), and click the Search icon.
3. Select DOCUMENT TYPE & PRODUCT filters if required. The all search Results page appears with the search results.
4. Click the package to download it.
Write your controller’s model number in the spaces provided below and circle the corresponding items in each table. This information will also
be useful when you wire your controller.
•Select the desired Key Number. The arrow to the right marks the selection available.
•Make the desired selections from Table I to Table VI. A dot ‘·’denotes availability.
Key Number –UDC2800 Single Loop Controller
Communications None
Auxiliary Output/Digital Input (1 Aux and 1 DI)
RS-485 Modbus Plus Auxiliary Output/Digital Input
10/100M Base-T Ethernet (Modbus RTU) Plus Auxiliary
Output/Digital Inputs
0_ _
1_ _
2_ _
3_ _
•
•
•
•
•
•
•
•
Software Limit Controller
Standard Software
Standard S/W and Set Point Programming
_ L _
_ S _
_ F _
•
•
•
•
•
•
Future options None _ _ 0 • •
Table III –Input 1 and Input 2
Input 1 TC, RTD, mV, 0-5V, 1-5V, 0-10V
TC, RTU, mV, 0-5V, 1-5V, 0-10V, 0-20mA, 4-20mA
1_ _
2_ _
•
•
•
•
Input 2 None
TC, RTD, mV, 0-5V, 1-5V, 0-10V
TC, RTD, mV, 0-5V, 1-5V, 0-10V, 0-20mA, 4-20mA
Slidewire Input for Position Proportional (Required 2 Relay Outputs)
Carbon, Oxygen or Dewpoint (Provide 2 Inputs)
_ 00
_ 10
_ 20
_ 40
_ 60
•
•
•
A
b
•
•
•
A
B
Table IV –Options
Approvals CE (Standard)
CE, UL and CSA
CE, UL and CSA and FM (Limit Controller)
0_ _
1_ _
2_ _
•
•
d
•
•
d
Tags None
Stainless Steel Customer ID Tag –3 lines w/22 characters/line
_ 0 _
_ T _
•
•
•
•
Future options None _ _ 0 • •
Table V –Documentation
Documents Quick Start Guide -English 0_ • •
Certificate None
Certificate of Conformance (F3391)
_ 0
_ C
•
•
•
•
Table VI –Extended Warranty
Extended Warranty None
Extended Warranty Additional 1 year
Extended Warranty Additional 2 year
0
1
2
•
•
•
•
•
•
Wiring
51-52-25-166, Revision 1.0
November 2022
Description Selection Availability
Digital Controller for use with 100 to 240 Vac Power DC2800 ↓
Digital Controller for use with 24 Vac/dc Power DC2900 ↓
Attention: It is recommended to set up an uninterrupted power supply to avoid fluctuations on the device power line, as such
fluctuations may cause device availability issues.
UDC2800 Universal Digital Limit Controller Quick Start Guide
Step Operation Press Result
1Enter Set Up Mode Setup key Enter in the first set up group, Security.
2Select any Set Up group Setup key or Increment
or Decrement keys
Sequentially displays the other set up groups shown in the prompt hierarchy.
See Configuration Record Sheet for prompts.
You can also use the Increment or Decrement keys to scan the set up groups
in both directions. Stop at the set up group tile that describes the group of
parameters you want to configure. Then proceed to the next step.
3Select a Function
parameter
Function key Enter in the first function prompt of the selected set up group.
Increment or
Decrement keys
Press Increment or Decrement keys to display the other function prompts of
the selected set up group. Stop at the function prompt that you want to
change.
4Change the Value or
Selection
Function key Enter in the value or selection of the selected function prompt.
Increment or
Decrement keys
Increment or decrement the value or selection that appears for the selected
function prompt.
You can press the Increment and Decrement keys at the same time to move the
current editable digit one step left.
5Enter the Value or
Selection Function key Enter value or selection made into memory.
6Exit Configuration Lower Display key Exit the set up mode and returns to the main screen.
Configuration Procedure
Configuration Record Sheet
Enter the value or selection for each prompt on this sheet so you will have a record of how your controller was configured.
Group Prompt Function Prompt Value or
Selection
Factory
Setting
Group Prompt Function Prompt Value or
Selection
Factory
Setting
Security Password
Lockout
FM version
Restore Settings
Restore*
Change Password
――――
――――
――――
――――
――――
――――
0
Calibration
Disable
Disable
Disable
- -
Alarms A1S1 Type
A1S1 Value
A1S1 State
A1S1 Delay
A1S1 Hysteresis
A1S2 Type
A1S2 Value
A1S2 State
A1S2 Delay
A1S2 Hysteresis
A2S1 Type
A2S1 Value
A2S1 State
A2S1 Delay
A2S1 Hysteresis
A2S2 Type
A2S2 Value
A2S2 State
A2S2 Delay
A2S2 Hysteresis
Alarm Output 1
Alarm Blocking
AO/CO Diagnostic
――――
――――
――――
――――
――――
――――
――――
――――
――――
――――
――――
――――
――――
――――
――――
――――
――――
――――
――――
――――
――――
――――
――――
None
90
High Alarm
0
0.1
None
10
Low Alarm
0
0.1
None
95
High Alarm
0
0.1
None
5
Low Alarm
0
0.1
Non Latching
Disable
Disable
Limit Control Low or High Limit
Power Up Status
SP High Limit
SP Low Limit
――――
――――
――――
――――
High Limit
Normal
1000
0
Input1 Input 1 Type
Input 1 Transmitter
Input 1 High Value
Input 1 Low Value
Input 1 Bias
Input 1 Filter
Input 1 Burnout
――――
――――
――――
――――
――――
――――
――――
0-10 mV
Linear
1000
0
0
1
No Burnout
Options Auxiliary Output
DI 1 Function
――――
――――
Disable
None
Display Decimal Digits
Temperature Unit
Language
TC Diagnostics
Theme
――――
――――
――――
――――
――――
None
None
English
Enable
White/Black
51-52-25-166, Revision 1.0
November 2022
Group Prompt Function Prompt Value or Selection Factory Setting
Communication Bluetooth Function
Bluetooth ID
Bluetooth MAC Address
Communication Type
Modbus Address
Baud Rate
Response Delay
Word Order for Float
Ethernet Address
Subnet Mask Address
Default Gateway
Shed Function
Shed Time
Shed Mode
Shed SP Recall
Computer SP Unit
Local Loopback
――――
――――
――――
――――
――――
――――
――――
――――
――――
――――
――――
――――
――――
――――
――――
――――
――――
Disable
UXXXXXXXX
XX:XX:XX:XX:XX:XX
Disable
3
19200
1
FP B 0123
10.0.0.2
255.255.255.0
0.0.0.0
Disable
30
Last Mode
To Local SP
Engineering Unit
Disable
Communication with RS485
board (Accessible via
Communication set up group or
Honeywell EasySet)
Bluetooth Function
Bluetooth ID
Bluetooth MAC Address
Communication Type
Modbus Address
Baud Rate
Response Delay
Word Order for Float
Shed Function
Shed Time
Shed Mode
Shed SP Recall
Computer SP Unit
Computer SP Ratio
Computer SP Bias
Local Loopback
――――
――――
――――
――――
――――
――――
――――
――――
――――
――――
――――
――――
――――
――――
――――
――――
Disable
UXXXXXXXX
XX:XX:XX:XX:XX:XX
Disable
3
19200
1
FP B 0123
Disable
30
Last Mode
To Local SP
Engineering Unit
1.00
0
Disable
Communication with Ethernet
board (Accessible via
Communication set up group or
Honeywell EasySet)
Bluetooth Function
Bluetooth ID
Bluetooth MAC Address
Communication Type
Modbus Address
Baud Rate
Response Delay
Word Order for Float
Ethernet Address
Subnet Mask Address
Default Gateway
Shed Function
Shed Time
Shed Mode
Shed SP Recall
Computer SP Unit
Computer SP Ratio
Computer SP Bias
――――
――――
――――
――――
――――
――――
――――
――――
――――
――――
――――
――――
――――
――――
――――
――――
――――
――――
Disable
UXXXXXXXX
XX:XX:XX:XX:XX:XX
Disable
3
19200
1
FP B 0123
10.0.0.2
255.255.255.0
0.0.0.0
Disable
30
Last Mode
To Local SP
Engineering Unit
1.00
0
Status Software Version Read only - -
Configuration Record Sheet
UDC2800 Universal Digital Limit Controller Quick Start Guide
Step Operation Press Result
3Enter the Local Setpoint Lower Display key Until the required "SP" and the Local Setpoint Value are displayed.
Increment or
Decrement keys
To adjust the local setpoint to the value at which you want the process variable
maintained.
Attention: The local setpoint 1 cannot be changed if the Setpoint Ramp function is
running.
Start Up Procedure for Operation
It is required to enter the initial password and a new password when start up the controller for the first time. The initial password is 1234.
For more information of interface displays, see "Function of displays“ in UDC2800 Product Manual.
Setpoints
You can configure the following setpoints for the UDC2800 controller.
•A Single Local Setpoint
Changing the Setpoint value
Step Operation Press Result
1Select the Setpoint Low Display key Until you see:
Lower Display = SP
2
Adjust the Output Increment or
Decrement keys
To change the Local Setpoint to the value at which you want the process maintained.
The display “blinks” if you attempt to enter setpoint values beyond the high and
low limits.
The configured setpoint will be stored immediately.
51-52-25-166, Revision 1.0
November 2022
Lower Display Description
SP XXXX.XXX Local Setpoint #1, appears when Control Algorithm is configured as ANY algorithm except Disable in the
Algorithms set up group.
It also appears for current setpoint when using SP Ramp.
CSP XXXX.XXX Computer Setpoint, when SP is in override.
•In the Algorithms set up group, configure Control Algorithm as ANY algorithm except Disable.
•In the Communication set up group, enable Shed Function. And CSP is successfully override by SP override
through Modbus.
Viewing the operating parameters
Under the main screen, press the Lower Display key to scroll through the operating parameters listed in table below. The lower display will
show only those parameters and their values that apply to your specific model.
Notices
For support, contact your local Honeywell Process Solutions Customer Contact Center (CCC). To find your local CCC visit the website,
https://www.honeywellprocess.com/en-US/contactus/customer-support-contacts/Pages/default.aspx.
This document contains Honeywell proprietary information. Information contained herein is to be used solely for the purpose submitted, and
no part of this document or its contents shall be reproduced, published, or disclosed to a third party without the express permission of
Honeywell International Sàrl.
While this information is presented in good faith and believed to be accurate, Honeywell disclaims the implied warranties of merchantability
and fitness for a purpose and makes no express warranties except as may be stated in its written agreement with and for its customer.
In no event is Honeywell liable to anyone for any direct, special, or consequential damages. The information and specifications in this
document are subject to change without notice.
Copyright 2022 -Honeywell International Sàrl
Support
Honeywell holds technical training classes that are taught by process control systems experts. For more information about these classes,
contact your Honeywell representative, or see http://www.automationcollege.com.
Training classes
You can find the most up-to-date documents on the Honeywell Process Solutions Support website at: www.honeywellprocess.com.
If you have comments about Honeywell Process Solutions documentation, send your feedback to: hpsdocs@Honeywell.com.
Use this email address to provide feedback, or to report errors and omissions in the documentation. For immediate help with a technical
problem, contact HPS Technical Support through your local Customer Contact Center, or by raising a support request on the Honeywell
Process Solutions Support website.
Documentation feedback
For the purpose of submission, a security vulnerability is defined as a software defect or weakness that can be exploited to reduce the
operational or security capabilities of the software.
Honeywell investigates all reports of security vulnerabilities affecting Honeywell products and services.
To report a potential security vulnerability against any Honeywell product, please follow the instructions at: https://www.honeywell.com/en-
us/product-security.
How to report a security vulnerability
Company Name: HONEYWELL System Sensor de Mexico, S. de R.L. de C.V .
Company Address: Avenida Miguel De La Madrid, #8102 Colonia Lote Bravo Ciudad Juarez, Chihuahua, C.P. 32695, México
Factory Information
Honeywell®, Experion®, PlantScape®, SafeBrowse®, and TotalPlant® are registered trademarks of Honeywell International, Inc.
Other brand or product names are trademarks of their respective owners.
Trademarks
This product may contain or be derived from materials, including software, of third parties. The third party materials may be subject to
licenses, notices, restrictions and obligations imposed by the licensor. The licenses, notices, restrictions and obligations, if any, may be found
in the materials accompanying the product, in the documents or files accompanying such third party materials, in a file named third_party_
licenses on the media containing the product, or at http://www.honeywell.com/en-us/privacy-statement.
Third-party licenses
Microsoft and SQL Server are either registered trademarks or trademarks of Microsoft Corporation in the United States and/or other
countries.
Trademarks that appear in this document are used only to the benefit of the trademark owner, with no intention of trademark infringement.
Other trademarks
Other manuals for UDC2800

2

Other Honeywell Controllers manuals

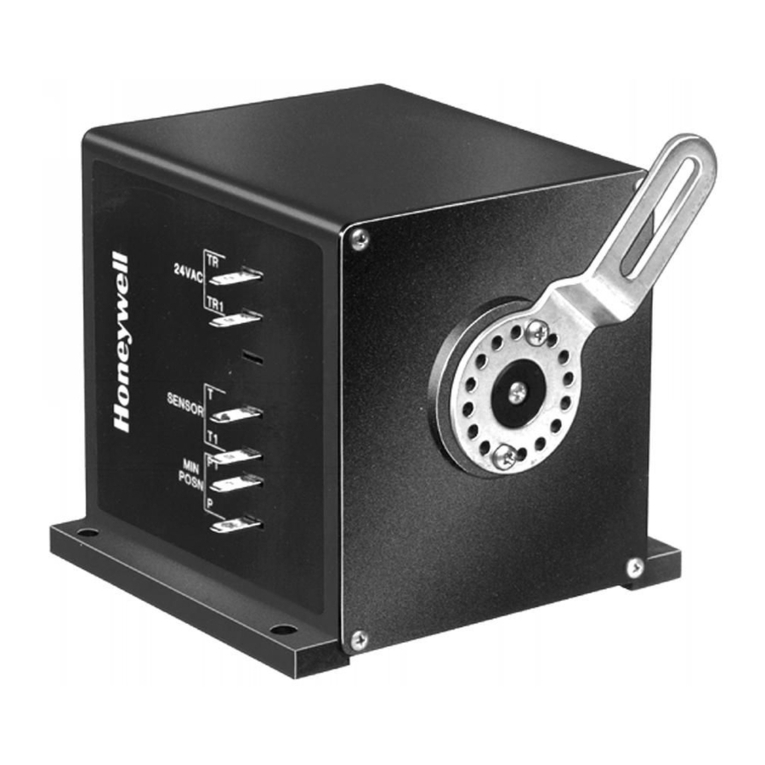
Honeywell W7340 Operation manual

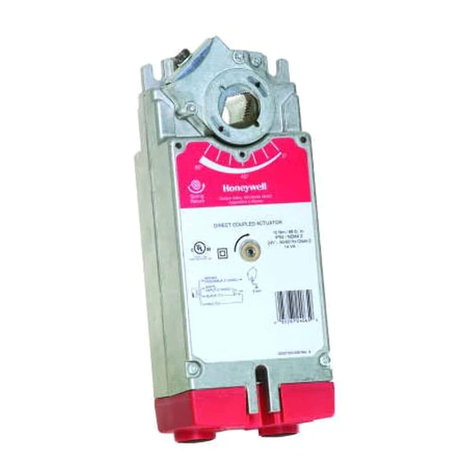
Honeywell

Honeywell W7340 Operation manual

Honeywell 5 Nm Series Operation manual

Honeywell

Honeywell 5 Nm Series Operation manual

Honeywell S9200U1000 User manual

Honeywell

Honeywell S9200U1000 User manual

Honeywell HON 670 Guide

Honeywell

Honeywell HON 670 Guide

Honeywell ML6284 Operation manual

Honeywell

Honeywell ML6284 Operation manual

Honeywell HJK7000 UltraKey Plus Instruction Manual

Honeywell

Honeywell HJK7000 UltraKey Plus Instruction Manual

Honeywell T775 Series User guide

Honeywell

Honeywell T775 Series User guide

Honeywell KromSchroder IC 40 Manual

Honeywell

Honeywell KromSchroder IC 40 Manual

Honeywell ML200 Series User manual

Honeywell

Honeywell ML200 Series User manual

Honeywell SHC Series User manual

Honeywell

Honeywell SHC Series User manual

Honeywell HON R100NG Series Operating instructions

Honeywell

Honeywell HON R100NG Series Operating instructions

Honeywell 6200 Series Instruction manual

Honeywell

Honeywell 6200 Series Instruction manual

Honeywell WEB-8000 Instruction Manual

Honeywell

Honeywell WEB-8000 Instruction Manual

Honeywell HR 80 User manual

Honeywell

Honeywell HR 80 User manual

Honeywell LP1501 Operator's manual

Honeywell

Honeywell LP1501 Operator's manual

Honeywell Elster Jeavons J125 User manual

Honeywell

Honeywell Elster Jeavons J125 User manual

Honeywell Excel 10 User manual

Honeywell

Honeywell Excel 10 User manual

Honeywell Excel 10 User manual

Honeywell

Honeywell Excel 10 User manual

Honeywell V9055A User manual

Honeywell

Honeywell V9055A User manual

Honeywell HVC0002 User manual

Honeywell

Honeywell HVC0002 User manual

Honeywell N05 Series Operation manual

Honeywell

Honeywell N05 Series Operation manual

Honeywell Touchpoint Plus User manual

Honeywell

Honeywell Touchpoint Plus User manual

Honeywell SLATE Series User manual

Honeywell

Honeywell SLATE Series User manual

Honeywell Spyder 5 WEB-RxxN Series User manual

Honeywell

Honeywell Spyder 5 WEB-RxxN Series User manual

Popular Controllers manuals by other brands

Cannon DVR-3000 Operation manual

Cannon

Cannon DVR-3000 Operation manual

YASKAWA MP3300 series product manual

YASKAWA

YASKAWA MP3300 series product manual

Shimaden SR253 Series instruction manual

Shimaden

Shimaden SR253 Series instruction manual

Johnson Controls PENN P70AB-2 Installation Sheets Manual

Johnson Controls

Johnson Controls PENN P70AB-2 Installation Sheets Manual

Omron CPM1 - PROGRAMING  02-2001 Programming manual

Omron

Omron CPM1 - PROGRAMING 02-2001 Programming manual

Thermo Scientific Dionex RFC Operator's manual

Thermo Scientific

Thermo Scientific Dionex RFC Operator's manual

Faro 33928 installation guide

Faro

Faro 33928 installation guide

FTDI FT8U232 manual

FTDI

FTDI FT8U232 manual

SOLARA SR135TL user manual

SOLARA

SOLARA SR135TL user manual

Afag IRG 1-S operating instructions

Afag

Afag IRG 1-S operating instructions

Panasonic CZ-ANC2 installation instructions

Panasonic

Panasonic CZ-ANC2 installation instructions

MADRIX Nebula user manual

MADRIX

MADRIX Nebula user manual

Yli Electronic YBC-431 quick start guide

Yli Electronic

Yli Electronic YBC-431 quick start guide

Offgridtec MPPT Pro Duo user manual

Offgridtec

Offgridtec MPPT Pro Duo user manual

Allegion LCN 8310-815 manual

Allegion

Allegion LCN 8310-815 manual

rotork IQT Installation and maintenance information

rotork

rotork IQT Installation and maintenance information

Evco EV3 CHIL instruction sheet

Evco

Evco EV3 CHIL instruction sheet

FONESTAR MPX-460P quick start guide

FONESTAR

FONESTAR MPX-460P quick start guide

manuals.online logo
manuals.online logoBrands
  • About & Mission
  • Contact us
  • Privacy Policy
  • Terms and Conditions

Copyright 2025 Manuals.Online. All Rights Reserved.