2700 Blankenbaker Pkwy, Suite 150
Louisville, KY, 40299, USA
www.honeywell.com/security
+1 800 323 4576
(North America only)
Aston Fields Road, Whitehouse Industrial Estate
Runcorn, Cheshire, WA7 3DL, UK
www.honeywell.com/security/uk
+1 44 (0) 1928 754 028
(Europe only)
35F Tower A, City Center, 100 Zunyi Road
Shanghai, 200051, China
www.asia.security.honeywell.com
+86 21 221 96888
(Asia Pacific only)
Document 800-23316 – Rev C – 08/2017
© 2017 Honeywell International Inc. All rights reserved. No part of this publication may be reproduced by any means without written permission from Honeywell. The information in this publication is believed to be accurate in all respects. However, Honeywell cannotassume responsibility for any consequences
resulting from the use thereof. The information contained herein is subject to change without notice. Revisions or new editions to this publication may be issued to incorporate such changes.
Mounting and Aiming the Camera
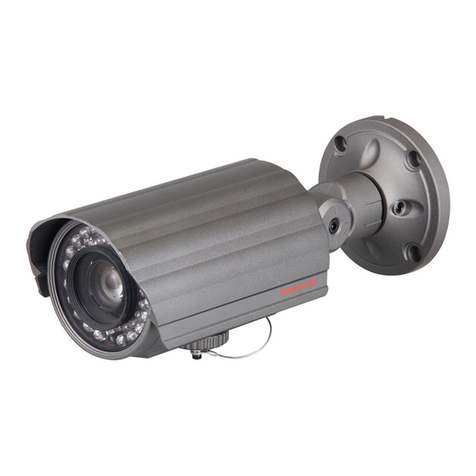
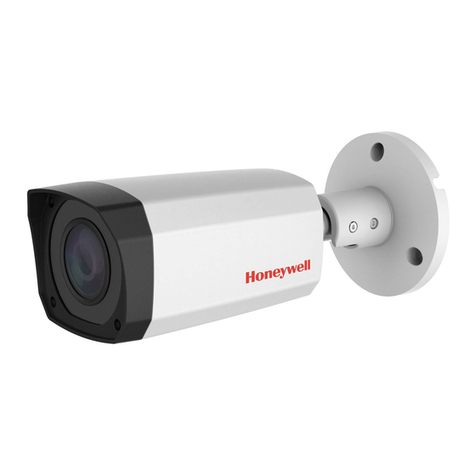
1. Connect the camera’s BNC connector to a coaxial cable.
2. The default video format is HQA/CVI. Use the DIP switch on the camera cable to change formats.
3. Connect the power connector to a 12 VDC power
source.
4. Position the camera so that the screw holes on the
mounting bracket base align with the anchors.
5. Fix the camera to the mounting surface using the
supplied screws.
6. Using a Phillips screwdriver, loosen the locking screw
on the mounting bracket arm.
7. Point the camera in the desired direction by rotating
the camera body and mounting bracket arm.
8. Tighten the locking screw.
Configuring the Camera
1. Connect the camera to a Honeywell Performance Series HQA DVR and log on as the admin user.
2. Right-click to display the shortcut menu, then click
Camera
Menu
. The
Menu Operation
window opens.
3. Click
Enter
to display the camera’s OSD menu.
4. To configure the camera, in the
Menu Operation
window,
click the up/down arrows to move through the menu list, click
the left/right arrows to change a menu setting, or click
Enter
to enter a submenu (
) or execute a command.
5. After you have finished configuring the camera, scroll down
to
Exit
, and then click
Enter
to exit the OSD menu. Right-click to close the
Menu Operation
window.
Recommended Recorders
Regulatory Statements
FCC Compliance
Information to the User: This equipment has been tested and found to comply with the limits for a Class B digital
device, pursuant to part 15 of the FCC Rules. These limits are designed to provide reasonable protection against
harmful interference in a residential installation. This equipment generates, uses, and can radiate radio frequency
energy and, if not installed and used in accordance with the instructions, may cause harmful interference to radio
communications. However, there is no guarantee that interference will not occur in a particular installation. If this
equipment does cause harmful interference to radio or television reception, which can be determined by turning the
equipment off and on, the user is encouraged to try to correct the interference by one or more of the following
measures:
• Reorient or relocate the receiving antenna.
• Increase the separation between the equipment and receiver.
• Connect the equipment into an outlet on a circuit different from that to which the receiver is connected.
• Consult the dealer or an experienced radio/TV technician for help.
Changes or modifications not expressly approved by the party responsible for compliance could void the user's
authority to operate the equipment.
This Class B digital apparatus complies with Canadian ICES-003.
Cet appareil numérique de la Classe B est conforme à la norme NMB-003 du Canada.
Manufacturer’s Declaration of Conformance
Europe The manufacturer declares that the equipment supplied is compliant with the European Parliament and
Council Directive on the restriction of the use of certain hazardous substances in electrical and electronic equipment
(2011/65/EU), General Product Safety Directive (2001/95/EC), and the essential requirements of the EMC directive
(2014/30/EU), conforming to the requirements of standards EN 55032 for emissions, EN 50130-4 for immunity, and
EN 60950-1 for electrical equipment safety.
WEEE (Waste Electrical and Electronic Equipment)
Correct disposal of this product (applicable in the European Union and other European countries with
separate collection systems). This product should be disposed of, at the end of its useful life, as per applicable
local laws, regulations, and procedures.
HRHQ104* 4-channel, 1 SATA, 720p@120fps, 1080p@60fps, alarm I/O
HRHQ108* 8-channel, 2 SATA, 720p@240fps, 1080p@120fps, alarm I/O
HRHQ116* 16-channel, 2 SATA, 720p@480fps, 1080p@240fps, alarm I/O
HRHT404* 4-channel, 1 SATA, 4 MP, HQA/1080p@60fps, HQA/SD/IP@120fps
HRHT408* 8-channel, 2 SATA, 4 MP, HQA/1080p@120fps, HQA/SD/IP@120fps
HRHT416* 16-channel, 2 SATA, 4 MP, HQA/1080p@240fps, HQA/SD/IP@120fps
1 2
CVI OFF OFF
SD ON ON
AHD ON OFF
TVI OFF ON
