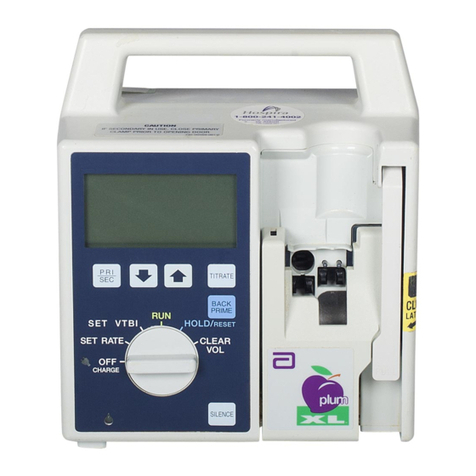
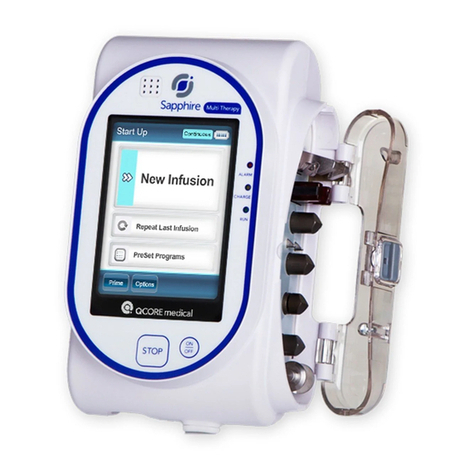
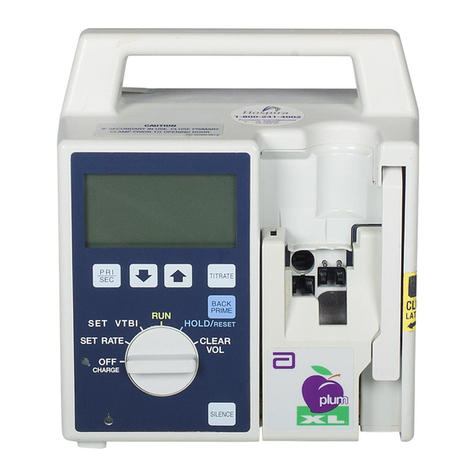
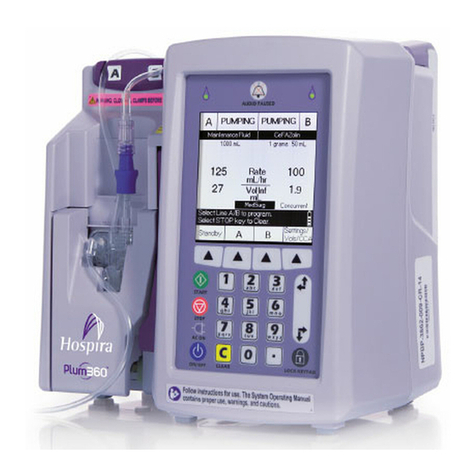
Hospira PLUMA+3 12348-04 Operating manual

430-95424-002 (Rev. 01/06) Plum A+®3 Infusion System
©Hospira, Inc.
This document and the subject matter disclosed herein are proprietary information.
Hospira retains all the exclusive rights of dissemination, reproduction, manufacture, and sale.
Any party using this document accepts it in confidence, and agrees not to duplicate it in whole
or in part nor disclose it to others without the written consent of Hospira.

Technical Service Manual 430-95424-002 (Rev. 01/06)
Change History
Part Number Description of Change
430-95424-001
(Rev. 09/03)
Original Issue
430-95424-002
(Rev. 01/06)
Second Issue
Updated Section 1, Section 5,
Section 6, and Section 8
Updated battery information
Incorporated Hospira name change
and updated to current style
Updated graphics throughout
Updated back page

CHANGE HISTORY
430-95424-002 (Rev. 01/06) Plum A+®3 Infusion System
This page intentionally left blank.

Technical Service Manual iii 430-95424-002 (Rev. 01/06)
Contents
Section 1
INTRODUCTION . . . . . . . . . . . . . . . . . . . . . . . . . . 1-1
1.1 SCOPE . . . . . . . . . . . . . . . . . . . . . . . . . . . 1-1
1.2 CONVENTIONS . . . . . . . . . . . . . . . . . . . . . . . . 1-2
1.3 COMPONENT DESIGNATORS . . . . . . . . . . . . . . . . . . 1-2
1.4 ACRONYMS AND ABBREVIATIONS . . . . . . . . . . . . . . . . 1-3
1.5 USER QUALIFICATION . . . . . . . . . . . . . . . . . . . . . 1-5
1.6 ARTIFACTS . . . . . . . . . . . . . . . . . . . . . . . . . 1-5
1.7 INSTRUMENT INSTALLATION PROCEDURE . . . . . . . . . . . . 1-5
1.7.1 UNPACKING . . . . . . . . . . . . . . . . . . . . . . 1-6
1.7.2 INSPECTION . . . . . . . . . . . . . . . . . . . . . . 1-6
1.7.3 SELF TEST. . . . . . . . . . . . . . . . . . . . . . . . 1-6
1.8 BIOMED SETTINGS . . . . . . . . . . . . . . . . . . . . . . 1-8
1.8.1 IV PARAMETERS . . . . . . . . . . . . . . . . . . . . . 1-10
1.8.2 ALARMS LOG . . . . . . . . . . . . . . . . . . . . . . 1-11
1.8.3 SETTING THE TIME AND DATE . . . . . . . . . . . . . . . 1-12
Section 2
WARRANTY . . . . . . . . . . . . . . . . . . . . . . . . . . . . 2-1
Section 3
SYSTEM OPERATING MANUAL . . . . . . . . . . . . . . . . . . . . 3-1
Section 4
THEORY OF OPERATION . . . . . . . . . . . . . . . . . . . . . . . 4-1
4.1 GENERAL DESCRIPTION . . . . . . . . . . . . . . . . . . . . 4-1
4.2 ELECTRONIC SUBSYSTEM OVERVIEW . . . . . . . . . . . . . . . 4-2
4.2.1 CPU SUBSYSTEM . . . . . . . . . . . . . . . . . . . . . 4-3
4.2.1.1 CPU . . . . . . . . . . . . . . . . . . . . . . . 4-3
4.2.1.2 SYSTEM MEMORY ADDRESS MAP . . . . . . . . . . . 4-3
4.2.1.3 PROGRAMMABLE READ-ONLY MEMORY . . . . . . . . 4-4
4.2.1.4 STATIC RANDOM ACCESS MEMORY . . . . . . . . . . 4-4
4.2.1.5 CONTROL LOGIC . . . . . . . . . . . . . . . . . 4-4
4.2.1.6 LCD CONTROLLER . . . . . . . . . . . . . . . . . 4-4
4.2.1.7 LCD BACKLIGHT CONTROL . . . . . . . . . . . . . 4-5
4.2.1.8 LCD CONTRAST CONTROL. . . . . . . . . . . . . . 4-5
4.2.1.9 REAL-TIME CLOCK . . . . . . . . . . . . . . . . . 4-5
4.2.1.10 VOLTAGE MONITOR WATCHDOG TIMER . . . . . . . . 4-6
4.2.1.11 ANALOG-TO-DIGITAL CONVERTER . . . . . . . . . . 4-6
4.2.1.12 DIGITAL-TO-ANALOG CONVERTER . . . . . . . . . . 4-8
4.2.1.13 FRONT PANEL KEYPAD MATRIX . . . . . . . . . . . 4-8
4.2.1.14 FRONT PANEL [ON/OFF] KEY . . . . . . . . . . . . . 4-8
4.2.1.15 FRONT PANEL LED INDICATORS . . . . . . . . . . . 4-8
4.2.1.16 KEYPAD LOCKOUT INTERFACE . . . . . . . . . . . . 4-9
4.2.1.17 NURSE CALL INTERFACE . . . . . . . . . . . . . . 4-9
4.2.1.18 AUDIBLE INDICATORS . . . . . . . . . . . . . . . 4-9
4.2.1.19 BARCODE READER INTERFACE . . . . . . . . . . . . 4-9
4.2.1.20 DATAPORT INTERFACE . . . . . . . . . . . . . . . 4-10
4.2.1.21 POWER SUPPLY INTERFACE . . . . . . . . . . . . . 4-10
4.2.1.22 MECHANISM INTERFACE . . . . . . . . . . . . . . 4-11

CONTENTS
430-95424-002 (Rev. 01/06) iv Plum A+®3 Infusion System
4.2.2 POWER SUPPLY SUBSYSTEM . . . . . . . . . . . . . . . . 4-13
4.2.2.1 MAIN SWITCHING REGULATOR . . . . . . . . . . . 4-13
4.2.2.2 MAIN REGULATOR FAULT DETECTION . . . . . . . . 4-14
4.2.2.3 SYSTEM POWER . . . . . . . . . . . . . . . . . . 4-14
4.2.2.4 AUXILIARY SUPPLIES . . . . . . . . . . . . . . . . 4-14
4.2.2.5 POWER CONTROL . . . . . . . . . . . . . . . . . 4-15
4.2.2.6 BATTERY VOLTAGE MEASUREMENT . . . . . . . . . 4-16
4.2.2.7 BATTERY CHARGE/DISCHARGE CURRENT
MEASUREMENT . . . . . . . . . . . . . . . . . . 4-16
4.2.2.8 BATTERY CHARGER . . . . . . . . . . . . . . . . 4-16
4.2.3 MECHANISM SUBSYSTEM . . . . . . . . . . . . . . . . . 4-17
4.2.3.1 MOTORS/MOTOR DRIVE . . . . . . . . . . . . . . 4-17
4.2.3.2 MOTOR POSITION SENSORS . . . . . . . . . . . . . 4-18
4.2.3.3 V2_5 REFERENCE VOLTAGE . . . . . . . . . . . . . 4-19
4.2.3.4 AIR SENSORS . . . . . . . . . . . . . . . . . . . 4-19
4.2.3.5 PRESSURE SENSORS . . . . . . . . . . . . . . . . 4-21
4.2.3.6 PRESSURE SENSOR CALIBRATION . . . . . . . . . . 4-23
4.2.3.7 CASSETTE TYPE/PRESENCE SELECTION. . . . . . . . . 4-23
4.2.3.8 SERIAL EEPROM . . . . . . . . . . . . . . . . . . 4-24
4.3 PRINTED WIRING ASSEMBLIES . . . . . . . . . . . . . . . . . 4-24
4.3.1 POWER SUPPLY PWA . . . . . . . . . . . . . . . . . . . 4-24
4.3.2 PERIPHERAL PWA . . . . . . . . . . . . . . . . . . . . 4-25
4.3.3 PERIPHERAL INTERFACE PWA . . . . . . . . . . . . . . . 4-25
4.3.4 CPU PWA . . . . . . . . . . . . . . . . . . . . . . . . 4-26
4.3.5 DRIVER PWA . . . . . . . . . . . . . . . . . . . . . . 4-26
4.3.6 SWITCH PWA . . . . . . . . . . . . . . . . . . . . . . 4-27
4.3.7 APP PWA . . . . . . . . . . . . . . . . . . . . . . . . 4-27
4.4 REMOTE MOUNTED PERIPHERALS . . . . . . . . . . . . . . . . 4-28
4.4.1 LCD . . . . . . . . . . . . . . . . . . . . . . . . . . 4-28
4.4.2 SEALED LEAD ACID BATTERY . . . . . . . . . . . . . . . 4-28
4.4.3 BARCODE READER WAND . . . . . . . . . . . . . . . . . 4-28
4.5 MECHANICAL OVERVIEW . . . . . . . . . . . . . . . . . . . 4-28
4.5.1 CASSETTE . . . . . . . . . . . . . . . . . . . . . . . 4-29
4.5.2 MECHANISM ASSEMBLY . . . . . . . . . . . . . . . . . 4-32
4.5.2.1 MOTOR AND VALVE ASSEMBLIES. . . . . . . . . . . 4-32
4.5.2.2 A/B VALVE SUBSYSTEM . . . . . . . . . . . . . . . 4-32
4.5.2.3 INLET/OUTLET VALVE SUBSYSTEM . . . . . . . . . . 4-33
4.5.2.4 PLUNGER DRIVE SUBSYSTEM . . . . . . . . . . . . 4-33
Section 5
MAINTENANCE AND SERVICE TESTS . . . . . . . . . . . . . . . . . . 5-1
5.1 ROUTINE MAINTENANCE . . . . . . . . . . . . . . . . . . . 5-1
5.1.1 CLEANING . . . . . . . . . . . . . . . . . . . . . . . 5-1
5.1.2 SANITIZING . . . . . . . . . . . . . . . . . . . . . . 5-2
5.2 PERFORMANCE VERIFICATION TEST . . . . . . . . . . . . . . . 5-2
5.2.1 EQUIPMENT REQUIRED . . . . . . . . . . . . . . . . . . 5-3
5.2.2 INSPECTION . . . . . . . . . . . . . . . . . . . . . . 5-3
5.2.3 TEST SETUP . . . . . . . . . . . . . . . . . . . . . . . 5-4
5.2.4 SELF TEST . . . . . . . . . . . . . . . . . . . . . . . 5-4
5.2.5 CASSETTE ALARM TEST . . . . . . . . . . . . . . . . . . 5-6
5.2.6 FREE FLOW TEST . . . . . . . . . . . . . . . . . . . . . 5-6
5.2.7 DISPLAY TEST . . . . . . . . . . . . . . . . . . . . . . 5-6
5.2.8 KEYPAD VERIFICATION/FUNCTIONAL TEST . . . . . . . . . . 5-7
5.2.9 ALARM LOUDNESS TEST . . . . . . . . . . . . . . . . . 5-7
5.2.10 LOCKOUT SWITCH TEST. . . . . . . . . . . . . . . . . . 5-8
5.2.11 PROXIMAL OCCLUSION TEST. . . . . . . . . . . . . . . . 5-9

CONTENTS
Technical Service Manual v 430-95424-002 (Rev. 01/06)
5.2.12 PROXIMAL AIR-IN-LINE TEST . . . . . . . . . . . . . . . . 5-9
5.2.13 DISTAL AIR-IN-LINE TEST . . . . . . . . . . . . . . . . . 5-10
5.2.14 DISTAL OCCLUSION TEST . . . . . . . . . . . . . . . . . 5-11
5.2.15 DELIVERY ACCURACY TEST . . . . . . . . . . . . . . . . 5-12
5.2.16 NURSE CALL TEST . . . . . . . . . . . . . . . . . . . . 5-13
5.2.17 ELECTRICAL SAFETY TEST . . . . . . . . . . . . . . . . . 5-13
5.2.18 END OF THE PVT . . . . . . . . . . . . . . . . . . . . . 5-13
5.5 PERIODIC MAINTENANCE INSPECTION . . . . . . . . . . . . . . 5-14
5.6 BATTERY OPERATION OVERVIEW . . . . . . . . . . . . . . . . 5-14
Section 6
TROUBLESHOOTING . . . . . . . . . . . . . . . . . . . . . . . . 6-1
6.1 TECHNICAL ASSISTANCE. . . . . . . . . . . . . . . . . . . . 6-1
6.2 WARNING MESSAGES . . . . . . . . . . . . . . . . . . . . . 6-1
6.3 ALARM MESSAGES AND ERROR CODES . . . . . . . . . . . . . . 6-2
6.3.1 OPERATIONAL ALARM MESSAGES . . . . . . . . . . . . . 6-2
6.3.2 ERROR CODES REQUIRING TECHNICAL SERVICE . . . . . . . . 6-7
6.4 TROUBLESHOOTING PROCEDURES. . . . . . . . . . . . . . . . 6-13
Section 7
REPLACEABLE PARTS AND REPAIRS . . . . . . . . . . . . . . . . . . 7-1
7.1 REPLACEABLE PARTS . . . . . . . . . . . . . . . . . . . . . 7-1
7.2 REPLACEMENT PROCEDURES . . . . . . . . . . . . . . . . . . 7-3
7.2.1 SAFETY AND EQUIPMENT PRECAUTIONS . . . . . . . . . . . 7-3
7.2.2 REQUIRED TOOLS AND MATERIALS . . . . . . . . . . . . . 7-3
7.2.3 RUBBER FOOT PAD REPLACEMENT . . . . . . . . . . . . . 7-4
7.2.4 BATTERY, BATTERY DOOR, AND DOOR PAD REPLACEMENT . . . 7-5
7.2.5 AC POWER CORD, RETAINER, AND VELCRO STRAP
REPLACEMENT . . . . . . . . . . . . . . . . . . . . . 7-7
7.2.6 SEPARATING THE FRONT ENCLOSURE, REAR ENCLOSURE,
AND MAIN CHASSIS ASSEMBLY . . . . . . . . . . . . . . . 7-8
7.2.7 PERIPHERAL INTERFACE ASSEMBLY REPLACEMENT . . . . . . 7-10
7.2.8 PERIPHERAL PWA REPLACEMENT . . . . . . . . . . . . . . 7-11
7.2.9 PERIPHERAL COMPONENT REPLACEMENT . . . . . . . . . . 7-13
7.2.9.1 VOLUME CONTROL KNOB REPLACEMENT . . . . . . . 7-13
7.2.9.2 PERIPHERAL COVER REPLACEMENT . . . . . . . . . . 7-14
7.2.10 FRONT/REAR ENCLOSURE GASKET REPLACEMENT . . . . . . . 7-16
7.2.11 LOWER FRONT ENCLOSURE GASKET REPLACEMENT . . . . . . 7-16
7.2.11.1 EMI GASKET REPLACEMENT . . . . . . . . . . . . . 7-17
7.2.11.2 KEYPAD GASKET REPLACEMENT . . . . . . . . . . . 7-18
7.2.11.3 TOP SEAL GASKET REPLACEMENT . . . . . . . . . . 7-18
7.2.12 REAR ENCLOSURE ASSEMBLY COMPONENT REPLACEMENT . . . 7-19
7.2.12.1 POLE CLAMP ASSEMBLY AND BACKING PLATE
REPLACEMENT . . . . . . . . . . . . . . . . . . 7-21
7.2.12.2 INTERNAL AC POWER CORD REPLACEMENT . . . . . . 7-22
7.2.12.3 AC CONNECTOR REPLACEMENT . . . . . . . . . . . 7-22
7.2.12.4 FUSE REPLACEMENT . . . . . . . . . . . . . . . . 7-23
7.2.12.5 REAR ENCLOSURE GASKET REPLACEMENT . . . . . . . 7-24
7.2.13 MINIPOLE ASSEMBLY REPLACEMENT . . . . . . . . . . . . 7-24
7.2.13.1 COTTER RING REPLACEMENT . . . . . . . . . . . . 7-25
7.2.13.2 BAG HANGER REPLACEMENT . . . . . . . . . . . . 7-26
7.2.13.3 CLUTCH HOUSING REPLACEMENT . . . . . . . . . . 7-26
7.2.13.4 CLUTCH SPRING REPLACEMENT . . . . . . . . . . . 7-27
7.2.14 MAIN CHASSIS ASSEMBLY COMPONENT REPLACEMENT. . . . . 7-27
7.2.14.1 POWER SUPPLY PWA REPLACEMENT . . . . . . . . . . 7-30

CONTENTS
430-95424-002 (Rev. 01/06) vi Plum A+®3 Infusion System
7.2.14.2 KEYPAD REPLACEMENT. . . . . . . . . . . . . . . 7-30
7.2.14.3 DISPLAY ASSEMBLY REPLACEMENT . . . . . . . . . . 7-31
7.2.14.4 CPU/DRIVER CABLE REPLACEMENT . . . . . . . . . . 7-32
7.2.14.5 MOTOR POWER CABLE REPLACEMENT. . . . . . . . . 7-35
7.2.14.6 CPU PWA REPLACEMENT . . . . . . . . . . . . . . 7-35
7.2.14.7 PIEZO ALARM ASSEMBLY REPLACEMENT. . . . . . . . 7-36
7.2.14.8 MECHANISM ASSEMBLY REPLACEMENT . . . . . . . . 7-37
7.2.14.9 CASSETTE DOOR AND FLUID SHIELD REPLACEMENT . . . 7-38
7.2.14.10 OPENER HANDLE ASSEMBLY REPLACEMENT . . . . . . 7-41
Section 8
SPECIFICATIONS . . . . . . . . . . . . . . . . . . . . . . . . . . 8-1
Section 9
DRAWINGS . . . . . . . . . . . . . . . . . . . . . . . . . . . . 9-1
Index . . . . . . . . . . . . . . . . . . . . . . . . . . . . . . I-1
Figures
Figure 1-1. Display and Keypad . . . . . . . . . . . . . . . . . . . . . 1-7
Figure 1-2. Biomed Settings . . . . . . . . . . . . . . . . . . . . . . 1-9
Figure 1-3. IV Parameters . . . . . . . . . . . . . . . . . . . . . . . 1-10
Figure 1-4. Alarms Log . . . . . . . . . . . . . . . . . . . . . . . . 1-11
Figure 1-5. Setting the Time and Date. . . . . . . . . . . . . . . . . . . 1-12
Figure 1-6. Common IV Parameters . . . . . . . . . . . . . . . . . . . 1-13
Figure 1-7. Macro IV Parameters . . . . . . . . . . . . . . . . . . . . 1-13
Figure 4-1. Electronic Functional Diagram . . . . . . . . . . . . . . . . . 4-2
Figure 4-2. Serial Interface to ADC. . . . . . . . . . . . . . . . . . . . 4-7
Figure 4-3. System Startup and Shutdown Timing, Battery Powered . . . . . . . . 4-15
Figure 4-4. Stepper Motor Coils . . . . . . . . . . . . . . . . . . . . . 4-18
Figure 4-5. Air Sensor Block Diagram. . . . . . . . . . . . . . . . . . . 4-20
Figure 4-6. Pressure Sensor Excitation and Amplifier Block Diagram . . . . . . . 4-22
Figure 4-7. Major Elements of the Dual-Channel Cassette . . . . . . . . . . . 4-30
Figure 4-8. Fluid Path in the Cassette . . . . . . . . . . . . . . . . . . . 4-31
Figure 4-9. Mechanism Valve Pins and Sensor Locations . . . . . . . . . . . . 4-33
Figure 5-1. Display and Keypad . . . . . . . . . . . . . . . . . . . . . 5-5
Figure 5-2. Rear View . . . . . . . . . . . . . . . . . . . . . . . . 5-8
Figure 5-3. Special Cassettes with Bubble Sensor Tips Removed . . . . . . . . . 5-10
Figure 5-4. Distal Occlusion Test Setup . . . . . . . . . . . . . . . . . . 5-12
Figure 7-1. Bottom View . . . . . . . . . . . . . . . . . . . . . . . 7-4
Figure 7-2. AC Power Cord, Retainer, Velcro Strap, and Battery Assembly . . . . . 7-6
Figure 7-3. Separating the Front Enclosure, Rear Enclosure, and Main Chassis
Assembly . . . . . . . . . . . . . . . . . . . . . . . . 7-9
Figure 7-4. Screw Placement Sequence . . . . . . . . . . . . . . . . . . 7-10
Figure 7-5. Peripheral Interface Assembly and Peripheral PWAs . . . . . . . . . 7-12
Figure 7-6. Peripheral Interface Assembly Components . . . . . . . . . . . . 7-15
Figure 7-7. Lower Front Enclosure Gaskets . . . . . . . . . . . . . . . . . 7-17
Figure 7-8. External Rear Enclosure Assembly Components . . . . . . . . . . . 7-19
Figure 7-9. Internal Rear Enclosure Assembly Components . . . . . . . . . . . 7-20
Figure 7-10. Minipole Assembly . . . . . . . . . . . . . . . . . . . . . 7-25

CONTENTS
Technical Service Manual vii 430-95424-002 (Rev. 01/06)
Figure 7-11. Main Chassis Components (1 of 2) . . . . . . . . . . . . . . . . 7-28
Figure 7-11. Main Chassis Components (2 of 2) . . . . . . . . . . . . . . . . 7-29
Figure 7-12. CPU/Driver Cable Routing . . . . . . . . . . . . . . . . . . 7-33
Figure 7-13. Ferrite Tape Positioning (1 of 2) . . . . . . . . . . . . . . . . . 7-34
Figure 7-13. Ferrite Tape Positioning (2 of 2) . . . . . . . . . . . . . . . . . 7-34
Figure 7-14. Fluid Shield Replacement . . . . . . . . . . . . . . . . . . . 7-39
Figure 7-15. Cassette Door and Opener Handle Assembly Replacement . . . . . . . 7-40
Figure 9-1. Illustrated Parts Breakdown . . . . . . . . . . . . . . . . . . 9-5
Figure 9-2. Front Enclosures, Rear Enclosure, and Main Chassis Assembly . . . . . 9-9
Figure 9-3. Front Enclosure Assemblies . . . . . . . . . . . . . . . . . . 9-11
Figure 9-4. Rear Enclosure Assembly . . . . . . . . . . . . . . . . . . . 9-13
Figure 9-5. Peripheral Interface Assembly . . . . . . . . . . . . . . . . . 9-17
Figure 9-6. Main Chassis Assembly . . . . . . . . . . . . . . . . . . . 9-19
Figure 9-7. CPU PWA, Display, and Keypad . . . . . . . . . . . . . . . . 9-23
Figure 9-8. CPU PWA and Main Chassis . . . . . . . . . . . . . . . . . . 9-25
Figure 9-9. AC Power Cord, Retainer, Batteries, and Minipole . . . . . . . . . . 9-27
Figure 9-10. Mechanism Assembly . . . . . . . . . . . . . . . . . . . . 9-29
Figure 9-11. Power Supply PWA Schematic . . . . . . . . . . . . . . . . . 9-31
Figure 9-12. Peripheral Interface PWA Schematic . . . . . . . . . . . . . . . 9-51
Figure 9-13. Peripheral PWA Schematic . . . . . . . . . . . . . . . . . . 9-63
Figure 9-14. CPU PWA Schematic. . . . . . . . . . . . . . . . . . . . . 9-71
Figure 9-15. Driver PWA Schematic . . . . . . . . . . . . . . . . . . . . 9-91
Figure 9-16. Switch PWA Schematic . . . . . . . . . . . . . . . . . . . . 9-97
Figure 9-17. APP PWA Schematic . . . . . . . . . . . . . . . . . . . . . 9-99
Tables
Table 1-1. Conventions. . . . . . . . . . . . . . . . . . . . . . . . 1-2
Table 1-2. System Configuration Data . . . . . . . . . . . . . . . . . . 1-9
Table 4-1. Analog Inputs . . . . . . . . . . . . . . . . . . . . . . . 4-7
Table 4-2. Keypad Map. . . . . . . . . . . . . . . . . . . . . . . . 4-8
Table 4-3. CPU-Power Supply Interface . . . . . . . . . . . . . . . . . . 4-10
Table 4-4. CPU-Mechanism Interface Signals . . . . . . . . . . . . . . . . 4-11
Table 4-5. Power Supply PWA Interface Connections . . . . . . . . . . . . . 4-24
Table 4-6. Peripheral PWA Interface Connections . . . . . . . . . . . . . . 4-25
Table 4-7. Peripheral Interface PWA Interface Connections . . . . . . . . . . . 4-25
Table 4-8. CPU PWA Interface Connections . . . . . . . . . . . . . . . . 4-26
Table 4-9. Driver PWA Interface Connections. . . . . . . . . . . . . . . . 4-27
Table 4-10. APP PWA Interface Connections . . . . . . . . . . . . . . . . 4-27
Table 5-1. Cleaning Solutions . . . . . . . . . . . . . . . . . . . . . 5-2
Table 6-1. Warning Messages . . . . . . . . . . . . . . . . . . . . . 6-2
Table 6-2. Operational Alarm Messages and Corrective Actions . . . . . . . . . 6-3
Table 6-3. Error Codes Requiring Technical Service . . . . . . . . . . . . . 6-7
Table 6-4. Troubleshooting with the PVT . . . . . . . . . . . . . . . . . 6-13
Table 9-1. Drawings . . . . . . . . . . . . . . . . . . . . . . . . . 9-1
Table 9-2. IPB for the Infuser . . . . . . . . . . . . . . . . . . . . . 9-2

CONTENTS
430-95424-002 (Rev. 01/06) viii Plum A+®3 Infusion System
This page intentionally left blank.

Technical Service Manual 1 - 1 430-95424-002 (Rev. 01/06)
Section 1
INTRODUCTION
The Hospira Plum A+®3 infusion system is designed to meet the growing demand for
hospital wide device standardization. The system consists of three component infusers,
which are designated line 1, line 2, and line 3. By incorporating three lines into one unit,
the Plum A+®3 provides three primary lines, three secondary lines, and piggyback fluid
delivery capabilities. The Plum A+®3 serves a wide range of general floor and critical care
needs. Compatibility with the LifeCare®5000 PlumSet®administration sets and
accessories make the Plum A+®3 infusion system convenient and cost-effective.
1.1
SCOPE
This manual is organized into the following sections:
❏Section 1 Introduction
❏Section 2 Warranty
❏Section 3 System Operating Manual
❏Section 4 Theory of Operation
❏Section 5 Maintenance and Service Tests
❏Section 6 Troubleshooting
❏Section 7 Replaceable Parts and Repairs
❏Section 8 Specifications
❏Section 9 Drawings
❏Appendices
❏Index
❏Technical Service Bulletins
If a problem in device operation cannot be resolved using the information in this manual,
contact Hospira (see Section 6.1).
Specific instructions for operating the device are contained in the Plum A+®and Plum A+®3
System Operating Manual. Provision is made for the inclusion of the system operating
manual in Section 3 of this manual.
Note: The terms “infusion system”, “infuser”, and “device” are used interchangeably
throughout the manual.
Note: Figures are rendered as graphic representations to approximate actual product.
Therefore, figures may not exactly reflect the product.
Note: Screen representations are examples only, and do not necessarily reflect the
most current software version.

SECTION 1 INTRODUCTION
430-95424-002 (Rev. 01/06) 1 - 2 Plum A+®3 Infusion System
1.2
CONVENTIONS
The conventions listed in Table 1-1 are used throughout this manual.
Throughout this manual, warnings, cautions, and notes are used to emphasize important
information as follows:
CAUTION: A CAUTION usually appears in front of a procedure or statement.
It contains information that could prevent hardware failure, irreversible damage
to equipment, or loss of data.
Note: A note highlights information that helps explain a concept or procedure.
1.3
COMPONENT DESIGNATORS
Components are indicated by alpha-numeric designators, as follows:
The number following the letter is a unique value for each type of component (e.g., R1, R2).
Note: Alpha-numeric designators may be followed with a dash (-) number that
indicates a pin number for that component. For example, U15-13 is pin 13 of the
encoder chip [U15] on the interface PWA.
Table 1-1. Conventions
Convention Application Example
Italic Reference to a section, figure,
table, or publication (see Section 6.1)
[ALL CAPS] In-text references to keys
and touchswitches [START]
ALL CAPS Screen displays CASSETTE TEST IN PROGRESS
Bold Emphasis CAUTION: Use proper ESD grounding
techniqueswhen handling components.
WARNING: A WARNING CONTAINS SPECIAL SAFETY EMPHASIS AND MUST
BE OBSERVED AT ALL TIMES. FAILURE TO OBSERVE A WARNING
MAY RESULT IN PATIENT INJURY AND BE LIFE-THREATENING.
Battery BT Diode DResistor R
Capacitor CFuse FSwitch SW
Crystal YIntegrated Circuit UTransistor Q

1.4 ACRONYMS AND ABBREVIATIONS
Technical Service Manual 1 - 3 430-95424-002 (Rev. 01/06)
1.4
ACRONYMS AND ABBREVIATIONS
Acronyms and abbreviations used in this manual are as follows:
AAmpere
AC Alternating current
A/D Analog-to-digital
ADC Analog-to-digital converter
APP Air, pressure, and pin
BCR Barcode reader
CCA Clinical care area
CCFT Cold cathode fluorescent tube
CMOS Complementary metal-oxide semiconductor
CPU Central processing unit
DAC Digital-to-analog converter
DC Direct current
DIP Dual in-line package
DMA Direct memory access
DMM Digital multimeter
DPM Digital pressure meter
ECG Electrocardiograph
EEG Electroencephalogram
EEPROM Electrically erasable/programmable read-only memory
EMG Electromyogram
EMI Electromagnetic interference
ESD Electrostatic discharge
ETO Ethylene oxide
FPGA Field programmable gate array
FSR Force sensing resistor
hr Hour
Hz Hertz
ID Identification
I/O Input/output
IPB Illustrated parts breakdown
IV Intravenous
KB Kilobyte
kHz Kilohertz
KVO Keep vein open
lbs Pounds

SECTION 1 INTRODUCTION
430-95424-002 (Rev. 01/06) 1 - 4 Plum A+®3 Infusion System
LCD Liquid crystal display
LED Light emitting diode
L/S Line select
MB Megabyte
MHz Megahertz
min Minute
mL Milliliter
mL/hr Milliliter per hour
MMIO Memory-mapped input/output
MOSFET Metal-oxide semiconductor field-effect transistor
ms Millisecond
nF nanofarad
Op-amp Operational amplifier
pF picofarad
PROM Programmable read-only memory
PVT Performance verification test
PWA Printed wiring assembly
PWM Pulse width modulator
RAM Random-access memory
rms Root-mean-square
RTC Real-time clock
SCC Serial communication controller
SCP Serial communication port
SMT Surface mount technology
SPI Serial peripheral interface
SRAM Static random access memory
TQFP Thin quad flat pack
VVolt
VAC Volts AC
VCC Collector supply voltage
VCO Voltage-controlled oscillator
VDC Volts DC
VSC 5 VDC supply circuitry
VSO Voltage sweep oscillator
VTBI Volume to be infused
WDI Watchdog input
µAMicroampere
µLMicroliter
µVMicrovolt
µsec Microsecond

1.5 USER QUALIFICATION
Technical Service Manual 1 - 5 430-95424-002 (Rev. 01/06)
1.5
USER QUALIFICATION
The infusion system is intended for use at the direction or under the supervision of licensed
physicians or certified healthcare professionals who are trained in the use of the infusion
system and the administration of parenteral and enteral fluids and drugs, and whole blood
or red blood cell components. Training should emphasize preventing related IV
complications, including appropriate precautions to prevent accidental infusion of air.
The epidural route can be used to provide anesthesia or analgesia.
1.6
ARTIFACTS
Nonhazardous, low-level electrical potentials are commonly observed when fluids are
administered using infusion devices. These potentials are well within accepted safety
standards, but may create artifacts on voltage-sensing equipment such as ECG, EMG,
and EEG machines. These artifacts vary at a rate that is associated with the infusion rate.
If the monitoring machine is not operating correctly or has loose or defective connections
to its sensing electrodes, these artifacts may be accentuated so as to simulate actual
physiological signals. To determine if the abnormality in the monitoring equipment
is caused by the infuser instead of some other source in the environment, set the device
so that it is temporarily not delivering fluid. Disappearance of the abnormality indicates
that it was probably caused by electronic noise generated by the infuser. Proper setup and
maintenance of the monitoring equipment should eliminate the artifact. Refer to the
appropriate monitoring system documentation for setup and maintenance instructions.
1.7
INSTRUMENT INSTALLATION
PROCEDURE
CAUTION: Infusion system damage may occur unless proper care is exercised
during product unpacking and installation. The battery may not be fully charged
upon receipt of the infuser. Do not place the infuser in service if it fails the self test.
CAUTION: Infusion system performance may be degraded by electromagnetic
interference (EMI) from devices such as electrosurgical units, cellular phones,
and two-way radios. Operation of the infusion system under such conditions should
be avoided.
Accessory equipment connected to the analog and digital interfaces must be certified
according to the respective IEC standards (e.g., IEC 60950 for data processing equipment,
and IEC 60601-1 for medical equipment). Furthermore, all configurations shall comply
with the system standard IEC 60601-1-1. Any person who connects additional equipment
to the signal input or output part configures a medical system, and is therefore responsible
for ensuring that the system complies with the requirements of IEC 60601-1-1. If in doubt,
contact Hospira Technical Support Operations (see Section 6.1).
The instrument installation procedure consists of unpacking, inspection, and self test.

SECTION 1 INTRODUCTION
430-95424-002 (Rev. 01/06) 1 - 6 Plum A+®3 Infusion System
1.7.1
UNPACKING
Inspect the shipping container as detailed in Section 1.7.2. Use care when unpacking the
infusion system. Retain the packing slip and save all packing material in the event it is
necessary to return the infuser to the factory. Verify the shipping container contains a copy
of the system operating manual.
1.7.2
INSPECTION
Inspect the shipping container for damage. Should any damage be found, contact the
delivering carrier immediately.
CAUTION: Inspect the infuser for evidence of damage. Do not use the device if it
appears to be damaged. Should damage be found, contact Hospira (see Section 6.1).
Inspect the infusion system periodically for signs of defects such as worn accessories,
broken connections, or damaged cable assemblies. Also inspect the infuser after repair
or during cleaning. Replace any damaged or defective external parts.
1.7.3
SELF TEST
CAUTION: Do not place the infuser in service if the self test fails.
Note: Do not place the infuser in service if the battery is not fully charged. To make
certain the battery is fully charged, connect the infuser to AC power for six hours
(see Section 8).
Note: If an alarm condition occurs during the self test, cycle the power and repeat the
self test. If the alarm condition recurs, note the message and take corrective action
(see Section 6). Repeat the self test. If the alarm condition continues to recur, remove
the infuser from service and contact Hospira.
Note: Records prior to the date the infuser is received may be from the manufacturing
process. Disregard any events from dates prior to receipt of the infuser.
Note: When performing the self test, line 1, line 2, and line 3 must be tested.
However, if appropriate, the test may be performed on all lines concurrently.
To perform the self test, see Figure 1-1, and proceed as follows:
1. Connect the AC power cord to a grounded AC outlet. Verify the charging/line
indicator CHARGE illuminates and an alarm beep sounds.
2. Without a cassette installed, press [ON/OFF] to turn on the infuser.
3. The LCD screen briefly displays the SELF TEST screen (see Figure 1-1).
Note: If the SELF TEST screen does not appear, contact Hospira.
4. After the self test is complete, the message “INSERT PLUM SET CLOSE LEVER”
appears.
5. Verify the time and date. To set the time and date, see Section 1.8.3.

1.7 INSTRUMENT INSTALLATION PROCEDURE
Technical Service Manual 1 - 7 430-95424-002 (Rev. 01/06)
6. Open the cassette door and insert a primed cassette. Close the cassette door.
The cassette test is complete when the “CASSETTE TEST IN PROGRESS” message
disappears.
Note: The message “MECHANISM INITIALIZATION IN PROGRESS” may briefly
appear prior to the “CASSETTE TEST IN PROGRESS” message.
7. The “CLEAR SETTINGS?” message may appear. Press the [YES] softkey.
8. Press [ON/OFF] to turn off the infuser.
Figure 1-1. Display and Keypad
05K01002
123
456
789
0
CLEAR
START
STOP
ON/OFF
ON/OFF
CHARGE
SILENCE
HOSPIRA Plum A+
Version X.XX MM/DD/YY
Copyright Hospira Inc.
2005
System Self Test
InProgress
SELECT
.
LINE FLOW
INDICATORS
A B
STATUS
REGION
WORKING
REGION
MESSAGE
REGION
SOFTKEY
LABEL REGION SOFTKEYS
LINE
INDICATOR
KEYPAD

SECTION 1 INTRODUCTION
430-95424-002 (Rev. 01/06) 1 - 8 Plum A+®3 Infusion System
1.8
BIOMED SETTINGS
The biomed settings screens contain the following options that can be changed or reviewed
by qualified personnel:
- IV screen parameters
- Alarms log
- Set time and date
All infusers (new or refurbished) are shipped with factory settings (see Table 1-2).
Note: Biomed screens do not time out for the Infuser Idle alarm or No Action alarm.
Note: The battery will not be detected in the biomed service mode.
To access the biomed settings, proceed as follows:
1. Open the door and turn on the device. The infusion system will perform a self test.
2. After the self test is complete, the message “INSERT PLUM SET CLOSE LEVER”
appears. Press the decimal [.] key, then [START], and verify the BIOMED SETTINGS
screen is displayed (see Figure 1-2).
Note: The [CHANGE BATTERY] softkey does not appear on earlier versions
of the Plum A+®3.

1.8 BIOMED SETTINGS
Technical Service Manual 1 - 9 430-95424-002 (Rev. 01/06)
Figure 1-2. Biomed Settings
Table 1-2. System Configuration Data
Data Options Range Factory Setting
MaximummacroIVmodedeliveryrate 0.1 - 99.9 mL/hr and
100 - 999 mL/hr 999 mL/hr
Macro distal occlusion alarm
(pressure level) 1 to 15 psi 6 psi
Deliver together enable Concurrent or Piggyback Piggyback
Delayed start/standby enable Yes or No Yes
Continue rate Rate or KVO KVO
Nurse callback default Yes or No No
Time (24 hr) 00:00 - 23:59 in
one minute increments Factory time
Date 1/1/2002 - 12/31/2098 Factory date
05K03010
BIOMED SETTINGS
IV Screen Parameters
Alarm Log
Set Time and Date
Choose
Select, then Choose
Change
Battery

SECTION 1 INTRODUCTION
430-95424-002 (Rev. 01/06) 1 - 10 Plum A+®3 Infusion System
1.8.1
IV PARAMETERS
The IV parameters screen contains common IV parameters and macro IV parameters
(see Figure 1-3).
To change the IV parameters, see Figure 1-6 and Figure 1-7, then proceed as follows:
1. Access the biomed settings screen as described in Section 1.8.
2. Select IV Screen Parameters, and press [CHOOSE].
3. Select the parameters to be changed, and press [CHOOSE].
4. Using the [CHANGE VALUE] softkey, select the desired value, and press [ENTER].
5. Repeat step 3 and step 4 for each parameter to be changed.
6. If there are no other changes, turn off the infuser.
Figure 1-3. IV Parameters
00H03003
Common IVParameters
Select, then Choose
BIOMED SETTINGS
IVParameters
Macro IVParameters
Choose Back
This manual suits for next models
1
Table of contents
Other Hospira Medical Equipment manuals

Hospira
Hospira Symbiq User manual

Hospira
Hospira PLUM XL Series Operating manual

Hospira
Hospira LifeCare PCA Infusion System User manual

Hospira
Hospira Plum 360 User manual

Hospira
Hospira Lifecare PCA3 User manual

Hospira
Hospira GemStar Operating manual

Hospira
Hospira Sapphire User manual

Hospira
Hospira Plum XL User manual

Hospira
Hospira Micro Macro plum XL User manual

Hospira
Hospira Lifecare PCA3 User manual