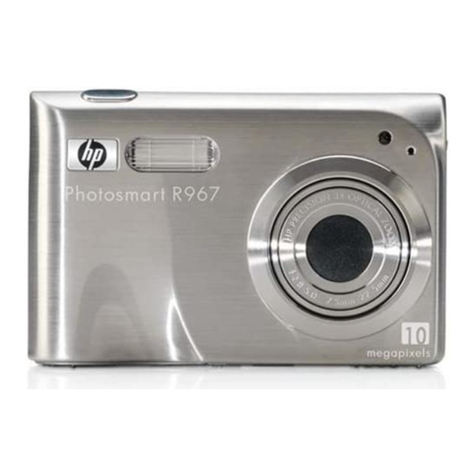
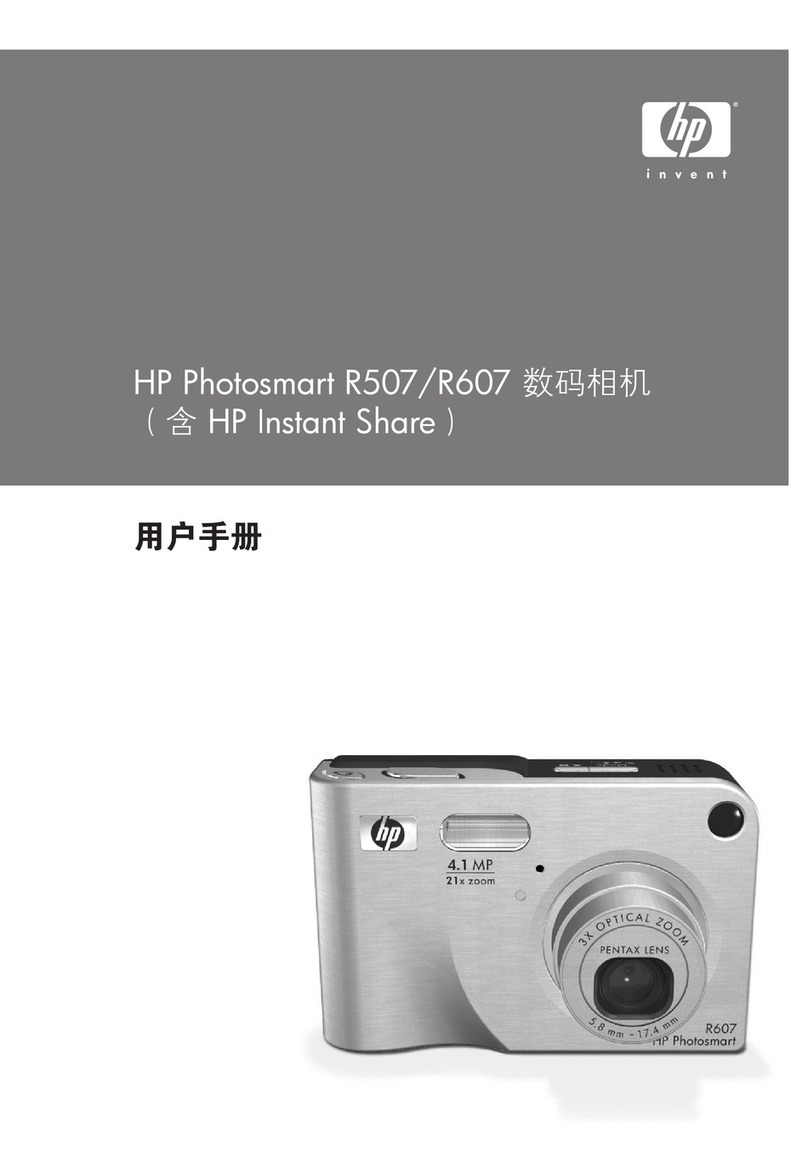
HP p550 User manual

p550
Digital Camera
數位相機
䀀东ઌ
デジタルカメラ
디지털카메라
Quick Start Guide
使用說明書
ࠌش円ࣔ䢰
ユーザーマニュアル
사용자 설명서
For the full vewrsion of the p550 product user manual go to: www.hp.com/support
p550 完整版產品使用者手冊請至:www.hp.com/support
p550 ݙᖞ䣈ش㡬֫㡸冉۟:www.hp.com/support
p550 ユーザー向け取扱説明書のフルバージョンは以下のサイトでご覧頂けます: www.hp.com/support
p550 제품에관련된상세설명서는다음사이트에서확인해주십시오. : www.hp.com/support

1
The numbers in parentheses indicate the pages where each item is explained.
•Camera
NOTE
• Note that the battery of a newly purchased camera is not charged. Perform the
steps below to load the battery into the camera and charge it.
• Use only the provided batteror type of battery and charger that came with your
camera. Using other types of battery or charger may damage the equipment and
invalidate the warranty.
Quick Start Guide
General Guide
ENGLISH
42135
67
[ ]
[
SET
]
[ ]
[ ]
[ ]
bk9bl bm bn8
bqbr bp bobs
1 Zoom controller
2 Shutter button
3Flash
4 [ON/OFF] (Power)
5 Front lamp
6 Lens
7 Microphone
8 [ ] (REC) button
9Backlamp
10 [ ] () button
11 Strap hole
12 [USB/AV] port
13 Connector cover
14 [SET] button
15 [ ] (Delete) button
16 [ ] (PLAY) button
17 Control button
([ ][ ][ ][ ])
18 Monitor screen
Back
19 Battery/memory card slots
20 Tripod hole
Use this hole when attaching to a tripod.
21 Speaker
Front
btckcl
Bottom

2
The first time you load a battery into the camera, a screen appears for configuring the
display language, date, and time settings. Failure to set the date and time correctly
will cause the wrong date and time data to be recorded with s.
1. Press [ON/OFF] (Power) to turn on the
camera.
2. Use [ ], [ ], [ ], and [ ] to select the
language you want and then press
[SET].
3. Use [ ] and [ ] to select a date format and then press [SET].
4. Set the date and the time.
Use [ ] and [ ] to select the setting you want to
change and then use [ ] and [ ] to change it.
To switch between 12-hour and 24-hour format, press
[ ] (Movie).
5. After setting the date and time, use [ ] and [ ]
to select “Apply” and then press [SET].
Configuring Basic Settings the First Time You Power On the
Camera
SET
[ON/OFF] (Power)

3
The Control Panel can be used to configure camera settings.
1. In the REC mode, press [SET].
This will select one of the Control Panel icons and display its settings.
2. Use [ ] and [ ] to select the setting you want to change.
* quality cannot be changed using the Control Panel.
3. Use [ ] and [ ] to change the setting.
4. If you want to configure another setting, repeat steps 2 and 3.
5. After all of the settings are the way you want, press [SET].
This will apply the settings and return to the REC mode.
If you selected “MENU”, the REC menu will appear.
If you selected “SCN”, the Scene Mode scene menu will appear.
• You can close the Control Panel by pressing (Disable).
Using the Control Panel
Control Panel
Available settings
1
9
5
3
4
7
8
2
6
[SET]
[][][][]
1 Snapshot size/quality*
2 image quality
3Flash
4 Self-timer
5 Face Tracking
6 Silent Mode
7 Simple Mode
8 REC menu display
9 Scene Mode scene selection

4
The Simple mode eliminates troublesome setups and simplifies snapshot recording.
This mode is recommended for those who are new to digital .
1. In the REC mode, press [SET].
2. Use [ ] and [ ] to select the third option from the bottom in the
Control Panel (Simple Mode).
3. Use [ ] and [ ] to select “ ” and then press [SET].
This enters the Simple mode.
4. Point the camera at the subject.
If the camera detects a human face, it continually focuses on the face.
If the camera does not detect a face, it continually focuses on the center of the
screen.
• The camera will focus and focus frame will turn green.
5. When you are ready to shoot, press the shutter button.
This records the snapshot.
1. Configure the quality setting for the video.
The length of the you can record will depend on the quality setting you
select.
2. In the REC mode, point the camera
at the subject and then press
[](
Video).
This will start recording and display
on the monitor screen.
recording includes monaural
audio.
3. Press [ ] (Video) again to stop
recording.
recording also will stop
automatically if memory becomes full
before you press [ ] ().
Using the Simple Mode
To record a video
Recording time
Remaining recording time

5
1. In the REC mode, press [SET].
2. Use [ ] and [ ] to select the
bottom Control Panel option (SCN)
and then press [SET].
This will display a menu of Scene Mode
scenes.
• The initial default selection is
(Auto).
3. Use [ ], [ ], [ ], and [ ] to move
the boundary to the scene you
want to select.
• The scene menu has multiple pages.
Use [ ] and [ ] to scroll between menu pages.
• You can access information about the currently selected scene.
• To return to normal snapshot recording, select Scene 1 (Auto).
4. Press [SET] to configure the camera with the settings for the currently
selected scene.
This returns to the REC mode.
• The settings of the scene you selected remain in effect until you select a
different scene.
• To select a different Scene Mode scene, repeat the above procedure from
step 1.
5. Press the shutter button (if you are shooting a snapshot) or [ ]
() (if you are shooting a ).
To shoot an with Scene Mode
Scene number
Scene name
[SET]
[ ] [ ] [ ] [ ]
Currently selected scene
(with boundary)

6
•Example REC Menu Screen Operation
1. In the REC mode, press [SET].
2. Use [ ] and [ ] to select the second Control Panel
option from the bottom (MENU) and then press
[SET].
This will display the REC menu screen.
3. Use [ ] and [ ] to select the tab where the menu
item you want to configure is located.
4. Use [ ] and [ ] to select the menu item you
want, and then press [ ].
5. Use [ ] and [ ] to change the setting of the
selected menu item.
6. After the setting is the way you want, press
[SET] to apply the setting and return to the
viewfinder screen.
• Pressing [ ] instead of [SET] applies the
selected setting and returns to the menu item
selection.
• To configure settings on another tab after
pressing [ ] to return to the menu item selection,
use [ ] or [ ] (Delete) to move the highlighting
up to the tabs, and then use [ ] and [ ] to select
the tab you want.
NOTE
• [ ] (Delete) provides a helpful way to navigate around tabs and menus.
– Pressing [ ] (Delete) while a tab is selected will display the viewfinder screen.
– Pressing [ ] (Delete) while menu item or setting is selected will “back step” in
the following sequence: Settings Menu items Tab.
Using On-screen Menus
[SET]
[ ] [ ] [ ] [ ]
Example:
When “ Quality” is
selected on the “Quality”
tab
Tabs
Selected menu item
Settings

7
Pressing [SET] in the PLAY mode will display the PLAY Panel.
•Example PLAY Panel Operation
1. In the PLAY mode, press [SET].
The PLAY Panel will appear along the
right side of the monitor screen.
2. Use [ ] and [ ] to select the PLAY
Panel item you want, and then
press [SET].
3. The following describes the
operations you can perform for each of the PLAY Panel items.
Using the PLAY Panel
Exit Exits the PLAY Panel.
Playback
Start
The operation that is performed when this item is selected
depends on the type of file that is currently displayed on the
monitor screen.
Slideshow Displays a slideshow menu.
Silent
Mode
The Silent mode turns off camera operation sounds so you
can avoid disturbing others around you when playing back
s.
Menu
Displays the PLAY menu. You can perform the following
operations on the PLAY menu.
1Use [ ] and [ ] to select the tab
where the menu item you want to
configure is located.
2Use [ ] and [ ] to select the
menu item you want, and then
press [ ].
3Use [ ] and [ ] to change the
setting of the selected menu
item.
4Press [SET] to apply the setting.
NOTE
• Pressing [ ] (Delete) performs one of the following
operations.
– If you previously selected a tab, pressing [ ] (Delete)
returns to the viewfinder screen.
– If you previously selected menu item, pressing [ ]
(Delete) returns to the tab.
[SET]
[][] PLAY Panel
Selected menu item
Tabs
1
⚦ҙ᱿ᄲ˩⠧׳ㅮᲿ᱿⦦ᆙㅪȯ
•
ᑨ
•⦼ᘜาŊᅘ⫵⇦ᑨ᱿ヅᖷᤀヅԻȯ⦼ࡠ⠗˫ʁᔎ㊾૽ヅᖷ⡶Ҙᑨʏᣅヅᖷ
҂ヅȯ
•⦼Хᮢᑨらえ᱿ヅᖷŊᆯㆩࠣ᱿ヅᖷُ҂ヅݽȯᮢҢㆩࠣ᱿ヅᖷ
҂ヅݽר⋱ሳံࣺ⡶⇦ʏΎߗᄓȯ
൬Ⳍᮢ྆֡
ɺ⎷྆֡
ⅺ㋤ʑᄽ
42135
67
[ ]
[
SET
]
[ ]
[ ]
[ ]
bk9bl bm bn8
bqbr bp bobs
1⩐ᤄӼݽ
2൬⸹
3҆ᥨ
4[ON/OFF]ņヅŇ
5ᔌㄇ྆ḻᥨ
6⽷ㆊ
7㓤҇ㆺ
8[ ]ņཞჶŇ⸹
9⋍ㄇ྆ḻᥨ
10 [ ]ņՒᯉŇ⸹
11 ઋ
12 [USB/AV] Ⳑࡎ
13 ㆊ╾
14 [SET] ⸹
15 [ ]ņӵぜŇ⸹
16 [ ]ņㆴḻŇ⸹
17 Ӽ⸹
ņ[][][][]Ň
18 ㆴḻ
⋍
⋍ㄇ
19 ヅᖷō⥆ຣ֦တᐥ
20 ɿ⌳ከમ⡶ઋ
મ⡶ɿ⌳ከᆹŊ⦼ᮢ⥿ઋȯ
21 ဗ⊖ݽ
ᔌㄇ
btckcl
ಎ
ಎⵒ

2
Ӯᓝ߱ᑨʑ⡶ҘヅᖷᆹŊሳӛɺΤᯉㄇŊ⥿ᯉㄇᮢ⥑હᯉㄇᄽ⦝⤵Ȯᅺቅُᆹ⿵
⥑હȯʃᔌ⥑હᅺቅُᆹ⿵Ŋԅሳ⎐ഛЭʀ⥆⻞᱿ᅺቅُᆹ⿵ӛ⼂⦡ȯ
1.
ྈ
[ON/OFF]
ņヅŇ༌ᑨヅȯ
2.
ᮢ
[]
Ȯ
[]
Ȯ
[]
ُ
[]
ⴆႹ෨ト᱿⦝
⤵Ŋᤋരྈ
[SET]
ȯ
3.
ᮢ
[]
ُ
[]
ⴆႹᅺቅጁೣŊᤋരྈ
[SET]
ȯ
4.
⥑હᅺቅُᆹ⿵ȯ
ᮢ[]ُ[]ⴆႹ෨⣬⩐ሩ᱿⥑હŊᤋരᮢ []ُ[]⩐
ሩ⥑હȯ
⣬ӡဘ 12 ଅᆹُ 24 ଅᆹӼጁೣŊ⦼ྈ []ņՒᯉŇȯ
5.
⥑હરᅺቅُᆹ⿵രŊᮢ
[]
ُ
[]
ⴆႹơᮢƢŊ
ᤋരྈ
[SET]
ȯ
⦼߱Ӯᓝۓᑨᆹ⥑હࡣ⥑હ
SET
[ON/OFF]ņヅŇ
[]ņՒᯉŇ

3
Ӽኈרᮢᅠ⥑હᑨ᱿⥑હȯ
1.
߱ཞჶᅞೣʑŊྈ
[SET]
ȯ
ⳆᑂሳⴆႹӼኈ᱿ҢʑɺΤߧḻŊʏㆴḻҢ⥑હȯ
2.
ᮢ
[]
ُ
[]
ⴆႹ෨⣬⩐ሩ᱿⥑હȯ
*ʃ⋱ᮢӼኈሩᄊ൬ᤫٴ⫨ȯ
3.
ᮢ
[]
ُ
[]
ሩᄊ⥑હȯ
4.
ኞト⣬⥑હҢ˟⥑હŊ⦼⸅⢒ᔎ㊾
2
ُ
3
ȯ
5.
⥑હરሷ⥑હരŊྈ
[SET]
ȯ
͵ሳᮢ⥑હŊᤋരⲙߊཞჶᅞೣȯ
ኞⴆႹơMENUŊ֯ሳㆴḻཞჶⴆ܈ȯƢ
ኞⴆႹơSCNƢŊ֯ሳㆴḻࢍᇓᑁೣⴆ܈ȯ
•ྈņṮᮢŇ֯ר〦Ӽኈȯ
ᮢӼኈ
Ӽኈ
רᮢ⥑હ
1
9
5
3
4
7
8
2
6
[SET]
[][][][]
1൬ᤫഛЭଙōٴ⫨*
2ՒᯉഛЭٴ⫨
3҆ᥨ
4⎊ཞݽ
5⍰ⵒଃᤄ
6ㅠᅞೣ
7 ᆞᑁೣ
8ཞჶⴆ܈ㆴḻ
9ࢍᇓᑁೣⴆႹ

4
ᆞᑁೣרⅺグ᱿⥑હŊ ջཞჶ൬ᤫႽȯ⩀ᄲჶഛ᱿ᅘ༆ᮢᔍᑁೣȯ
1.
߱ཞჶᅞೣʑŊྈ
[SET]
ȯ
2.
ᮢ
[]
ُ
[]
ⴆႹӼኈʁㄇ᱿ὮɿΤⴆㅮņ ᆞᑁೣŇȯ
3.
ᮢ
[]
ُ
[]
ⴆႹơ ƢŊᤋരྈ
[SET]
ȯ
Ⳇᑂଔ⋱ⳖҘ ᆞᑁೣȯ
4.
૽ᑨଃཞჶଃ⩽ȯ
ኞᑨϴᛵӷː⍰Ŋሳྃ↲ଃᤄː⍰ȯ
ኞᑨቍϴᛵӷː⍰Ŋሳྃ↲ଃᤄᯉㄇʑȯ
•ᑨ૽ሳଃᤄŊଃᤄጉ૽ሳ⩐ᣅℂ⏨ȯ
5.
ᯍ෨ЈཞჶᆹŊྈ൬ྈ⸹ȯ
Ⳇᑂଔ⋱ཞჶ൬ᤫȯ
1.
⥑હഛЭٴ⫨⥑હᣅՒᯉ
רཞჶ᱿Ւᯉಙחᗉᅠⴆ᱿ഛЭٴ⫨⥑હȯ
2.
߱ཞჶᅞೣʑŊ૽ᑨଃཞჶଃ⩽Ŋ
ᤋരྈ
[]
ņՒᯉŇȯ
֯ሳআཞჶŊʏʈ߱ㆴḻʀㆴḻ
ȯ
Ւᯉཞჶሳ˫܈⊖ⳬჶҘȯ
3.
Ҫᓝྈ
[]
ņՒᯉŇϟᔋཞჶՒᯉȯ
ኞ߱෨ྈ []ņՒᯉŇԊ⥆ຣ㋤ដŊ
ԅՒᯉཞჶሳ⎊Ւϟᔋȯ
ᮢ ᆞᑁೣ
ཞჶՒᯉ
ཞჶᆹ⿵
Ԙㇷཞჶᆹ⿵
[]ņՒᯉŇ

5
1.
߱ཞჶᅞೣʑŊྈ
[SET]
ȯ
2.
ᮢ
[]
ُ
[]
ⴆႹӼኈ᱿ಎⵒⴆㅮ
ņ
SCN
ŇŊᤋരྈ
[SET]
ȯ
֯ሳㆴḻࢍᇓᑁೣ᱿ⴆ܈ȯ
•Ӯআㅷ⥑ϊⴆႹ ņ⎊ՒŇȯ
3.
ᮢ
[]
Ȯ
[]
Ȯ
[]
ُ
[]
Ẽⴗጉ⎏෨ᓥ
ⴆႹ᱿ࢍᇓȯ
•ࢍᇓⴆ܈Ҡሷㅪȯ
ᮢ[]ُ[]࿉Ւⴆ܈ㅪㄇȯ
•෨ר˫એח〦ᅠᲿԊⴆࢍᇓ᱿⫏⤻ȯ
•⣬ⲙߊཞჶᐻ൬ᤫŊ⦼ⴆႹࢍᇓ 1
ņ⎊ՒŇȯ
4.
ྈ
[SET]
֯רᮢᲿԊⴆࢍᇓ᱿⥑હԽ˫⥑હᑨȯ
֯ሳⲙߊཞჶᅞೣȯ
•ⴆႹҢ˟ࢍᇓʠԊŊⴆࢍᇓ᱿⥑હ૽ɺ᳅ሷᄓȯ
•⣬ⴆႹҢ˟ࢍᇓᑁೣŊ⦼ഺ
ᔎ㊾ 1 আ⸅⢒ʀⲩᔎ㊾ȯ
5.
ྈ൬⸹ņཞჶ൬ᤫᆹŇ
[]
ņՒᯉŇņཞჶՒᯉᆹŇȯ
ᮢࢍᇓᑁೣԼ⋱ཞჶഛЭ
ࢍᇓℶ⚦
ࢍᇓờ
[SET]
[ ] [ ] [ ] [ ]
ᲿԊⴆ᱿ࢍᇓ
ņңሷⴗጉŇ

6
•
ཞჶⴆ܈ᯉㄇႽḻ
1.
߱ཞჶᅞೣʑŊྈ
[SET]
ȯ
2.
ᮢ
[]
ُ
[]
ⴆႹӼኈʁㄇ᱿ὮʷΤⴆㅮņ
MENU
ŇŊ
ᤋരྈ
[SET]
ȯ
͵ሳㆴḻཞჶⴆ܈ᯉㄇȯ
3.
ᮢ
[]
ُ
[]
ⴆႹ෨ᓥ⥑હʠⴆ܈ㅮᲿ߱᱿ᐻ ȯ
4.
ᮢ
[]
ُ
[]
ⴆႹト᱿ⴆ܈ㅮᲿŊᤋരྈ
[]
ȯ
5.
ᮢ
[]
ُ
[]
ሩᄊⴆⴆ܈ㅮᲿ᱿⥑હȯ
6.
⥑હરໞരŊྈ
[SET]
ᮢ⥑હʏⲙߊחᇓݽ
ᯉㄇȯ
•ྈ[]≟ [SET] ሳᮢⴆ⥑હʏⲙߊⴆ܈ㅮ
ᲿⴆႹȯ
•⣬߱ྈ []ⲙߊⴆ܈ㅮᲿⴆႹര⥑હҢ˟ᐻ ᱿
⥑ હŊ⦼ ᮢ [][]ņӵぜŇ૽וᱺ֒ẼՒӷᐻ
ʀŊᤋരᮢ []ُ[]ⴆႹトᐻ ȯ
•[ ]ņӵぜŇ⋱Հ෨ᡕ⤍ᐻ ُⴆ܈ȯ
–߱ⴆႹᐻ ᆹྈ []ņӵぜŇሳㆴḻחᇓݽᯉㄇȯ
–߱ⴆႹⴆ܈ㅮᲿ⥑હᆹྈ []ņӵぜŇሳᤫʁӬㅯⳖ⠗ơⳀ₤ⲙߊƢႽŘ
⥑હ ⴆ܈ㅮᲿ ᐻ ȯ
ᮢᯉㄇⴆ܈
[SET]
[ ] [ ] [ ] [ ]
Ř
ⴆႹơᤫᦸٴ⫨Ƣᐻ ᱿
ơᤫᦸٴ⫨Ƣ
ᐻ
ⴆⴆ܈ㅮᲿ
⥑હ

7
߱ㆴḻᅞೣʑྈ [SET] ֯רⳖҘㆴḻኈȯ
•
ㆴḻኈႽḻ
1.
߱ㆴḻᅞೣʑŊྈ
[SET]
ȯ
ㆴḻኈሳӛ߱ㆴḻ᱿ϳȯ
2.
ᮢ
[]
ُ
[]
ⴆႹト᱿ㆴḻኈㅮ
ᲿŊᤋരྈ
[SET]
ȯ
3.
ᕓɺㆴḻኈㅮᲿרࡠ⠗᱿Ⴝ⦦ᆙ
ʁȯ
ᮢㆴḻኈ
ⲵӛ
ⲵӛㆴḻኈȯ
আႩᄍ
ⴆႹᔍㅮᲿᆹŊרࡠ⠗᱿ႽሳらㆴḻʀᲿԊㆴḻ᱿ᒆጊㆩ
ࠣ≟ሷʃȯ
౿ᥨᦸ
ㆴḻ౿ᥨᦸⴆ܈ȯ
ㅠᅞೣ
ㅠᅞೣሳ〦ᑨ᱿ႽㅠŊ˫҉߱ႩᄍഛЭᆹ౸ჟӷⳕ⳼
᱿ːȯ
ⴆ܈
ӛㆴḻⴆ܈ȯ෨ר߱ㆴḻⴆ܈ࡠ⠗ʁӬႽȯ
1ᮢ[]ُ[]ⴆႹ෨ᓥ⥑હʠⴆ
܈ㅮᲿ߱᱿ᐻ ȯ
2ᮢ[]ُ[]ⴆႹト᱿ⴆ܈ㅮ
ᲿŊᤋ ര ྈ []ȯ
3ᮢ[]ُ[]ሩᄊⴆⴆ܈ㅮᲿ
᱿⥑હȯ
4ྈ[SET] ᮢ⥑હȯ
•ྈ[]ņӵぜŇרࡠ⠗˫ʁႽȯ
–ኞʠԊⴆႹᐻ Ŋྈ []ņӵぜŇרⲙߊחᇓݽᯉㄇȯ
–ኞʠԊⴆႹⴆ܈ㅮᲿŊྈ []ņӵぜŇרⲙߊᐻ ȯ
[SET]
[][] ㆴḻኈ
ⴆⴆ܈ㅮᲿ
ᐻ

1
ᣀোݙⱘ᭄ᄫҷ㸼乍Ⳃⱘ䇈ᯢ义ⷕDŽ
•
Ⳍᴎ
•䇋⊼ᛣˈᮄ䌁㕂Ⳍᴎⱘ⬉∴ᇮܙ⬉DŽᠻ㸠ҹϟℹ偸ˈᇚ⬉∴㺙ܹⳌᴎᑊᇍ݊ܙ⬉DŽ
•াՓ⫼Ⳍᴎ䜡༫ⱘ⬉∴ܙ⬉఼㉏ൟDŽՓ⫼݊ᅗ㉏ൟ⬉∴ܙ⬉఼ৃ㛑Ӯᤳണ䆒
ˈᑊ䗴៤ֱׂ༅ᬜDŽ
ᖿ䗳ܹ䮼ᣛ
ϔ㠀ᣛ
ㅔԧЁ᭛
42135
67
[ ]
[
SET
]
[ ]
[ ]
[ ]
bk9bl bm bn8
bqbr bp bobs
1ব⛺ࠊ఼
2ᖿ䮼䪂
3䮾ܝ
4[ON/OFF]˄⬉⑤˅
5ࠡ♃
6䬰༈
7呺ܟ亢
8[ ]˄ᢡᨘ˅䪂
9ৢ♃
10 [ ]˄ࡼ⬏˅䪂
11 ᏺᄨ
12 [USB/AV]ッষ
13 ᦦᄨⲪ
14 [SET]䪂
15 [ ]˄ߴ䰸˅䪂
16 [ ]˄ᰒ⼎˅䪂
17 ࠊ䪂
˄[][][][]˅
18 ᰒ⼎ሣ
㚠
㚠䴶
19 ⬉∴ˋᄬټῑ
20 ϝ㛮ᶊᅝ㺙ᄨ
ᅝ㺙ϝ㛮ᶊᯊˈ䇋Փ⫼䆹ᄨDŽ
21 ᡀໄ఼
ℷ䴶
btckcl
ᑩ
ᑩ䚼

2
߱ⳌᴎЁ㺙ܹ⬉∴ᯊˈӮߎ⦄ϔϾ⬏䴶ˈ䆹⬏䴶⫼ᴹ䜡㕂ᰒ⼎䇁㿔ǃ᮹ᳳᯊ䯈䆒
ᅮDŽབℷ⹂䆒ᅮ᮹ᳳᯊ䯈ˈ߭Ӯᇐ㟈ᕅڣϞ䆄ᔩⱘ᮹ᳳᯊ䯈ߎ⦄䫭䇃DŽ
1.
ᣝ
[ON/OFF]
˄⬉⑤˅ᠧᓔⳌᴎ⬉⑤DŽ
2.
⫼
[]
ǃ
[]
ǃ
[]
[]
䗝ᢽ᠔䳔ⱘ䇁㿔ˈ
✊ৢᣝ
[SET]
DŽ
3.
⫼
[]
[]
䗝ᢽ᮹ᳳḋᓣˈ✊ৢᣝ
[SET]
DŽ
4.
䆒ᅮ᮹ᳳᯊ䯈DŽ
⫼[][]䗝ᢽ㽕ᬍⱘ䆒ᅮˈ✊ৢ⫼ [][]䖯㸠
ᬍDŽ
㽕ߛᤶ 12 ᇣᯊ 24 ᇣᯊḐᓣˈ䇋ᣝ []˄ࡼ⬏˅DŽ
5.
䆒ᅮ᮹ᳳᯊ䯈ৢˈ⫼
[]
[]
䗝ᢽĀᑨ⫼āˈ✊ৢ
ᣝ
[SET]
DŽ
߱ᠧᓔⳌᴎᯊ䜡㕂ᴀ䆒ᅮ
SET
[ON/OFF]˄⬉⑤˅
[]˄ࡼ⬏˅

3
᪡ᵓ⫼Ѣ䜡㕂Ⳍᴎ䆒ᅮDŽ
1.
ᢡᨘᮍᓣЁˈᣝ
[SET]
DŽ
֓ৃ䗝ᢽϔϾ᪡ᵓᑊᰒ⼎݊䆒ᅮDŽ
2.
⫼
[]
[]
䗝ᢽ㽕ᬍⱘ䆒ᅮDŽ
*ϡ㛑Փ⫼᪡ᵓᴹᬍᖿ✻ڣ䋼䞣DŽ
3.
⫼
[]
[]
ᬍ䆒ᅮDŽ
4.
བᵰ䳔㽕䜡㕂݊ᅗ䆒ᅮˈ䇋䞡ℹ偸
2
3
DŽ
5.
ᅠ៤᠔䳔ⱘܼ䚼䆒ᅮৢˈᣝ
[SET]
DŽ
֓ৃᑨ⫼䆹䆒ᅮᑊ䖨ಲᢡᨘᮍᓣDŽ
བᵰ䗝ᢽњĀMENUāˈ߭ᇚᰒ⼎ᢡᨘ䗝DŽ
བᵰ䗝ᢽњĀSCNāˈ߭ᇚᰒ⼎എ᱃ᓣϟⱘഎ᱃䗝DŽ
•ৃҹ䗮䖛ᣝ ˄⽕⫼˅݇䯁᪡ᵓDŽ
Փ⫼᪡ᵓ
᪡ᵓ
ৃ⫼䆒ᅮ
1
9
5
3
4
7
8
2
6
[SET]
[][][][]
1ᖿ✻ᕅڣሎᇌˋڣ䋼䞣*
2ࡼ⬏ڣ䋼䞣
3䮾ܝ
4㞾ᢡ఼
5㜌䚼ᇍ⛺
6䴭䷇ᮍᓣ
7ㅔᯧᓣ
8ᢡᨘ䗝ᰒ⼎
9എ᱃ᓣഎ᱃䗝ᢽ

4
ㅔᯧᓣৃҹⳕএ㐕⧤ⱘ䆒ᅮ䖛ˈㅔ࣪ᖿ✻ᔩࠊDŽᇍѢ᭄ⷕᨘᕅⱘᮄˈᓎ䆂Փ⫼ℸ
ᮍᓣDŽ
1.
ᢡᨘᮍᓣЁˈᣝ
[SET]
DŽ
2.
⫼
[]
[]
䗝ᢽ᪡ᵓⱘצ᭄ϝϾ䗝乍˄ㅔᯧᓣ˅DŽ
3.
⫼
[]
[]
䗝ᢽĀ āˈ✊ৢᣝ
[SET]
DŽ
䖯ܹㅔᯧᓣDŽ
4.
ᇚⳌᴎᇍޚᢡᨘᇍ䈵DŽ
བᵰⳌᴎẔ⌟ࠄҎ㜌ˈᇚᣕ㓁ᇍ⛺Ҏ㜌ϞDŽ
བᵰⳌᴎẔ⌟ࠄҎ㜌ˈᇚᣕ㓁ᇍ⛺⬏䴶Ё༂DŽ
•Ⳍᴎ֓Ӯᇍ⛺ˈᇍ⛺Ḛব㓓DŽ
5.
ޚᢡᨘᯊˈᣝϟᖿ䮼䪂DŽ
֓ৃᢡᨘᖿ✻DŽ
1.
䜡㕂ࡼ⬏ⱘڣ䋼䞣䆒ᅮDŽ
ৃᢡᨘⱘࡼ⬏䭓ᑺ㾚䗝ᢽⱘڣ䋼䞣䆒ᅮ㗠ᓖDŽ
2.
ᢡᨘᮍᓣЁˈᇚⳌᴎᇍޚᢡᨘᇍ䈵ˈ
✊ৢᣝ
[]
˄ࡼ⬏˅DŽ
֓ৃᓔྟᢡᨘˈᰒ⼎ሣϞᰒ⼎ DŽ
ࡼ⬏ᢡᨘࣙᣀ䆄ᔩໄ䘧ໄ䷇DŽ
3.
ݡᣝ
[]
˄ࡼ⬏˅ذℶᢡᨘDŽ
བᵰᣝ []˄ࡼ⬏˅ࠡᄬټ఼Ꮖ⒵ˈࡼ
⬏ᢡᨘгӮ㞾ࡼذℶDŽ
Փ⫼ㅔᯧᓣ
ᢡᨘࡼ⬏
ᢡᨘᯊ䯈
࠽ԭᢡᨘᯊ䯈
[]˄ࡼ⬏˅

5
1.
ᢡᨘᮍᓣЁˈᣝ
[SET]
DŽ
2.
⫼
[]
[]
䗝ᢽ᪡ᵓⱘ᳔ৢϔϾ
䗝乍˄
SCN
˅ˈ✊ৢᣝ
[SET]
DŽ
֓Ӯᰒ⼎എ᱃ᓣϟⱘഎ᱃䗝DŽ
•߱ྟ㔎ⳕ䗝ᢽЎ ˄㞾ࡼ˅DŽ
3.
⫼
[]
ǃ
[]
ǃ
[]
[]
ᇚ䖍Ḛ⿏ࡼࠄ
㽕䗝ᢽⱘഎ᱃ϞDŽ
•എ᱃䗝᳝义DŽ⫼ [][]⒮ࡼ䗝
义䴶DŽ
•ৃ㦋পᔧࠡ᠔䗝എ᱃ⱘֵᙃDŽ
•㽕䖨ಲℷᐌᖿ✻ᢡᨘˈ䇋䗝ᢽഎ᱃ 1 ˄㞾ࡼ˅DŽ
4.
ᣝ
[SET]
Փ⫼ᔧࠡᰒ⼎എ᱃ⱘ䆒ᅮᴹ䜡㕂ⳌᴎDŽ
֓Ӯ䖨ಲᢡᨘᮍᓣDŽ
•䗝ᢽ݊Ҫഎ᱃Пࠡˈ᠔䗝എ᱃ⱘ䆒ᅮᇚϔⳈ᳝ᬜDŽ
•㽕䗝ᢽ݊Ҫഎ᱃ᓣϟⱘഎ᱃ˈ䇋Ңℹ偸 1 ᓔྟ䞡Ϟ䗄ℹ偸DŽ
5.
ᣝᖿ䮼䪂˄ᢡᨘᖿ✻ᯊ˅
[]
˄ࡼ⬏˅˄ᢡᨘࡼ⬏ᯊ˅DŽ
⫼എ᱃ᓣᢡᨘᕅڣ
എ᱃㓪ো
എ᱃ৡ⿄
[SET]
[ ] [ ] [ ] [ ] ᔧࠡ䗝ᅮⱘഎ᱃˄ᏺ䖍Ḛ˅
Other manuals for p550
2
Table of contents
Other HP Digital Camera manuals