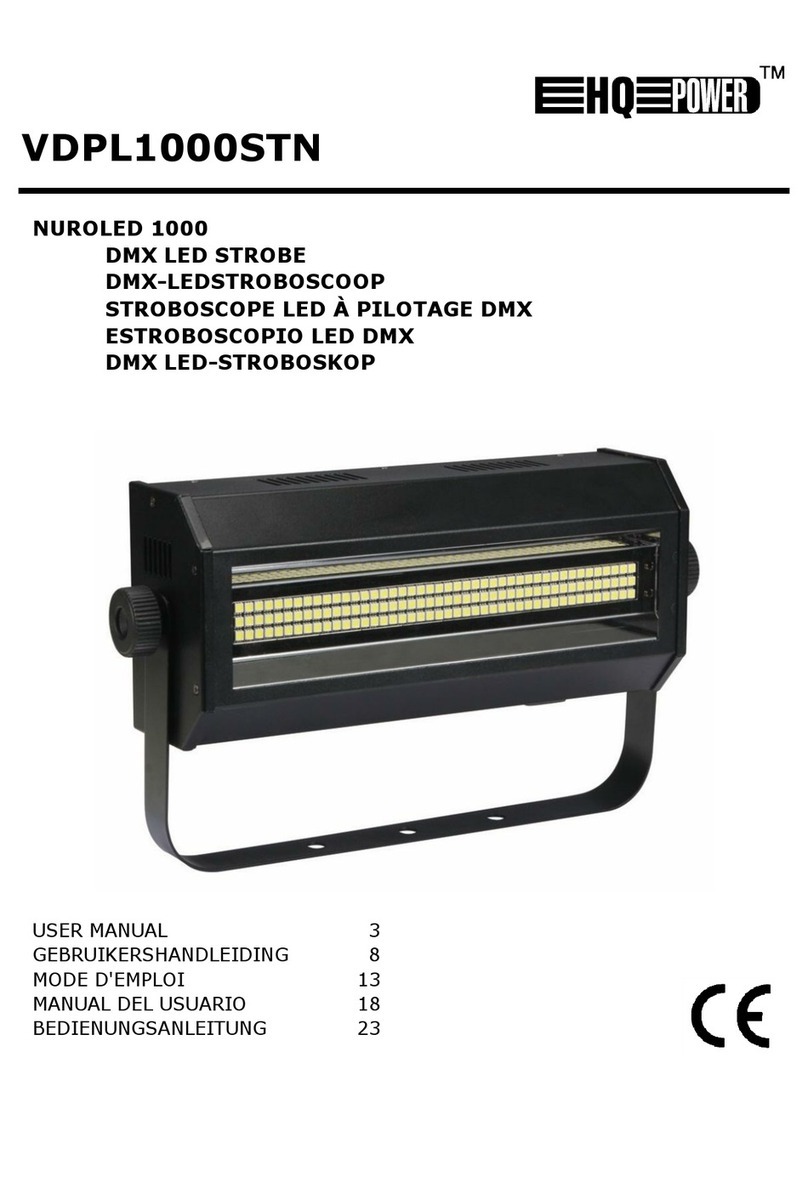
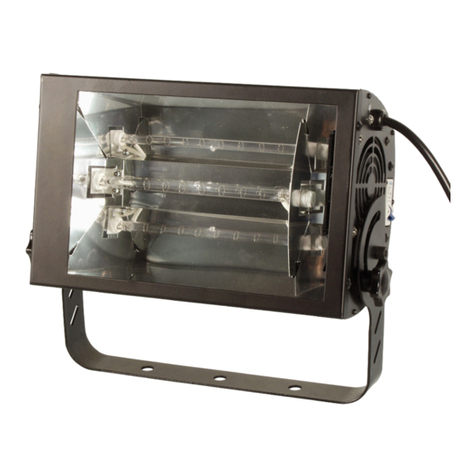
HQ Power VDP3000ST User manual

VD
P
DMX
DMX
STR
O
EST
R
DMX
USER
M
GEBRU
NOTIC
E
MANU
A
BEDIE
N
P
3000
S
-CONTR
O
-GESTU
U
O
BOSCO
P
R
OBOSC
O
-GESTE
U
M
ANUAL
IKERSHAN
D
E
D’EMPLOI
A
L DEL USU
A
N
UNGSANLE
S
T
O
LLED
S
U
RDE ST
P
E
À
PI
L
O
PIO C
O
U
ERTES
S
D
LEIDING
A
RIO
ITUNG
S
TROBE
–
ROBOS
C
L
OTAGE
D
O
NTROL
A
S
TROBO
S
1
2
2
–
3000
W
C
OOP –
3
D
MX – 3
A
DO PO
R
S
KOP –
3
2
8
4
0
6
W
3
000 W
000 W
R
DMX –
3
3
000W
3
000W

16.03.201
1. In
t
To all r
e
Import
a
If in do
u
Thank y
o
service.
I
2. Sa
f
•Dam
a
the
d
•A qu
a
•Do n
Prot
e
•This
quali
•Mak
e
man
u
•Do n
nece
•Disc
o
the
p
•Ther
e
nor
m
•Do n
•Kee
p
of th
e
•Note
•The l
•Kee
p
3. Ge
n
Refer to
t
•This
shou
max
.
•Ligh
t
lives
.
•Do n
•Sele
c
Spe
c
outp
u
0
t
roduction
e
sidents of th
e
a
nt environme
This symbol o
n
could harm th
e
waste; it shoul
to your distrib
u
u
bt, contact y
o
o
u for choosing
H
I
f the device wa
s
f
ety Instru
c
Be very
electros
h
Do not t
o
Keep thi
s
Unplug
t
a
ge caused by
d
d
ealer will not a
c
a
lified technicia
ot switch the d
e
e
ct the device a
g
device falls un
d
fied person car
r
e
sure that the
a
u
al.
ot crimp the po
ssary.
o
nnect the devi
c
p
lug only.
e
may be some
m
al and any sm
o
ot look directly
p
the device aw
a
e
device.
that damage c
a
amps and mec
h
p
the device aw
a
n
eral Guid
e
t
he Velleman
®
device is desig
n
ld only be used
.
230VAC/50Hz
.
t
ing effects are
.
ot shake the d
e
c
t a location wh
c
ifications”), d
u
t and any illu
m
e
European Un
ntal informati
n
the device or
t
e
environment.
d be taken to a
u
tor or to a loc
a
o
ur local wast
e
H
QPowe
r
! Pleas
e
s
damaged in tr
a
c
tions
careful during t
h
ocks.
o
uch the devic
e
s
device away
f
t
he mains lead
b
d
isregard of ce
r
c
cept responsi
b
n should install
e
vice on immed
g
ainst damage
d
er protection cl
r
y out the elect
r
a
vailable voltag
wer cord and p
r
c
e from the ma
i
smoke or a pa
r
o
ke or smell wil
l
at the light sou
a
y from splashi
n
a
used by user
m
h
anical wear ar
e
a
y from child
r
e
n
e
lines
Service and
Q
n
ed for professi
o
indoors with t
h
.
not designed fo
e
vice. Avoid bru
t
ere the device
i
ust and moistu
r
m
inated surface.
VDP30
0
2
USER M
A
ion
on about this
t
he package in
d
Do not dispose
specialized co
m
a
l recycling ser
v
e
disposal au
t
e
read the man
u
a
nsit, don't inst
a
he installation:
e
during operati
o
f
rom rain and
m
b
efore opening
t
r
tain guidelines
b
ility for any en
s
and service thi
iately after it h
a
by leaving it s
w
ass I. It is ther
e
r
ic connection.
e does not exc
e
r
otect it agains
t
i
ns to clean it o
r
r
ticular smell w
h
l
gradually disa
p
rce as sensitiv
e
n
g and dripping
m
odifications to
e
not covered b
n
and unauthori
Q
uality Warra
n
o
nal use on sta
g
h
e included pow
r permanent o
p
t
e force when i
n
i
s protected ag
a
r
e. Respect a m
0
0ST
A
NUAL
product
d
icates that dis
p
of the unit (or
b
m
pany for recy
c
v
ice. Respect th
e
t
horities.
u
al thoroughly b
e
a
ll or use it and
touching live
w
o
n as the housi
n
m
oisture.
t
he housing.
in this manual
i
s
uing defects o
r
s device.
a
s been expose
d
w
itched off until
e
fore essential
t
e
ed the voltage
t
damage. Hav
e
r
when it is not
h
en the device
i
p
pear.
e
people may g
o
liquids. Never
p
the device is n
o
y warranty.
sed users.
n
ty on the last
p
g
e, in discos, t
h
er adapter con
n
p
eration: regula
n
stalling or ope
r
a
inst extreme h
e
inimum distanc
e
p
osal of the dev
i
b
atteries) as u
n
c
ling.
T
his devic
e
local environ
m
e
fore bringing t
h
contact your de
w
ires can cause
l
n
g heats up.
i
s not covered
b
r
problems.
d
to changes in
it has reached
t
hat the device
stated in the s
p
e
an authorised
in use. Handle
i
s activated for
o
into epileptic
s
p
ut objects fille
o
t covered by t
h
p
ages of this m
a
h
eatres, etc. Th
e
n
ected to an alt
e
r operation bre
a
r
ating the devi
c
e
at (see “Tech
n
e
of 0.5m betw
e
R
©Vellem
a
i
ce after its life
c
n
sorted municip
a
e should be ret
u
m
ental
r
ules.
h
is device into
aler.
l
ife-threatening
b
y the warranty
temperature.
room temperat
u
be earthed. Ha
v
p
ecifications of
t
dealer replace i
the power cord
the first time.
T
s
eizure if they
d
d
with liquid on
h
e warranty.
a
nual.
e
VDP3000ST
e
rnating curren
a
ks will prolong
c
e.
n
ical
e
en the device’s
R
ev 01
a
n nv
c
ycle
a
l
u
rned
and
u
re.
v
e a
t
his
t if
by
T
his is
d
o.
top
t of
their
light

VDP3000ST Rev 01
16.03.2010 ©Velleman nv
3
•Use an appropriate safety cable to fix the device (e.g. VDLSC8).
•Familiarise yourself with the functions of the device before actually using it. Do not allow operation
by unqualified people. Any damage that may occur will most probably be due to unprofessional use
of the device.
•Use the original packaging if the device is to be transported.
•All modifications of the device are forbidden for safety reasons.
•Only use the device for its intended purpose. All other uses may lead to short circuits, burns,
electroshocks, crash, etc. Using the device in an unauthorised way will void the warranty.
•The installation has to be approved by an expert before the device is taken into service.
•Connect the device to the mains with the power plug. Don’t connect it to a dimming pack.
4. Installation
a) Mounting the Device
•Have the device installed by a qualified person, respecting EN 60598-2-17 and all other applicable
norms.
•The carrying construction must be able to support 10 times the weight of the device for 1 hour
without deforming.
•The installation must always be secured with a secondary attachment e.g. a safety cable.
•Never stand directly below the device when it is being mounted, removed or serviced. Have a
qualified technician check the device once a year and once before you bring it into service.
•Install the device in a location with few passers-by that is inaccessible to unauthorised persons.
•Overhead mounting requires extensive experience: calculating workload limits, determining the
installation material to be used… Have the material and the device itself checked regularly. Do not
attempt to install the device yourself if you lack these qualifications as improper installation may
result in injuries.
•Adjust the desired inclination angle via the mounting bracket and tighten the bracket screws.
•Make sure there is no flammable material within a 0.5m radius of the device.
•Have a qualified electrician carry out the electric connection.
•Connect the device to the mains with the power plug. Do not connect it to a dimming pack.
•The installation has to be approved by an expert before the device is taken into service.
b) Lamp Power Setting
The VDP3000ST can be set at high or low power setting. The high power setting provides you
maximum flash intensity, the low power setting reduces the output by approximately 50% and
extends the lamp lifetime. Select the desired setting through DIP switch 6. The setting applies
regardless of the other switch setting.
↓1 2 3 4 5 6 ↓1 2 3 4 5 6
ON ON
high powe
r
low powe
r
c) Lamps
•Only fit or replace a lamp when the device is unplugged from the
mains.
•Let a lamp cool down before replacing it as the temperature of a
lamp can reach 700°C during operation.
•When handling a halogen lamp, do not touch it with your bare
hands. Use a cloth to insert or remove it.
•Do not install lamps with a higher wattage than what this device
was designed for.
•Replace any deformed or damaged lamp with a lamp of the same
type (see “Technical Specifications”):
1. Unscrew the 2 marked screws on the side of the fixture
and open the front glass cover.
2. Disconnect the wires at the screw terminals. Lift the lamp and remove.
3. Replace the lamp and close the lamp compartment.

VDP3000ST Rev 01
16.03.2010 ©Velleman nv
4
5. Use
•Detailed DMX Values per Channel
Channel Function From
To Description
1 INTENSITY
0 5 Blackout
6 255 Intensity from 0 ~ 100%
2 FLASH DURATION 0 255 From 0 ~ 530ms
3 FLASH RATE
0 5 No rate
6 255 From 0.6 ~ 30Hz
4 EFFECTS
0 5 No effect
6 42 Ramp up
43 85 Ramp down
86 128 Ramp up-down
129 171 Random
172 214 Lighting
215 255 Spikes
INTENSITY: Set the flash intensity from minimum (blackout) up to maximum using the intensity fader.
The maximum intensity is reduced in low power mode.
FLASH RATE: Set the flash rate from 0 to 25 flashes per second using the flash rate fader. Switch the
flashing on and off with the run/stop button (red LED when switched on, green LED when switched off).
CHASE/SYNC: The chase/sync button toggles between staggered and simultaneous flashing of multiple
fixtures. The LED blinks in chase mode and remains steady in sync mode.
BLINDER EFFECT: The blinder effect is controlled through the momentary blinder effect button. The
lamp power is electronically regulated to prevent the lamp from overheating.
SINGLE FLASH: Press the single flash button to select the single flash mode with continuous flashing
stopped. The flash rate cycle can be restarted by pressing the single flash button while continuous
flashing is running.
•DMX512 Connection
Connect the provided XLR cable to the female 3-pin XLR output of your controller and the other side to
the male 3-pin XLR input of the VDP3000ST. Multiple VDP3000STs can be linked through serial linking.
The linking cable should be a two-core screened cable with XLR input and output connectors.
•DMX512 Chain with Termination
A DMX terminator is recommended for installations where the DMX cable has to
run a long distance or is in an electrically noisy environment (e.g. discos). The
terminator prevents corruption of the digital control signal by electrical noise.
The DMX terminator is simply an XLR plug with a 120Ωresistor between pins 2
and 3, which is then plugged into the XLR output socket of the last device in the
chain.
Please see illustration.
•DMX Start Address

VDP3000ST Rev 01
16.03.2010 ©Velleman nv
5
All DMX-controlled devices need a digital start address so that the correct device responds to the signals.
This start address is the channel number from which the device starts to “listen” to the DMX controller.
Enter the correct number and read it from the display located on the base of the VDP3000ST.
You can use the same starting address for a whole group of devices or enter an individual one for every
device.
When all devices have the same address, all the VDP3000STs will “listen” to the control signal on one
particular channel. In other words: changing the settings of one channel will affect all devices
simultaneously. If you set different addresses, each device will “listen” to a separate channel number.
Changing the settings of one channel will only affect the device in question.
In the case of the 4-channel VDP3000ST, you will have to set the start address of the first VDP3000ST
to 1, the second VDP3000ST to 5 (1 + 4), the third to 9 (5 + 4) and so on.
•DMX Control Modes
The DMX control modes are selected through DIP switches 1 to 5.
o1-Channel Mode
The 1-channel mode allows you to use the whole flash range (0 ~ max.) and the blinder effect. Select
the 1-channel DMX mode by setting DIP switch 5 to ON.
↓1 2 3 4 5 6
ON
1-channel mode
o3-Channel Mode
The 3-channel mode allows you to control the flash intensity, flash duration and flash rate for more
advanced control. Select the 3-channel DMX mode by setting DIP switches 1 ~ 5 to OFF.
↓1 2 3 4 5 6
ON
3-channel mode
o4-Channel Mode
The 4-channel mode allows you to control the flash intensity, flash duration and flash rate for more
advanced control and offers a 4th channel special pre-programmed effects. Select the 4-channel DMX
mode by setting DIP switch 4 to ON.
↓1 2 3 4 5 6
ON
4-channel mode

VDP3000ST Rev 01
16.03.2010 ©Velleman nv
6
•DMX Control Modes
DIP switch 10 must always be set to OFF.
•Mode Setting
The remote controller is powered through the master fixture. Set DIP switches 2 and 3 to ON to select
the master fixture. Connect the slave fixtures and set DIP switch 2 to ON.
↓1 2 3 4 6 8 ↓1 2 3 4 5 6
ON ON
MASTER mode SLAVE mode

VDP3000ST Rev 01
16.03.2010 ©Velleman nv
7
6. Remote Controller (optional)
The controller allows you to control the functions more easily. Connect the VDP3000RC to the fixtures
using a 3-pin XLR cable. The controller is able to control up to 20 fixtures. Remove the terminator from
the last VDP3000ST in the chain when using the VDP3000RC controller. Install a signal splitter after
the first fixture if necessary.
1. chase/sync toggle switch
2. intensity fader
3. blinder effect button
4. run/stop toggle switch
5. flash rate fader
6. single flash button
7. Cleaning and Maintenance
1. All screws should be tightened and free of corrosion.
2. The housing, visible parts, mounting supports and the installation location (e.g. ceiling, suspension,
trussing) should not be deformed, modified or tampered with e.g. do not drill extra holes in mounting
supports, do not change the location of the connections.
3. Moving mechanic parts must not show any signs of wear and tear.
4. The electric power supply cables must not show any damage. Have a qualified technician maintain
the device.
5. Disconnect the device from the mains prior to maintenance activities.
6. Wipe the device regularly with a moist, lint-free cloth. Do not use alcohol or solvents.
7. There are no user-serviceable parts.
8. Contact your dealer for spare parts if necessary.
8. Technical Specifications
power supply max. 230VAC/50Hz
power consumption 8A (33A peak)
lamp Philips®XOP 15-OF strobe lamp (order code LAMP3000ST)
fuse F32A, 250VAC
DMX512 1, 3 or 4 channels
dimensions 246 x 425 x 240mm
total weight 7.5kg
max. ambient temperature 40°C
optional controlle
r
VDP3000RC
Use this device with original accessories only. Velleman nv cannot be held responsible in the
event of damage or injury resulted from (incorrect) use of this device. For more info
concerning this product and the latest version of this manual, please visit our website
www.velleman.eu. The information in this manual is subject to change without prior notice.
© COPYRIGHT NOTICE
The copyright to this manual is owned by Velleman nv. All worldwide rights reserved.
No part of this manual or may be copied, reproduced, translated or reduced to any electronic medium or
otherwise without the prior written consent of the copyright holder.

16.03.201
1. Inl
Aan all
e
Belangr
Hebt u
v
Dank u
v
toestel b
e
2. Ve
i
•De g
a
uw d
verb
a
•Laat
•Om
b
bloo
t
is.
•Dit t
o
gesc
h
•De b
han
d
•De v
o
plaa
t
•Trek
niet
g
•Wan
n
en e
e
•Kijk
n
epile
•Hou
d
gevu
•Scha
gara
n
•De l
a
•Hou
d
3. Al
g
Raadple
e
•Dit t
o
binn
e
maxi
0
eiding
e
ingezetenen
v
ijke milieu-in
f
Dit symbool o
p
weggeworpen
,
batterijen) ni
e
terechtkomen
recyclagepunt
v
ragen, conta
c
v
oor uw aankoo
p
e
schadigd tijde
n
i
ligheidsin
s
Wees vo
dodelijk
e
Raak he
t
Bescher
m
Verzeke
r
openen.
a
rantie geldt ni
e
ealer zal de ve
r
a
nd mee houde
dit toestel inst
a
b
eschadiging te
t
gesteld aan te
m
o
estel valt ond
e
h
oolde technicu
eschikbare net
s
d
leiding.
o
edingskabel
m
t
sen.
de stekker uit
h
g
ebruikt.
n
eer u het toes
t
e
n bepaalde ge
u
n
iet rechtstree
k
psie.
d
dit toestel uit
d
ld met vloeisto
f
de door wijzigi
n
n
tie.
a
mp en mechan
d
dit toestel uit
d
g
emene ric
h
e
g de Vellema
n
o
estel is ontwo
r
e
nshuis gebrui
k
mum 230 VAC
/
GEBR
U
v
an de Europ
e
f
ormatie betr
e
p
het toestel of
,
dit toestel sch
e
t bij het gewon
voor recyclage
brengen. Resp
e
c
teer dan de p
p
! Lees deze h
a
n
s het transpor
t
s
tructies
orzichtig bij de
e
elektroshocks
t
toestel niet aa
m
dit toestel te
g
r
u ervan dat h
e
e
t voor schade
r
antwoordelijkh
e
n.
a
lleren en onde
r
vermijden, zet
m
peratuurscho
m
e
r bescherming
s
s moet de elek
t
s
panning mag n
m
ag niet omgepl
h
et stopcontact
t
el voor het eer
s
u
r. Dit is norma
k
s in de lichtbro
n
d
e buurt van o
p
f
op het toestel.
n
gen die de ge
b
ische schade v
a
d
e buurt van ki
h
tlijnen
n
®
service- en
k
r
pen voor profe
s
k
en door de me
e
/
50 Hz.
VDP30
0
8
U
IKERSH
A
e
se Unie
e
ffende dit pr
o
de verpakking
ade kan toebre
n
e huishoudelijk
e
. U moet dit to
e
e
cteer de plaat
s
laatselijke au
t
a
ndleiding gron
d
t
, installeer het
installatie: raa
k
te vermijden.
n wanneer het
g
en regen en v
o
e
t toestel niet a
a
door het neger
e
e
id afwijzen vo
o
r
houden door e
e
u het toestel b
e
m
melingen. Wa
c
s
klasse I, wat
w
t
rische aansluiti
iet hoger zijn d
a
ooid of bescha
d
(trek niet aan
d
s
t gebruikt, ka
n
al en de event
u
n
. De lichtbron
p
spattende en
d
b
ruiker heeft aa
n
a
llen niet onder
nderen en onb
e
k
waliteitsgar
a
s
sioneel gebrui
k
e
geleverde ada
p
0
0ST
A
NDLEI
D
o
duct
geeft aan dat,
a
n
gen aan het
m
e
afval; het mo
e
stel naar uw v
e
s
elijke milieuw
e
t
oriteiten bet
r
d
ig voor u het t
o
dan niet en ra
a
k
geen kabels a
a
in gebruik is: d
e
o
chtigheid.
a
ngesloten is o
p
e
n van bepaald
e
o
r defecten of p
e
n geschoolde t
e
st niet aan on
m
c
ht tot het toes
t
w
il zeggen dat h
e
ng verzorgen.
a
n de spanning
d
igd zijn. Laat u
d
e kabel!) voor
d
n
dit gepaard g
a
u
ele rook of geu
kan bij gevoeli
g
d
ruppelende vlo
e
n
gebracht aan
h
de garantie.
e
voegden.
a
ntie achteraa
n
k
op podia, in d
i
p
ter aan te slui
t
D
ING
a
ls het na zijn l
e
m
ilieu. Gooi dit t
o
et bij een gesp
e
e
rdeler of naar
e
e
tgeving.
r
effende de ve
o
estel in gebrui
k
a
dpleeg uw dea
l
a
n die onder st
r
e
behuizing wo
r
p
een stroombr
o
e
richtlijnen in
d
roblemen die h
i
echnicus.
m
iddellijk nada
t
t
el op kamerte
m
e
t toestel geaa
r
in de specifica
t
w dealer zo no
d
d
at u het toest
e
a
an met een lic
h
r zal geleidelijk
g
e mensen leid
e
e
istoffen. Plaat
s
h
et toestel vall
e
n
deze handleidi
i
sco's, enz. U
m
t
en op een wiss
e
R
©Vellem
a
e
venscyclus wo
r
o
estel (en even
e
cialiseerd bed
r
e
en lokaal
rwijdering.
k
neemt. Werd
l
er.
r
oom staan om
r
dt warm.
o
n alvorens het
d
eze handleidin
g
i
er rechtstreek
s
t
het werd
m
peratuur geko
m
r
d moet zijn. Ee
t
ies achteraan
d
d
ig een nieuwe
e
l reinigt en als
h
te rookontwik
k
aan verdwijne
n
e
n tot een aanv
a
s
geen objecten
e
n niet onder d
e
ng.
m
ag dit toestel e
e
lspanning van
R
ev 01
a
n nv
r
dt
tuele
r
ijf
het
te
g
en
s
m
en
n
d
e
kabel
u het
k
eling
n
.
a
l van
e
nkel

VDP3000ST Rev 01
16.03.2010 ©Velleman nv
9
•Lichteffecten zijn niet ontworpen voor continue werking: regelmatige onderbrekingen doen ze langer
meegaan.
•Schud het toestel niet dooreen. Vermijd brute kracht tijdens de installatie en de bediening van dit
toestel.
•Installeer het toestel weg van extreme temperaturen (zie ‘Technische specificaties’), vochtigheid
en stof. Zorg voor een minimumafstand van 0,5 m tussen de lichtuitgang van het toestel en het
belichte oppervlak.
•Maak het toestel vast met een geschikte veiligheidskabel (bv. VDLSC7).
•Leer eerst de functies van het toestel kennen voor u het gaat gebruiken. Ongeschoolde personen
mogen dit toestel niet gebruiken. Meestal is beschadiging het gevolg van onprofessioneel gebruik.
•Gebruik de oorspronkelijke verpakking wanneer u het toestel vervoert.
•Om veiligheidsredenen mag de gebruiker geen wijzigingen aanbrengen aan het toestel.
•Gebruik het toestel enkel waarvoor het gemaakt is. Andere toepassingen kunnen leiden tot
kortsluitingen, brandwonden, elektrische schokken, enz. Bij onoordeelkundig gebruik vervalt de
garantie.
•De installatie moet voor het eerste gebruik gekeurd worden door een expert.
•Sluit het toestel via de stekker aan op het lichtnet. Sluit het niet aan op een dimmerpack.
4. Installatie
a) Het toestel monteren
•Laat een geschoolde technicus dit toestel installeren conform EN 60598-2-17 en andere toepasselijke
normen.
•De constructie waaraan het toestel wordt bevestigd, moet gedurende 1 uur 10 x het gewicht van dit
toestel kunnen dragen zonder te vervormen.
•Maak het toestel ook vast met een veiligheidskabel.
•Sta nooit recht onder het toestel wanneer u het monteert, verwijdert of schoonveegt. Laat het toestel
controleren door een geschoolde technicus voor u het in gebruik neemt en laat het 1 x per jaar
volledig nakijken.
•Installeer dit toestel op een plaats waar niemand langs moet lopen, kan neerzitten of het toestel kan
aanraken.
•Een degelijke praktijkervaring is vereist voor de plaatsing van dit toestel. U moet de
maximumbelasting van de draagconstructie kunnen berekenen, weten welk constructiemateriaal u
kunt gebruiken en u moet het gebruikte materiaal en het toestel af en toe laten nakijken. Monteer
het toestel niet zelf indien u er geen ervaring mee heeft. Een slechte montage kan leiden tot
verwondingen.
•Regel de gewenste invalshoek door middel van de montagebeugel en draai de regelschroeven stevig
aan.
•Verwijder alle brandbaar materiaal in een straal van 0,5 m rond het toestel.
•Een geschoolde elektricien moet het toestel aansluiten.
•Sluit het toestel via de stekker aan op het lichtnet. Sluit het niet aan op een dimmerpack.
•De installatie moet voor het eerste gebruik gekeurd worden door een expert.
b) Vermogeninstelling van de lamp
De VDP3000ST heeft twee vermogeninstellingen nl. hoog en laag. Aan hoog vermogen levert de
lamp de maximale flitsintensiteit; aan laag vermogen wordt de intensiteit met ongeveer 50 %
verminderd maar wordt de levensduur van de lamp verlengd. Selecteer de gewenste instelling met
DIP-schakelaar 6. Deze instelling is onafhankelijk van alle andere instellingen.
↓1 2 3 4 5 6 ↓1 2 3 4 5 6
ON ON
hoog vermogen laag vermogen
VDP3000ST Rev 01
16.03.2010 ©Velleman nv
10
C) Lamp
•Plaats of vervang een lamp enkel wanneer het toestel niet is
aangesloten op het lichtnet.
•Laat een lamp afkoelen voor u ze vervangt: de bedrijfstemperatuur
van een lamp ligt rond de 700 °C.
•Raak een halogeenlamp niet aan met uw blote handen. Gebruik een
doek om een halogeenlamp te vervangen.
•Plaats geen lampen met een te hoog wattage. Deze worden warmer
dan die waarop dit toestel is voorzien.
•Vervang een vervormde of beschadigde lamp door een lamp van hetzelfde type (zie ‘Technische
specificaties’). Ga als volgt te werk:
1. Maak de 2 schroeven aan de zijkant van de stroboscoop los en open het lampcompartiment.
2. Schroef de terminals los en verwijder de kabels. Verwijder de lamp uit de fitting.
3. Vervang door een gelijkaardige lamp en sluit het compartiment.
5. Gebruik
•Gedetailleerde DMX-waarden pet kanaal
Kanaal
Functie Van Tot Omschrijving
1 INTENSITEIT
0 5 Black-out
6 255 Intensiteit van 0 ~ 100 %
2 FLITSDUU
R
0 255 Van 0 ~ 530 ms
3 FLITSSNELHEID
0 5 Geen functie
6 255 Van 0,6 ~ 30 Hz
4 EFFECTEN
0 5 Geen functie
6 42 Versnelling
43 85 Vertraging
86 128 Versnelling-vertraging
129 171 Willekeurig
172 214 Flits
215 255 Spike
INTENSITEIT: Stel de flitsintensiteit in van minimaal (black-out) tot maximaal met de intensiteitfader.
De maximale waarde wordt gehalveerd in de lage vermogeninstelling.
FLITSSNELHEID: Stel de flitssnelheid in van 0 tot 25 flitsen per seconde met de snelheidsfader. Schakel
de flitsfunctie in of uit met de aan-uitschakelaar (rode led indien ingeschakeld, groene led indien
uitgeschakeld).
CHASE-SYNC: Met de chase-syncschakelaar schakelt u tussen de aparte en gelijktijdige flitsfunctie van
meerdere stroboscopen. De led knippert in chasemodus en blijft constant branden in syncmodus.
BLINDEREFFECT: Het blindereffect wordt ingesteld via de instelknop voor blindereffect. Het vermogen
van de lamp wordt elektronisch gestuurd om oververhitting te vermijden.
ENKELE FLITS: Druk op de instelknop voor enkele flits om de enkele flitsmodus te selecteren. Reset de
flitssnelheid met een druk op de instelknop voor enkele flits tijdens de continue flitsmodus.

16.03.201
•DM
X
Sluit de
m
kant van
elkaar k
o
kabel m
e
•DM
X
•DM
X
Alle DM
X
de signal
van de
D
VDP300
U kunt é
é
startadr
e
Wannee
r
woorden
reageren
Wannee
r
woorden
reageren
In het g
e
instellen
,
•DM
X
Selectee
r
o
1
In de 1-
k
Selectee
r
o
3
In de 3-
k
en flitss
n
plaatsen
.
o
0
X
512-aansluiti
n
m
eegeleverde
X
de mannelijke
o
ppelen met be
h
e
t XLR ingang-
e
X
512-keten m
e
X
-startadres
X
-gestuurde toe
s
en. Dit digitale
D
MX controller.
G
0ST.
é
n enkel starta
d
e
s ingeven.
r
u één enkel st
a
: wanneer u de
.
r
u verschillend
e
: wanneer u de
.
e
val van de 4-k
a
,
van het tweed
X
-aanstuurmo
d
r
de aanstuurm
o
1
-kanaals aanst
k
anaals aanstu
u
r
de 1-kanaals
a
↓
O
N
3
-kanaals aanst
k
anaals aanstu
u
n
elheid instellen
.
↓
O
N
n
g
X
L
R
-kabel aan d
3-pin XLR-inga
n
h
ulp van een s
e
e
n uitgangsaan
s
e
t eindweerst
a
Een DMX e
i
gebruikt in
eindweerst
a
elektrische
met een w
e
aangeslote
n
illustratie li
s
tellen hebben
e
startadres is h
e
G
eef het correc
t
d
res gebruiken
v
a
rtadres instelt
,
instellingen vo
o
e
adressen inst
e
instellingen va
n
a
naals VDP30
0
e toestel op 5 (
d
us
o
dus met DIP-
s
uurmodus
u
rmodus kunt u
a
anstuurmodus
↓
1
N
uurmodus
u
rmodus heeft
u
. Selecteer de
3
↓
1
N
VDP30
0
11
e vrouwelijke
3
n
g van de VDP
3
e
riële koppeling.
s
luitingen.
a
nd
i
ndweerstand i
s
een omgeving
a
nd voorkomt
c
ruis. De DMX e
e
e
r
stand van 1
2
n
op de XL
R
-uit
nks.
e
en digitaal sta
r
e
t kanaalnumm
e
t
e nummer in e
v
oor een groep
,
zullen alle toe
s
o
r 1 kanaal ver
a
e
lt, dan luistert
n
een kanaal v
e
0
0ST, zult u he
t
1 + 4), van he
t
s
chakelaar 1 tot
het hele flitssp
e
door DIP-scha
k
2 3
1-kanaals aan
s
u
meer instelmo
3
-kanaals aanst
2 3
3-kanaals aan
s
0
0ST
3
-pin XLR-uitga
n
3
000ST. U ku
n
Gebruik daarv
o
s
aanbevolen al
s
met veel elektr
i
c
orruptie van h
e
indweerstand i
s
2
0 Ωvan pin 2
n
gang van het l
a
r
tadres nodig,
z
e
r van waarop
h
n lees het af o
p
toestellen of u
s
tellen ‘luistere
n
a
ndert, zullen a
elk toestel naa
r
e
randert, zal en
k
t
startadres van
t
derde op 9 (5
5.
e
ctrum (0 ~ m
a
k
elaar 5 op ON
t
4
s
tuurmodus
gelijkheden en
uurmodus door
4
s
tuurmodus
n
g van de contr
o
n
t verscheidene
o
or een 2-aderi
s
de DMX-kabel
i
sche ruis (bv.
e
e
t digitale contr
o
s
niets meer da
n
n
aar 3. Deze X
L
a
atste toestel in
z
odat het juiste
h
et toestel ‘luis
t
p
de display ond
kunt per toest
e
n
’ naar hetzelfd
e
lle toestellen e
r
r
een ander kan
k
el het toestel
o
het eerste toe
s
+ 4), enz.
a
x.) en het blin
d
t
e plaatsen.
5 6
kunt u de flitsi
n
DIP-schakelaa
r
5 6
R
©Vellem
a
o
ller en de and
e
VDP3000ST’s
ge afgescherm
d
vrij lang is of
w
e
en discotheek)
o
lesignaal door
n
een XL
R
-stek
k
LR
-stekker wor
d
de reeks. Zie
d
toestel reagee
r
t
ert’ naar het si
g
eraan uw
e
l een nieuw
e
kanaal. Met a
r
tegelijk op
aal. Met ander
e
o
p dat kanaal
s
tel op 1 moete
n
d
ereffect gebrui
n
tensiteit, flitsd
u
r
1 ~ 5 op OFF
t
R
ev 01
a
n nv
e
re
aan
d
e
w
ordt
. De
k
er
d
t dan
d
e
r
t op
g
naal
ndere
e
n
ken.
u
ur
t
e

VDP3000ST Rev 01
16.03.2010 ©Velleman nv
12
o4-kanaals aanstuurmodus
In de 4-kanaals aanstuurmodus kunt u, net zoals in de 3-kanaals aanstuurmodus, de flitsintensiteit,
flitsduur en flitssnelheid instellen. Bovendien beschikt u over een 4ekanaal met geprogrammeerde
effecten. Selecteer de 4-kanaals aanstuurmodus door DIP-schakelaar 4 op ON te plaatsen.
↓1 2 3 4 5 6
ON
4-kanaals aanstuurmodus
•DMX-adres
Plaats DIP-schakelaar 10 altijd op OFF.

VDP3000ST Rev 01
16.03.2010 ©Velleman nv
13
•Master-slavemodus
De afstandsbediening wordt gevoed via de stroboscoop. Plaats DIP-schakelaar 2 en 3 op ON om de
masterfunctie te selecteren. Koppel de slavestroboscopen aan de masterstroboscoop en plaats DIP-
schakelaar 2 van de slavestroboscopen op ON.
↓1 2 3 4 6 8 ↓1 2 3 4 5 6
ON ON
MASTE
R
SLAVE
6. Afstandsbediening (optie)
Met de afstandsbediening kunt u de functies van 20 stroboscopen gemakkelijker aansturen. Sluit de
VDP3000RC aan de stroboscoop met een 3-pin XLR-kabel. Verwijder de eindweerstand uit de laatste
VDP3000ST in de reeks indien u een VDP3000RC-afstandsbediening gebruikt. Installeer een splitter na
de eerste stroboscoop indien nodig.
1. chase-syncschakelaar
2. intensiteitfader
3. knop blindereffect
4. aan-uitschakelaar
5. snelheidsfader
6. knop enkele flits
7. Reiniging en onderhoud
1. Alle gebruikte schroeven moeten goed zijn aangespannen en mogen geen sporen van roest vertonen.
2. De behuizing, de lenzen, de montagebeugels en de montageplaats (bv. het plafond of het gebinte)
mogen niet vervormd zijn of aangepast worden (geen extra gaten in montagebeugels, aansluitingen
niet verplaatsen, enz.)
3. Mechanisch bewegende delen mogen geen sporen van slijtage vertonen en mogen niet onregelmatig
bewegen.
4. De voedingskabels mogen niet beschadigd zijn. Laat het toestel onderhouden door een geschoolde
technicus.
5. Ontkoppel het toestel van het lichtnet voor u aan onderhoudswerkzaamheden begint.
6. Maak het toestel geregeld schoon met een vochtige, niet pluizende doek. Gebruik geen alcohol of
solvent.
7. De gebruiker mag geen onderdelen vervangen.
8. Bestel eventuele reserveonderdelen bij uw dealer.
8. Technische specificaties
voeding max. 230 VAC/50 Hz
verbrui
k
8 A (33 A piek)
lamp Philips®XOP 15-OF stroboscooplamp (ordercode LAMP3000ST)
zekering F32A, 250 VAC
DMX512 1, 3 of 4 kanalen
afmetingen 246 x 425 x 240 mm
gewicht 7,5 kg
max. omgevingstemperatuu
r
40°C
optionele controlle
r
VDP3000RC
Gebruik dit toestel enkel met originele accessoires. Velleman nv is niet aansprakelijk voor
schade of kwetsuren bij (verkeerd) gebruik van dit toestel. Voor meer informatie over dit
product en de laatste versie van deze handleiding, zie www.velleman.eu. De informatie in
deze handleiding kan te allen tijde worden gewijzigd zonder voorafgaande kennisgeving.
© AUTEURSRECHT
Velleman nv heeft het auteursrecht voor deze handleiding. Alle wereldwijde rechten
voorbehouden. Het is niet toegestaan om deze handleiding of gedeelten ervan over te nemen, te
kopiëren, te vertalen, te bewerken en op te slaan op een elektronisch medium zonder voorafgaande
schriftelijke toestemming van de rechthebbende.

16.03.201
1. In
t
Aux rés
i
Des inf
o
Ce symb
o
l’environ
n
En cas
d
Nous vo
u
l’apparei
l
revende
u
2. Co
n
•La g
a
noti
c
résul
•Conf
i
•Ne p
a
dom
m
•Cet
a
Un t
e
•La t
e
noti
c
•Le c
â
reno
u
•Débr
a
le câ
b
•La p
r
C’es
t
•Ne p
a
certa
•Teni
r
liqui
d
•Les
d
gara
n
•L’us
u
•Gard
0
t
roduction
i
dents de l'Un
i
o
rmations env
i
o
le sur l'appare
l'environneme
n
parmi les déch
e
question. Renv
local. Il convie
n
n
ement.
d
e questions,
c
u
s remercions d
l
. Si l’appareil a
u
r.
n
signes de
Être pr
causer
Ne pa
s
Proté
ge
Débra
n
a
rantie ne s’ap
p
c
e et votre reve
n
tent.
i
er l’installation
a
s brancher l’a
p
m
ages, attendr
e
a
ppareil ressort
e
chnicien qualif
i
e
nsion réseau n
e
c
e.
â
ble d’alimentat
u
veler le câble
d
a
ncher l’appareil
b
le.
r
emière mise e
n
t
normal. Toute
a
s regarder direc
t
ins gens.
r
l’appareil à l’é
c
d
e sur l’appareil
d
ommages occa
n
tie.
u
re mécanique
e
er votre VDP3
0
N
O
i
on européen
n
i
ronnemental
e
il ou l'emballag
e
n
t. Ne pas jeter
e
ts municipaux
oyer les équipe
n
t de respecter
c
ontacter les
a
e votre achat !
été endomma
g
sécurité
udent lors d
e
des électro
c
s
toucher l’a
p
e
r l’appareil
c
n
cher le câbl
e
p
lique pas aux
d
n
deur déclinera
et l’entretien à
p
pareil après e
x
e
jusqu’à ce qu
e
à la classe de
p
i
é doit établir la
e
peut pas dép
a
ion ne peut pa
s
d
’alimentation
s
s’il n’est pas utili
s
n
service peut s
’
fumée ou odeu
t
ement la sourc
e
c
art d’éclabous
s
.
sionnés par de
s
e
t l’ampoule ne
0
00ST hors de
VDP30
0
14
O
TICE D
n
e
e
s importante
s
e
indique que l’
un appareil éle
c
non sujets au t
ments usagés
à
la réglementati
o
a
utorités local
Lire la présent
e
g
é pendant le tr
e
l’installatio
n
c
hocs mortel
s
p
pareil lorsq
u
c
ontre la plu
i
e
d'alimenta
t
d
ommages surv
e
toute respons
a
un personnel
q
x
position à des
v
e
l’appareil ait
a
p
rotection I, ce
connexion éle
c
a
sser la tension
s
être replissé o
s
i nécessaire.
s
é ou pour le ne
t
’
accompagner
d
r disparaîtra gr
a
e
lumineuse com
m
s
ures et de jailli
s
modifications
à
tombent pas s
o
la portée de pe
0
0ST
’EMPLO
I
s
concernant
c
élimination d’u
n
c
trique ou élect
ri sélectif ; une
à
votre fourniss
e
o
n locale relati
v
es pour élimi
n
e
notice attenti
v
ansport, ne pa
s
n
: toucher u
n
s
.
u
’il est en ser
i
e et l’humidi
t
ion avant d'
o
e
nus en néglig
e
a
bilité pour les
p
q
ualifié.
v
ariations de te
m
a
tteint la tempé
qui implique qu
c
trique.
mentionnée da
u endommagé.
t
toyer. Tirer la fic
d
’un peu de fu
m
a
duellement.
m
e ceci peut ent
r
ssements. Ne j
a
à
l’appareil par
o
us la garantie.
rsonnes non qu
I
c
e produit
n
appareil en fi
n
ronique (et des
déchèterie trai
t
e
ur ou à un ser
v
v
e à la protecti
o
n
ation.
v
ement avant la
s
l’installer et c
o
n
câble sous
vice : le boît
i
té.
o
uvrir le boîti
e
ant certaines d
p
roblèmes et le
s
m
pérature. Afi
n
rature ambiant
e
e l’appareil doi
t
ns les spécifica
t
Demander à v
o
he pour débranc
h
m
ée ou d’une od
e
r
aîner des crises
d
a
mais placer d’
o
le client, ne to
m
alifiées et de j
e
R
©Vellem
a
n
de vie peut p
o
piles éventuell
e
t
era l’appareil
e
v
ice de recycla
g
o
n de
mise en servic
e
o
nsulter votre
tension peu
t
i
er chauffe !
er.
irectives de cet
t
s
défauts qui e
n
n
d’éviter des
e
avant de l’util
i
t
être mis à la t
e
t
ions à la fin de
o
tre revendeur
d
h
er l'appareil ; n
o
e
ur particuliè
r
e
.
d
’épilepsie chez
o
bjet contenan
t
m
bent pas sous
unes enfants.
R
ev 01
a
n nv
o
lluer
e
s)
e
n
g
e
e
de
t
t
e
n
i
ser.
e
rre.
cette
d
e
o
n pas
.
t
un
la

VDP3000ST Rev 01
16.03.2010 ©Velleman nv
15
3. General Guidelines
Se reporter à la garantie de service et de qualité Velleman®en fin de notice.
•Cet appareil a été développé pour usage professionnel dans des discothèques, des théâtres, etc.
Employer cet appareil à l’intérieur et avec l’adaptateur connecté à une source de courant CA de max.
230 VCA/50 Hz.
•Un effet lumineux n’est pas conçu pour une opération continue. Des pauses régulières prolongeront
sa vie.
•Éviter de secouer l’appareil et traiter l’appareil avec circonspection pendant l’installation et
l’opération.
•Choisir un endroit où l’appareil est protégé contre la poussière, l’humidité et des températures
extrêmes (voir « Spécifications techniques »). Respecter une distance minimum de 0,5 m entre la
sortie lumière de l’appareil et la surface illuminée.
•Fixer l’appareil à l’aide d’un câble de sécurité adéquat (p.ex. VDLSC7).
•Se familiariser avec le fonctionnement de l’appareil avant de l’utiliser. Ne pas permettre pas aux
personnes non qualifiées d’opérer cet appareil. La plupart des dégâts sont causés par un usage non
professionnel.
•Transporter l’appareil dans son emballage originel.
•Toute modification de l’appareil est interdite pour des raisons de sécurité.
•N’utiliser votre VDP3000ST qu’à sa fonction prévue. Tout autre usage peut causer des courts-
circuits, des brûlures, des électrochocs etc. Un usage impropre annule d'office la garantie.
•L’installation doit être approuvée par un expert avant sa mise en service
4. Installation
a) Montage de l’appareil
•Un technicien qualifié doit installer l’appareil en respectant EN 60598-2-17 et toute autre norme
applicable.
•La construction portante de l’appareil doit être capable de supporter 10 x le poids de l’appareil
pendant une heure, sans qu’une déformation de la construction en résulte.
•Fixer votre VDP3000ST à l’aide d’un câble de sécurité (sécurité supplémentaire).
•Éviter de vous positionner en dessous de l’appareil pour l’enlever ou lors du montage ou du
nettoyage. Un technicien qualifié doit réviser l’appareil avant la mise en service. Organiser une
révision minutieuse annuelle.
•Installer l’appareil à un endroit où personne ne peut passer ou s’asseoir et où personne ne peut le
toucher.
•L’installation de cet appareil exige une solide expérience pratique : le calcul de la charge max. de la
construction, les matériaux d’installation requis etc. De temps en temps, un technicien qualifié doit
vérifier la construction portante et l’appareil même. Ne pas essayer d’installer cet appareil vous-
même si vous n’avez pas les qualifications requises ; une installation incorrecte peut entraîner des
blessures.
•Déterminer l’angle d’inclinaison au moyen de l’étrier de montage et serrer les vis de montage.
•Enlever tout matériau inflammable dans un rayon de 0,5 m autour de l’appareil.
•Un électricien qualifié doit établir la connexion électrique.
•Brancher l’appareil sur le réseau électrique par la fiche d’alimentation. Ne pas le brancher sur un bloc
de puissance.
•Un expert doit approuver l’installation avant qu’elle puisse être prise en service.
b) Sélection de la puissance de l’ampoule
La puissance de sortie du VDP3000ST est sélectionnable. La sélection maximale offre l’intensité
maximale ; la sélection minimale réduit cette puissance de sortie d’environ 50 % ce qui prolonge la durée
de vie de l’ampoule. Sélectionner la puissance avec l’interrupteur DIP n° 6. Ce réglage est indépendant
d’autres réglages.
↓1 2 3 4 5 6 ↓1 2 3 4 5 6
ON ON
mode puissance maximale mode puissance minimale

VDP3000ST Rev 01
16.03.2010 ©Velleman nv
16
c) Ampoule
•Déconnecter l’appareil du réseau électrique avant d’installer ou de
remplacer une ampoule.
•Laisser refroidir une ampoule avant de la remplacer; elle peut atteindre
une température de 700 °C.
•Éviter de toucher une ampoule halogène les mains nues. Remplacer
l’ampoule à l’aide d’un chiffon.
•N’installer aucune ampoule dont la puissance dépasse la puissance
maximale mentionnée dans cette notice.
•Remplacer toute ampoule déformée ou endommagée par une ampoule du même type (voir
« Spécifications techniques ») :
1. Desserrer les 2 vis marquées sur le côté du stroboscope et ouvrir le compartiment de
l’ampoule.
2. Desserrer les cosses et déconnecter les câbles. Retirer l’ampoule.
3. Remplacer l’ampoule par une nouvelle et refermer la compartiment.
5. Emploi
•Valeurs DMX détaillées par canal
Canal
Fonction De
À
Description
1 INTENSITÉ 0 5 Noi
r
6 255 Intensité de 0 ~ 100 %
2 DUR
É
E DE L’
É
CLA
T
0 255 De 0 ~ 530 ms
3 VITESSE DE L’ÉCLAT 0 5 Pas de fonction
6 255 De 0,6 ~ 30 Hz
4 EFFETS
0 5 Pas de fonction
6 42 Accélération
43 85 Ralentissement
86 128 Accélération-ralentissement
129 171 Effets aléatoires
172 214 Foudre
215 255
É
clats
INTENSITÉ : Régler l’intensité de l’éclat de l’intensité minimale (noir) jusqu’à l’intensité maximale avec
la glissière d’intensité. L’intensité maximale est réduite en mode puissance minimale.
VITESSE DE L’ÉCLAT : Régler la vitesse de 0 à 25 éclats par secondes avec le réglage de vitesse.
Activer/désactiver les éclats avec l’interrupteur marche/arrêt (éclats activés : DEL rouge, éclats
désactivés : DEL verte).
POURSUITE/SYNCHRO : Le sélecteur poursuite/synchro commute entre la fonction de poursuite et la
fonction d’éclatement simultané. La DEL clignote en mode poursuite et s’allume en continu en mode
synchro.
EFFET BLINDER : Régler l’effet blinder avec le réglage momentané. Le contrôle électronique de
l’ampoule évite sa surchauffe.
ÉCLAT UNIQUE : Enfoncer le bouton d’effet à éclat unique pour activer un seul éclat. Réinitialiser la
vitesse des éclats en enfonçant le bouton d’effet à éclat unique en mode continu.

VDP3000ST Rev 01
16.03.2010 ©Velleman nv
17
•Connexion DMX512
Connecter le câble à fiche XLR inclus à la sortie XLR femelle à 3 broches de votre contrôleur et l’autre
fiche XLR mâle à 3 broches à l’entrée du VDP3000ST. Il est possible de relier plusieurs VDP3000ST à
partir d’une connexion sérielle. Utiliser un câble de connexion blindé à 2 conducteurs avec des
connecteurs d’entrée et de sortie XLR.
•Connexion DMX512 avec une résistance de terminaison
Une résistance de terminaison DMX est à recommander si le câble DMX
doit couvrir une grande distance ou s’il est utilisé dans un
environnement avec beaucoup de bruit électrique (p.ex. une
discothèque). La résistance de terminaison prévient la corruption du
signal de contrôle numérique par le bruit électrique. La résistance de
terminaison DMX n’est rien d’autre qu’une fiche XLR avec une résistance
de 120 Ωde broche 2 vers broche 3 (voir illustration à gauche). Cette
fiche XLR est connectée à la sortie XLR du dernier appareil de la série.
•Adresse DMX de départ
Tous les appareils pilotés par un signal DMX demandent une adresse de départ DMX pour assurer que les
appareils corrects réagissent sur les signaux de contrôle. Cette adresse de départ numérique indique le
numéro de canal sur lequel l’appareil écoute le contrôleur DMX. Déterminer cette adresse avec les
interrupteurs DIP au dos de l’appareil.
Vous avez le choix entre une seule adresse de départ pour toute une série d’appareils ou une adresse de
départ par appareil. Dans le cas d’une seule adresse, tous les appareils « écouteront » les mêmes
signaux, sur un seul canal. Tous les appareils seront donc influencés lorsque vous changez les réglages
d’un seul canal. Avec des adresses de départ individuelles, chaque appareil « écoutera » son propre
canal. Par conséquent, un ajustement des réglages d’un canal n’influence que l'appareil sur ce canal.
Pour le VDP3000ST à 4 canaux, l’adresse de départ du premier appareil est 1, du deuxième 5 (1 + 4),
du troisième 9 (5 + 4), etc.
•Modes DMX
Sélectionner les modes DMX avec les interrupteurs DIP 1 à 5.
oMode 1 canal
Le mode 1 canal permet l’utilisation de l’effet blinder et du spectre entier des éclats (0 ~ max.).
Sélectionner le mode 1 canal en plaçant l’interrupteur DIP n° 5 sur ON.
↓1 2 3 4 5 6
ON
mode 1 canal
oMode 3 canaux
Le mode 3 canaux permet de régler l’intensité, la durée et la vitesse des éclats. Sélectionner le mode 3
canaux en plaçant les interrupteurs DIP n° 1 ~ 5 sur OFF.
↓1 2 3 4 5 6
ON
mode 3 canaux
o

VDP3000ST Rev 01
16.03.2010 ©Velleman nv
18
oMode 4 canaux
Le mode 4 canaux permet de régler l’intensité, la durée et la vitesse des éclats. En outre, il offre un 4ème
canal avec des effets préprogrammés. Sélectionner le mode 4 canaux en plaçant l’interrupteur DIP n° 4
sur ON.
↓1 2 3 4 5 6
ON
mode 4 canaux
•Adresse DMX
Placer l’interrupteur DIP n° 10 sur OFF.

VDP3000ST Rev 01
16.03.2010 ©Velleman nv
19
•Sélection du mode
La télécommande est alimentée depuis le stroboscope maître. Placer les interrupteurs DIP n° 2 et 3 sur
ON pour sélectionner le stroboscope maître. Raccorder les stroboscopes esclaves au stroboscope maître
placer l’interrupteur DIP n° 2 des stroboscopes esclaves sur ON.
↓1 2 3 4 6 8 ↓1 2 3 4 5 6
ON ON
mode MA
Î
TRE mode ESCLAVE
6. Télécommande (optionnelle)
La télécommande vous permet d’actionner les fonctions de 20 stroboscopes. Raccorder le VDP3000RC
au stroboscope en utilisant un câble XLR à 3 broches. Retirer la résistance de terminaison du dernier
VDP3000ST dans la série lors de l’utilisation de la VDP3000RC. Installer un répartiteur après le premier
stroboscope si nécessaire.
1. sélecteur poursuite/synchro
2. réglage d’intensité
3. effet blinder
4. interrupteur marche/arrêt
5. réglage de la vitesse des éclats
6. éclat unique
7. Entretien
1. Serrer les écrous et les vis et vérifier qu’ils ne rouillent pas.
2. Le boîtier, les lentilles, les supports de montage et la construction portante ne peuvent pas être
déformés, adaptés ou bricolés p.ex. pas de trous additionnels dans un support, ne pas déplacer les
connexions etc.
3. Les parties mécaniques mobiles ne peuvent pas être usées ou bouger de manière irrégulière.
4. Les câbles d'alimentation ne peuvent pas être endommagés. Un technicien qualifié doit entretenir
l’appareil.
5. Débrancher l’appareil avant de le nettoyer.
6. Essuyer l’appareil régulièrement avec un chiffon humide non pelucheux. Éviter l’usage d’alcool et de
solvants.
7. Il n’y a aucune pièce maintenable par l’utilisateur.
8. Commander des pièces de rechange éventuelles chez votre revendeur.
8. Spécifications techniques
alimentation max. 230 VCA/50 Hz
consommation 8 A (33 A c
r
ête)
ampoule ampoule st
r
oboscopique Philips®XOP 15-OF (
r
éf. LAMP3000ST)
fusible F32 A, 250 VCA
DMX512 1, 3 ou 4 canaux
dimensions 246 x 425 x 240 mm
poids 7,5 kg
température ambiante max. 40°C
télécommande optionnelle VDP3000RC
N’employer cet appareil qu’avec des accessoires d’origine. SA Velleman ne sera aucunement
responsable de dommages ou lésions survenus à un usage (incorrect) de cet appareil. Pour
plus d’information concernant cet article et la dernière version de cette notice, visitez notre
site web www.velleman.eu. Toutes les informations présentées dans cette notice peuvent être
modifiées sans notification préalable.
© DROITS D’AUTEUR
SA Velleman est l’ayant droit des droits d’auteur pour cette notice. Tous droits mondiaux
réservés. Toute reproduction, traduction, copie ou diffusion, intégrale ou partielle, du contenu de cette
notice par quelque procédé ou sur tout support électronique que se soit est interdite sans l’accord
préalable écrit de l’ayant droit.

16.03.201
1. In
t
A los ci
u
Import
a
Si tiene
Gracias
p
usarlo. S
distribui
d
2. In
s
•Dañ
o
gara
n
•La in
•No c
o
apar
a
•Este
a tie
r
•Aseg
•No a
supe
•Desc
limpi
•No
m
•No e
x
un fl
o
•Los
d
•La b
o
•Man
t
3. No
Véase la
•Este
per
m
•No h
a
prol
o
•No a
g
•Sele
c
extr
e
el ár
e
•Fije
e
0
t
roducción
u
dadanos de l
a
a
ntes informa
c
Este símbolo
dañar el me
d
doméstica; d
distribuidor
o
ambiente.
dudas, conta
c
p
or haber comp
i el aparato ha
d
o
r
.
s
truccione
s
Cuidado
cables c
o
¡No toq
u
No expo
n
Descone
o
s causados po
r
n
tía y su distrib
stalación y el
m
o
necte el apara
t
a
to llegue a la
t
aparato perten
e
r
ra. La conexió
n
úrese de que l
a
plaste el cable
d
rficie afilada. S
i
onecte siempre
arlo. Tire siem
p
m
ire directamen
t
x
ponga el apar
a
o
rero, en el ap
a
d
años causados
o
mbilla y el des
g
t
enga el VDP3
0
rmas gene
r
Garantía de s
e
aparato ha sid
o
m
itido para el u
s
a
sido diseñad
o
o
ngar la vida de
g
ite el aparato.
c
cione un lugar
e
mas (véase «
E
e
a iluminada.
e
l aparato con
u
MA
N
a
Unión Europ
e
c
iones sobre
e
en este aparat
o
d
io ambiente. N
o
ebe ir a una e
m
o
a la unidad de
c
te con las au
t
rado el VDP30
0
sufrido algún d
a
s
de seguri
d
durante la inst
a
o
n un voltaje p
e
u
e el aparato du
n
ga este equip
o
cte el cable de
a
r
descuido de la
s
uidor no será r
e
m
antenimiento
d
t
o si ha estado
t
emperatura a
m
e
ce a la clase d
e
n
eléctrica debe
a
tensión de red
d
e alimentación
i
es necesario,
p
el aparato si n
o
p
re del enchufe
t
e a la fuente d
e
a
to a ningún tip
a
rato.
por modificaci
o
g
aste no están
0
00ST lejos del
r
ales
e
rvicio y calid
a
o
diseñado para
s
o en interiores
o
para un uso in
l aparato.
Evite usar exc
e
de montaje do
n
E
specificacion
e
u
n cable de seg
u
VDP30
0
20
N
UAL DE
L
e
a
e
l medio ambi
e
o
o el embalaje
o
tire este apar
a
m
presa especiali
reciclaje local.
t
oridades loca
0
0ST! Lea aten
a
ño en el trans
p
d
ad
a
lación: puede
s
e
ligroso.
rante su opera
c
o
a lluvia ni hu
m
a
limentación d
e
s
instrucciones
e
sponsable de
n
d
eben ser realiz
a
expuesto a gra
n
m
biente.
e
protección I,
P
llevarla a cabo
no sea mayor
q
y protéjalo co
n
p
ida a su distri
b
o
va a usarlo d
u
para desconect
e
luz. Esto pue
d
o de salpicadur
o
nes no autoriz
a
cubiertos por l
a
alcance de per
s
a
d Velleman
®
uso profesiona
y conéctelo a u
interrumpido. I
e
siva fuerza du
r
n
de el aparato
n
e
s»). Respete
u
ridad adecuad
o
0
0ST
L
USUA
R
e
nte concerni
e
indica que, si t
a
to (ni las pilas
,
zada en recicla
j
Respete las le
y
les para resid
u
tamente las in
s
p
orte no lo inst
a
s
ufrir una pelig
r
c
ión: la caja se
m
edad.
e
la red antes d
e
de seguridad d
e
n
ingún daño u
o
a
dos por perso
n
n
des cambios d
P
or lo tanto, es
un técnico cua
l
q
ue la tensión i
n
tra posibles da
b
uidor reemplaz
u
rante un largo
ar el cable de r
e
d
e causar un ata
q
a o goteo. Nun
c
a
das, no están
c
a
garantía.
s
onas no capac
i
al final de este
l en una discot
e
na fuente de c
o
ntroduzca frecu
r
ante la instala
c
n
o esté expuest
una distancia d
o
(p.ej. VDLSC
7
R
IO
e
nte a este pr
o
ira las muestra
s
,
si las hubiera
)
j
e. Devuelva es
t
y
es locales en r
e
u
os.
s
trucciones del
m
a
le y póngase e
r
osa descarga
e
calienta!
e
abrir la caja.
e
este manual i
n
o
tros problemas
n
al especializad
o
e temperatura.
esencial que el
l
ificado.
ndicada en las
e
ños causados p
ar el cable de a
período de tie
m
e
d, nunca del p
q
ue epiléptico.
c
a ponga un ob
j
c
ubiertos por la
i
tadas y niños.
manual del us
u
e
ca, un teatro,
e
o
rriente CA de
m
entemente una
c
ión y la repara
c
o a polvo, hum
e
e mín. 0.5m en
7
).
R
©Vellem
a
o
ducto
s
inservibles, p
o
en la basura
t
e aparato a su
e
lación con el m
m
anual antes d
e
n contacto con
léctrica al toca
r
n
validarán su
resultantes.
o
.
Espere hasta q
aparato esté p
e
specificacione
s
or algún tipo d
e
limentación.
m
po o antes de
ropio cable.
j
eto con líquido
,
garantía.
u
ario.
e
tc. Sólo está
m
áx. 230VCA /
5
pausa para
c
ión.
e
dad y temper
a
tre la salida de
R
ev 01
a
n nv
o
drían
edio
e
su
r
los
ue el
uesto
s
.
e
,
p.ej.
5
0Hz.
a
turas
luz y
Other manuals for VDP3000ST
1
Table of contents
Languages:
Other HQ Power Test Equipment manuals

HQ Power
HQ Power VDL20ST2 User manual

HQ Power
HQ Power HQLE10024 User manual

HQ Power
HQ Power HQPL10001 User manual

HQ Power
HQ Power VDLL24ST2 User manual

HQ Power
HQ Power VDP750ST User manual

HQ Power
HQ Power DERBY HQLE10027 User manual

HQ Power
HQ Power VDL1500ST User manual

HQ Power
HQ Power VDP3000ST User manual

HQ Power
HQ Power HQST10001 User manual

HQ Power
HQ Power VDP1500ST User manual