manuals.online logo
Brands
  1. Home
  2. •
  3. Brands
  4. •
  5. HTC
  6. •
  7. Cell Phone
  8. •
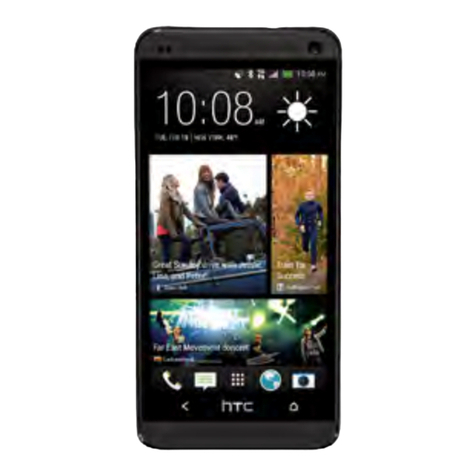
  9. HTC One M9 User manual

HTC One M9 User manual

Other manuals for One M9

10

Other HTC Cell Phone manuals

HTC TOUCH PRO 2 User manual

HTC

HTC TOUCH PRO 2 User manual

HTC Touch Diamond2 Owner's manual

HTC

HTC Touch Diamond2 Owner's manual

HTC Desire 626G User manual

HTC

HTC Desire 626G User manual

HTC Desire 510 Specification sheet

HTC

HTC Desire 510 Specification sheet

HTC Wildfire S T-Mobile User manual

HTC

HTC Wildfire S T-Mobile User manual

HTC Shift User manual

HTC

HTC Shift User manual

HTC Opera User manual

HTC

HTC Opera User manual

HTC One max User manual

HTC

HTC One max User manual

HTC HTC Surround User manual

HTC

HTC HTC Surround User manual

HTC Touch Cruise User manual

HTC

HTC Touch Cruise User manual

HTC Desire Z User manual

HTC

HTC Desire Z User manual

HTC Desire 626S User manual

HTC

HTC Desire 626S User manual

HTC HTC One User manual

HTC

HTC HTC One User manual

HTC One mini User manual

HTC

HTC One mini User manual

HTC Desire 612 User manual

HTC

HTC Desire 612 User manual

HTC FUZE Mounting instructions

HTC

HTC FUZE Mounting instructions

HTC HTC Magic+ User manual

HTC

HTC HTC Magic+ User manual

HTC OZONE User manual

HTC

HTC OZONE User manual

HTC Rezound User manual

HTC

HTC Rezound User manual

HTC TyTN II - Smartphone - WCDMA User manual

HTC

HTC TyTN II - Smartphone - WCDMA User manual

HTC 99HEH104-00 - Touch Smartphone - GSM User manual

HTC

HTC 99HEH104-00 - Touch Smartphone - GSM User manual

HTC 8XT Operating manual

HTC

HTC 8XT Operating manual

HTC One M9 User manual

HTC

HTC One M9 User manual

HTC One VX User manual

HTC

HTC One VX User manual

Popular Cell Phone manuals by other brands

Nokia 6700 classic user guide

Nokia

Nokia 6700 classic user guide

LG L34C user guide

LG

LG L34C user guide

Ericsson T60d manual

Ericsson

Ericsson T60d manual

Zte Score M user manual

Zte

Zte Score M user manual

Sony Xperia Z1 Compact Startup guide

Sony

Sony Xperia Z1 Compact Startup guide

AT AT-Q5 user manual

AT

AT AT-Q5 user manual

Vingtor ACM-M-A-V2 Installation/configuration

Vingtor

Vingtor ACM-M-A-V2 Installation/configuration

Olitech EasyFlip 2 Quick setup guide

Olitech

Olitech EasyFlip 2 Quick setup guide

Zte Atrium Z793C user manual

Zte

Zte Atrium Z793C user manual

Alcatel IDEAL manual

Alcatel

Alcatel IDEAL manual

Zte BLADE A520 quick start guide

Zte

Zte BLADE A520 quick start guide

switel M222 user manual

switel

switel M222 user manual

LG LG-P503 user guide

LG

LG LG-P503 user guide

LG F2410 user guide

LG

LG F2410 user guide

Argom E500 manual

Argom

Argom E500 manual

Hisense U30 user manual

Hisense

Hisense U30 user manual

Argom Tech E401 user manual

Argom Tech

Argom Tech E401 user manual

Nokia 3595 - Cell Phone - GSM Manual Del Usuario

Nokia

Nokia 3595 - Cell Phone - GSM Manual Del Usuario

manuals.online logo
manuals.online logoBrands
  • About & Mission
  • Contact us
  • Privacy Policy
  • Terms and Conditions

Copyright 2025 Manuals.Online. All Rights Reserved.

HTC ONE M9
Users ManUal
Key Functions
1. Power Button lets you turn the device on or o or turn on/o the
screen.
2. Volume Buttons allows you to adjust the ringer or media volume or
adjust the voice volume during a call.
3. microSD™ card slot with eject hole
4. Front Camera lets you capture a self-portrait or a video.
5. Proximity Sensor automatically switches the display screen o
when you hold the device near your face during a call.
6. Dual Speakers lets you hear the dierent ringers and sounds. The
speaker also lets you hear the caller’s voice in speakerphone mode.
7. nanoSIM card slot with eject hole
8. USB Connector allows you to connect the device charger.
CAUTION! Inserting an accessory into the incorrect jack may damage the
device.
9. 3.5 mm Headset Jack allows you to plug in either a stereo headset
or an optional headset for convenient, hands-free conversations.
CAUTION! Inserting an accessory into the incorrect jack may damage the
device.
Getting Started
The Battery
Charging the battery
1. Insert the small end of the USB cable into the USB connector.
2. Plug in the power adapter to an electrical outlet to start charging the battery.
Turning The Phone On / O
Turn Phone On
- Press the power button until HTC One M9 vibrates.
Turn Phone O
1. If the display is o, press the POWER button to turn it back on.
2. Press and hold the POWER button for a few seconds.
3. Tap Power o on the options menu.
Unlocking The Screen
Swipe up to unlock the screen.
If you’ve set up a screen lock, you’ll be asked to provide your credentials before HTC One
M9 unlocks.
Phone Features
Turning Wi-Fi On / O
1. From the Home screen, tap , and then nd and tap Settings.
2. Tap the Wi-Fi On/O switch to turn Wi-Fi on or o.
3. Tap Wi-Fi to see a list of detected wireless networks.
4. Tap a Wi-Fi network you want to connect to. If you selected a secured network, enter
the network key or password. Tap Connect. You’ll see the Wi-Fi icon in the status bar
when connected.
Accessing Internet
Use Google Chrome to surf the Internet, search the Web, and bookmark your favorite
websites.
Turning Bluetooth On/O
1. From the Home screen, tap , and then nd and tap Settings.
2. Tap the Bluetooth On/O switch to turn the Bluetooth connection on and o.
3. Tap Bluetooth to see a list of available devices.
Pairing Devices
1. Turn Bluetooth on and check the list of available devices.
2. If you don’t see your device listed, tap Scan for devices to refresh the list.
3. Tap the name of your device in the Available Devices section. HTC One M9
pairs with the device and the device connection status is displayed in the
Paired Devices section.
4. If prompted, enter the device passcode.
6
7
8 9
1
2
3
4
5
Taking Pictures
1. On the Home screen, tap the camera icon to open
the Camera app.
2. Point the camera at what you want to capture.
The camera adjusts the focus automatically as you
move it.
3. When you’re ready to take the photo, tap .
Recording Video
1. On the Home screen, tap the camera icon to open
the Camera app.
3. When you’re ready to start recording, tap .
4. Change focus to a dierent subject or area by just
tapping it on the Viewnder screen.
6. Tap to pause the recording, and then tap to
resume.
7. To stop recording, tap .
Receiving Calls
- If the display is on, tap Answer or Decline.
- If you’ve set up a lock screen, drag or upwards.
Messaging
1. From the Home screen, tap the Messages icon.
2. Tap .
3. Fill in one or more recipients. You can:
- Enter phone numbers directly in the To eld. If
you’re sending the message to several phone
numbers, separate the phone numbers with a
comma. As you enter information, any matching
phone numbers from your contacts list are
displayed. Tap a match to enter that number or
address directly.
- Tap the icon, and then select the phone
numbers of the contacts to whom you want to
send the message. You can also select contact
groups as recipients. When you have selected all
the message recipients, tap Done.
4. Tap the area that says Add text, and then enter
your message. To add a multimedia attachment, tap
,then choose an attachment type.
5. Tap to send, or tap to save the message as
a draft.
Making and Answering Calls
Making Calls
You can either dial a number directly, or use Smart
dial to quickly place a call. Smart dial searches and
calls a stored/synced contact or a number from your
call history.
1. On the Home screen, tap the phone icon to open
the Phone app.
2. Enter the phone number or rst few letters of the
contact’s name to see the top matching contact.
3. If there are a number of matches found (for
example, 8 matches), tap the number to see all the
matches.
4. Tap the contact you want to call.
– or –
To call a dierent phone number associated with the
contact, tap at the right side of the contact name.
On the contact details screen, tap the number you
want to call.
Zooming
- Before taking a photo or video, slide two ngers
apart to zoom in or together to zoom out.
- When you’re recording video, you can freely zoom
in or out while recording.
Turning the camera ash on or o
Tap the ash icon to choose a ash setting.
When using or , the camera intelligently sets the
best ash brightness for your photo.
Ending Calls
- Tap End Call.