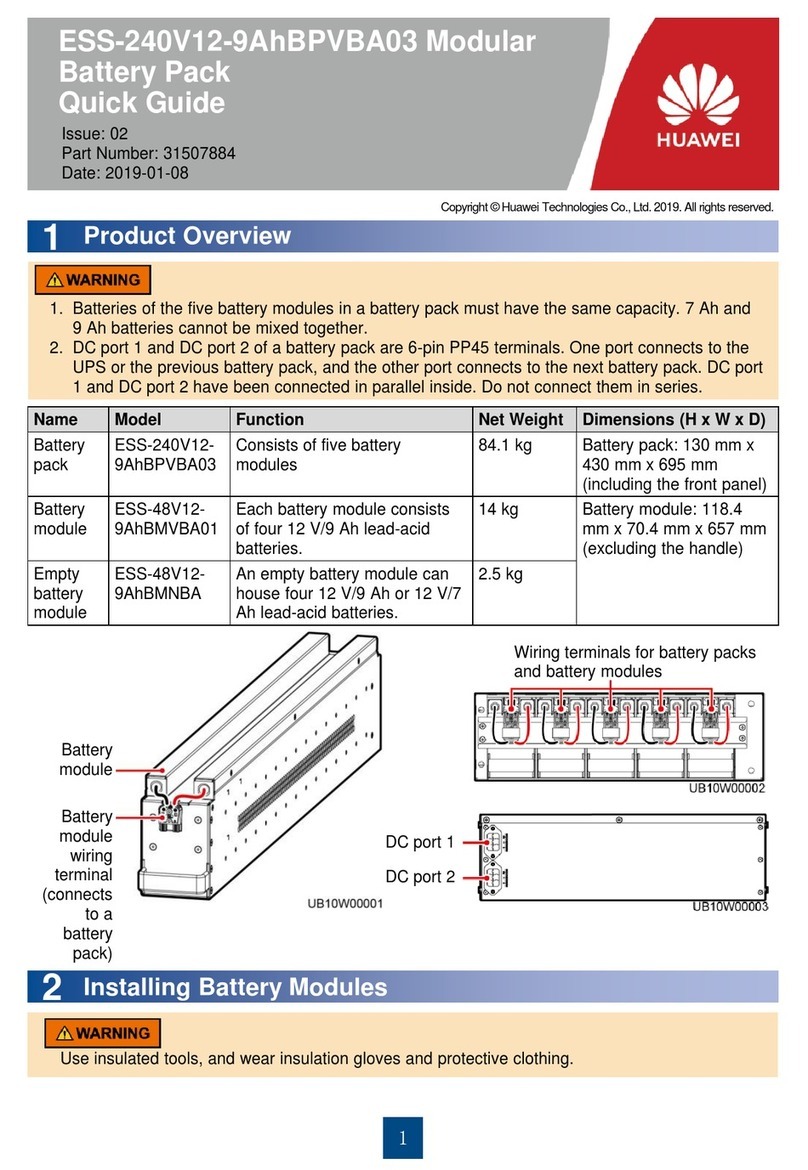
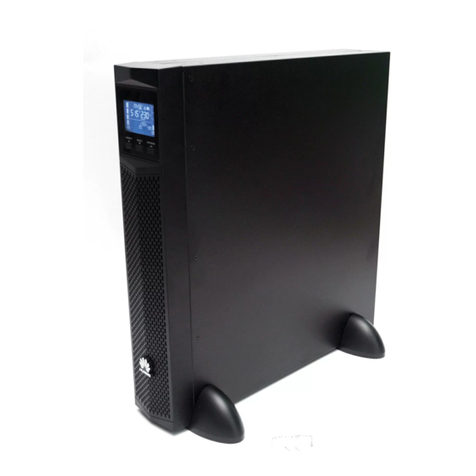
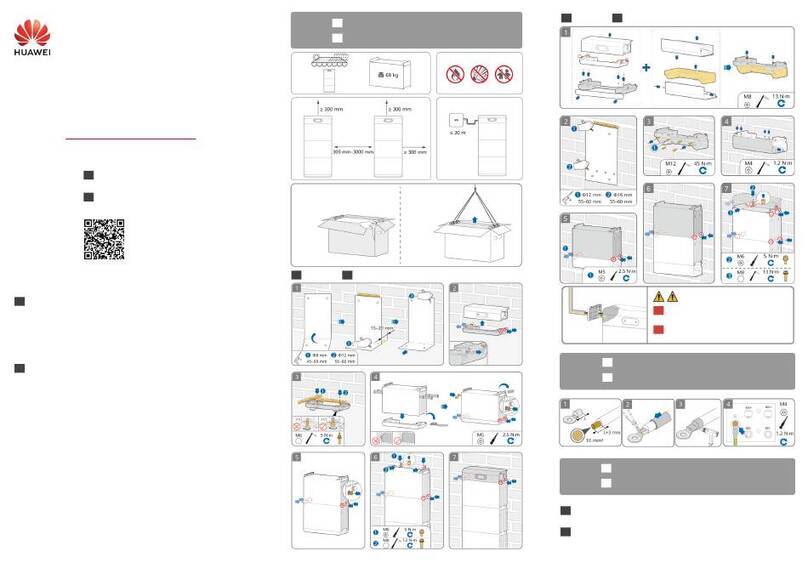
Huawei ESS-240V12-9AhBPVBA04 User manual

ESS-240V12-(9AhBPVBA04, 7AhBPVBA04) Battery
Pack
Quick Guide
Issue 01
Date 2021-12-23
HUAWEI DIGITAL POWER TECHNOLOGIES CO., LTD.

Copyright © Huawei Digital Power Technologies Co., Ltd. 2021. All rights reserved.
No part of this document may be reproduced or transmitted in any form or by any means without prior
written consent of Huawei Digital Power Technologies Co., Ltd.
Trademarks and Permissions
and other Huawei trademarks are the property of Huawei Technologies Co., Ltd.
All other trademarks and trade names mentioned in this document are the property of their respective
holders.
Notice
The purchased products, services and features are stipulated by the contract made between Huawei
Digital Power Technologies Co., Ltd. and the customer. All or part of the products, services and features
described in this document may not be within the purchase scope or the usage scope. Unless otherwise
specied in the contract, all statements, information, and recommendations in this document are
provided "AS IS" without warranties, guarantees or representations of any kind, either express or implied.
The information in this document is subject to change without notice. Every eort has been made in the
preparation of this document to ensure accuracy of the contents, but all statements, information, and
recommendations in this document do not constitute a warranty of any kind, express or implied.
Huawei Digital Power Technologies Co., Ltd.
Address:
Website:
Huawei Digital Power Antuoshan Headquarters
Futian,Shenzhen 518043
People's Republic of China
https://e.huawei.com
Issue 01 (2021-12-23) Copyright © Huawei Digital Power Technologies Co., Ltd. i

About This Document
Intended Audience
This document is intended for:
● Technical support engineers
● Hardware installation engineers
● Commissioning engineers
Symbol Conventions
The symbols that may be found in this document are dened as follows:
Symbol Description
Indicates a hazard with a high level of risk which,
if not avoided, will result in death or serious
injury.
Indicates a hazard with a medium level of risk
which, if not avoided, could result in death or
serious injury.
Indicates a hazard with a low level of risk which,
if not avoided, could result in minor or moderate
injury.
Indicates a potentially hazardous situation which,
if not avoided, could result in equipment damage,
data loss, performance deterioration, or
unanticipated results.
NOTICE is used to address practices not related to
personal injury.
Supplements the important information in the
main text.
NOTE is used to address information not related
to personal injury, equipment damage, and
environment deterioration.
ESS-240V12-(9AhBPVBA04, 7AhBPVBA04) Battery
Pack
Quick Guide About This Document
Issue 01 (2021-12-23) Copyright © Huawei Digital Power Technologies Co., Ltd. ii

Change History
Issue Date Description
01 2021-12-23 This is the rst ocial release.
ESS-240V12-(9AhBPVBA04, 7AhBPVBA04) Battery
Pack
Quick Guide About This Document
Issue 01 (2021-12-23) Copyright © Huawei Digital Power Technologies Co., Ltd. iii

Contents
About This Document................................................................................................................ ii
1 Safety Information.................................................................................................................. 1
1.1 Safety Precautions...................................................................................................................................................................1
1.2 Compliance with Local Laws and Regulations.............................................................................................................. 1
1.3 Personnel Requirements....................................................................................................................................................... 1
1.4 Personal Safety.........................................................................................................................................................................1
2 Product Description.................................................................................................................3
3 Installation................................................................................................................................ 5
3.1 Preparations for Installation................................................................................................................................................ 5
3.2 Unpacking and Checking...................................................................................................................................................... 6
3.3 Installing the Equipment...................................................................................................................................................... 7
3.3.1 (Optional) Installing a Temperature Sensor............................................................................................................... 9
3.3.2 Installing a Battery Pack................................................................................................................................................. 11
3.3.2.1 Method 1: Rack Mounting.......................................................................................................................................... 11
3.3.2.2 Mode 2: Tower Mounting............................................................................................................................................16
3.4 Cable Connection.................................................................................................................................................................. 17
3.4.1 Connecting Cables to Battery Packs for UPS2000-G-6 kVA/10 kVA................................................................18
3.4.2 Connecting Cables to Battery Packs for UPS2000-G-15 kVA/20 kVA............................................................. 21
3.4.3 Connecting Cables to Battery Packs for UPS2000-H-6 kVA............................................................................... 25
3.5 Battery Maintenance........................................................................................................................................................... 25
A Obtaining Product Documents Through QR Code Scanning......................................31
B Battery Backup Time............................................................................................................ 32
C Troubleshooting.....................................................................................................................34
D Replacing a Fuse Board....................................................................................................... 35
ESS-240V12-(9AhBPVBA04, 7AhBPVBA04) Battery
Pack
Quick Guide Contents
Issue 01 (2021-12-23) Copyright © Huawei Digital Power Technologies Co., Ltd. iv

1 Safety Information
1.1 Safety Precautions
When installing, operating, and maintaining the equipment, observe all the safety
instructions on the equipment and in this document to prevent personal injury and
equipment damage. The information provided under the ''NOTE'', "NOTICE",
"CAUTION", "WARNING", and "DANGER" headings within this manual is not
intended to cover all applicable safety policies, and instead acts as a supplement
to the comprehensive safety information provided. The Company will not be liable
for any consequences that may arise due to violations of general safety
requirements or safety standards concerning the design, production, and usage of
the equipment.
1.2 Compliance with Local Laws and Regulations
When operating the equipment, comply with local laws and regulations.
1.3 Personnel Requirements
● Personnel who can install, operate, and maintain the equipment must meet
the following requirements:
– Have electrician skills.
– Have received strict professional training to obtain high voltage and AC
operation qualications, and be familiar with correct operations.
– Be familiar with safety precautions.
● Do not modify default parameters unless required by the document or
approved by technical support engineers.
1.4 Personal Safety
● Before performing any operation, carefully read the installation guide.
● To prevent electric shocks, use insulated tools and wear insulated gloves when
connecting cables.
ESS-240V12-(9AhBPVBA04, 7AhBPVBA04) Battery
Pack
Quick Guide 1 Safety Information
Issue 01 (2021-12-23) Copyright © Huawei Digital Power Technologies Co., Ltd. 1

● To prevent personal injury, wear protective shoes when moving battery packs.
● In the case of re, use a dry powder extinguisher. Using a uid re
extinguisher may cause electric shocks.
● Do not touch uninsulated battery terminals. Otherwise, electric shocks may
occur.
● Using incorrect battery models may cause explosion. Dispose of faulty
batteries as required.
● Cut o power supply and remove metal objects such as watches and rings
before maintenance.
● Do not transport the equipment by holding the mounting ears, front panel, or
wiring port covers. Move the equipment in compliance with the corresponding
requirements, as shown in the following gure:
ESS-240V12-(9AhBPVBA04, 7AhBPVBA04) Battery
Pack
Quick Guide 1 Safety Information
Issue 01 (2021-12-23) Copyright © Huawei Digital Power Technologies Co., Ltd. 2

2 Product Description
Battery Pack Model Weight Dimensions (H x W x D)
ESS-240V12-7AhBPVBA04 63 kg 130 mm x 430 mm x 685 mm
ESS-240V12-9AhBPVBA04 70.5 kg
Figure 2-1 Appearance of the ESS-240V12-(9AhBPVBA04, 7AhBPVBA04)
ESS-240V12-(9AhBPVBA04, 7AhBPVBA04) Battery
Pack
Quick Guide 2 Product Description
Issue 01 (2021-12-23) Copyright © Huawei Digital Power Technologies Co., Ltd. 3

Figure 2-2 Front and rear panels of the ESS-240V12-(9AhBPVBA04, 7AhBPVBA04)
(1) Front panel (2) Rear panel (3) DC port 1
(4) DC port 2 (5) Cable outlet for the battery
temperature sensor
(6) QR codea
NO TE
a: position of the QR code. You can scan the QR code to view the quick guide of the
product. The information on the QR code label is subject to the actual product.
Table 2-1 Environmental specications
Item Specications
Operating temperature range 0–40°C
Altitude 0–4000 m
ESS-240V12-(9AhBPVBA04, 7AhBPVBA04) Battery
Pack
Quick Guide 2 Product Description
Issue 01 (2021-12-23) Copyright © Huawei Digital Power Technologies Co., Ltd. 4

3 Installation
3.1 Preparations for Installation
WARNING
Get tools insulated to prevent electric shocks.
Table 3-1 Installation tools
Appearance, Specications, and Name
Wire stripper Insulation tape Cotton cloth
Flat-head screwdriver (2
mm x 80 mm)
Heat gun Electrician's knife
ESS-240V12-(9AhBPVBA04, 7AhBPVBA04) Battery
Pack
Quick Guide 3 Installation
Issue 01 (2021-12-23) Copyright © Huawei Digital Power Technologies Co., Ltd. 5

Appearance, Specications, and Name
Electrostatic discharge
(ESD) gloves
Insulated gloves Hydraulic pliers
Phillips screwdriver (PH2
x 150 mm, PH3 x 250
mm)
Diagonal pliers Brush
Protective gloves Cable tie Heat-shrink tubing
3.2 Unpacking and Checking
No. Check Item
1 Check the battery pack appearance after unpacking. If any damage is
found, contact the carrier immediately.
2 Check that battery pack barcode (on the rear of the pack near the wiring
ports) is consistent with that specied in the order. If any discrepancy is
found, contact the local oce immediately.
ESS-240V12-(9AhBPVBA04, 7AhBPVBA04) Battery
Pack
Quick Guide 3 Installation
Issue 01 (2021-12-23) Copyright © Huawei Digital Power Technologies Co., Ltd. 6

3.3 Installing the Equipment
NO TICE
● Do not transport the equipment by holding the mounting ears, front panel, or
wiring port covers.
● Remove rings, watches, and other metal objects before moving battery packs.
● When battery packs are connected in series or parallel, only battery packs of
the same model and specications can be installed or replaced. Do not use
battery packs of dierent models or specications together. For details, see the
battery pack nameplate. The following gures are for reference only.
● Install or replace with battery packs of the same model and specications.
Figure 3-1 Same battery pack model and specications
● Battery packs of dierent models cannot be connected in series or parallel.
ESS-240V12-(9AhBPVBA04, 7AhBPVBA04) Battery
Pack
Quick Guide 3 Installation
Issue 01 (2021-12-23) Copyright © Huawei Digital Power Technologies Co., Ltd. 7

Figure 3-2 Dierent battery pack models
● Battery packs of dierent specications cannot be connected in series or
parallel.
ESS-240V12-(9AhBPVBA04, 7AhBPVBA04) Battery
Pack
Quick Guide 3 Installation
Issue 01 (2021-12-23) Copyright © Huawei Digital Power Technologies Co., Ltd. 8

Figure 3-3 Dierent battery pack specications
3.3.1 (Optional) Installing a Temperature Sensor
Procedure
Step 1 Remove three screws from the cover of the battery pack.
Step 2 Remove the cover horizontally.
ESS-240V12-(9AhBPVBA04, 7AhBPVBA04) Battery
Pack
Quick Guide 3 Installation
Issue 01 (2021-12-23) Copyright © Huawei Digital Power Technologies Co., Ltd. 9

Figure 3-4 Removing the cover
(a) Cover
NO TE
If multiple battery packs are installed, install the battery temperature sensor on one battery
pack.
Step 3 Remove the bae plate from the cable hole of the battery temperature sensor,
rotate the bae plate 180 degrees, and secure it with the removed screws. Route
the battery temperature sensor into the battery pack through the cable hole, and
secure the sensor to the cable bridge with a cable tie.
ESS-240V12-(9AhBPVBA04, 7AhBPVBA04) Battery
Pack
Quick Guide 3 Installation
Issue 01 (2021-12-23) Copyright © Huawei Digital Power Technologies Co., Ltd. 10

Figure 3-5 Installing the battery temperature sensor
(a) Battery temperature sensor (b) Cable hole bae plate (c) Cable bridge
Step 4 Reinstall the cover for the battery pack, and secure the cover with the three
removed screws.
----End
3.3.2 Installing a Battery Pack
3.3.2.1 Method 1: Rack Mounting
Context
1. The standard UPS2000-G-6 kVA/10 kVA is typically congured with one
battery pack. The long backup time UPS is congured with at least two
battery packs. A maximum of four battery packs can be congured for a
standard or long backup time UPS. If more than one battery pack is
connected to the 6 kVA/10 kVA long backup time UPS, connect the battery
packs in parallel and then connect them to the UPS battery input ports, as
shown in the following gure.
ESS-240V12-(9AhBPVBA04, 7AhBPVBA04) Battery
Pack
Quick Guide 3 Installation
Issue 01 (2021-12-23) Copyright © Huawei Digital Power Technologies Co., Ltd. 11

2. If the number of UPS2000-G-6 kVA/10 kVA UPSs in a parallel system is
greater than or equal to three, each UPS can be congured with a maximum
of four battery packs. The installation methods for each UPS and battery pack
are the same as those for a single UPS, that is, UPS > battery packs > UPS >
battery packs... UPS > battery packs.
3. For details about how to install UPS2000-G-15 kVA/20 kVA and battery packs,
see the following gures.
Figure 3-6 One UPS (model UPS2000-G-15 kVA/20 kVA) + four battery packs
Figure 3-7 Two UPSs (model UPS2000-G-15 kVA/20 kVA, 1+1 parallel system)
+ four battery packs (sharing battery packs)
ESS-240V12-(9AhBPVBA04, 7AhBPVBA04) Battery
Pack
Quick Guide 3 Installation
Issue 01 (2021-12-23) Copyright © Huawei Digital Power Technologies Co., Ltd. 12

Figure 3-8 Two UPSs (model UPS2000-G-15 kVA/20 kVA, 1+1 parallel system)
+ eight battery packs (not sharing battery packs)
Procedure
Step 1 When battery packs are connected in series or parallel, ensure that the models on
the nameplates of the battery packs are the same.
Step 2 Install the mounting ears.
Figure 3-9 Installing the mounting ears
ESS-240V12-(9AhBPVBA04, 7AhBPVBA04) Battery
Pack
Quick Guide 3 Installation
Issue 01 (2021-12-23) Copyright © Huawei Digital Power Technologies Co., Ltd. 13

Step 3 There are two methods for installing battery packs on a rack.
Method 1: oating nuts + common guide rails Align the lower edge of the guide
rail with the lower edge of a U scale. Install oating nuts (six in total) in positions
numbered 2, 5, and 8, as shown in the gure.
Figure 3-10 Installing common guide rails
Method 2: adjustable guide rails + oating nuts
1. Determine installation positions for the guide rails (height: 2 U). Align the
lower edge of the guide rail with the lower edge of a U scale.
2. Insert the mounting ears at the front and rear ends of the guide rail into the
corresponding mounting holes, secure the rear end using M6x16 screws, and
level the guide rail. Do not install the screws at the front end. Install the other
guide rail in the same method.
3. Install oating nuts in the upper part of the guide rails (on the front end), as
shown in the following gure.
NO TICE
● The guide rail on the right has the R silkscreen, and the guide rail on the left
has the L silkscreen. Do not install them reversely.
● Adjustable guide rails are optional. You are advised to use adjustable guide rails
for rack-mounted installation. For a 3 U device, install guide rails and two
oating nuts, and secure the guide rails with screws. The oating nuts are
delivered with the device.
● The front end of the adjustable guide rails is not secured by screws. Do not
push the adjustable guide rails out of the rack when placing a battery pack on
the rack.
ESS-240V12-(9AhBPVBA04, 7AhBPVBA04) Battery
Pack
Quick Guide 3 Installation
Issue 01 (2021-12-23) Copyright © Huawei Digital Power Technologies Co., Ltd. 14

Figure 3-11 Installing adjustable guide rails
Step 4 Place a battery pack on the guide rails, and secure it to the rack using M6x16
screws through the mounting ears.
D ANGER
Ground the rack properly before operation.
WARNING
Do not touch uninsulated battery terminals. Otherwise, electric shocks may occur.
ESS-240V12-(9AhBPVBA04, 7AhBPVBA04) Battery
Pack
Quick Guide 3 Installation
Issue 01 (2021-12-23) Copyright © Huawei Digital Power Technologies Co., Ltd. 15
Other manuals for ESS-240V12-9AhBPVBA04
1
This manual suits for next models
1
Table of contents
Other Huawei Batteries Pack manuals

Huawei
Huawei ESS-240V12-9AhBPVBA Series User manual

Huawei
Huawei LUNA2000-5-S0 User manual

Huawei
Huawei LUNA2000 Series User manual

Huawei
Huawei UPS2000-G Series User manual

Huawei
Huawei LUNA2000-15-S0 User manual

Huawei
Huawei ESS-240V12-9AhBPVBA03 User manual

Huawei
Huawei SmartLi 2.0 User manual

Huawei
Huawei UPS2000-G-1 kVA User manual

Huawei
Huawei LUNA2000-2.0MWH Series User manual

Huawei
Huawei ESS-240V12-16AhBPVBB User manual