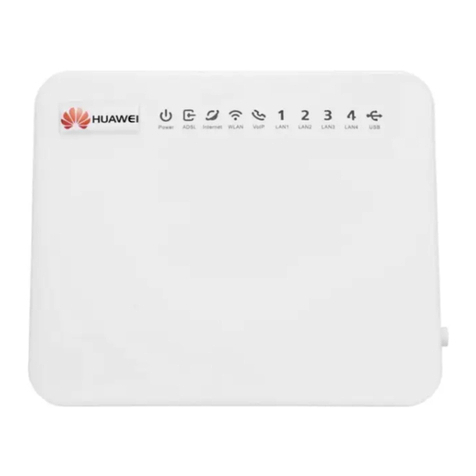
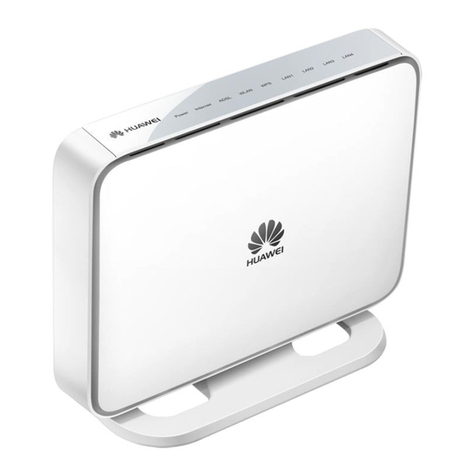
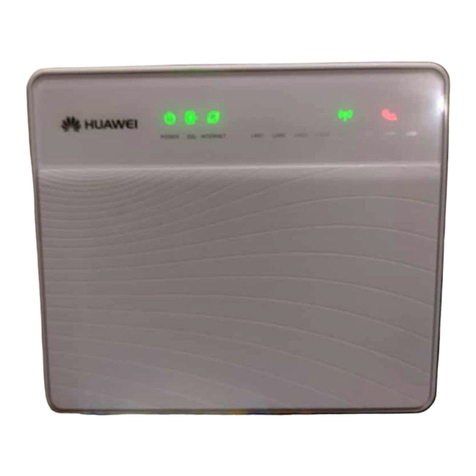
Huawei H350L/B890-66s User manual

H350L/B890-66s LTE Wireless Gateway
Quick Start


1
1Installing your H350L/B890-66s
Follow the steps below to have an initial installation of your H350L/B890-66s.
Step 1 Insert SIM card into the SIM Card Slot.
Step 2 Connect the power adapter to the power port and plug into the wall socket.
The H350L/B890-66s will power on automatically.
Interferences or obstacles may block wireless signal. Place the H350L/B890-66s at
an indoor open area or close to a window.
To prevent interference caused by radio signals, place the H350L/B890-66s at least
1 meter (3.28 feet) away from telephone and other electrical devices.
Before removing the
SIM card, ensure that H350L/B890-66s is powered off and
disconnected from the power outlet.

2
Step 3 Wait for about 60 seconds for the Internet connection initialization. Check
the indicators on the front panel of your H350L/B890-66s. If they are lit as
description below, you are ready to connect the internet.
Power indicator
Solid White: the H350L/B890-66s is powered
on.
Wireless Signal
indicator
Solid Blue or Cyan: the H350L/B890-66s is
registered with the wireless network.
If this indicator is red and blinking, power off the
H350L/B890-66s and ensure your SIM card is
inserted correctly.
Wireless network
connection
indicator
Solid: the H350L/B890-66s is connected to the
wireless network.
If this indicator is blinking continuously, power
off the H350L/B890-66s for 2 minutes and try
again.

3
2Setting up an Internet Connection
You can connect your devices (computer, laptop, tablet, etc.) to the H350L/B890-66s
via a wired or wireless (Wi-Fi) connection to access to the Internet.
Follow the steps below to have an Internet connection according to your device.
Wired Connection with an Ethernet Cable
Step 1 Connect an Ethernet cable to one of the 3 LAN ports and connect the other
end to your computer.
Step 2 Check the LAN indicators ( / / ) on the front panel of your
H350L/B890-66s.
If they are lit as description below, you are ready to access to the Internet
through the computer.
/ /
LAN indicators
Solid: 1, 2 or 3 will be lit depending on which
LAN port you are connected to.
Blinking: data is transferring.
Do not
connect the Ethernet cable to the WAN port that is closest to the right hand
si
de of the H350L/B890-66s.

4
Wireless (Wi-Fi) Connection
Step 1 Ensure that on the front panel is steady on and Wi-Fi is enabled on
your device (computer, laptop, tablet, etc.).
Step 2 From your device, scan for wireless networks in your area. Connect to the
network name that matches the SSID found on the Wireless Security Sticker
on the bottom of your H350L/B890-66s.
Step 3 Wait for about 30 seconds to establish the connection. Your Wi-Fi enabled
device will notify you when it is connected.
Step 4 You may connect up to 32 Wi-Fi enabled devices. Repeat steps 1 through 3.
Wi-Fi Encryption of the H350L/B890-66s is open as default. To protect your
wireless network from unauthorized access,
you can log into the web management
page and set a Wi-Fi password.
If you are using Windows Vista or later, you can press the WPS button on the top
of your H350L/B890-66s for 6 seconds instead of entering the Wi-Fi Password.

5
3Connecting to a telephone
Follow the steps below to connect a telephone to your H350L/B890-66s to make
voice call, you will require an addional voice plan to use this feature
Step 1 Connect a standard telephone to the Telephone Port with a RJ-11 telephone
cable.
Step 2 Check the indicators the front panel of your H350L/B890-66s. If they are lit
as description below, you are ready to make calls using your H350L/B890-
66s.
Voicemail
indicator
Blinking: new voicemail messages.
To check your voicemail, you can:
Dial the voice mail number printed on the SIM card
and hold the 1.
Dial your telephone number to access to voicemail.
Call status
indicator
Not lit
Solid white when you are on a call.
This indicator will blink when you are receiving a call in
addition to your phone ringing.
Do not connect the B882 to the telephone wall outlet (or any Pu
blic Switched
Telephone Network), because doing so could damage the
H350L/B890-66s due to
excessive heat.
Radio signals can interfere with the telephone call connection and quality. To
eliminate the risk of possible interference, place the telephone at least 1 meter
away from the H350L/B890-66s.
Fax is not support on the H350L/B890-66s.

6
4First Time Logging into the Web User
Interface
You can configure and manage the H350L/B890-66s settings using the web user
interface.
Step 1 Launch a web browser, and enter http://device.webui or
http://192.168.20.1 in the address bar.
Step 2 Enter the password, and log in to the web user interface. The default
password is printed as WEBUI Login on the Wireless Security Sticker
located on the bottom of the H350L/B890-66s.
Step 3 Follow the instruction to configure the Wi-Fi encryption.
Setting a strong wireless security level (such as WPA/WPA2-PSK – AES+TKIP)
can prevent unauthorized access to your Wi-Fi, and enter a Wi-Fi password
you wish to use in WPA pre-shared key.
To protect your H350L/B890-66s, only one user can log in to the web user
interface at a time.
To protect your account, change the password immediately. For details, see the
online help information on the web user interface.

7
Step 4 Get yourself familiar with common features.
Home Page:
> Main status banner: show current status or error messages of the
H350L/B890-66s
> Language selection (in the right up corner): Switch language both will
affect to the web user interface and audio error messages in the
telephone.
> Help hyperlink (in the right up corner): get into help information
pages.
Balance:
Learn current balance information of your SIM card.

8
5Getting to Know Your H350L/B890-66s
Appearance
SIM card slot Wired connection indicator
Network connection button USB indicator
Wi-Fi/WPS button Power button
Power indicator Power port
Network mode indicator Telephone port
Wi-Fi/WPS indicator USB port*
Voicemail indicator LAN port
Call status indicator WAN port
Wireless connection indicator Reset button
LAN indicator
* USB port: to connect to a USB storage device, or USB printer. Not for USB host devices such as computers.
This port can provide a current up to 500mA. If this port is connected to a portable hard disk drive (or other
peripherals) whose required current beyond what the H350L/B890-66s can provide, please use an auxiliary
power supply for the hard disk drive.

9
Indicators
The front panel of your H350L/B890-66s provides simple and intuitive indicators so
that you can easily learn the H350L/B890-66s’s status by observing the indicator lights.
Power indicator
On: H350L/B890-66s is powered on.
Off: H350L/B890-66s is powered off.
Network mode
indicator
Blinking red: SIM card failure. (SIM card not inserted,
SIM card rejected, SIM card blocked, or SIM card
unregistered.)
Steady cyan: registered with an LTE network.
Steady blue: registered with a 3G network.
Off: no signal.
Wi-Fi/WPS indicator
Steady on: Wi-Fi turned on or data transfer in progress.
Blinking: a WPS connection is being set up.
Off: Wi-Fi turned off.
Voicemail indicator
Blinking: new voicemail messages.
Call status indicator
Steady on: call in progress.
Blinking slow: incoming call.
Blinking fast: insufficient voice balance or out of voice
balance.
Off: call restricted when you are making a call.
Wireless connection
indicator
Steady on: connected to a LTE/3G network.
Blinking: connecting to a LTE/3G network.
Blinking fast: out of data balance.
* and Both blinking: activation required or no data and voice
balance available..
/ /
LAN indicator
Steady on: LAN port is connected to a client.
Blinking: data is being transmitted through LAN port.
Off: no client is connected to LAN port.

10
Wired connection
indicator
Steady on: connected to an Ethernet network.
Blinking: connecting to an Ethernet network.
USB indicator
Steady on: USB device connected.
Off: USB device not connected.

11
6Installing External Antenna
In areas with poor network coverage, connect an external antenna to the
H350L/B890-66s's external antenna port for better signal reception.
Step 1 Power off the H350L/B890-66s and disconnect from the power outlet.
Step 2 Remove the cover from the antenna port. (Keep it in a safe place.)
Step 3 Screw external antenna fully into the SMA1 antenna port, as shown in the
following figure.
Step 4 If it’s necessary, screw another external antenna fully into the SMA2
antenna port to get a stronger receiving signal.
Before using an external antenna, log in to the web management page
(http://device.webui or http://192.168.20.1) and set antenna mode to outer. For
details, see the help information on the web management page.
Do not install an external antenna to SMA2 unless there is already an external
antenna connected to SMA1. Only installing an external antenna to SMA2 will
result in your Smart Hub not being able to connect to the Internet. Only installing
external antenna to SMA1 is allowed.
Only use the external antenna indoors, and do not use it during a thunderstorm.
Do not change another unexpected antenna unless manufacture provide.

12
7Restoring Factory Defaults
If you are uncertain of which settings you have configured or changed, you can
restore the factory default settings of the H350L/B890-66s, and then reconfigure.
To restore the factory defaults:
Step 1 Use a sharp-pointed object to press and hold the RESET button until the
signal indicators on the H350L/B890-66s blinks.
Step 2 Wait until the H350L/B890-66s restart automatically, the factory default
settings are restored.
Restoring factory defaults will delete all the B890 Smart Hub's user-defined settings
and restore all settings on the web user interface to their defaults.

13
8Frequently Asked Questions
What should I do if the LTE/3G signal strength is
weak?
Method 1: move H350L/B890-66s to an appropriate place
Make sure that H350L/B890-66s is located within wireless network coverage. And
move H350L/B890-66s to an appropriate place, such as beside the window, to get
better signal.
Method 2: install external antenna
Refer “Installing external antenna”.
What should I do if I forget the IP address of the
management page?
Method 1:
Launch a web browser and enter http://device.webui to log in to the management
page and automatically obtain an IP address.
Method 2:
Step 1 Use Reset button to restore H350L/B890-66s to factory defaults.
Step 2 In a web browser, visit http://192.168.1.1 to log in to the management
page.
What should I do if there is noises during a call?
Wireless signal interference will affect call quality, please keep the telephone away
from H350L/B890-66s and other wireless devices.

14
9For More Help
If you are experiencing any other issues with H350L/B890-66s:
Restart H350L/B890-66s.
See the help information on the web management page.
Restore H350L/B890-66s to its factory settings.
Contact your service provider.
Please visit http://consumer.huawei.com/en/support/hotline for recently updated
hotline and email address in your country or region.
Figures in this guide are for your reference only. Specific models may vary slightly,
contact your service provider
for more detailed information.

15
10 Safety information
This section contains important information about the operation of your device. It
also contains information about how to use the device safely. Read this information
carefully before using your device.
Electronic device
Do not use your device if using the device is prohibited. Do not use the device if doing
so causes danger or interference with other electronic devices.
Interference with medical equipment
Follow rules and regulations set forth by hospitals and health care facilities. Do not
use your device where prohibited.
Some wireless devices may affect the performance of hearing aids or pacemakers.
Consult your service provider for more information.
Pacemaker manufacturers recommend that a minimum distance of 15 cm be
maintained between a device and a pacemaker to prevent potential interference
with the pacemaker. If using a pacemaker, hold the device on the side opposite the
pacemaker and do not carry the device in your front pocket.
Areas with flammables and explosives
Do not use the device where flammables or explosives are stored (in a gas station,
oil depot, or chemical plant, for example). Using your device in these environments
increases the risk of explosion or fire. In addition, follow the instructions indicated
in text or symbols.
Do not store or transport the device in containers with flammable liquids, gases, or
explosives.
Operating environment
Avoid dusty, damp, or dirty environments. Avoid magnetic fields. Using the device
in these environments may result in circuit malfunctions.
Before connecting and disconnecting cables, stop using the device and disconnect
it from the power supply. Ensure that your hands are dry during operation.
Place the device on a stable surface.
Keep the device away from electronic appliances that generate strong magnetic or
electric fields, such as a microwave oven or refrigerator.
During thunderstorms, power off your device and remove all cables connected to it
to protect against lightning strikes.
Do not use your device during thunderstorms to protect your device against any
danger caused by lightning.

16
Ideal operating temperatures are 0°C to 45°C. Ideal storage temperatures are
-30°C to +60°C. Extreme heat or cold may damage your device or accessories.
Keep the device and accessories in a well-ventilated and cool area away from
direct sunlight. Do not enclose or cover your device with towels or other objects.
Do not place the device in a container with poor heat dissipation, such as a box or
bag.
Do not expose your device to direct sunlight (such as on a car dashboard) for
prolonged periods.
To protect your device or accessories from fire or electrical shock hazards, avoid
rain and moisture.
Keep the device away from sources of heat and fire, such as a heater, microwave
oven, stove, water heater, radiator, or candle.
Do not place any object, such as a candle or a water container, on the device. If
any foreign object or liquid enters the device, immediately stop using it, power it
off, and remove all cables connected to it. Then, contact an authorized service
center.
Do not block device openings. Reserve a minimum of 10 cm around the device to
dissipate heat.
Stop using your device or applications for a while if the device is overheated. If skin
is exposed to an overheated device for an extended period, low temperature burn
symptoms, such as red spots and darker pigmentation, may occur.
Do not touch the device's antenna. Otherwise, communication quality may be
reduced.
Do not allow children or pets to bite or suck the device or accessories. Doing so
may result in damage or explosion.
Observe local laws and regulations, and respect the privacy and legal rights of
others.
The device should be installed and operated with a minimum distance of 20 cm
between the radiator and your body.
Keep the device in a place with good reception. The distance between the device
and other metal materials (such as metal brackets or metal doors and windows)
should be greater than 25 cm and the distance between the device should be
greater than 30 cm.
Child's safety
Comply with all precautions with regard to child's safety. Letting children play with
the device or its accessories may be dangerous. The device includes detachable
parts that may present a choking hazard. Keep away from children.
The device and its accessories are not intended for use by children. Children should
only use the device with adult supervision.

17
Accessories
Using an unapproved or incompatible power adapter, charger or battery may cause
fire, explosion or other hazards.
Choose only accessories approved for use with this model by the device
manufacturer. The use of any other types of accessories may void the warranty,
may violate local regulations and laws, and may be dangerous. Please contact your
retailer for information about the availability of approved accessories in your area.
Power adapter safety
The power plug is intended to serve as a disconnect device.
For pluggable devices, the socket-outlet shall be installed near the devices and shall
be easily accessible.
Unplug the power adapter from electrical outlets and the device when not in use.
Do not drop or cause an impact to the power adapter. If it is damaged, take it to
an authorized service center for inspection.
If the power cable is damaged (for example, the cord is exposed or broken), or the
plug loosens, stop using it at once. Continued use may lead to electric shocks,
short circuits, or fire.
Do not touch the power cord with wet hands or pull the power cord to disconnect
the power adapter.
Do not touch the device or the power adapter with wet hands. Doing so may lead
to short circuits, malfunctions, or electric shocks.
If your power adapter has been exposed to water, other liquids, or excessive
moisture, take it to an authorized service center for inspection.
Ensure that the power adapter meets the requirements of Clause 2.5 in IEC60950-
1/EN60950-1/UL60950-1 and has been tested and approved according to national
or local standards.
Cleaning and maintenance
During storage, transportation, and operation of the device, keep it dry and
protect it from collision.
Keep the device and accessories dry. Do not attempt to dry it with an external heat
source, such as a microwave oven or hair dryer.
Do not expose your device or accessories to extreme heat or cold. These
environments may interfere with proper function and may lead to fire or explosion.
Avoid collision, which may lead to device malfunctions, overheating, fire, or
explosion.
If the device is not going to be used for an extended period of time, power it off,
and remove all cables connected to it.
If anything unusual occurs (for example, if the device emits smoke or any unusual

18
sound or smell), immediately stop using it, power it off, remove all cables
connected to it, and contact an authorized service center.
Do not trample, pull, or excessively bend any cable. Doing so may damage the
cable, causing the device to malfunction.
Before you clean or maintain the device, stop using it, stop all applications, and
disconnect all cables connected to it.
Do not use any chemical detergent, powder, or other chemical agents (such as
alcohol and benzene) to clean the device or accessories. These substances may
cause damage to parts or present a fire hazard. Use a clean, soft, and dry cloth to
clean the device and accessories.
Do not place magnetic stripe cards, such as credit cards and phone cards, near the
device for extended periods of time. Otherwise the magnetic stripe cards may be
damaged.
Do not dismantle or remanufacture the device and its accessories. This voids the
warranty and releases the manufacturer from liability for damage. In case of
damage, contact an authorized service center for assistance or repair.
Emergency calls
The availability of emergency calls is subject to your cellular network quality, service
provider policy, and local laws and regulations. Never rely solely on your device for
critical communications like medical emergencies.
Environmental protection
The device and its accessories (if included), such as the power adapter, headset,
and battery should not be disposed of with household garbage.
Disposal of the device and its accessories is subject to local regulations. Support
proper collection and recycling.
FCC Regulatory Compliance
FCC statement
This equipment has been tested and found to comply with the limits for a Class B
digital device, pursuant to Part 15 of the FCC Rules. These limits are designed to
provide reasonable protection against harmful interference in a residential installation.
This equipment generates, uses and can radiate radio frequency energy and, if not
installed and used in accordance with the instructions, may cause harmful
interference to radio communications. However, there is no guarantee that
interference will not occur in a particular installation. If this equipment does cause
harmful interference to radio or television reception, which can be determined by
turning the equipment off and on, the user is encouraged to try to correct the
interference by one or more of the following measures:
--Reorient or relocate the receiving antenna.
--Increase the separation between the equipment and receiver.
Table of contents
Other Huawei Gateway manuals

Huawei
Huawei HG630 User manual

Huawei
Huawei HG532c User manual

Huawei
Huawei B311-221 Technical specifications

Huawei
Huawei B315s-608 User manual

Huawei
Huawei USG6310 User manual

Huawei
Huawei DAU eA300-8a User manual

Huawei
Huawei HG532t User manual

Huawei
Huawei EchoLife HG510 User manual

Huawei
Huawei eA660 Series Technical specifications

Huawei
Huawei HG536a User manual

Huawei
Huawei B260 Technical specifications

Huawei
Huawei B882-66 Operator's manual

Huawei
Huawei HG256 User manual

Huawei
Huawei B2268H User manual

Huawei
Huawei HG532t User manual

Huawei
Huawei USG6305 Operator's manual

Huawei
Huawei HG630a User manual

Huawei
Huawei AR515 Series User manual

Huawei
Huawei B890 User manual
Huawei
Huawei HG658d User manual