manuals.online logo
Brands
  1. Home
  2. •
  3. Brands
  4. •
  5. Huawei
  6. •
  7. Power Supply
  8. •
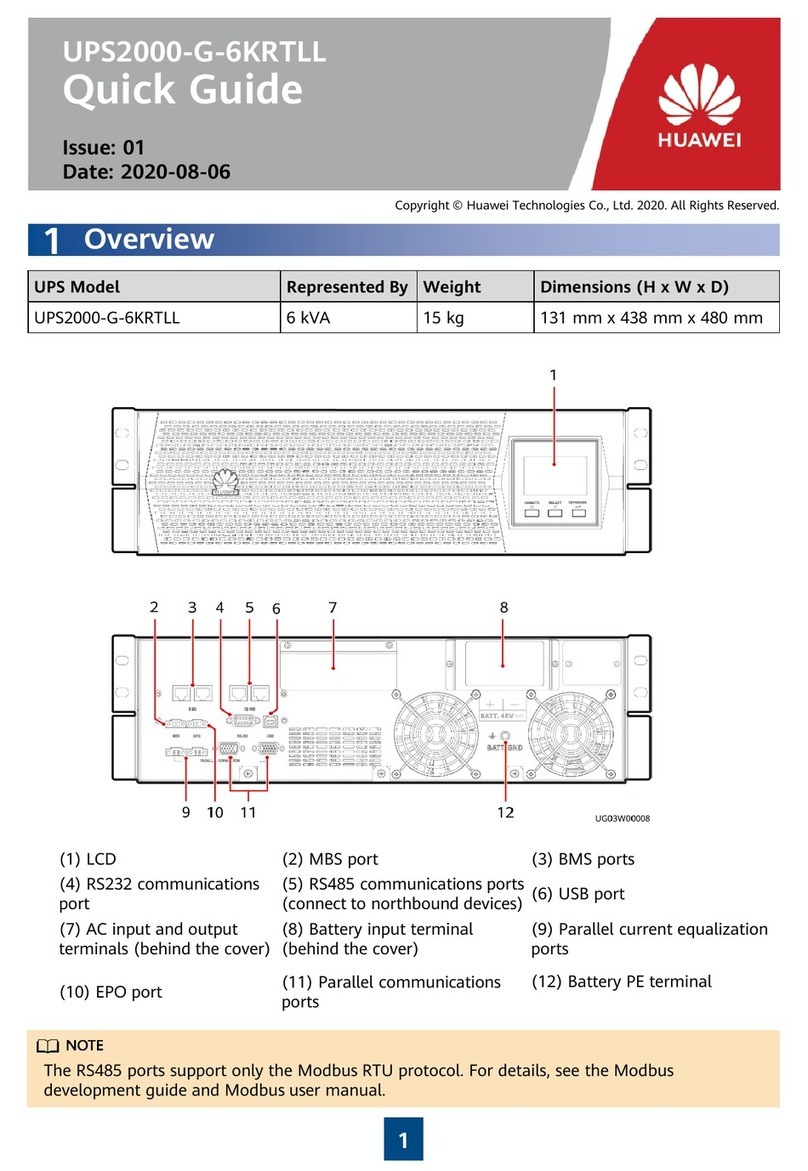
  9. Huawei UPS2000-H-6 kVA User manual

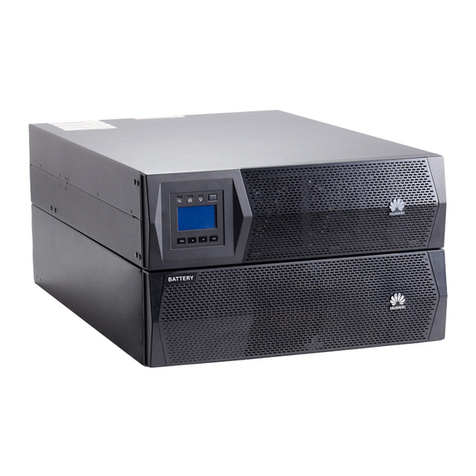
Huawei UPS2000-H-6 kVA User manual

Lithium battery
(3 U)
Reserved space
(1 U)
10 kVA UPS
(2 U)
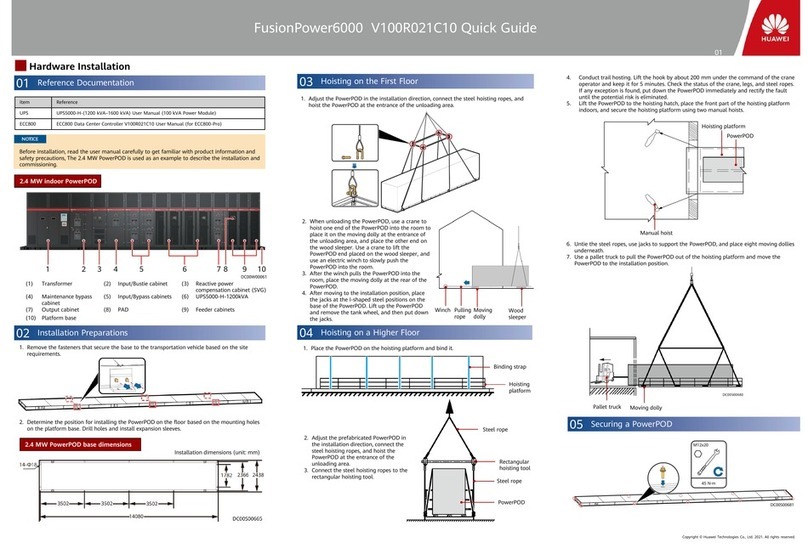
UPS2000-H-(6 kVA–10 kVA) Quick Guide
01 Installation Preparations
Model
Weight
Dimensions (H x W x D)
UPS2000
-H-6KRTL-Li
14 kg
43 mm x 430 mm x 514 mm
UPS2000
-H-10KRTL-Li
17 kg
86 mm x 430 mm x 514 mm
Issue: 02
Date: 2021-10-13
1. Before installing the devices, read the user manual carefully to get familiar with product information and safety precautions.
2. Use insulated tools during installation.
3. Only engineers certified by Huawei or its agents are allowed to install, commission, and maintain the UPS. Otherwise, personal injury or equipment damage may occur, and the UPS faults
caused are beyond the warranty scope of Huawei.
4. When routing power cables and communications cables, prevent cables from being scratched by cabinet components.
1
Unit: mm
6 kVA UPS
(1 U)
Lithium battery
(3 U)
Reserved space
(1 U)
UPS Dimensions and Space Planning (6 kVA)
Rack-mounted
Tower-mounted
T/H sensor Ethernet
SNMP
User equipment
Dry Contact Card
Model
Wiring Terminal
Number
of Phases
Rated Voltage
External Circuit
Breaker
Cable Cross
-
sectional
Area
Terminal Type
Note
6 kVA (single
-
phase input
single
-phase
output)
AC input
L/N/PE
1
220 V AC/230 V
AC/240 V AC
50 A (feature C)
10
mm2
OT
-10 mm2-M6 terminal
M4 screw tightening torque
: 1.2 N·m
Torque for tightening screws
: 4.8 N·m
Notes:
•
Use flexible conductors with a working
temperature of 90℃or softer conductors
for power cables. Cables with solid
conductors or twisted conductors may fail
to be installed.
•
If there is no battery bus bar (BBB) box,
connect battery cables to the UPS. Select OT
terminals based on the battery cables.
•
a: The lithium battery is equipped with a
circuit breaker.
•
b: In bypass mode, the UPS obtains power
from phase A. The input current is the
three-phase total current.
AC output
L/N/PE
1
40 A (feature D)
6
mm2
OT
-6 mm2-M6 terminal
Battery
+
2
54
V DC
160 A
a
2 x 25
mm2
OT
-25 mm2-M6 terminal
-
2 x 25
mm2
PE
-
2 x 6
mm2
OT
-6 mm2-90°bending-M4
terminal
10 kVA (single
-
phase input
single
-phase
output)
AC input
L/N/PE
1
220 V AC/230 V
AC/240 V AC
80
A (feature C)
16
mm2
OT
-16 mm2-M6 terminal
AC output
L/N/PE
1
63 A (feature D)
16
mm2
OT
-16 mm2-M6 terminal
Battery
+
2
54
V DC
250 A
a
2 x 35
mm2
OT
-35 mm2-M6 terminal
-
2 x 35
mm2
-
PE
2 x 6
mm2
OT
-6 mm2-M6 terminal
10 kVA (three
-
phase input
single
-phase
output)
AC input
L/N/PE
3
380 V AC/400 V
AC/415 V AC
80
Ab(feature C)
16
mm2
OT
-16 mm2-M6 terminal
AC output
L/N/PE
1
63 A (feature D)
16
mm2
OT
-16 mm2-M6 terminal
Battery
+
2
54
V DC
250 A
a
2 x 35
mm2
OT
-35 mm2-M6 terminal
-
2 x 35
mm2
PE
-
2 x 6
mm2
OT
-6 mm2-M6 terminal
Lithium battery
+
2
54
V DC
-
25
m2
OT
-25 mm2-M6 terminal
-
25
mm2
PE
6
mm2
OT
-6 mm2-M6 terminal
Unit: mm
Rack-mounted
Tower-mounted
UPS Dimensions and Space Planning (10 kVA)
02 Installing a UPS
Installing Optional Components
6 kVA UPS
(1 U)
Lithium battery
(3 U)
Subrack
Lithium battery
(3 U)
10 kVA UPS
(2 U)
Subrack
The 4G module is
connected to the USB
port of the SNMP card
through a USB
extension cable. The
4G module is magnetic
and can be mounted
to the near cabinet.
4G Module
Installing Mounting Ears
Installing Guide Rails
install four floating nuts.
Typical Rack-mounted Scenario
Connect cables to the lower
UPS and then to the upper
UPS.
•The installation of the 6 kVA UPS is similar to that of the
10 kVA UPS. This document uses the 6 kVA UPS as an
example. Perform operations based on the actual
situation.
•A UPS supports a maximum of eight lithium batteries in
parallel.
•It is recommended that the BBB box be installed behind
the lithium batteries.
•If four groups of batteries are installed in the rack-
mounted mode, reserve 1 U space between each two
groups of lithium batteries for battery cables.
•You are advised to reserve 1 U space between UPSs, 1 U
space between the UPS and lithium battery, and 1 U space
above the UPS.
The following uses two 6 kVA UPSs and
two lithium batteries in rack-mounted
mode without a junction box as an
example.
If the build-out resistor is not installed,
the communication between the UPS
and batteries will fail.
Securing the UPS and Lithium batteries.
Connect the COM port on
the UPS to the COM_IN
port on the lithium battery.
UPS2000-H-(6 kVA–10 kVA) Quick Guide
02
Installing AC Power Cables (Single UPS)
6 kVA (Single-Phase Input Single-Phase Output)
Installing Battery Cables (Single UPS)
10 kVA (Single-Phase Input Single-Phase Output) 10 kVA (Three-Phase input Single-Phase Output)
Installing Communications Cables (Single UPS)
1. Connect UPS AC input and output power cables in the same phase sequence.
Connect battery terminals correctly.
2. Before connecting cables to the UPS, ensure that the input circuit breaker and
output circuit breaker are OFF to prevent operations with power on.
3. If the input or output cables has to be changed, contact Huawei technical support
if you are not familiar with the operation. Do not power on the UPS directly.
4. If the input or output system is changed, ensure that the short-circuit copper bar
status and cable connections at input and output ports are correct.
5. In a single UPS system, connect loads to AC OUTPUT sL and pL terminals. Connect
primary loads to the sL terminal and secondary loads to the pL terminal.
6. K1: UPS input circuit breaker; Q1: UPS output circuit breaker.
When replacing a faulty lithium battery,
disconnect all loops between the UPS and
the battery to prevent maintenance with
power on.
Installing Cables
2
Typical Tower-mounted Scenario
Rear view
Front view
Secure the upper
and lower subracks.
•The following uses one 6 kVA UPS and four lithium batteries
in tower-mounted mode with a junction box as an example.
•A subrack can house a maximum of three devices and only
one UPS is supported.
•In a single-server scenario, if more than six lithium batteries
are installed, two junction boxes need to be installed.
If the build-out resistor is not
installed, the communication
between the UPS and batteries
will fail.
Front view
Rear view
Secure the UPS and
lithium batteries.
Install a BBB
box.
Rear view
Front view of a subrack
mounting bar
Installing floating nuts You are advised to partially
bend battery cables at the
side of the cabinet before
connecting the cables.
03
UPS2000-H-(6 kVA–10 kVA) Quick Guide
Install the cabinet.
3
Installing AC Power Cables (Parallel System)
Installing Battery Cables (Parallel System) Installing Communications Cables (Parallel System)
No. Check Item
1
If the input or output system is changed, ensure that the short
-circuit copper bar status and cable connections at input and
output ports are correct.
2
The phase sequence of the input power is correct. Use a
multimeter to check that the input and output are not short-circuited.
3
Cables and terminals are securely connected.
4
Battery cables and terminals are connected correctly, and voltages comply with industry standards.
5
The UPS is properly connected to the lithium battery string.
6
Input circuit breakers and load circuit breakers are OFF.
7
Power cables and signal cables are correctly identified.
8
The ground cable is reliably connected. The voltage difference between the neutral wire and the ground cable is less than 5 V
AC.
9
The build
-out resistor is correctly installed.
10
The voltage range of the UPS upstream input circuit breaker is 80
–280 V AC (phase voltage), and the rated frequency is 50
Hz/60 Hz.
11
The positive and negative voltages of the lithium battery measured by a
multimeter ranges from 41 V to 51 V.
04 Verifying the Installation
6 kVA Single-Phase Input Single-Phase Output 10 kVA Single-Phase Input Single-Phase Output 10 kVA Three-Phase Input Single-Phase Output
1. Ensure that the AC input and output
power cables on each UPS are
connected in the same phase sequence,
battery terminals are connected
correctly, and the bypass power cables
are connected in the same phase
sequence.
2. Before cable connection, turn off all
circuit breakers in the parallel system.
1. The UPS can generate large leakage
currents. A circuit breaker equipped with
a residual current device (RCD) is not
recommended. If leakage protection is
required, select a recommended circuit
breaker.
2. Circuit breakers used for cable connection
need to be provided by the customer.
3. When UPSs are connected in parallel, the
output parallel power cables of each UPS
must be at least 1 m long and the length
deviation must be less than ±10%. The
four cables must be connected at the
remote end.
4. K: general AC input circuit breaker; K1:
UPS 1 input circuit breaker; K2: UPS 2
input circuit breaker; Q: general AC
output circuit breaker; Q1: UPS 1 output
circuit breaker; Q2: UPS 2 output circuit
breaker; B1–Bn: lithium battery circuit
breakers.
Button WiFi indicator
03 Power-On Commissioning
1. Before powering on the UPS, ensure that the UPS has passed all check items in "Verifying the Installation."
2. The voltage range of the UPS upstream input circuit breaker is 80–280 V AC (phase voltage), and the rated frequency is 50 Hz/60 Hz.
06 Shutdown
Copyright © Huawei Technologies Co., Ltd. 2021. All rights reserved.
UPS2000-H-(6 kVA–10 kVA) Quick Guide
Scan here for more documents:
You can also log in to
Huawei technical support
website:
Support
Support-E WeChat
https://support.huawei.com
https://support.huawei.com/enterprise
4
6. Tap UPS. The Connect WiFi screen is displayed. Use either of the following methods to connect to the WiFi network.
7. After the WiFi connection is set up, the UPS login screen is displayed.
8. Enter the user name and password and tap Log In. (The default user name is admin, and the initial password is
Changeme.)
Power Button
Function Description
Starting the
inverter
When the UPS works in bypass mode (the bypass indicator is on), hold down the
button on the UPS panel for more than 5s. Release the button when the inverter
indicator blinks and you hear a beep sound. Do not press any button during inverter
startup. When the startup command is successfully delivered, and the inverter
indicator is steady on, the UPS enters normal mode.
Shutting down
the inverter
When the UPS works in inverter mode, hold down the button on the UPS panel for
more than 5s. Release the button when the inverter indicator blinks and you hear a
beep sound. Do not press any button during inverter shutdown. When the shutdown
command is successfully delivered, and the inverter indicator is off, the UPS shuts
down the inverter output and enters bypass mode.
Enabling WiFi
When the WiFi is disabled, press and hold the button for 0.5s to enable the WiFi (the
WiFi indicator is on).
Disabling WiFi
When the WiFi is enabled, press and hold the button for 0.5s to disable the WiFi (the
WiFi indicator is off).
Cold
-
Starting the
UPSs Using
Batteries
When the mains is abnormal or disconnected, connect the battery and hold down
the lithium battery switch for at least 5s and less than 15s to power on the lithium
battery.
Hold down the UPS button for 3s (the bypass indicator, battery indicator, and
inverter indicator are on at the same time), and the UPS is powered on. After the
UPS initialization is complete (about 10s), the indicator status changes and the UPS
enters the standby state (the
WiFi
indicator is on and the fault indicator blinks). Hold
down the UPS button for more than 5s, and the UPS enters battery mode.
1. Use a mobile device to scan the QR code on the UPS panel.
Installing the App
Logging In to the App
•After the initial login, change the password in time to improve account security and prevent data tampering.
•For the first login, you need to enter the WiFi password.
1. Enable WLAN on your phone.
2. Turn off mobile data on your phone.
3. Power on the UPS.
4. Press and hold the UPS button for about 0.5s to enable the UPS WiFi (the WiFi indicator is steady on).
5. Open the NetEco app on the mobile device. The Select Application screen is displayed.
11. Tap OK. The home screen is displayed.
Manually connect to WiFi.
①Tap Manually connect to WiFi. The Select WLAN network screen is displayed.
②Select the UPS WiFi name whose last 12 digits are the same as the SN.
Scan to connect to WiFi
①Tap Scan to connect to WiFi.
②Scan the QR code on the UPS panel.
③Enter the WiFi password. (The initial WiFi password is Changeme.)
9. In the displayed dialog box, tap OK. After the initial password is changed, enter the new password to log in to the app.
10. After the login is successful, the quick settings screen is displayed. You can manually set the parameters as required.
Starting a UPS
Starting a Parallel System
1. Hold down the MANUAL ON/OFF button on the lithium battery panel for at least 5s and less than 15s to power on the lithium battery.
2. Switch on the mains AC input circuit breaker K1 for the UPS. The UPS works in bypass mode (the bypass indicator is on). The sL
terminal outputs bypass voltage, and the pL terminal has no voltage output.
3. If the alarm indicator on the UPS panel is blinking, view the alarm details on the app and handle the alarm.
4. Perform "startup operations" on the UPS by using one of the following methods for the UPS to work in normal mode:
•When the UPS works in bypass mode (the bypass indicator is on), hold down the button on the UPS panel for more than 5s. Release the
button when the inverter indicator blinks and you hear a beep sound. Do not press any button during inverter startup. When the startup
command is successfully delivered, and the inverter indicator is steady on, the UPS enters normal mode.
•Choose Configuration > Control > Power-on/off on the app to start the inverter. After successful startup, the UPS enters normal mode.
For details about how to install and log in to the app, see the Appendix.
•On the WebUI, choose Monitoring > UPS System > Running Control to start the UPS.
5. When the UPS runs properly, switch on the UPS AC output circuit breaker Q1 to supply power to loads.
1. Hold down the MANUAL ON/OFF button on the lithium battery panel for at least 5s and less than 15s to power on the lithium battery.
2. Switch on the UPS mains input circuit breakers K1 and K2, the general mains input circuit breaker K, and the UPS AC output circuit
breakers Q1 and Q2. The parallel system has no output.
3. If the alarm indicator on the UPS panel is blinking, view the alarm details on the app and handle the alarm. For details about how to
install and log in to the app, see the Appendix.
4. The parallel configuration parameters are adaptive. Choose Config > System Parameters > Parallel system. You can manually set the
parameters as required.
5. Start the UPS one by one and shut down the inverters. The output PL terminal has voltage output.
6. Switch on output circuit breaker Q1 (provided by the customer), switch off output circuit breaker Q2 (provided by the customer), and
check that the voltage difference between the two ends of output circuit breaker Q2 does not exceed 2 V.
7. Switch on the output circuit breaker Q2.
8. After you perform "startup operations" on each UPS in the parallel system, all UPSs transfer to normal mode.
9. When the parallel system runs properly, switch on the general output circuit breaker Q (provided by the customer) and branch output
circuit breakers (provided by the customer), and start loads one by one.
Perform "shutdown operations" on the UPS by using one of the following methods:
•When the UPS works in inverter mode, hold down the button on the UPS panel for more than 5s. Release the button when the
inverter indicator blinks and you hear a beep sound. Do not press any button during inverter shutdown. When the shutdown
command is successfully delivered, and the inverter indicator is off, the UPS shuts down the inverter output and enters bypass mode.
Choose Configuration > Control > Power-on/off on the app to shut down the inverter. After successful shutdown, the UPS enters
the bypass mode.
On the WebUI, choose Monitoring > UPS System > Running Control to shut down the UPS.
1. Shut down loads.
2. Perform "shutdown operations" on the UPS. The inverter shuts down, and the UPS transfers to bypass mode.
3. Hold down the MANUAL ON/OFF button on the lithium battery panel for at least 5s and less than 15s to power off the lithium
battery.
4. Switch off the mains AC input circuit breaker K1 and output circuit breaker Q1 of the UPS. After all indicators turn off and fans stop,
the UPS shuts down, and the loads power off.
1Shutting Down the Inverter to Transfer the UPS to Bypass Mode
Powering Off a Single UPS
1. Perform "shutdown operations" twice within 30s for a UPS in the parallel system. Then the UPS shuts down and generates no
output. Other UPS works without being affected.
2. Hold down the MANUAL ON/OFF button on the lithium battery panel for at least 5s and less than 15s to power off the lithium
battery.
3. Switch off the AC input circuit breakers K1 and K2 and AC output circuit breakers Q1 and Q2 for the UPS. After all indicators turn off
and fans stop, the UPS shuts down.
4. The UPS exits from the parallel system.
Perform "shutdown operations" on each UPS in the parallel system. All UPSs shut down the inverters and transfer to bypass mode.
1. Shut down loads.
2. Perform "shutdown operations" on each UPS in the parallel system. All UPSs shut down the inverters and transfer to bypass mode.
3. Hold down the MANUAL ON/OFF button on the lithium battery panel for at least 5s and less than 15s to power off the lithium
battery.
4. Switch off the mains AC input circuit breakers K1 and K2 and the general mains AC input circuit breaker K for the UPS system.
Switch off the UPS AC output circuit breakers Q1 and Q2 and the general AC output circuit breaker Q for the UPS system. After all
indicators turn off and fans stop, the UPSs shut down, and the loads power off.
Shutting Down a Single UPS in the Parallel System
Transferring a Parallel System to Bypass Mode
Powering Off a Parallel System
Shutting Down a Single UPS
Shutting Down a Parallel System
05 Startup
Appendix
Button
2. Install the app using either of the following methods:
Download the NetEco app using a browser and install it.
Download the NetEco app from Huawei AppGallery and install it.
The last 12 digits
of the WiFi name
are the same as
the SN.
WLAN list
UPS
If it is not the first login, skip the quick settings operation.
This manual suits for next models

3

Other Huawei Power Supply manuals

Huawei UPS5000-E-12 User manual

Huawei

Huawei UPS5000-E-12 User manual

Huawei UPS2000-A-RTL Series User manual

Huawei

Huawei UPS2000-A-RTL Series User manual

Huawei FusionPower6000 User manual

Huawei

Huawei FusionPower6000 User manual

Huawei TP482000B Series User manual

Huawei

Huawei TP482000B Series User manual

Huawei UPS5000-H-400 kVA User manual

Huawei

Huawei UPS5000-H-400 kVA User manual

Huawei UPS5000-S Series User manual

Huawei

Huawei UPS5000-S Series User manual

Huawei PowerCube 500 PC500-300H1 User manual

Huawei

Huawei PowerCube 500 PC500-300H1 User manual

Huawei Telecom Power TP48200A-HX09A3 User manual

Huawei

Huawei Telecom Power TP48200A-HX09A3 User manual

Huawei TP48200A-D14A1 Telecom Power User manual

Huawei

Huawei TP48200A-D14A1 Telecom Power User manual

Huawei UPS2000 Series User manual

Huawei

Huawei UPS2000 Series User manual

Huawei UPS2000 Series User manual

Huawei

Huawei UPS2000 Series User manual

Huawei TP48200A-DT19D1 Telecom Power User manual

Huawei

Huawei TP48200A-DT19D1 Telecom Power User manual

Huawei UPS2000-G-6KRTLL User manual

Huawei

Huawei UPS2000-G-6KRTLL User manual

Huawei V100R001C50 Instruction sheet

Huawei

Huawei V100R001C50 Instruction sheet

Huawei SmartLi 3.0 User manual

Huawei

Huawei SmartLi 3.0 User manual

Huawei FusionPower6000 User manual

Huawei

Huawei FusionPower6000 User manual

Huawei TP48200A-HX09A2 User manual

Huawei

Huawei TP48200A-HX09A2 User manual

Huawei Telecom Power TP48200A-HT19C3 User manual

Huawei

Huawei Telecom Power TP48200A-HT19C3 User manual

Huawei MAP05A1 User manual

Huawei

Huawei MAP05A1 User manual

Huawei APM30H User manual

Huawei

Huawei APM30H User manual

Huawei ETP4830-A1 User manual

Huawei

Huawei ETP4830-A1 User manual

Huawei TP48200E-H12C1 User manual

Huawei

Huawei TP48200E-H12C1 User manual

Huawei Telecom Power TP48200A-DT19C1 User manual

Huawei

Huawei Telecom Power TP48200A-DT19C1 User manual

Huawei UPS5000-E Series User manual

Huawei

Huawei UPS5000-E Series User manual

Popular Power Supply manuals by other brands

Kenwood PS-31 instruction manual

Kenwood

Kenwood PS-31 instruction manual

Televes 563901 user manual

Televes

Televes 563901 user manual

Xtralis VPS-215-E Installation and commissioning instructions

Xtralis

Xtralis VPS-215-E Installation and commissioning instructions

Venitem TUL 135 installation manual

Venitem

Venitem TUL 135 installation manual

Life technologies novex PowerEase 500 user guide

Life technologies

Life technologies novex PowerEase 500 user guide

Puls QT20.481 installation manual

Puls

Puls QT20.481 installation manual

CAMBRIONIX PP8S user manual

CAMBRIONIX

CAMBRIONIX PP8S user manual

Pulsar PSCL12020 quick start guide

Pulsar

Pulsar PSCL12020 quick start guide

Analytic Systems PWS1505 Installation & operation manual

Analytic Systems

Analytic Systems PWS1505 Installation & operation manual

SFC Energy EFOY Pro Series quick start guide

SFC Energy

SFC Energy EFOY Pro Series quick start guide

Argus RST 48/30 owner's manual

Argus

Argus RST 48/30 owner's manual

Horizont trapper N45 instruction manual

Horizont

Horizont trapper N45 instruction manual

Elenco Electronics XR-38 operating instructions

Elenco Electronics

Elenco Electronics XR-38 operating instructions

M-system 18KDY instruction manual

M-system

M-system 18KDY instruction manual

Furrion Trekker 500 Installation and owner's manual

Furrion

Furrion Trekker 500 Installation and owner's manual

Transition Networks E-MCC-1600 installation guide

Transition Networks

Transition Networks E-MCC-1600 installation guide

Optimal Power OPR200-48S manual

Optimal Power

Optimal Power OPR200-48S manual

Elettrotest CPS/T Series user manual

Elettrotest

Elettrotest CPS/T Series user manual

manuals.online logo
manuals.online logoBrands
  • About & Mission
  • Contact us
  • Privacy Policy
  • Terms and Conditions

Copyright 2025 Manuals.Online. All Rights Reserved.