manuals.online logo
Brands
  1. Home
  2. •
  3. Brands
  4. •
  5. Hubbell
  6. •
  7. Outdoor Light
  8. •
  9. Hubbell Kim Lighting EL161 User manual

Hubbell Kim Lighting EL161 User manual

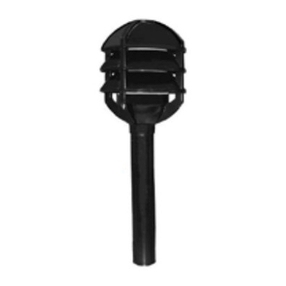
Adjustable Path Lighter Installation Instructions
P.O. Box 60080 • 16555 East Gale Ave.
City of Industry, California 91716-0080
626/968-5666 •FAX 626/330-3861
Revised 7/16/10 ECN100715008 Status 5 Part No. 95659
INSTRUCTIONS PERTAINING TO A RISK OF FIRE OR INJURY TO PERSONS
IMPORTANT SAFETY INSTRUCTIONS!
WARNING: Fixtures must be grounded in accordance with local codes orthe National Electrical Code.
Portable spear or tree mounts using a cord and plug, must be plugged into a receptacle protected by
a Ground Fault Circuit Interrupter (GFCI) in accordance with the National Electrical Code. Failure to do take
these steps may result in seriouspersonal injury. Lighted lamp is HOT! Do not touch hot lens, guard or
enclosure.
CAUTION: L.E.D. fixtures are available in 120 volt input or 277 volt input. Please verify before wiring fixture
to field wires (see lamp label to verify).
MAINTENANCE: To maintain light efficiency and prevent fixture overheating, lenses must be kept clean and free
of dirt, dust, leaves, trash and mineral deposits from water. For optimum performance a regularly
scheduled maintenance program should be followed.DO NOToperate luminaire with missing ordamaged lens.
KEEP THIS SHEET FOR FUTURE REFERENCE.
Tools Required: Flat Blade Screwdriver Adjustable Wrench 5/64"Allen Wrench Thread Sealant
Installation Instructions: Make certain electrical supply is OFF before starting fixture installation.
EL161
BN166
6161
6166
1. Coat threads with a good sealant
and install pole into desired junction
box. (Direct burial box for H.I.D.)
2. Position fixture & tighten locknut with adjustable wrench. Make all
necessary connections observing polarity, i.e.; green-to-ground, white-to-
common, and black-to-voltage. Replace fixture to junction box.
3. Remove screws from lens frame
with a flat blade screwdriver.
4. Install lamp of type and wattage
shown on fixture label & chart. Do
not exceed maximum wattage.
Reinstall lens and lens frame.
Lens Frame
!
Par20 Lamp
Shown
EL168
BN168
5. The EL168 and BN168 fixtures are
equipped with L.E.D. lamps from
the factory. Make sure the (4) lens
cover screws are tightened for
proper sealing.
IMPORTANT!
For L.E.D. fixtures
only. Verify input
voltage. See
Caution above.
!
Page 2 Kim Lighting • 16555 E. Gale Ave. • P.O. Box 60080 • City of Industry, CA 91716-0080 • 626/968-5666 • FAX 626/330-3861
Adjustable Path Lighter Installation Instructions
How may we serve you better?
Please let us know. Visit our website at:
www.kimlighting.com
Your input matters to us.
Transition
Hub
Set Screws
6. Loosen both set screws on transition hub.
Turn hub two complete turns to loosen, do
not remove from threaded stem. Adjust
height/orientation and tighten hub and set
screws to secure.
LAMP INFORMATION
Incandescent
Cat. No. Lamp Type Max. Watts
EL161/ PAR20 50
BN166 or A19 60
(Lamps By Others)
LAMP INFORMATION
H.I.D.
Cat. No. Lamp Type Max. Watts
6161
6166 (Lamps By Others)
PAR20 35MH
WARNING!
The H.I.D. / Fluorescent fixture utilizes a lamp
that may contain mercury. For information on
disposal of lamp, go to website:
www.lamprecycle.org
LAMP INFORMATION
L.E.D.
Cat. No. Lamp Type Max. Watts
EL168
BN168 L.E.D.
By KIM 15
7. *L.E.D. identifier - both are available in
120 volt or 277 volt input. Reference
label on side of driver component or lamp
label to determine.
5 Watt 15 Watt
* L.E.D. IDENTIFIER
KIM LIGHTING LIMITED WARRANTY
When installed in accordance with Kim Installation Instructions and accepted
trade practices, the following shall apply:
General Product Limited Warranty Coverage
All material and component parts used in the manufacture of Kim Products, are
warranted to be free from defects of material and/or workmanship for a period
of 1 year from date of sale, with the following exceptions:
Auxiliary Equipment
All auxiliary equipment (such as lamps, ballasts, and transformers) provided by
and/or included in Kim Products shall carry the component manufacturer's
warranty.
Copper, Bronze and Brass Landscape Components
Copper and Bronze Landscape fixture components shall be warranted against
defects of material and/or workmanship, and failure due to corrosion, for a
period of 25 years from date of sale.
Kim Lighting's brass components are constructed from several brass parts
that are manufactured by various methods at various times. Since brass
naturally deepens in color as it ages through the normal oxidation process,
these parts may exhibit subtle differences in coloration when the product is
new. This is normal and expected. These color differences will be eliminated
shortly after installation through the normal brass oxidation process.
Composite In-Ground Components
Composite In-Ground fixture components installed below grade, shall be
warranted against defects of material and/or workmanship, and failure due to
corrosion, for a period of 7 years from date of sale.
Aluminum Landscape Components
Aluminum Landscape fixture components not in direct contact with soil, shall
be warranted against defects of material and/or workmanship for a period of 3
years from date of sale. Aluminum fixture components in direct contact with
soil shall be warranted from defects of material and failure from corrosion for a
period of 1 year from date of sale.
Limit of Liability and General Conditions
Only products which are installed, used and maintained in accordance with
applicable Kim instructions, specifications and accepted trade practices, are
covered by the Kim Warranty. During the warranty period, with proof of
purchase, Kim will repair or replace with the same or similar product, at Kim's
option, without charge. Labor costs are the owner's responsibility and are
excluded from this warranty. This warranty is void if the product is modified,
tampered with, misapplied, poorly installed, improperly maintained, or
subjected to abnormal conditons.
Repair or replacement as provided under this warranty is the exclusive
remedy of the purchaser. This warranty is in lieu of all other warranties,
expressed or implied, including any implied warranty of fitness for a particular
application. Kim Lighting shall not be liable to the purchaser for indirect or
consequential damages.

This manual suits for next models

5

Other Hubbell Outdoor Light manuals

Hubbell KIM LIGHTINING C24 User manual

Hubbell

Hubbell KIM LIGHTINING C24 User manual

Hubbell WGH81L User manual

Hubbell

Hubbell WGH81L User manual

Hubbell VBGL-2 User manual

Hubbell

Hubbell VBGL-2 User manual

Hubbell PERIMALITER III Service manual

Hubbell

Hubbell PERIMALITER III Service manual

Hubbell KIM Lighting SCARAB Accent Series User manual

Hubbell

Hubbell KIM Lighting SCARAB Accent Series User manual

Hubbell KIM LIGHTING ARCHETYPE-LED-AR-LED User manual

Hubbell

Hubbell KIM LIGHTING ARCHETYPE-LED-AR-LED User manual

Hubbell SLING Service manual

Hubbell

Hubbell SLING Service manual

Hubbell MATRIX AREA User manual

Hubbell

Hubbell MATRIX AREA User manual

Hubbell Kim Pavilion PA7R User manual

Hubbell

Hubbell Kim Pavilion PA7R User manual

Hubbell Dual-Lite PGN Manual

Hubbell

Hubbell Dual-Lite PGN Manual

Hubbell Kim Lighting KLV Series User manual

Hubbell

Hubbell Kim Lighting KLV Series User manual

Hubbell DDL-9L1 User manual

Hubbell

Hubbell DDL-9L1 User manual

Hubbell Kim Lighting Wall Forms WF30H Series User manual

Hubbell

Hubbell Kim Lighting Wall Forms WF30H Series User manual

Hubbell Kim Lighting Neo Sphere NS User manual

Hubbell

Hubbell Kim Lighting Neo Sphere NS User manual

Hubbell LNC4 User manual

Hubbell

Hubbell LNC4 User manual

Hubbell KIM Path Pilot KLV101 User manual

Hubbell

Hubbell KIM Path Pilot KLV101 User manual

Hubbell DDL Series User manual

Hubbell

Hubbell DDL Series User manual

Hubbell LUMASQUARE User manual

Hubbell

Hubbell LUMASQUARE User manual

Hubbell KIM LIGHTING VSBC User manual

Hubbell

Hubbell KIM LIGHTING VSBC User manual

Hubbell FXL LED FLOOD User manual

Hubbell

Hubbell FXL LED FLOOD User manual

Hubbell AIRO User manual

Hubbell

Hubbell AIRO User manual

Hubbell RATIO AREA User manual

Hubbell

Hubbell RATIO AREA User manual

Hubbell Killark KFLX Series Instruction Manual

Hubbell

Hubbell Killark KFLX Series Instruction Manual

Hubbell RFL2 User manual

Hubbell

Hubbell RFL2 User manual

Popular Outdoor Light manuals by other brands

Landscape Forms Hawthorne installation guide

Landscape Forms

Landscape Forms Hawthorne installation guide

SLV L-LINE 1003537 instruction manual

SLV

SLV L-LINE 1003537 instruction manual

Ingo Maurer The MaMo Nouchies Samurai Mounting instructions

Ingo Maurer

Ingo Maurer The MaMo Nouchies Samurai Mounting instructions

Costway EP24442 user manual

Costway

Costway EP24442 user manual

LIGMAN LH-10573 installation manual

LIGMAN

LIGMAN LH-10573 installation manual

Seville Classics GloGlobe instruction manual

Seville Classics

Seville Classics GloGlobe instruction manual

Envirolite EV7065-306 manual

Envirolite

Envirolite EV7065-306 manual

Inspire Cardea OS1959-3 instruction manual

Inspire

Inspire Cardea OS1959-3 instruction manual

Quoizel DE8959IB Assembly instruction sheet

Quoizel

Quoizel DE8959IB Assembly instruction sheet

Steren LAM-850 instruction manual

Steren

Steren LAM-850 instruction manual

ItsImagical esa moon in my room manual

ItsImagical

ItsImagical esa moon in my room manual

urban ambiance UQL1100 installation instructions

urban ambiance

urban ambiance UQL1100 installation instructions

LIGMAN TU-10136-2-SB installation manual

LIGMAN

LIGMAN TU-10136-2-SB installation manual

LUTEC 6901501000 user manual

LUTEC

LUTEC 6901501000 user manual

Quoizel SNN8408PN Assembly instruction

Quoizel

Quoizel SNN8408PN Assembly instruction

Kichler Lighting LEMMY 37535 instructions

Kichler Lighting

Kichler Lighting LEMMY 37535 instructions

Perel LAMPH10S user manual

Perel

Perel LAMPH10S user manual

LUG ARTERA LED installation instructions

LUG

LUG ARTERA LED installation instructions

manuals.online logo
manuals.online logoBrands
  • About & Mission
  • Contact us
  • Privacy Policy
  • Terms and Conditions

Copyright 2025 Manuals.Online. All Rights Reserved.