Husqvarna BLi100 Instruction manual

Workshop manual
BLi100, BLi200, BLi200X, BLi300
English
1856 - 001 - 14.04.2022

Contents
1 Introduction
1.1 Document description............................................ 3
1.2 Target group...........................................................3
1.3 Revisions................................................................3
1.4 Safety..................................................................... 3
1.5 Servicing tools........................................................3
2 Safety
2.1 Safety definitions....................................................4
2.2 General safety instructions.....................................4
2.3 Important safety instructions.................................. 4
2.4 To prepare for battery repair work..........................4
3 Symbols on the product
4 To charge the battery
5 Servicing data
5.1 Servicing data BLi300............................................ 7
5.2 Servicing data BLi100, BLi200, BLi200X............... 8
6 Servicing tools
6.1 Servicing tools........................................................9
6.2 Diagnostic tools......................................................9
7 Product overview
8 Repair instructions
8.1 Battery terminals.................................................. 11
8.2 To replace the casing BLi300...............................11
8.3 To replace the casing BLi100, BLi200, BLi200X..12
9 Troubleshooting
9.1 Troubleshooting................................................... 14
10 Technical data
10.1 Technical data....................................................15
21856 - 001 - 14.04.2022

1 Introduction
1.1 Document description
This manual gives a full description of how to do
maintenance and repair on the product. It also gives
safety instructions that the personnel must obey.
1.2 Target group
This manual is for personnel with a general knowledge
of how to do repair and do servicing. All personnel that
do repair or do servicing on the product must read and
understand the manual.
1.3 Revisions
Changes to the product can cause changes to
the maintenance work and spare parts. Separate
information is sent out for each change.
Read the manual together with all received information
about changes to maintenance and spare parts for the
product.
1.4 Safety
WARNING: All personnel that repair or do
servicing on the product must read and
understand the safety instructions in this
workshop manual.
1.5 Servicing tools
The manual gives information about necessary servicing
tools. Always use original tools from Husqvarna.
1856 - 001 - 14.04.2022 Introduction - 3

2 Safety
2.1 Safety definitions
Warnings, cautions and notes are used to point out
specially important parts of the manual.
WARNING: Used if there is a risk of injury
or death for the operator or bystanders if the
instructions in the manual are not obeyed.
CAUTION: Used if there is a risk of damage to
the product, other materials or the adjacent area
if the instructions in the manual are not obeyed.
Note: Used to give more information that is necessary in
a given situation.
2.2 General safety instructions
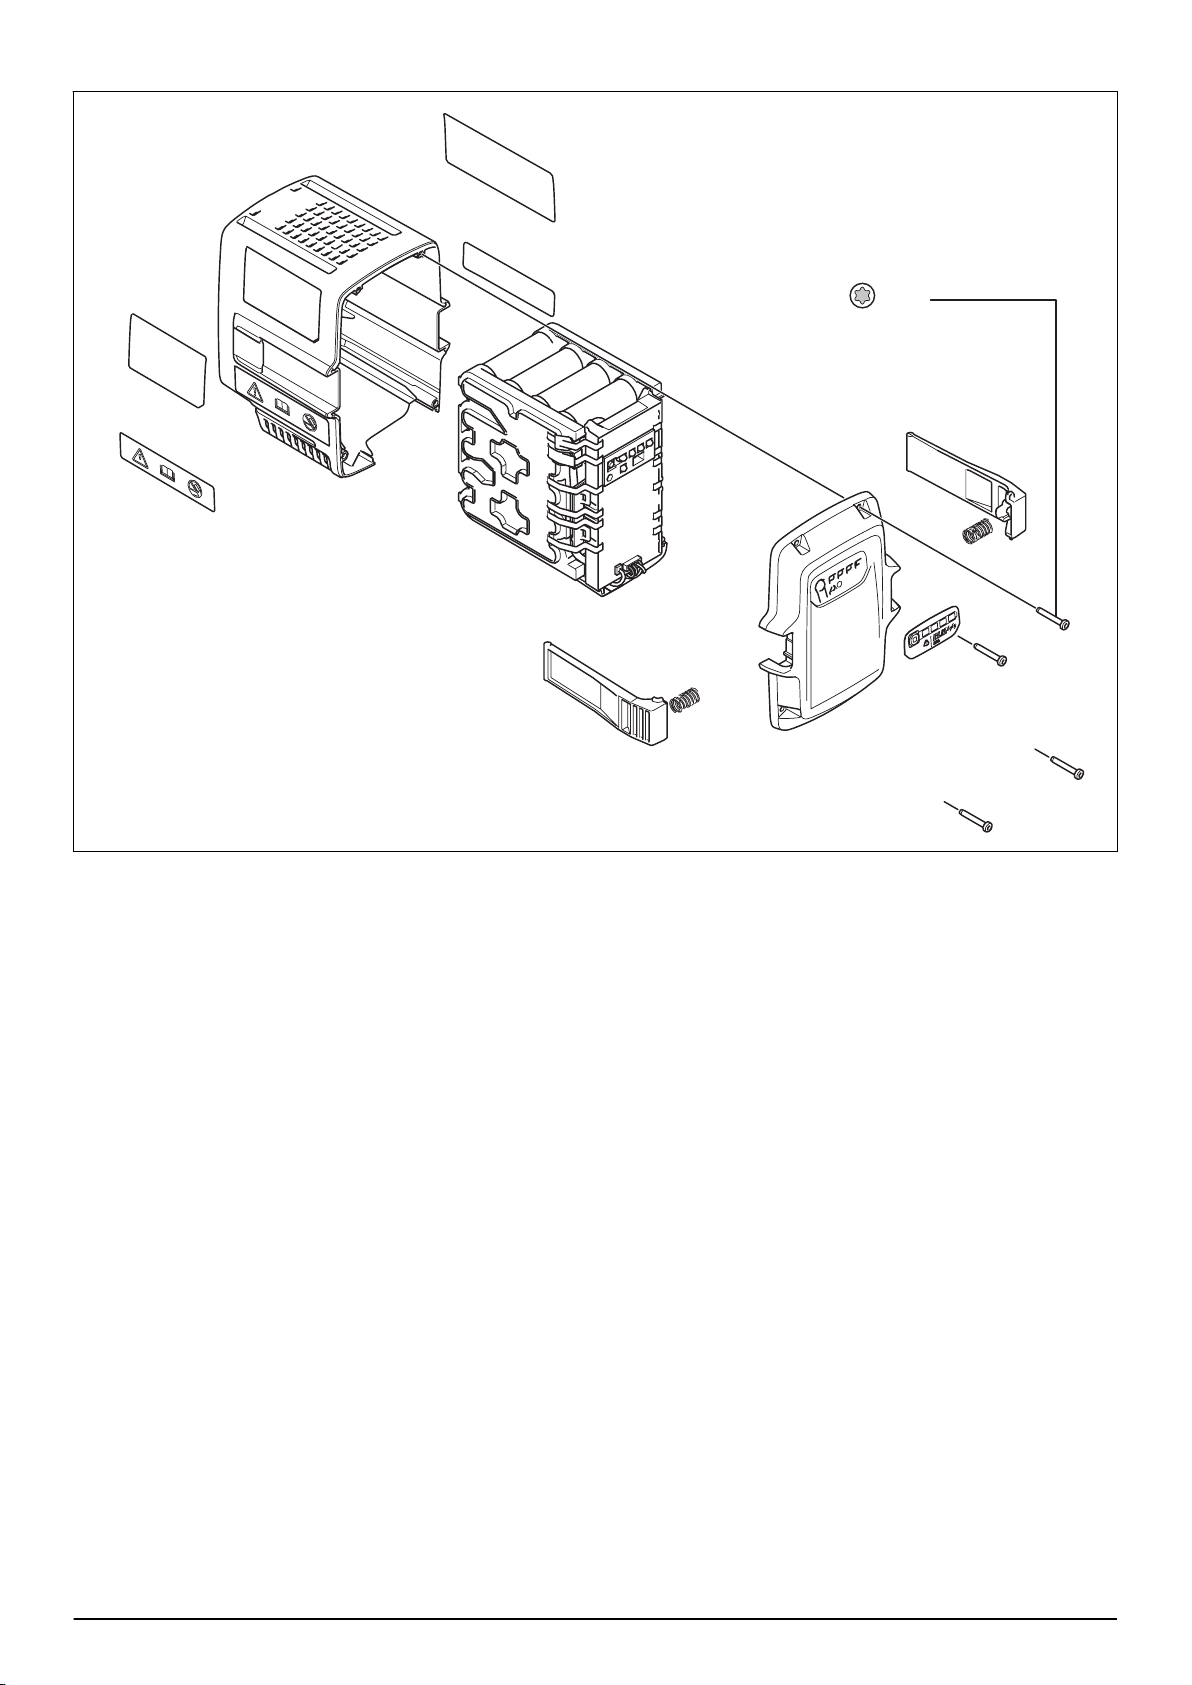
WARNING: Apply a new warning label if a
warning symbol on the product is damaged or
missing.
2.3 Important safety instructions
WARNING: Read all safety warnings and all
instructions. Failure to obey the warnings and
instructions may result in electrical shock, fire
and/or serious injury.
Note: Save all warnings and instructions.
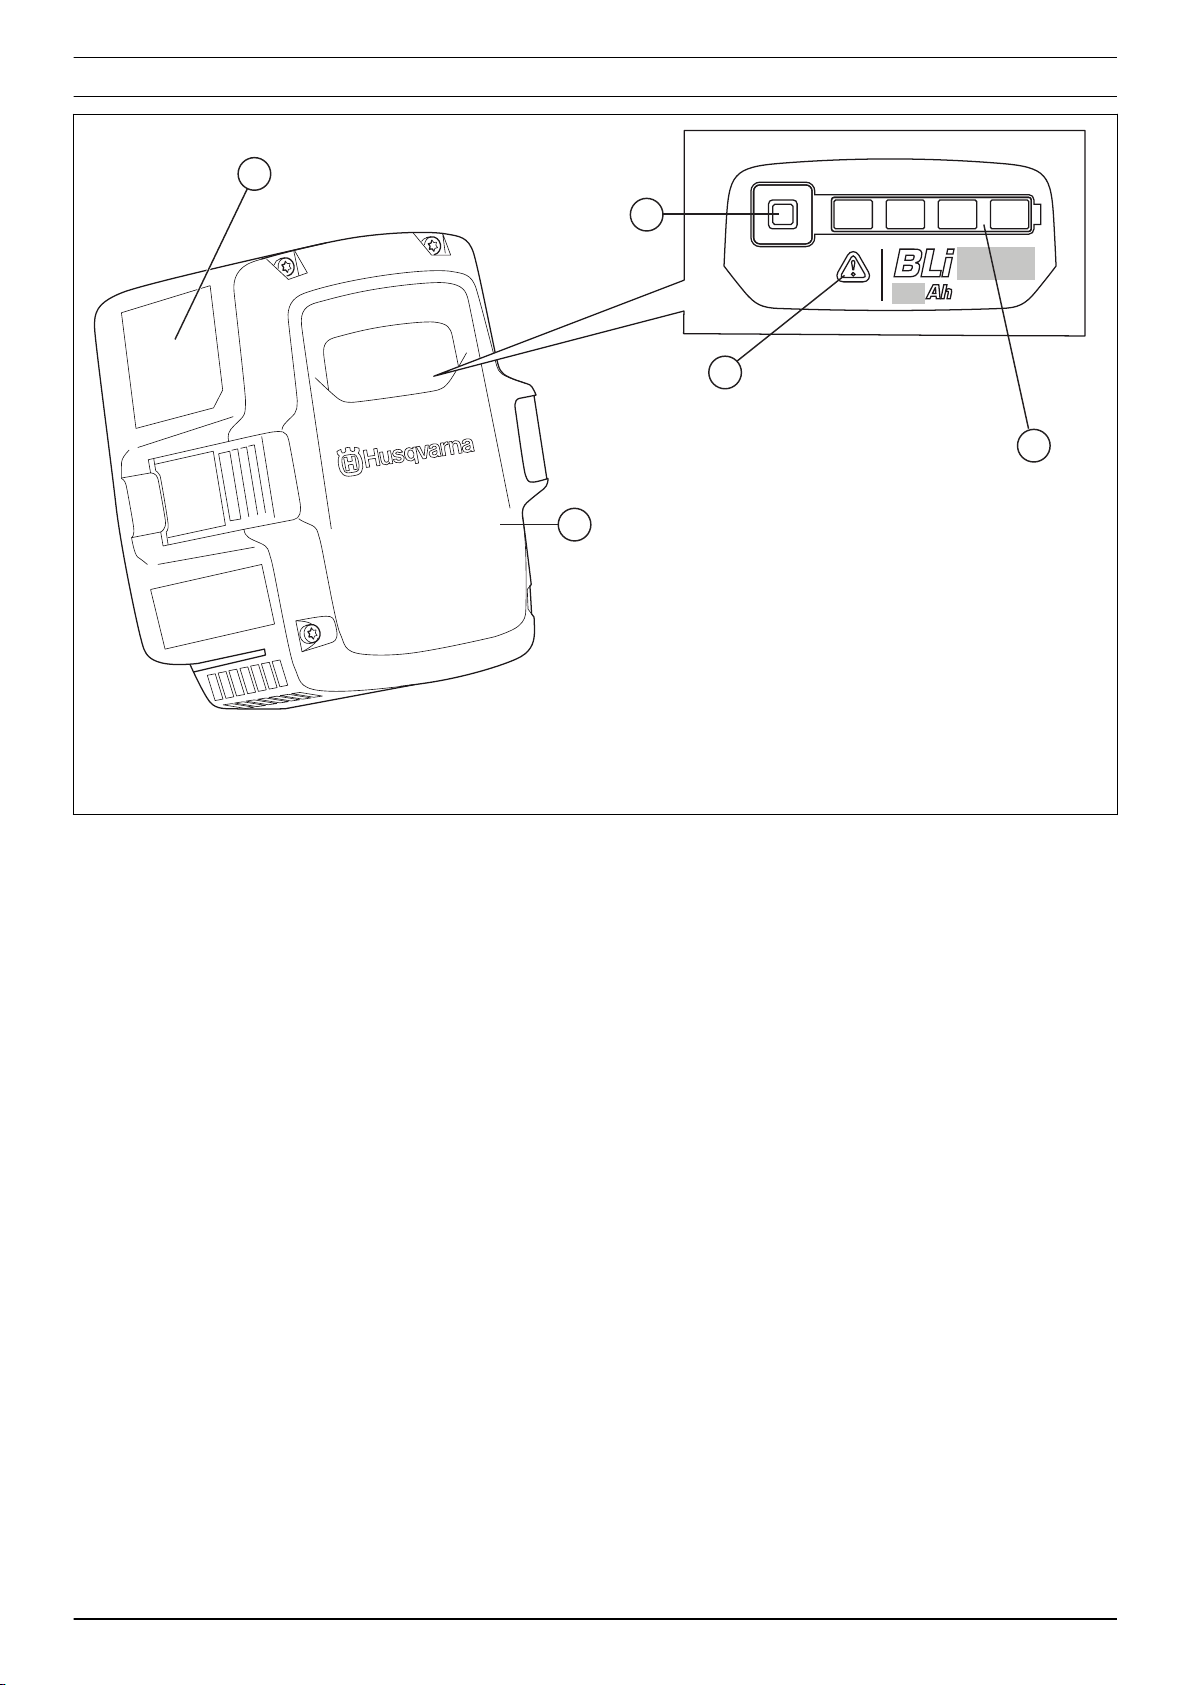
• Use the BLi100, BLi200, BLi200X, BLi300 batteries
as a power supply for the related Husqvarna
products only. To prevent injury, do not use the
battery as a power supply for other devices.
• Keep the battery away from sunlight, heat or open
flame. The battery can cause burns and/or chemical
burns.
• Do not cause mechanical shock to the battery.
• Keep the battery away from children.
• Keep the battery clean and dry.
• Do not keep the battery in the battery charger when
it is fully charged.
• Do not short circuit the battery.
2.4 To prepare for battery repair work
WARNING: The battery cells contain much
energy. Use tools with electrical insulation.
WARNING: Do not touch a battery that have a
leak or if there has been explosions.
1. Make sure that the surface on the workbench
is made from a nonconductive and nonflammable
material.
2. Remove all metal objects from the work area.
3. Remove all metal objects from your hands and
wrists.
4. Put a battery box, a shovel and a heat resistant
glove adjacent to the workbench.
WARNING: Use the shovel and the heat
resistant glove to move the battery to the
battery box, if the battery get hot.
5. Put on protective glasses and rubber gloves.
4 - Safety 1856 - 001 - 14.04.2022

3 Symbols on the product
Be careful and use the product correctly.
This product can cause serious injury or
death to the operator or others.
Read the operator's manual carefully
and make sure that you understand the
instructions before use.
Do not use the product in rain.
The product agrees with the applicable
EC directives.
Recycle the product at an applicable
disposal location for electrical and
electronic equipment.
The product or package of the product is
not domestic waste.
yyyywwxxxx The rating plate shows serial number.
yyyy is the production year, ww is the
production week and xxxx is the se-
quential number.
Note: Other symbols/decals on the product refer to
certification requirements for some commercial areas.
1856 - 001 - 14.04.2022 Symbols on the product - 5

4 To charge the battery
Charge the battery before the first time of operation. A
new battery is charged 30%. Push the battery indicator
button to get information of the state of charge of the
battery.
CAUTION: Only charge the battery when the
ambient temperature is between 5°C (41°F) and
40°C (114°F).
CAUTION: Use the battery only when the
ambient temperature is between -10°C (14°F)
and 40°C (104°F).
Note: The battery will not charge if the battery
temperature is more than 60°C (140°F).
1. Put the battery in the battery charger. When the
charging LED on the battery charger comes on, the
battery is connected correctly to the battery charger.
2. The battery is fully charged when all LEDs on the
LED indicator on the battery are on.
3. Remove the battery from the battery charger.
6 - To charge the battery 1856 - 001 - 14.04.2022

5 Servicing data
5.1 Servicing data BLi300
1 Nm T10
1856 - 001 - 14.04.2022 Servicing data - 7

5.2 Servicing data BLi100, BLi200, BLi200X
1 Nm T10
8 - Servicing data 1856 - 001 - 14.04.2022

6 Servicing tools
6.1 Servicing tools
WARNING: Risk of electric shock. Use tools with electric insulation.
1 2
Pos. Description Used for Order No.
1 Diagnostic Tool Kit Diagnostic examination and
troubleshooting
583 89 71-01
2 Adapter cable for battery prod-
ucts
Diagnostic examination of bat-
tery products
581 19 23-01
6.2 Diagnostic tools
6.2.1 Common service tool
The common service tool (CST) is used with a computer
(not included) for Husqvarna products.
The common service tool transmits data from the
product and battery to the computer, for example
product ID.
6.2.2 To connect the common service tool (CST)
CAUTION: If you install firmware to a new spare
part, make sure that you know the Husqvarna
identification number (HID). The identification
number is found on the spare part.
1. Remove the battery from the product.
2. Connect the adapter cable (A) to the battery (B) and
to the battery slot connector (C) on the product.
B
C
A
D
3. Make sure that the product is in operation mode.
4. Start the common service tool (CST) on the
computer.
5. Connect the cable (D) to the computer.
6. Obey the instructions on the common service tool
(CST) and in the related chapter in this manual.
CAUTION: Do not disconnect the product
until the update is completed.
WARNING: Do not push the power trigger.
The motor can operate when the product is
in servicing mode.
6.2.3 To do troubleshooting of the common service
tool
If there is no signal to the common service tool when it is
connected to the product, do the procedure that follows.
1. Make sure that the connectors on the battery and
on the product are clean and not damaged. Replace
the battery or control unit on the product if there is
damage.
2. Make sure that the cable to the common service tool
is clean and not damaged. Replace the cable if there
is damage.
3. Restart the computer.
4. Install the software again.
1856 - 001 - 14.04.2022 Servicing tools - 9

7 Product overview
1 2 3 4
1
5
4
3
2
1. Battery
2. Type plate
3. Battery indicator button
4. LED indicator for errors
5. LED indicator for the state of charge (SoC)
10 - Product overview 1856 - 001 - 14.04.2022

8 Repair instructions
8.1 Battery terminals
1 2 3 4
1. Battery + (Possitive battery voltage), Red
2. Shut down (SD-signal), White
3. 1-wire (Battery 1-wire communication), Gray
4. Battery - (Negative battery voltage), Black
8.2 To replace the casing BLi300
WARNING: Risk of electric shock. Use tools
with electric insulation.
1. Prepare the work area for battery repair work. Refer
to
To prepare for battery repair work on page 4
.
2. Make a note of the serial number. The serial number
is found on the type plate on the removed casing.
3. Remove the 4 screws.
4. Put the screws at a safe distance from the battery.
5. Remove the top cover.
1856 - 001 - 14.04.2022 Repair instructions - 11

6. Push the clips away from the battery pack.
7. Push out the battery connector from the slot.
8. Remove the battery pack. Hold the battery pack at
the ends of the circuit board to prevent short circuit.
WARNING: Do not touch the circuits on the
circuit board.
9. Remove the clips.
10. Replace all damaged parts.
11. Install the new casing in the opposite sequence.
Note: Push the top cover in the direction of the
casing when you install the screws.
8.3 To replace the casing BLi100, BLi200,
BLi200X
WARNING: Risk of electric shock. Use tools
with electric insulation.
1. Prepare the work area for battery repair work. Refer
to
To prepare for battery repair work on page 4
.
2. Make a note of the serial number. The serial number
is found on the type plate on the removed casing.
12 - Repair instructions 1856 - 001 - 14.04.2022

3. Remove the 4 screws.
4. Put the screws at a safe distance from the battery.
5. Push and hold the clips and remove the top cover
and the clips.
WARNING: The springs in the top cover can
cause a short circuit if the springs fall from
the top cover.
6. Push out the battery connector from the slot.
7. Remove the battery pack. Hold the battery pack at
the ends of the circuit board to prevent short circuit.
WARNING: Do not touch the circuits on the
circuit board.
8. Replace all damaged parts.
9. Install the new casing in the opposite sequence.
Note: Push the top cover in the direction of the
casing when you install the screws.
1856 - 001 - 14.04.2022 Repair instructions - 13

9 Troubleshooting
9.1 Troubleshooting
Symptoms Cause Solution
LED indicator for
errors flashes.
Temporary error. The BMS have detected a temperature, voltage or cur-
rent outside of the optimal limits. The error LED flashes
until the conditions return to normal.
Charge the battery.
LED indicator for
errors have a con-
stant light.
Permanent error. Do a check of the tool and the charger that where used
together with the battery before the error occurred.
14 - Troubleshooting 1856 - 001 - 14.04.2022

10 Technical data
10.1 Technical data
BLi100 BLi200 BLi200X BLi300
Capacity, Ah 2.6 5.2 5.2 9.4
Voltage, V 36 36 36 36
Battery output power, Wh 93.6 180 180 337
Weight, g 950 1396 1396 1970
Dimensions, mm (WxLxH) 98x132x115.6 98x132x115.6 98x132x115.6 98x155x115.6
1856 - 001 - 14.04.2022 Technical data - 15

1143114-26
2022-04-14
Other manuals for BLi100
3
This manual suits for next models
3
Table of contents
Other Husqvarna Batteries Pack manuals