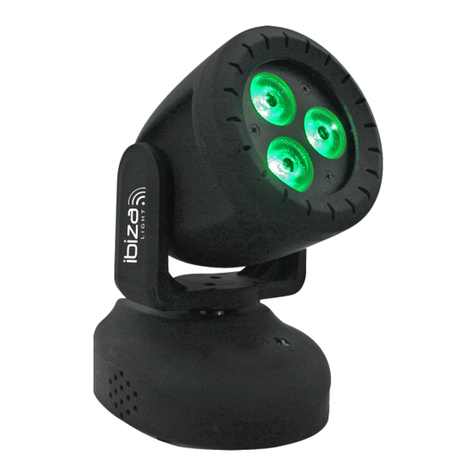
Ibiza MHBEAM40-FX User manual

2-IN-1 BEAM LED MOVING HEAD
with Animation Wash Ring &
DMX Control
MANUAL
Ref.
MHBEAM40-FX
FR - Manuel d'Utilisation - p. 8
DE - Bedienungsanleitung - S. 14
NL - Handleiding - p. 20
RO - Manual de instructiuni - p. 26
SI - Navodila za uporabo - p. 32
ES - Manual de Instrucciones - p. 38

MANUAL - MHBEAM40-FX
2
DUAL 2-IN-1 WASH & BEAM LED MOVING HEAD
WITH DMX CONTROL
INSTRUCTION MANUAL
1. SAFETY PRECAUTIONS
For Your Own Personal Safety, Please Read and Understand This Manual Completely Before You
Attempt To Install Or Operate This Unit!
⬢To reduce the risk of electrical shock or re, do not expose this unit rain or moisture
⬢Do not spill water or other liquids into or on to your unit.
⬢Do not attempt to operate this unit if the power cord has been frayed or broken.
⬢Do not attempt to remove or break o the ground prong from the electrical cord. This prong is used to reduce
the risk of electrical shock and re in case of an internal short.
⬢Disconnect from main power before making any type of connection.
⬢Do not remove the cover under any conditions. There are no user serviceable parts inside.
⬢Never operate this unit when the cover is removed.
⬢Only mount this unit in an area that will allow proper ventilation. Allow about 15cm between this device and
a wall.
⬢Do not attempt to operate this unit, if it is damaged.
⬢This unit is intended for indoor use only, use of this product outdoors voids all warranties.
⬢Always mount this unit in safe and stable way.
⬢Power cords should be routed so that they are not likely to be walked on or pinched by items placed upon or
against them, paying particular attention to cords at plugs, convenience receptacles, and the point where
they exit from the appliance.
⬢Cleaning -The xture should be cleaned only as recommended by the manufacturer.
⬢Heat -This xture should be situated away from heat sources such as radiators, heat registers, stoves, or
other appliances (including ampliers) that produce heat.
⬢The xture should be serviced by qualied service personnel when:
A. Objects have fallen, or liquid has been spilled into the appliance.
B. The appliance has been exposed to rain or water.
C. The appliance does not appear to operate normally or exhibits a marked change in performance.
2. MOUNTING
When installing the unit, the trussing or area of installation must be able to hold 10 times the weight without
any deformation. When installing the unit must be secured with a secondary safety attachment, e.g. and appro-
priate safety cable. Never stand directly below the unit when mounting, removing, or servicing the unit.
Overhead mounting requires extensive experience, including calculating working load limits, installation ma-
terial being used, and periodic safety inspection of all installation material and unit. If you lack these qualica-
tions, do not attempt the installation yourself.
The installation should be checked by a skilled person once a year
The xture is fully operational in three dierent mounting positions: hanging upside-down from a ceiling, set on
a at level surface, or on its side attached to trussing. Be sure this xture is kept at least 0.5m away from any
ammable materials (decoration etc.). Always use and install the supplied safety cable as a safety measure to
prevent accidental damage and/or injury in the event the clamp fails
NOTICE: The suitable environmental temperature for this lighting xture is between -25˚ C to 45˚ C. Do not
place this lighting xture in an environment where the temperatures are under or above the temperatures
stated above. This will allow the xture to run at its best and help prolong the xture life.
Screw one clamp via a M12 screw and nut to the included bracket. Attach the bracket using the included
screws to the bottom of the xture. Attach the eyehole screw to the bottom of the base and pull the safety-
cable through the screw and over the trussing system or a safe xation spot. Insert the end in the carabine and
tighten the safety screw.
EN

MANUAL - MHBEAM40-FX
3
3. DMX SET UP
Notice: Be sure to follow gures two and three when making your own cables. Do not use the ground lug on the
XLR connector. Do not connect the cable’s shield conductor to the ground lug or allow the shield conductor to
come in contact with the XLR’s outer casing. Grounding the shield could cause a short circuit and erratic beha-
vior.
Special Note: Line Termination. When
longer cable runs are used, you may
need to use a terminator on the last unit
to avoid erratic behavior. A terminator
is a 110-120 ohm 1/4W resistor which
is connected between pins 2 and 3 of a
male XLR connector (DATA + and DATA
-). This unit is inserted in the female XLR
connector of the last unit in your daisy
chain to terminate the line. Using a cable terminator will decrease the possibilities of erratic behavior.
4. MENU:
4.1 DISPLAY:
LED Display with four buttons: MENU, UP, DOWN, ENTER
4.2 MENU CHART:

MANUAL - MHBEAM40-FX
4
DMX Address Mode
Setting of the DMX address: Press MENU to select Addr, press Enter to start setting.
Use the UP or DOWN keys to set the desired Address. Then press Enter to conrm.
DMX Channel Mode
Selection of the channel mode: Press MENU to select Chnd. Press Enter to start setting
Select the channel mode via the UP or DOWN keys: successively 11CH and 32CH. Press
Enter again to conrm your selection.
11CH: 13Channel mode
32CH: 21Channel mode
Master/Slave Mode
Setting the Master-slave mode: Press MENU to select SLnd. Then press Enter to start
setting. MAST, SL1, SL2 or d512 will be displayed. Press UP or DOWN to choose Master
or slave, then press Enter again to conrm your selection.
MAST: Choose the device as master
SL1: Choose the device as slave
Show modes 1-4 (Factory programs). Show mode can run with sound active mode
Press MENU to select ShNd. Press Enter to start setting. Sh X will be displayed, X representing a
number between 1-4. Select a show via the UP and DOWN buttons. Press ENTER to conrm your
choice. Keep the MENU button pressed for at least 3 seconds to activate the show.
Auto–Autorunningeect
1. Press the MENU button until “Auto” is displayed, press ENTER.
2. The Display will show either “Au 1” - “Au 4”. Press the UP or DOWN buttons to nd your desired
show, and “SP 0” - “SP 9” to choose the eect speed.
Sound Sensitivity
Adjustment of sound sensitivity: Press MENU, select SEns and press Enter to start set-
ting. Use the UP and Down keys to adjust the sound sensitivity from 0-100. Press Enter
to conrm your choice.
Led
Withthisfunctionthedisplaybacklightwillturnoafter2minutes.
1. Press the MENU button until “Led” is displayed, press ENTER.
2. The display will show either “ON” or “OFF”. Press the UP or DOWN buttons to select “ON” to keep the LED
display on at all times, or “OFF” to switch to have the LED display switch o after 2 minutes.
3. Press ENTER and then press and hold the MENU button for at least three seconds to conrm.
Display Reverse by 180°
This option allows the user to reverse the direction of the display panel. Press MENU,
select dISP. press Enter to start the setting. Use the UP and Down keys to select dSIP
and it will reverse directions. Press Enter to conrm your choice.
Pan Reverse
This option is set to reverse the Pan direction. Press MENU, select Pan, press Enter to
start setting, UP and Down to select no or Yes, then press Enter to conrm your choose
Tilt Reverse
This option allows the user to reverse the Tilt 1 direction: Press MENU, select tiLt, press
Enter to start the setting. Use the UP and Down keys to select no or Yes, then press
Enter to conrm your choice.
Ver – Check the device version
AutO
led
ver
11ch
32ch

MANUAL - MHBEAM40-FX
5
Reset
Press MENU, select rSEt, press Enter key and wait for 1-3seconds. The light will be reset
5. DMX CHANNEL
DMX modes
5.1 11 Channel Mode
11CH Function Value
1Pan 000-255 Pan 0° ~ 540°
2Tilt 000-255 Tilt 0° ~ 210°
3 Pan & Tilt Speed 000-255 P/T Speed from fast to slow
4 Dimmer 000-255 Dimmer 0 ~ 100%
5 Strobe 000-008 No Function
009-255 Strobe slow to fast
6Red 000-255 Red Dimmer 0 ~ 100%
7Green 000-255 Green Dimmer 0 ~ 100%
8Blue 000-255 Blue Dimmer 0 ~ 100%
9White 000-255 White Dimmer 0 ~ 100%
10 Halo Color Chase 000-127 Color Macro
128-255 Color Chase
11 Function
000-199 No Function
200-209 Reset
210-239 No Function
240-255 Sound Action
5.2 32 Channel Mode
32CH Function Value
1Pan 000-255 Pan 0° ~ 540°
2 Pan Fine 000-255
3Tilt 000-255 Tilt 0° ~ 210°
4 Tilt Fine 000-255
5 Pan & Tilt Speed 000-255 P/T Speed from fast to slow
6Dimmer 000-255 Dimmer 0 ~ 100%
7Strobe 000-008 No Function
009-255 Strobe slow to fast
8Red 000-255 Red Dimmer 0 ~ 100%
9 Green 000-255 Green Dimmer 0 ~ 100%
10 Blue 000-255 Blue Dimmer 0 ~ 100%
11 White 000-255 White Dimmer 0 ~ 100%
12 Halo Part 1 Red 000-255 Dimmer 0 ~ 100%
13 Halo Part 1 Green 000-255 Dimmer 0 ~ 100%
14 Halo Part 1 Blue 000-255 Dimmer 0 ~ 100%
15 Halo Part 2 Red 000-255 Dimmer 0 ~ 100%
16 Halo Part 2 Green 000-255 Dimmer 0 ~ 100%
17 Halo Part 2 Blue 000-255 Dimmer 0 ~ 100%
18 Halo Part 3 Red 000-255 Dimmer 0 ~ 100%
19 Halo Part 3 Green 000-255 Dimmer 0 ~ 100%
20 Halo Part 3 Blue 000-255 Dimmer 0 ~ 100%
21 Halo Part 4 Red 000-255 Dimmer 0 ~ 100%

MANUAL - MHBEAM40-FX
6
32CH Function Value
22 Halo Part 4 Green 000-255 Dimmer 0 ~ 100%
23 Halo Part 4 Blue 000-255 Dimmer 0 ~ 100%
24 Halo Part 5 Red 000-255 Dimmer 0 ~ 100%
25 Halo Part 5 Green 000-255 Dimmer 0 ~ 100%
26 Halo Part 5 Blue 000-255 Dimmer 0 ~ 100%
27 Halo Part 6 Red 000-255 Dimmer 0 ~ 100%
28 Halo Part 6 Green 000-255 Dimmer 0 ~ 100%
29 Halo Part 6 Blue 000-255 Dimmer 0 ~ 100%
30 Halo Color Chase 000-127 Color Macro
128-255 Color chase
31 Color Chase Speed 000-255 Color chase speed slow -> fast
32 Function
000-199 No Function
200-209 Reset
210-239 No Function
240-255 Sound controlled
5.3 Color Macro
Color Macro
000 - 010 no function
011 - 044 R
045 - 079 G
080 - 114 B
115 - 149 RG
150 - 184 RB
185 - 219 GB
220 - 255 RGB
6. FUSE REPLACEMENT
Locate and remove the unit’s power cord. Once the cord has been removed located the fuse holder inside the
power socket. Insert a at-head screw driver into the power socket and gently pry out the fuse holder. Remove
the bad fuse and replace with a new one. The fuse holder has a built-in socket for a spare fuse. Be sure not to
confuse the spare fuse with the active fuse.
Warning: If after replacing the fuse you continue to blow fuses, STOP using the unit. Contact customer support
for further instructions. Continuing to use the unit may cause serious damage.
7. CLEANING
Fixture Cleaning: Due to fog residue, smoke, and dust cleaning the internal and external lenses should be car-
ried out periodically to optimize light output.
1. Use normal glass cleaner and a soft cloth to wipe down the outer case.
2. Use a brush to clean the cooling vents and fan grill.
3. Clean the external optics with a glass cleaner and a soft cloth every 20 days.
4. Clean the internal optics with a glass cleaner and a soft cloth every 30-60 days.
5. Always be sure to dry all parts completely before plugging the unit back in.
8. TROUBLE SHOOTING
Listed below is a problem that you may encounter, with a solution.
No light output from the unit;
1. Be sure the fuse has not blown. The fuse is located on the rear panel inside the power socket. See Fuse Re-
placement.
2. Be sure the fuse holder is completely and properly seated.

MANUAL - MHBEAM40-FX
7
Auto Sensing Voltage: This xture contains an automatic voltage switch, which will auto sense the voltage
when it is plugged into a power source.
9. SPECIFICATIONS:
Voltage: ....................................................................................................................................... AC100V-240V, 50/60 Hz
Total power:................................................................................................................................................................ 65W
Light source: ......................................................................................... 40W RGBW 4in1 LED, 12pcs 5050 RGB 3in1 LED
Control mode: ...........................................................................................Auto run, sound activated, DMX, master-slave
DMX Channel: .................................................................................................................................................11CH/32CH
Light eect: ................................................................Wash light, color jumping, color gradual change, strobe, dimming
Optics system: .......................................................................................................................High eciency 8°optic lens
Movement: ................................................................................................................Pan 540° rotation, Tilt 210° rotation
Dimming: .........................................................................................................................................................0% - 100%
Strobe: ...........................................................................................................................................1-20 times per second
Display: .......................................................................................................................................................... LED Display
Cooling system ................................................................................................................................................. Fan cooled
Dimensions: ........................................................................................................................................160x 145x 250mm
Weight: .................................................................................................................................................................. 2.61 kg
Please Note: Specications and improvements in the design of this unit and this manual are subject to change
without any prior written notice.
Electric products must not be put into household waste. Please bring them to a recycling
centre. Ask your local authorities or your dealer about the way to proceed.

MANUEL D'INSTRUCTION - MHBEAM40-FX
8
LYRE BEAM 2-EN-1 A LED 40W
AVEC ANNEAU D’ANIMATION WASH & CONTRÔLE DMX
MANUEL D’INSTRUCTION
1. CONSIGNES DE SÉCURITÉ
Pour votre propre sécurité, veuillez lire et comprendre ce manuel complètement avant d’essayer
d’installer ou d’utiliser cet appareil!
⬢Pour réduire le risque de choc électrique ou d’incendie, tenir l’appareil à l’abri de la pluie et de l’humidité
⬢Ne renversez pas d’eau ou d’autres liquides dans ou sur votre appareil.
⬢Ne pas utiliser cet appareil si le cordon d’alimentation est endommagé ou brisé.
⬢Ne pas enlever ou casser la broche de mise à la terre du cordon électrique. Cette broche sert à réduire le
risque de choc électrique et d’incendie en cas de court-circuit interne.
⬢Débranchez l’alimentation principale avant d’eectuer tout type de connexion.
⬢Ne jamais retirer le couvercle. Il n’y a pas de pièces réparables par l’utilisateur à l’intérieur.
⬢N’utilisez jamais cet appareil lorsque le couvercle est retiré.
⬢Montez cet appareil uniquement dans un endroit permettant une bonne ventilation. Laissez environ 15 cm
entre cet appareil et un mur.
⬢N’essayez pas de faire fonctionner cet appareil s’il est endommagé.
⬢Cet appareil est conçu pour une utilisation en intérieur uniquement. L’utilisation de ce produit à l’extérieur
annule toutes les garanties.
⬢Installez toujours cet appareil de manière sûre et stable.
⬢Les cordons d’alimentation doivent être acheminés de telle sorte qu’ils ne puissent pas être piétinés ou pin-
cés par des objets placés sur ou contre eux, en accordant une attention particulière aux prises de courant et
au point de sortie de l’appareil.
⬢Nettoyage -L’appareil doit être nettoyé uniquement selon les recommandations du fabricant.
⬢Chaleur - Cet appareil doit être placé loin des sources de chaleur telles que les radiateurs, les poêles ou
autres appareils (y compris les amplicateurs) qui produisent de la chaleur.
⬢L’appareil doit être réparé par du personnel qualié dans les cas suivants:
A. Des objets sont tombés ou du liquide a été renversé dans l’appareil.
B. L’appareil a été exposé à la pluie ou à l’eau.
C. L’appareil ne semble pas fonctionner normalement ou présente un changement marqué de performance.
2. MONTAGE
Lors de l’installation de l’appareil, la structure ou la zone d’installation doit pouvoir supporter 10 fois le poids
sans aucune déformation. Lors de l’installation, l’appareil doit être sécurisé avec un accessoire de sécurité sup-
plémentaire, par exemple une élingue de sécurité appropriée. Ne vous tenez jamais directement sous l’appareil
lors du montage, de la dépose ou de l’entretien.
Le montage au plafond nécessite une certaine expérience, notamment en matière de calcul des limites des
charges, du matériel d’installation utilisé et de l’inspection de sécurité périodique de tout le matériel d’installa-
tion ainsi que de l’appareil. Si vous n’êtes pas qualié, ne tentez pas l’installation vous-même.
L’installation doit être vériée par une personne qualiée une fois par an
Le luminaire est entièrement opérationnel dans trois positions de montage diérentes: Suspendu à l’envers à
partir d’un plafond, posé sur une surface plane et horizontale, ou sur le côté xé à la structure. Assurez-vous
que ce luminaire est éloigné d’au moins 0,5 m de tout matériau inammable (décoration, etc.). Toujours utiliser
et installer le câble de sécurité fourni comme une sécurité supplémentaire pour éviter des dommages acciden-
tels et / ou des blessures en cas de défaillance de l’étrier.
REMARQUE: La température ambiante appropriée pour cet appareil se situe entre -25˚C et 45˚C. N’exposez pas
cet appareil à des températures inférieures ou supérieures aux températures indiquées ci-dessus. Cela permet-
tra d’optimiser les performances et l’appareil et prolongera sa durée de vie.
Vissez une attache à l’aide d’une vis M12 et d’un écrou sur le support fourni. Fixez le support à l’aide des vis
incluses au bas de l’appareil. Fixez la vis à œillet au fond de la base et passez le câble de sécurité à travers
l’œillet et attachez-le sur la structure ou un point de xation sûr. Insérez l’extrémité dans le mousqueton et
serrez la vis de sécurité.
FR
MANUEL D'INSTRUCTION - MHBEAM40-FX
9
3.CONFIGURATION DMX
Remarque: Reportez-vous aux g. 2 et 3 lorsque vous confectionnez vos propres câbles. N’utilisez pas la cosse
de mise à la terre sur le connecteur XLR. Ne connectez pas le blindage du câble à la cosse de mise à la terre et
ne laissez pas le blindage entrer en contact avec le boîtier extérieur du XLR. La mise à la terre du blindage peut
entraîner un court-circuit et un comportement erratique.
Note spéciale: Fin de ligne. Lorsque des câbles plus longs sont utili-
sés, vous devez utiliser une résistance de n de ligne sur le dernier
appareil pour éviter un comportement erratique. Une terminaison
est une résistance 110-120 ohms 1 / 4W qui est connectée entre les
broches 2 et 3 d’un connecteur XLR mâle (DATA et DATA -). Cette
résistance de n de ligne est insérée dans le connecteur XLR femelle
du dernier appareil de votre chaîne pour terminer la ligne. L’utilisation d’une résistance de n de ligne réduit les
possibilités de comportement erratique.
4. MENU:
4.1 AFFICHEUR:
L’acheur comporte 4 boutons: MENU, UP, DOWN et
ENTER
4.2 CHARTE DU MENU
Pour accéder au menu, tapez sur n’importe quel bouton.

MANUEL D'INSTRUCTION - MHBEAM40-FX
10
Mode d’adresse DMX
Appuyez sur MENU pour sélectionner Addr, appuyez sur Enter pour commencer le
réglage. Utilisez les touches UP ou DOWN pour dénir l’adresse souhaitée. Puis ap-
puyez sur ENTER pour conrmer.
Mode de canal DMX
Appuyez sur MENU pour sélectionner Chnd. Appuyez sur Enter pour démarrer le
réglage. Sélectionnez le mode de canal via les touches UP ou DOWN: successivement
11CH et 32CH. Appuyez encore une fois sur ENTER pour conrmer votre sélection.
11CH: Mode 13 canaux
32CH: Mode 21 canaux
Mode maître / esclave
Appuyez sur MENU pour sélectionner SLnd. puis appuyez sur Enter pour commencer
le réglage. MAST, SL1, SL2 ou d512 sera aché. Appuyez sur UP ou DOWN pour choi-
sir Maître ou esclave, puis appuyez encore une fois sur Enter pour conrmer votre
sélection.
MAST: Choisissez l’appareil en tant que maître
SL1: Choisissez l’appareil comme esclave
Programmes automatiques 1-4 (programmés d’usine). Les programmes au-
tomatiques peuvent fonctionner avec le mode contrôlé par la musique
Appuyez sur MENU jusqu’à ce que «Shnd» s’ache et appuyez sur ENTER. «Sh X»
s’achera. «X» représente un chire entre 1 et 4. Sélectionnez le programme désiré
avec les touches UP et DOWN. Conrmez avec ENTER. Ensuite, maintenez la touche
MENU enfoncée pendant au moins 3 secondes pour activer le programme.
Auto – Fonctionnement automatique
Appuyez sur la touche MENU jusqu’à ce que «Auto» s’ache. Appuyez sur ENTER.
L’acheur indique «Au 1» jusqu’à «AU 4». Sélectionnez le programme souhaité avec les touches UP & DOWN.
Ensuite réglez la vitesse souhaitée entre «SP 0» et «SP 9».
Sensibilité au son
Appuyez sur MENU, sélectionnez SEns et appuyez Enter pour commencer le réglage.
Utilisez les touches UP et Down pour ajuster la sensibilité sonore de 0-100. Appuyez
sur Enter pour conrmer votre choix.
Led – Extinction du rétro-éclairage de l’acheur au bout de 2 minutes
Appuyez sur MENU jusqu’à ce que «Led» s’ache et appuyez sur ENTER. Soit «ON», soit «OFF»
s’achent. Faites votre choix avec les touches UP et DOWN. Si ON est sélectionné, l’acheur reste toujours
éclairé. Si OFF est sélectionné, l’acheur s’éteint au bout de 2 minutes.
Appuyez sur ENTER et ensuite maintenez la touche MENU appuyée pendant au moins 3 secondes pour conr-
mer.
Inversion de l’acheur
Appuyez sur MENU, sélectionnez dISP. Appuyez sur Enter pour commencer le ré-
glage. Utilisez la touche UP pour sélectionner dSIP et inverser l’acheur ou dISP
pour revenir à l’orientation normale. Appuyez sur Enter pour conrmer votre choix.
Pan Reverse
Appuyez sur MENU, sélectionnez PAN et appuyez sur Enter pour commencer le ré-
glage. Appuyez sur UP ou DOWN pour sélectionner no ou Yes, puis appuyez su Entrer
pour conrmer votre choix
11ch
32ch
AutO
led

MANUEL D'INSTRUCTION - MHBEAM40-FX
11
5. CANAUX DMX
Modes DMX
5.1 Mode 11 Canaux
11CH Fonction Valeur
1Pan 000-255 Pan 0° ~ 540°
2Tilt 000-255 Tilt 0° ~ 210°
3 Vitesse Pan/Tilt 000-255 Vitesse Pan/Tilt rapide - lent
4 Dimmer 000-255 Dimmer 0 ~ 100%
5 Stroboscope 000-008 Pas de fonction
009-255 Strobo lent - rapide
6Rouge 000-255 Dimmer rouge 0 ~ 100%
7 Vert 000-255 Dimmer vert 0 ~ 100%
8Bleu 000-255 Dimmer bleu 0 ~ 100%
9 Blanc 000-255 Dimmer blanc 0 ~ 100%
10 Eet de halo 000-127 Couleur Macro
128-255 Couleur Chase
11 Fonction
000-199 Pas de fonction
200-209 Reset
210-239 Pas de fonction
240-255 Contrôlé par le son
5.2 Mode 32 Canaux
32CH Fonction Valeur
1Pan 000-255 Pan 0° ~ 540°
2 Pan Fin 000-255
3Tilt 000-255 Tilt 0° ~ 210°
4 Tilt Fin 000-255
5 Vitesse Pan/Tilt 000-255 Vitesse Pan/Tilt rapide - lent
6Dimmer 000-255 Dimmer 0 ~ 100%
7Stroboscope 000-008 Pas de Fonction
009-255 Strobscope lent -> rapide
8 Rouge 000-255 Dimmer rouge 0 ~ 100%
9Vert 000-255 Dimmer vert 0 ~ 100%
10 Bleu 000-255 Dimmer bleu 0 ~ 100%
11 Blanc 000-255 Dimmer blanc 0 ~ 100%
12 Halo Partie 1 Rouge 000-255 Dimmer 0 – 100%
13 Halo Partie 1 Vert 000-255 Dimmer 0 – 100%
14 Halo Partie 1 Bleu 000-255 Dimmer 0 – 100%
ver
Inversion Tilt
Appuyez sur MENU, sélectionnez tiLt, appuyez sur Enter pour commencer le réglage.
Utilisez les touches UP et DOWN pour sélectionner no ou Yes, puis appuyez sur Enter
pour conrmer votre choix.
Ache la version de l’appareil
RESET
Appuyez sur MENU, sélectionnez rSEt, appuyez sur Enter et attendez 1-3 secondes. L’appareil se
réinitialise.

MANUEL D'INSTRUCTION - MHBEAM40-FX
12
32CH Fonction Valeur
15 Halo Partie 2 Rouge 000-255 Dimmer 0 – 100%
16 Halo Partie 2 Vert 000-255 Dimmer 0 – 100%
17 Halo Partie 2 Bleu 000-255 Dimmer 0 – 100%
18 Halo Partie 3 Rouge 000-255 Dimmer 0 – 100%
19 Halo Partie 3 Vert 000-255 Dimmer 0 – 100%
20 Halo Partie 3 Bleu 000-255 Dimmer 0 – 100%
21 Halo Partie 4 Rouge 000-255 Dimmer 0 – 100%
22 Halo Partie 4 Vert 000-255 Dimmer 0 – 100%
23 Halo Partie 4 Bleu 000-255 Dimmer 0 – 100%
24 Halo Partie 5 Rouge 000-255 Dimmer 0 – 100%
25 Halo Partie 5 Vert 000-255 Dimmer 0 – 100%
26 Halo Partie 5 Bleu 000-255 Dimmer 0 – 100%
27 Halo Partie 6 Rouge 000-255 Dimmer 0 – 100%
28 Halo Partie 6 Vert 000-255 Dimmer 0 – 100%
29 Halo Partie 6 Bleu 000-255 Dimmer 0 – 100%
30 Halo Color Chase 000-127 Couleur Macro
128-255 Color chase
31 Vitesse Color Chase 000-255 Vitesse lent - rapide
32 Fonction
000-199 Pas de fonction
200-209 Reset
210-239 Pas de fonction
240-255 Contrôlé par le son
5.3 MACRO COULEUR
Color Macro
000 – 010 Pas de fonction
011 - 044 R
045 - 079 G
080 - 114 B
115 - 149 RG
150 - 184 RB
185 - 219 GB
220 - 255 RGB
6. REMPLACEMENT DE FUSIBLE
Débranchez le cordon d’alimentation de l’appareil. Une fois le cordon retiré, placez le porte-fusible à l’intérieur
de la prise de courant. Insérez un tournevis à tête plate dans la prise de courant et soulevez doucement le
porte-fusible. Retirez le mauvais fusible et remplacez-le par un nouveau. Le porte-fusible a un logement intégré
pour un fusible de rechange. Assurez-vous de ne pas confondre le fusible de rechange avec le fusible actif.
Attention: Si après avoir remplacé le fusible, vous continuez à faire sauter les fusibles, ARRÊTEZ d’utiliser l’uni-
té. Contactez le service client pour obtenir des instructions supplémentaires. Continuer à utiliser l’appareil peut
causer de graves dommages.
7. NETTOYAGE
Nettoyage de l’appareil: En raison des résidus de fumée et de poussière, il convient de nettoyer régulièrement
les lentilles internes et externes pour optimiser la puissance lumineuse.
1. Essuyez le boîtier externe avec un nettoyant de vitre classique et un chion doux.
2. Nettoyez les orices de ventilation et le ventilateur avec une brosse.
3. Nettoyez les optiques externes avec du nettoyant à vitres et un chion doux toutes les 3 semaines.
4. Nettoyez les optiques internes avec du nettoyant à vitres et un chion doux tous les 30-60 jours.
5. Séchez toutes les pièces complètement avant de brancher l’appareil sur le secteur.

MANUEL D'INSTRUCTION - MHBEAM40-FX
13
8. DIAGNOSTIC DE DÉFAILLANCE
Pas de lumière
1. Assurez-vous que le fusible n’a pas sauté. Le fusible est situé sur le panneau arrière à l’intérieur de la prise
de courant. Voir Remplacement des fusibles.
2. Assurez-vous que le porte-fusible est complètement et correctement installé.
Détection automatique de la tension: Cet appareil contient un commutateur de tension automatique qui dé-
tecte automatiquement la tension lorsqu’il est branché sur une source d’alimentation.
9. CARACTÉRISTIQUES TECHNIQUES:
Alimentation: .............................................................................................................................. AC100V-240V, 50/60 Hz
Puissance totale: ........................................................................................................................................................65W
Source lumineuse: ................................................................... 1 LED de 40W RGBW 4en1, 12 LED SMD 5050 RVB 3en1
Mode de fonctionnement: .............................................................. Automatique, activé par le son, DMX, maître-esclave
Canal DMX: ................................................................................................................................................... 11CH / 32CH
Eet de lumière: ............................Eet Wash, saut de couleur, changement graduel de couleur, stroboscope, dimmer
Système optique: ...............................................................................................Lentille optique à haut rendement de 8°
Mouvement: .........................................................................................................Rotation Pan 540°, rotation tilt de 210°
Dimming: .........................................................................................................................................................0% - 100%
Stroboscope: ...................................................................................................................................1-20 fois par seconde
Achage:.................................................................................................................................................. Acheur à LED
Refroidissement .........................................................................................................................................par ventilateur
Dimensions: ......................................................................................................................................160 x 145 x 250mm
Poids: .................................................................................................................................................................... 2.61 kg
Note: Les caractéristiques techniques de cet appareil peuvent être modiées sans préavis.
NOTE IMPORTANTE : Les produits électriques ne doivent pas être mis au rebut avec les ordures ménagères. Veuillez
les faire recycler à un point de collecte spécialisé. Consultez les autorités locales ou votre revendeur sur la façon de
les recycler.

BEDIENUNGSANLEITUNG - MHBEAM40-FX
14
2-IN-1 BEAM LED MOVING HEAD 40W
MIT WASH ANIMATIONSRING & DMX-STEUERUNG
BEDIENUNGSANLEITUNG
1. SICHERHEITSVORKEHRUNGEN
Zu Ihrer eigenen Sicherheit, bitte lesen Sie dieses Handbuch vollständig durch, bevor Sie dieses
Gerät installieren oder betreiben!
⬢Setzen Sie dieses Gerät weder Regen noch Feuchtigkeit aus, um die Gefahr eines elektrischen Schlags oder
Brandes zu verringern
⬢Verschütten Sie kein Wasser oder andere Flüssigkeiten in oder auf Ihr Gerät.
⬢Versuchen Sie nicht, das Gerät zu betreiben, wenn das Netzkabel beschädigt ist.
⬢Versuchen Sie nicht, den Erdungsstift vom Stromkabel zu entfernen oder abzubrechen. Dieser Stift verhindert
bei einem internen Kurzschluss Stromschlag und Feuer.
⬢Gerät vom Stromnetz trennen, bevor Sie Anschlüsse jeglicher Art vornehmen.
⬢Entfernen Sie die Abdeckung unter keinen Umständen. Es gibt keine Teile, die vom Benutzer gewartet werden
können.
⬢Betreiben Sie dieses Gerät niemals, wenn die Abdeckung entfernt ist.
⬢Montieren Sie dieses Gerät nur in Bereichen mit ausreichender Belüftung. Lassen Sie ca. 15 cm zwischen
dem Gerät und der Wand.
⬢Nicht das Gerät bedienen, wenn es beschädigt ist.
⬢Dieses Gerät ist nur für den Gebrauch in Innenräumen vorgesehen. Die Verwendung dieses Produkts im
Freien führt zum Erlöschen aller Gewährleistungen.
⬢Die Installation muss sicher und stabil sein.
⬢Netzkabel sollten so verlegt werden, dass sie nicht durch Gegenstände, die auf oder gegen sie gelegt wer-
den, betreten oder eingeklemmt werden können. Achten Sie besonders auf Kabel an Steckern, Steckdosen
und an der Stelle, an der sie aus dem Gerät austreten.
⬢Reinigung - Das Gerät sollte nur gemäß den Empfehlungen des Herstellers gereinigt werden.
⬢Hitze - Diese Leuchte sollte nicht in der Nähe von Wärmequellen wie Heizkörpern, Öfen oder anderen Geräten
(einschließlich Verstärkern) stehen, die Wärme erzeugen.
⬢Das Gerät sollte von qualiziertem Servicepersonal gewartet werden, wenn:
A. Gegenstände oder Flüssigkeiten ist ins Gerät eingedrungen sind.
B. Das Gerät Regen oder Wasser ausgesetzt wurde.
C. Das Gerät nicht normal zu funktionieren scheint oder eine deutliche Leistungsänderung aufweist.
2. MONTAGE
Bei der Installation muss die Traversen oder der Installationsbereich das 10-fache des Gewichts ohne Verfor-
mung halten können. Bei der Installation muss das Gerät mit einer zweiten Sicherheitsvorrichtung gesichert
werden, z. B. mit einem geeigneten Sicherheitskabel. Stellen Sie sich niemals direkt unter dem Gerät auf, wenn
Sie das Gerät montieren, entfernen oder warten.
Die Deckenmontage erfordert einschlägige Erfahrung, einschließlich der Berechnung der Belastungsgrenzwerte,
der Verwendung von Installationsmaterial und der regelmäßigen Sicherheitsinspektion aller Installationsma-
terialien und Geräte. Wenn Sie diese Qualikationen nicht besitzen, versuchen Sie nicht die Installation selbst
vorzunehmen.
Die Installation sollte einmal jährlich von einem Fachmann überprüft werden
Die Leuchte ist in drei verschiedenen Montagepositionen voll funktionsfähig: hängend von der Decke, auf einer
ebenen Fläche oder seitlich an einer Traverse befestigt. Vergewissern Sie sich, dass diese Leuchte mindestens
0,5 m von brennbaren Materialien entfernt ist (Dekoration usw.). Verwenden und installieren Sie immer das
mitgelieferte Sicherheitskabel als Sicherheitsmaßnahme, um versehentliche Schäden und / oder Verletzungen
im Falle eines Versagens der Klemme zu vermeiden
HINWEIS: Die geeignete Umgebungstemperatur für diese Leuchte liegt zwischen -25 ° C und 45 ° C. Stellen Sie
diese Leuchte nicht in Umgebungen auf, in denen die Temperaturen unter oder über den oben angegebenen
Temperaturen liegen. Dadurch kann das Gerät optimal laufen und die Lebensdauer des Geräts wird verlängert.
DE

MANUAL - MHBEAM40-FX
15
BEDIENUNGSANLEITUNG - MHBEAM40-FX
Schrauben Sie eine Klemme über eine M12 Schraube und Mutter an die mitgelieferte Halterung. Befestigen Sie
die Halterung mit den mitgelieferten Schrauben an der Unterseite des Geräts. Befestigen Sie die Ringschraube
an der Unterseite der Basis und ziehen Sie das Sicherheitskabel durch die Schraube und über das Traversensys-
tem oder einen sicheren Befestigungsort. Führen Sie das Ende in den Karabiner ein und ziehen Sie die Si-
cherheitsschraube fest.
3. DMX EINRICHTEN
Hinweis: Folgen Sie den Abbildungen 2 und 3, wenn Sie eigene Kabel herstellen. Verwenden Sie nicht den Mas-
seleiter des XLR-Verbinders. Schließen Sie nicht die Abschirmung des Kabels an den Masseleiter an, und verhin-
dern Sie jeglichen Kontakt der Abschirmung mit dem Gehäuse des XLR Verbinders. Die Erdung der Abschirmung
könnte einen Kurzschluss und ein fehlerhaftes Verhalten verursachen.
Spezieller Hinweis: Letzter Verbinder der Kette.
Bei längeren Kabelwegen muss ein Abschlusswi-
derstand an das letzte Gerät angeschlossen
werden, um fehlerhaftes Verhalten zu vermei-
den. Ein Abschlusswiderstand ist ein 110-120
Ohm 1 / 4W Widerstand, der zwischen den Pins
2 und 3 eines männlichen XLR-Steckers (DATA +
und DATA -) angeschlossen ist. Der Widerstand
wird in die XLR-Buchse des letzten Geräts in
Ihrer Kette eingefügt. Dieser Endwiderstand verhindert
ein eventuelles Fehlverhalten der Geräte.
4. MENÜ
4.1 DISPLAY
LED Display mit 4 Tasten: MENU, UP, DOWN und ENTER.
4.2 MENU ÜBERSICHT

MANUAL - MHBEAM60-FX
16
DMX-Adressmodus
Einstellung der DMX Adresse: Drücken Sie MENU, wählen Sie Addr, und drücken
Sie Enter, um mit der Einstellung zu beginnen. Mit den UP und DOWN Tasten die
gewünschte Adresse einstellen. Mit ENTER bestätigen.
DMX-Kanalmodus
Drücken Sie MENU und wählen Sie Chnd. Drücken Sie ENTER, um mit der Einstel-
lung zu beginnen. Wählen Sie den Kanalmodus mit den Tasten UP oder DOWN:
11CH oder 32CH. Drücken Sie erneut ENTER, um Ihre Auswahl zu bestätigen.
11CH: 11-Kanal Betrieb
32CH: 32-Kanal Betrieb
Master / Slave-Modus
Drücken Sie MENU und wählen Sie SLnd. ENTER drücken, um mit der Einstellung
zu beginnen. MAST, SL1, SL2 und d512 werden angezeigt. Drücken Sie UP oder
DOWN, um Master oder Slave zu wählen, dann mit ENTER bestätigen.
MAST: Wählen Sie das Gerät als Master
SL1: Wählen Sie das Gerät als Slave
Show Programme 1-4 (werkseitig vorprogrammiert). In dieser Betriebsart kann
auch die Musiksteuerung aktiviert werden
Drücken Sie MENU und wählen Sie ShNd. Drücken Sie ENTER, um mit der Einstellung zu be-
ginnen. SH X wird angezeigt, wobei X eine Zahl zwischen 1 und 4 ersetzt. Mit den UP& DOWN
Tasten das gewünschte Programm wählen und mit ENTER die Wahl bestätigen. MENU Taste mindestens 3
Sekunden gedrückt halten, um das Programm zu aktivieren.
Automatikbetrieb
1. MENU Taste drücken bis «Auto» erscheint. ENTER drücken.
2. Auf dem Display erscheint «Au1» - «Au 4». Mit den UP & DOWN Tasten das gewünschte Pro-
gramm und von «SP 0» bis «SP 9» die Geschwindigkeit wählen.
Klangempndlichkeit
MENU drücken und SENS wählen. Drücken Sie ENTER, um mit der Einstellung zu
beginnen. Mit den UP und DOWN Tasten die Klangempndlichkeit von 0-100 ein-
stellen. Mit ENTER die Wahl bestätigen.
Led: Display-Beleuchtung schaltet nach 2 Minuten aus
1. MENU Taste drücken, bis LED erscheint. ENTER drücken.
2. Auf dem Display erscheint entweder «ON» oder «OFF». Mit den UP & DOWN Tasten «ON» wählen, wenn das
Display ständig erleuchtet bleiben soll, oder «OFF», um die Beleuchtung nach 2 Minuten auszuschalten.
3. ENTER drücken und dann die MENU Taste mindestens 3 Sekunden gedrückt halten, um die Wahl zu bestäti-
gen.
Umkehrung des Displays
Das Display wird um 180° gedreht. MENU drücken, dISP wählen. Drücken Sie EN-
TER, um mit der Einstellung zu beginnen. Mit der UP oder DOWN Taste dSIP wählen
und das Display wird umgekehrt. Mit ENTER die Wahl bestätigen.
PAN Umkehrung
MENU drücken und PAN wählen. ENTER drücken, um mit der Einstellung zu be-
ginnen. Mit der UP oder DOWN Taste no oder Yes wählen und mit ENTER bestätigen.
11ch
32ch
AutO
led
BEDIENUNGSANLEITUNG - MHBEAM40-FX

MANUAL - MHBEAM60-FX
17
Tilt Umkehrung
MENU drücken, tiLt wählen und ENTER drücken, um die Einstellung zu starten. Mit
der UP oder DOWN Taste no oder Yes wählen und mit ENTER bestätigen.
Anzeige der Geräteversion
Reset
MENU drücken, rSEt wählen, ENTER drücken und 1-3 Sekunden warten. Das Gerät führt ein
Reset aus.
5. DMX KANÄLE
DMX Betriebsarten
5.1 11-Kanal-Betrieb
11CH Funktion Wert
1Pan 000-255 Pan 0° ~ 540°
2Tilt 000-255 Tilt 0° ~ 210°
3 Pan & Tilt Geschwindigkeit 000-255 P/T Geschwindigkeit von langsam auf schnell
4 Dimmer 000-255 Dimmer 0 ~ 100%
5 Stroboskop 000-008 Unbelegt
009-255 Stroboskop von langsam auf schnell
6Rot 000-255 Roter Dimmer 0 ~ 100%
7Grün 000-255 Grüner Dimmer 0 ~ 100%
8Blau 000-255 Blauer Dimmer 0 ~ 100%
9Weiß000-255 Weißer Dimmer 0 ~ 100%
10 Halo Color Chase 000-127 Farb-Macro
128-255 Farb-Chase
11 Funktion
000-199 Unbelegt
200-209 Reset
210-239 Unbelegt
240-255 Musikgesteuert
5.2 32-Kanal-Betrieb
32CH Function Value
1Pan 000-255 Pan 0° ~ 540°
2 Pan Fineinstellung 000-255
3Tilt 000-255 Tilt 0° ~ 210°
4 Tilt Fineinstellung 000-255
5 Pan & Tilt Geschwindigkeit 000-255 P/T Geschwindigkeit von langsam auf schnell
6Dimmer 000-255 Dimmer 0 ~ 100%
7Stroboskop 000-008 Unbelegt
009-255 Stroboskop von langsam auf schnell
8Rot 000-255 Roter Dimmer 0 ~ 100%
9 Grün 000-255 Grüner Dimmer 0 ~ 100%
10 Blau 000-255 Blauer Dimmer 0 ~ 100%
11 Weiß000-255 Weißer Dimmer 0 ~ 100%
12 Halo Teil 1 Rot 000-255 Dimmer 0 ~ 100%
13 Halo Teil 1 Grün 000-255 Dimmer 0 ~ 100%
13 Halo Teil 1 Blau 000-255 Dimmer 0 ~ 100%
ver
BEDIENUNGSANLEITUNG - MHBEAM40-FX

BEDIENUNGSANLEITUNG - MHBEAM40-FX
18
32CH Function Value
14 Halo Teil 2 Rot 000-255 Dimmer 0 ~ 100%
15 Halo Teil 2 Grün 000-255 Dimmer 0 ~ 100%
16 Halo Teil 2 Blau 000-255 Dimmer 0 ~ 100%
17 Halo Teil 3 Rot 000-255 Dimmer 0 ~ 100%
18 Halo Teil 3 Grün 000-255 Dimmer 0 ~ 100%
19 Halo Teil 3 Blau 000-255 Dimmer 0 ~ 100%
20 Halo Teil 4 Rot 000-255 Dimmer 0 ~ 100%
21 Halo Teil 4 Grün 000-255 Dimmer 0 ~ 100%
22 Halo Teil 4 Blau 000-255 Dimmer 0 ~ 100%
23 Halo Teil 5 Rot 000-255 Dimmer 0 ~ 100%
24 Halo Teil 5 Grün 000-255 Dimmer 0 ~ 100%
25 Halo Teil 5 Blau 000-255 Dimmer 0 ~ 100%
26 Halo Teil 6 Rot 000-255 Dimmer 0 ~ 100%
27 Halo Teil 6 Grün 000-255 Dimmer 0 ~ 100%
28 Halo Teil 6 Blau 000-255 Dimmer 0 ~ 100%
29 Halo Teil 6 Grün 000-255 Dimmer 0 ~ 100%
29 Halo Teil 6 Blau 000-255 Dimmer 0 ~ 100%
30 Halo Color Chase 000-127 Color Macro
128-255 Color chase
31 Color Chase Geschwindigkeit 000-255 Color chase Geschwindigkeit von langsam auf schnell
32 Funktion
000-199 Unbelegt
200-209 Reset
210-239 Unbelegt
240-255 Musikgesteuert
5.3 Farbmacro
Color Macro
000 - 010 Unbelegt
011 - 044 R
045 - 079 G
080 - 114 B
115 - 149 RG
150 - 184 RB
185 - 219 GB
220 - 255 RGB
6. Sicherungswechsel
Gerät vom Netz trennen. Der Sicherungshalter bendet sich in der Steckdose. Stecken Sie einen
Schlitzschraubendreher in die Steckdose und ziehen Sie den Sicherungshalter vorsichtig heraus. Entfernen Sie
die defekte Sicherung und ersetzen Sie sie durch eine neue. Der Sicherungshalter hat eine eingebaute Nische
für eine Ersatzsicherung. Achten Sie darauf, die Ersatzsicherung nicht mit der aktiven Sicherung zu verwech-
seln.
Warnhinweise: Wenn die Sicherung nach dem Ersetzen weiterhin durchbrennt, benutzen Sie das Gerät nicht
mehr. Wenden Sie sich an den Kundendienst, um weitere Anweisungen zu erhalten. Wenn Sie das Gerät weiter
verwenden, kann dies zu schweren Schäden führen.

BEDIENUNGSANLEITUNG - MHBEAM40-FX
7. Reinigung und Wartung
Pege: Aufgrund von Nebelrückständen, Rauch und Staub sollten die inneren und äußeren Linsen regelmäßig
gereinigt werden, um die Lichtleistung zu optimieren.
1. Verwenden Sie einen normalen Glasreiniger und ein weiches Tuch, um das Außengehäuse abzuwischen.
2. Reinigen Sie die Lüftungsschlitze und das Ventilatorgitter mit einem Pinsel.
3. Reinigen Sie die externe Optik alle 20 Tage mit einem Glasreiniger und einem weichen Tuch.
4. Reinigen Sie die interne Optik alle 30 bis 60 Tage mit einem Glasreiniger und einem weichen Tuch.
5. Achten Sie immer darauf, alle Teile vollständig zu trocknen, bevor Sie das Gerät wieder anschließen.
8. FEHLERDIAGNOSE
Die Lampe leuchtet nicht.
1. Prüfen Sie, ob die Sicherung nicht durchgebrannt ist. Die Sicherung bendet sich auf der Rückseite in der
Steckdose. Siehe Sicherung ersetzen.
2. Vergewissern Sie sich, dass der Sicherungshalter vollständig und richtig sitzt.
Automatische Spannungserkennung: Dieses Gerät enthält einen automatischen Spannungsschalter, der die
Spannung selbsttätig erkennt, wenn er an eine Stromquelle angeschlossen wird.
9. Technische Daten:
Eingangsspannung: .................................................................................................................... AC100V-240V, 50/60 Hz
Gesamtleistung: .........................................................................................................................................................65W
Lichtquelle: ...........................................................................................40W RGBW 4in1 LED, 12 St. 5050 RGB 3in1 LED
Steuerarten: ..............................................................................Automatikprogramm, Musikaktiviert, DMX, Master-Slave
DMX Kanal: ...................................................................................................................................................11CH / 32CH
Lichteekt: .................................................................................... Wash, Farbensprung, Farbübergang, Strobe, Dimmen
Optiksystem: .......................................................................................................................Hocheziente 8 ° -Optiklinse
Bewegung: ................................................................................................................................Pan 40°, Tilt 10° Drehung
Dimmen: ..........................................................................................................................................................0% - 100%
Stroboskop: ................................................................................................................................. 1-20 Blitze pro Sekunde
Display: .......................................................................................................................................................... LED Display
Kühlsystem .........................................................................................................................................................Ventilator
Abmessungen: .................................................................................................................................160 x 145 x 250 mm
Gewicht: ................................................................................................................................................................ 2.61 kg
Hinweis: Spezikationen und Verbesserungen des Designs dieses Geräts und dieses Handbuchs können ohne
vorherige schriftliche Ankündigung geändert werden.
WICHTIGER HINWEIS: Elektrogeräte gehören nicht in den Hausmüll. Sie müssen in speziellen Betrieben recycelt
werden. Wenden Sie sich hierzu an die örtlichen Behörden oder Ihren Fachhändler!
19

HANDLEIDING - MHBEAM40-FX
20
NL
2-IN-1 BEAM LED MOVING HEAD 40W
MET WASH RING & DMX BESTURING
HANDLEIDING
1. VEILIGHEIDSMAATREGELEN
Voor uw eigen veiligheid, lees en begrijp deze handleiding volledig voordat u probeert deze een-
heid te installeren of te gebruiken!
⬢Stel het apparaat niet bloot aan regen of vocht om het risico van een elektrische schok of brand te verminde-
ren
⬢Mors geen water of andere vloeistoen in of op uw apparaat.
⬢Probeer dit apparaat niet te gebruiken als het netsnoer is beschadigd.
⬢Probeer de aardepin niet van het netsnoer te verwijderen of af te breken. Dit pin wordt gebruikt om het risico
van een elektrische schok en brand te verminderen in geval van een interne kortsluiting.
⬢Ontkoppel de netspanning voordat u een verbinding tot stand brengt.
⬢Verwijder het deksel onder geen enkele omstandigheid. Er bevinden zich geen door de gebruiker te repare-
ren onderdelen.
⬢Gebruik dit apparaat nooit wanneer de kap is verwijderd.
⬢Monteer dit toestel alleen in een ruimte die voor voldoende ventilatie zorgt. Laat ongeveer 15 cm ruimte
tussen dit apparaat en een muur.
⬢Probeer dit apparaat niet te gebruiken als het beschadigd is.
⬢Dit apparaat is alleen bedoeld voor gebruik binnenshuis. Gebruik van dit product buitenshuis maakt alle ga-
ranties ongeldig.
⬢Monteer dit apparaat altijd op een veilige en stabiele manier.
⬢Netsnoeren moeten zo worden gelegd dat ze niet kunnen worden belopen of bekneld raken door voorwerpen
die erop of ertegen worden geplaatst, met name aandacht voor snoeren bij stekkers, stopcontacten en het
punt waar ze uit het apparaat komen.
⬢Reinigen -Het apparaat mag alleen worden schoongemaakt zoals aanbevolen door de fabrikant.
⬢Warmte: dit apparaat moet uit de buurt van warmtebronnen worden geplaatst, zoals radiatoren, ovens of
andere apparaten (inclusief versterkers) die warmte produceren.
⬢Het apparaat mag alleen worden onderhouden door bevoegd onderhoudspersoneel als:
A. Voorwerpen zijn gevallen of er is vloeistof in het apparaat gemorst.
B. Het apparaat was blootgesteld aan regen of water.
C. Het apparaat lijkt niet normaal te werken of vertoont een opmerkelijke prestatiewijziging.
2. MONTAGE
Bij het installeren van de unit moet de trussing of het montageoppervlak 10 keer het gewicht kunnen bevatten
zonder vervorming. Bij de installatie moet het apparaat worden beveiligd met een secundair veiligheidsacces-
soire, bijvoorbeeld een geschikte veiligheidskabel. Sta nooit recht onder het apparaat wanneer u het apparaat
monteert, verwijdert of onderhoudt.
Overheadmontage vereist uitgebreide ervaring, inclusief het berekenen van belastingslimieten, installatiemate-
riaal dat wordt gebruikt en periodieke veiligheidsinspectie van al het installatiemateriaal. Als u deze kwalica-
ties mist, probeer de installatie dan niet zelf.
De installatie moet eenmaal per jaar door een vakman worden gecontroleerd
Het apparaat is volledig operationeel in drie verschillende montageposities: ondersteboven aan een plafond
hangen, op een plat oppervlak of op de zijkant aan een traliewerk bevestigd. Zorg ervoor dat dit apparaat mins-
tens 0,5 meter verwijderd blijft van ontvlambare materialen (decoratie, enz.). Gebruik en installeer altijd de
meegeleverde veiligheidskabel als veiligheidsmaatregel om onopzettelijke schade en / of letsel te voorkomen in
het geval de klem uitvalt
LET OP: De geschikte omgevingstemperatuur voor deze verlichtingsarmatuur ligt tussen -25˚ C tot 45˚ C. Plaats
deze verlichtingsarmatuur niet in een omgeving waar de temperaturen onder of boven de hierboven vermelde
temperaturen liggen. Hierdoor kan het toestel op zijn best functioneren en de levensduur wordt verlengd.
Table of contents
Languages:
Other Ibiza Light Fixture manuals

Ibiza
Ibiza LED6EYES User manual

Ibiza
Ibiza JDL009R User manual

Ibiza
Ibiza MH-BEAM-WASH User manual

Ibiza
Ibiza MH-ASTRO-BEAM User manual

Ibiza
Ibiza DJLIGHT85LED User manual

Ibiza
Ibiza TWIRLY-WASH8 User manual

Ibiza
Ibiza JDL4-ASTRO User manual

Ibiza
Ibiza LMH250WH User manual

Ibiza
Ibiza MH-ASTRO-WASH User manual

Ibiza
Ibiza LMH50LED User manual
Popular Light Fixture manuals by other brands

Philips
Philips Lytecaster 1050 Series Installation

Chauvet Professional
Chauvet Professional ROGUEOUTCAST1BEAMWASH Quick reference guide

Gearwrench
Gearwrench 83124 user manual

DTS
DTS XR8 SPOT user manual

Jesco
Jesco Sleek Plus S902 installation instructions

Cooper Lighting
Cooper Lighting Metalux SA SERIES Specifications